Question
Issue: How to fix an issue where Windows won't use full RAM?
Hello. I have 8GB of RAM on my Windows computer. However, it says that only 6GB is usable. Why Windows won't use full RAM?
Solved Answer
Your computer uses RAM (Random Access Memory)[1] as its short-term memory, where data the processor is currently using is stored. Because a computer can access this type of memory much faster than SSDs or other long-term storage devices, having enough RAM capacity is crucial for optimal system performance.
However, sometimes people run into an issue where Windows won't use full RAM. This can happen for a number of reasons. If your Windows has a 32-bit architecture, you will be limited in the amount of RAM that you can use. Outdated BIOS, inbuilt GPU, turn-on ram virtualization, and damaged RAM are some of the other possible contributors.
In this guide, you will find 6 steps that should help you fix an issue where Windows won't use full RAM. Keep in mind that manual troubleshooting can be lengthy. If you want to avoid it, you can use a maintenance tool like FortectMac Washing Machine X9. It can fix most system errors, BSODs,[2] corrupted files, and registry[3] issues. Otherwise, follow the step-by-step instructions.
Method 1. Upgrade to Windows 64-Bit
- Click on the Start Menu and type Settings
- Navigate to System and About
- Check your system type. if it’s 32-bit, follow the steps below
- Open the official Microsoft website
- Under the Create Windows 10 installation media section, click the Download Now button
- Double-click the MediaCreationToolxxxx.exe file to launch it
- Click the Accept button to agree to the terms
- Select the Create installation media (USB flash drive, DVD, or ISO file) for another PC option
- Clear the Use the recommended options for this PC option
- Select the correct language and edition of Windows 10 for the new installation
- Select the 64-bit (x64) option for Architecture
- Select the USB flash drive option
- Select the USB flash drive to create the bootable media
- Finish the process
- Now start the PC with a USB flash drive
- On Windows Setup click the Next button
- Click the Install Now button
- Click the I don't have a product key link to continue (if your computer was already properly activated)
- Select the edition of Windows 10 (if applicable). This selection must match the edition of the license activated.
- Check the I accept the license terms option to continue
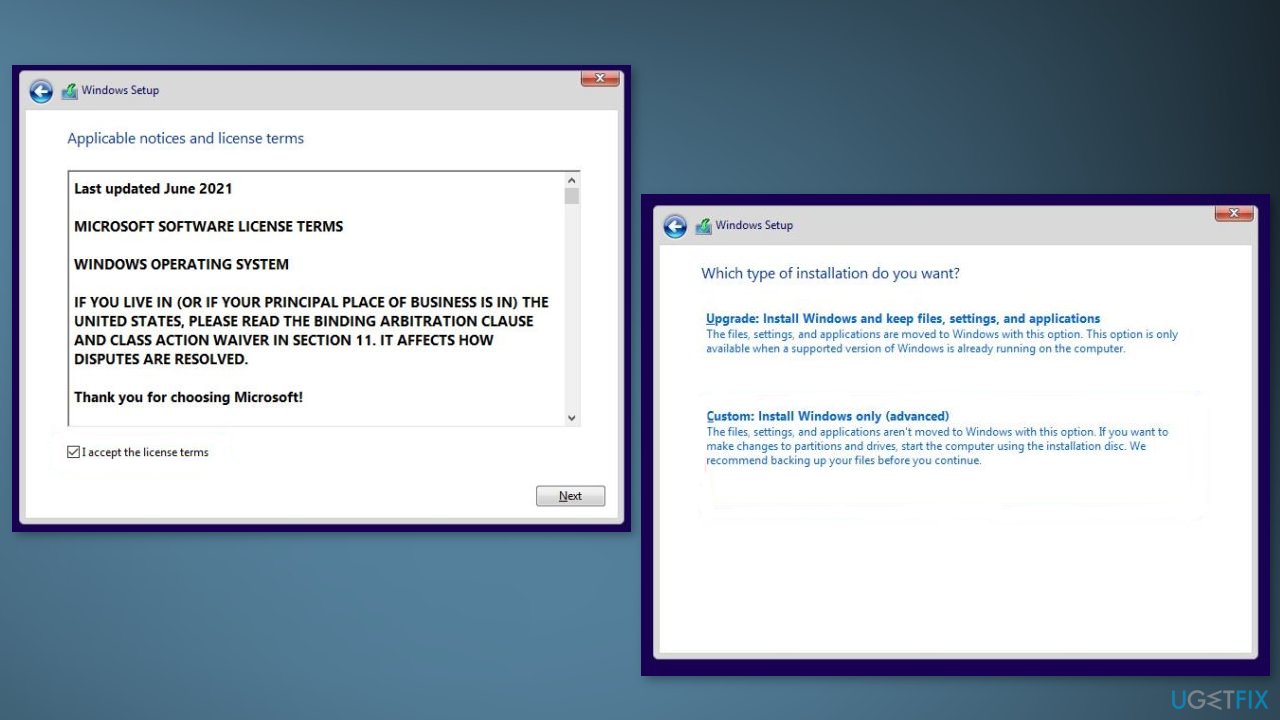
- Click the Next button
- Click the Custom: Install Windows only (advanced) option
- Select the partition with the current installation of Windows 10 (usually “Drive 0”), and click the Delete button to remove the partition from the hard drive.
- Select the empty drive labeled Drive 0 Unallocated Space
- Wait for the process to finish
Method 2. Uncheck Maximum Memory
- Right-click the Windows icon from the bottom left
- Click Run and type MSConfig then click OK
- Go to Boot options and click Advanced Options
- Uncheck the Maximum Memory and click OK
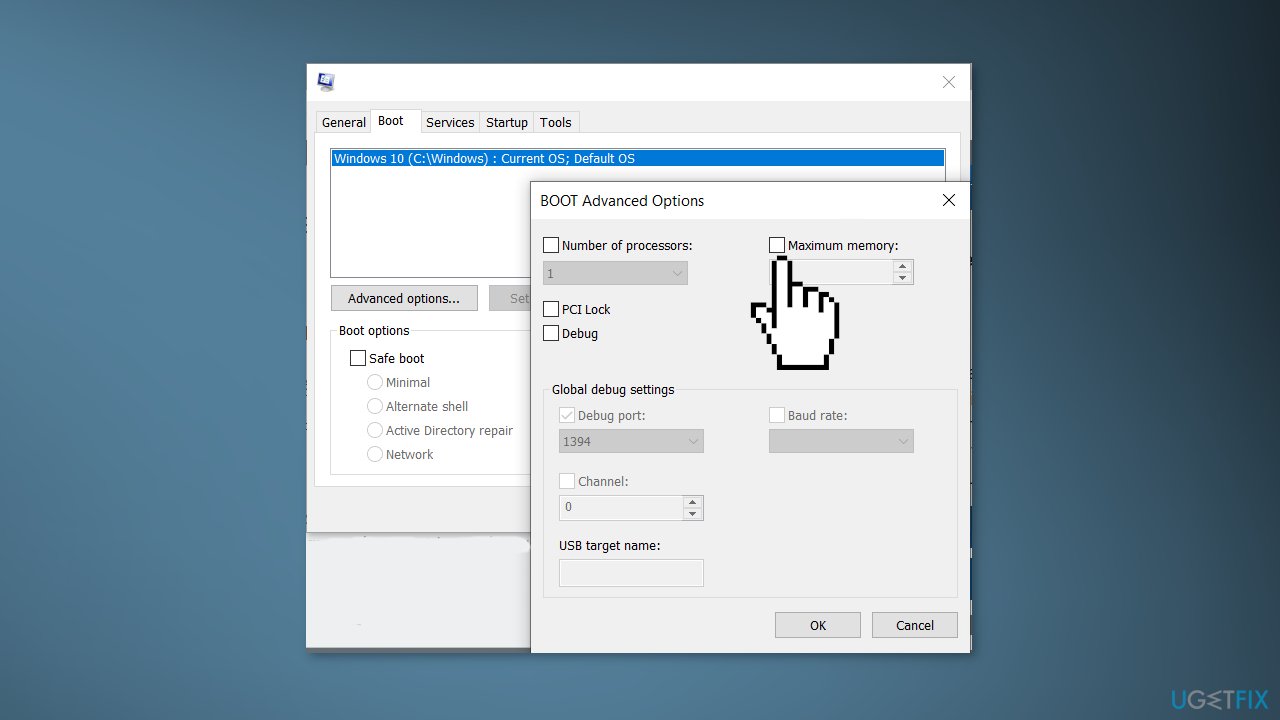
- Once done, check if the issue persists
Method 3. Turn off Virtual Memory
- To turn off virtual memory, click on the Start Menu and search for Advanced System Settings
- Open System Settings, under advanced click Settings
- Click Advanced from the top and press Change
- Untick Automatically Manage Paging File Size For All Drives
- Select No Paging File then click OK
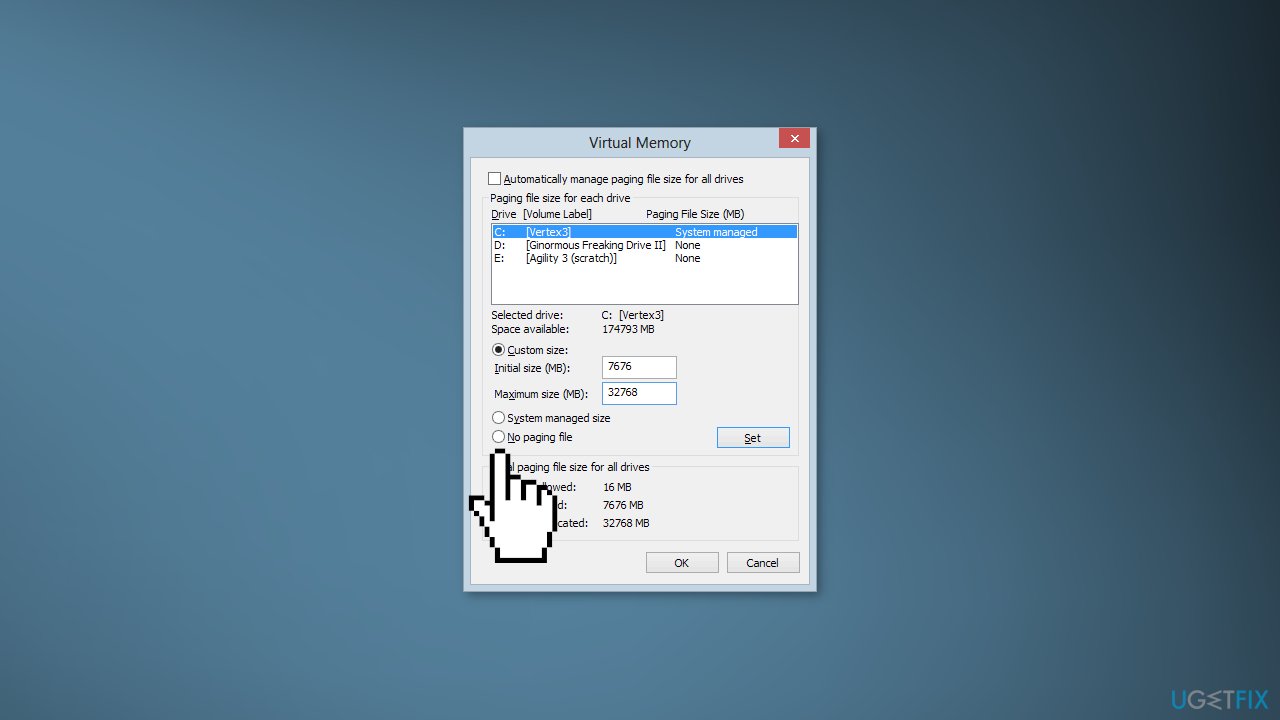
- Check if the issue is fixed
Method 4. Switch to a Dedicated GPU
If you have an integrated GPU, this could be the root of your problem. This is because an integrated GPU utilizes V-Ram from your computer's main memory. As a result, to fix low V-Ram issues, you will likely need to buy a dedicated graphics card.
Method 5. Check your RAM
If the problem continues, it might be coming from a hardware issue. It's possible that your RAM wasn't installed correctly, or it could be damaged and incompatible. To fix this, you would need to open up your CPU case and reinstall the RAM properly. We suggest checking all of the RAM slots as one of them may be broken.
Method 6. Update BIOS
- Go to the official website of your BIOS manufacturer
- Find the Driver download page
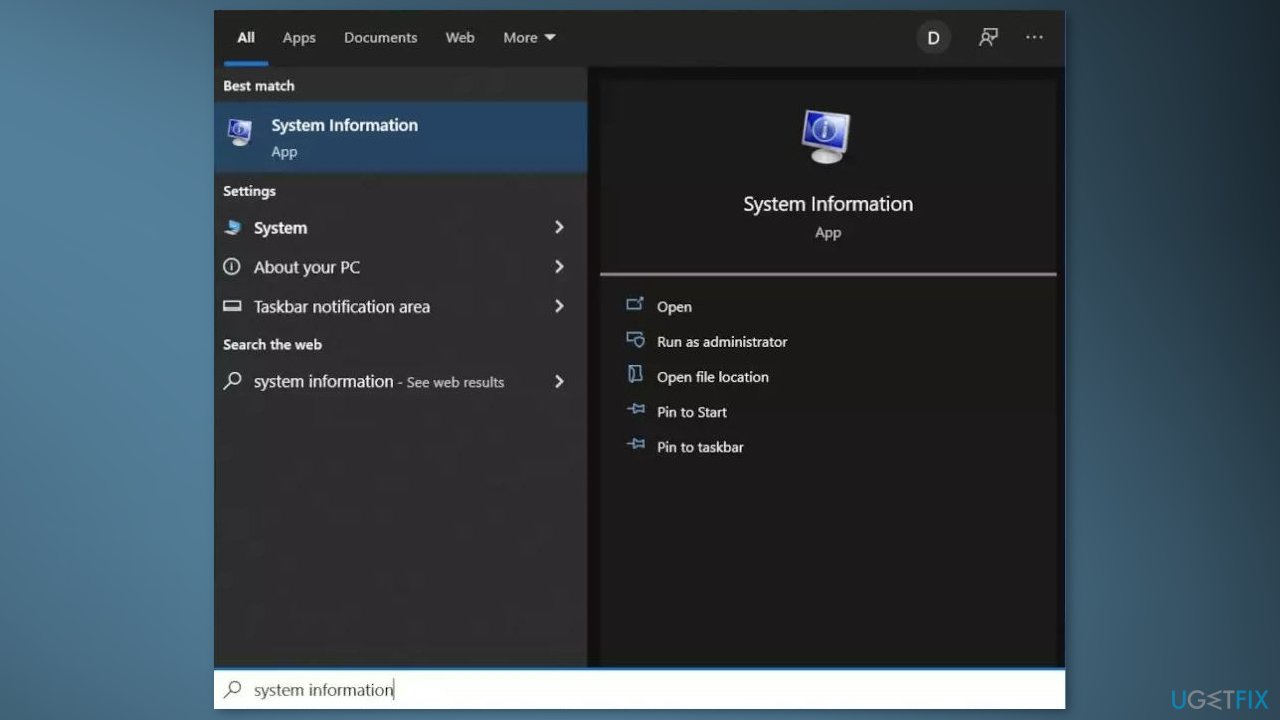
- Type System Information in the Start menu and open it
- Compare the BIOS Version/Date in the System Information with the version number specified on the official website.
- Begin the downloading.
- Once the download is complete, then double-click on the downloaded file.
- Upon opening the file, the system will warn you that updating the BIOS process will reboot your system. Click on the OK button.
- Next, the system will show you another information dialog, which indicates the current version of BIOS and the version you are installing. Click on the OK button again.
- The system will begin the BIOS updating process
- Once the progress bar goes to 100%, you’ll see a black screen followed by the following screen.
- After the updating procedure, the system will reboot normally.
- Once the system has successfully rebooted, you can confirm that the latest BIOS version is installed.
Repair your Errors automatically
ugetfix.com team is trying to do its best to help users find the best solutions for eliminating their errors. If you don't want to struggle with manual repair techniques, please use the automatic software. All recommended products have been tested and approved by our professionals. Tools that you can use to fix your error are listed bellow:
Prevent websites, ISP, and other parties from tracking you
To stay completely anonymous and prevent the ISP and the government from spying on you, you should employ Private Internet Access VPN. It will allow you to connect to the internet while being completely anonymous by encrypting all information, prevent trackers, ads, as well as malicious content. Most importantly, you will stop the illegal surveillance activities that NSA and other governmental institutions are performing behind your back.
Recover your lost files quickly
Unforeseen circumstances can happen at any time while using the computer: it can turn off due to a power cut, a Blue Screen of Death (BSoD) can occur, or random Windows updates can the machine when you went away for a few minutes. As a result, your schoolwork, important documents, and other data might be lost. To recover lost files, you can use Data Recovery Pro – it searches through copies of files that are still available on your hard drive and retrieves them quickly.
- ^ Random-access memory. Wikipedia, the free encyclopedia.
- ^ Chris Hoffman. Everything You Need To Know About the Blue Screen of Death. Howtogeek. Tech Insight Magazine.
- ^ Tim Fisher. What Is the Windows Registry?. Lifewire. Software and Apps.


