Question
Issue: How to fix Camera not working after Windows update?
Hello. I recently updated my Windows PC and then the camera stopped working. What could be the issue?
Solved Answer
The issue of a camera not working after a Windows update is a common problem faced by many users. The camera app in Windows is a built-in feature that allows users to take photos and videos, and use it for video conferencing, live streaming, and other similar activities. The camera app is beneficial to users as it provides a convenient and easy way to capture moments and share them with others.
However, when a Windows update is installed, it can sometimes cause issues with the camera app. This can result in the camera not working or not being able to be accessed by the user. This can impact users in various ways, such as not being able to participate in video conferencing for work or school, not being able to capture important moments, and not being able to use certain apps or features that require the use of the camera.
Possible solutions for this issue include checking for Windows camera updates, reinstalling the camera driver,[1] or modifying the registry. Another solution is to reinstall the Windows camera app itself. In this guide, you will find 6 steps that should help you fix Camera not working after Windows update.
Keep in mind that the camera may have stopped working because of underlying system issues. You can use a maintenance tool like FortectMac Washing Machine X9 that can fix most system errors, BSODs,[2] corrupted files, and registry[3] issues. Otherwise, follow the step-by-step instructions below.
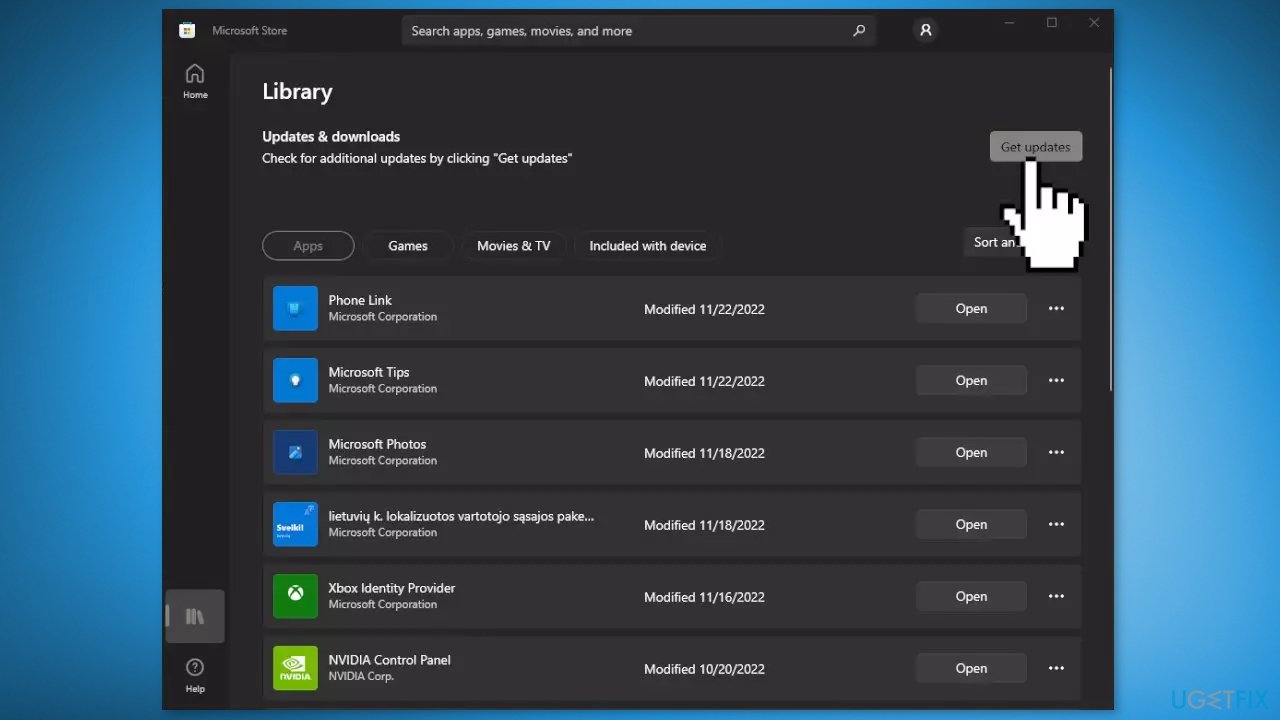
Solution 1. Check for Windows Camera Updates
- Open the Microsoft Store and click on Library
- You will see the installed applications, click Get updates to see if there are any available updates
- Click the Update button on the right to update
- Wait for the process to finish and check if the error is fixed
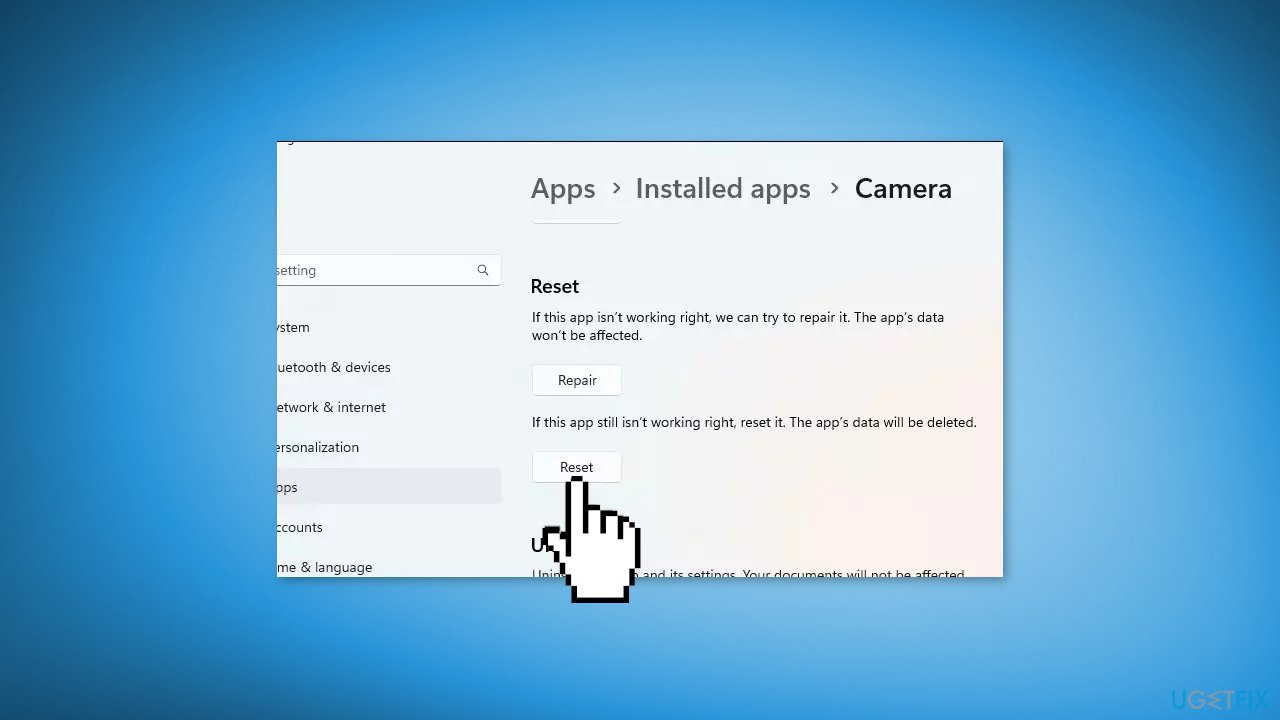
Solution 2. Reset Windows Camera
- Open the Windows Search Menu
- Type Windows Camera and right-click on the result
- Press on App settings
- Scroll down to find the Reset button
Solution 3. Reinstall the Windows Camera App
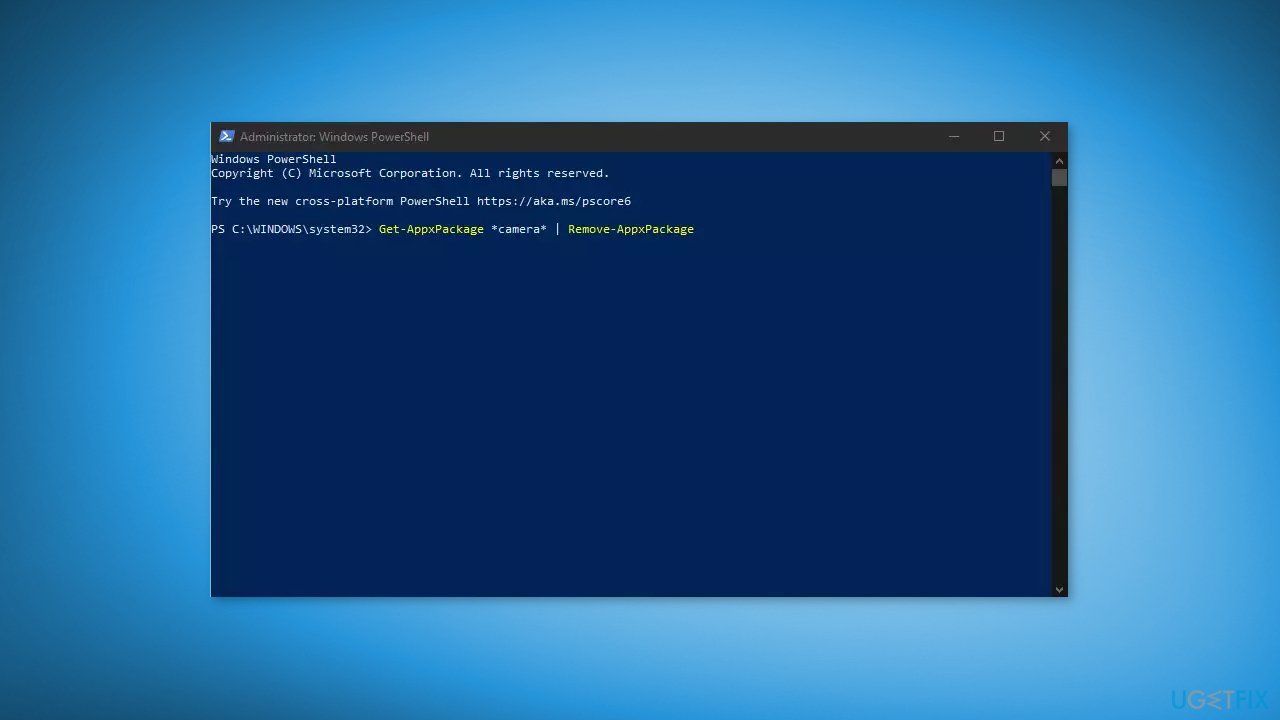
You can also reinstall the app using a PowerShell command:
- Press the Windows key + X, then choose Windows PowerShell (Admin) from the menu
- Execute the following command in the PowerShell window:
Get-AppxPackage *camera* | Remove-AppxPackage
Solution 4. Reinstall Camera Driver
If the older camera driver does not work well with the updated version of Windows 10/11, you can check the manufacturer’s website for the latest version of the camera driver and install it on your computer. If you want an automatic solution, you can use a dedicated utility like DriverFix. It can find the best drivers for your system and install them. You can also uninstall the driver and replace it with the basic driver from Microsoft:
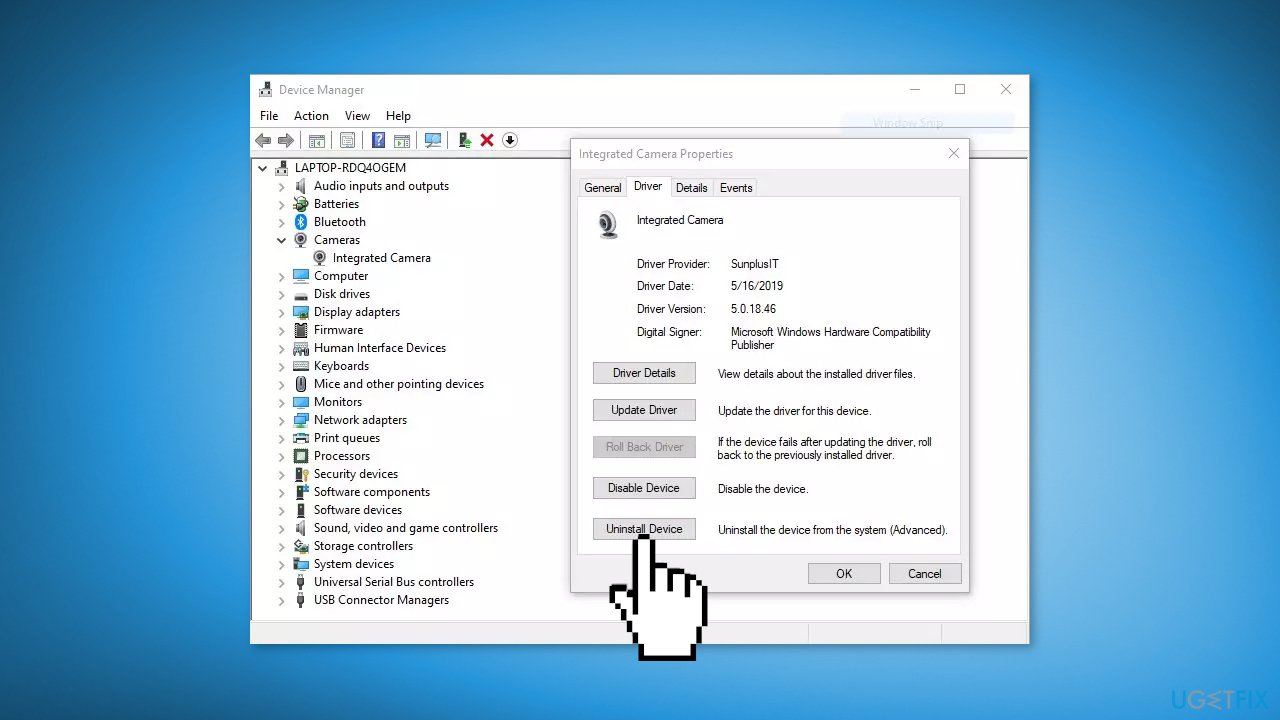
- Press the Windows key + X and click on Device Manager from the menu
- Expand Cameras
- Right-click on your camera and press Uninstall device
- Restart your computer and check if the issue is solved
Solution 5. Edit the Windows Registry
This worked for several Windows users but remember that editing the registry may cause irreversible changes to your computer, so proceed with caution:
- Press the Windows key + S, then search for Registry Editor
- Navigate to the following key:
Computer\HKEY_LOKAL_MACHINE\SOFTWARE\WOW6432Node\Microsoft\Windows Media Foundation\Platform
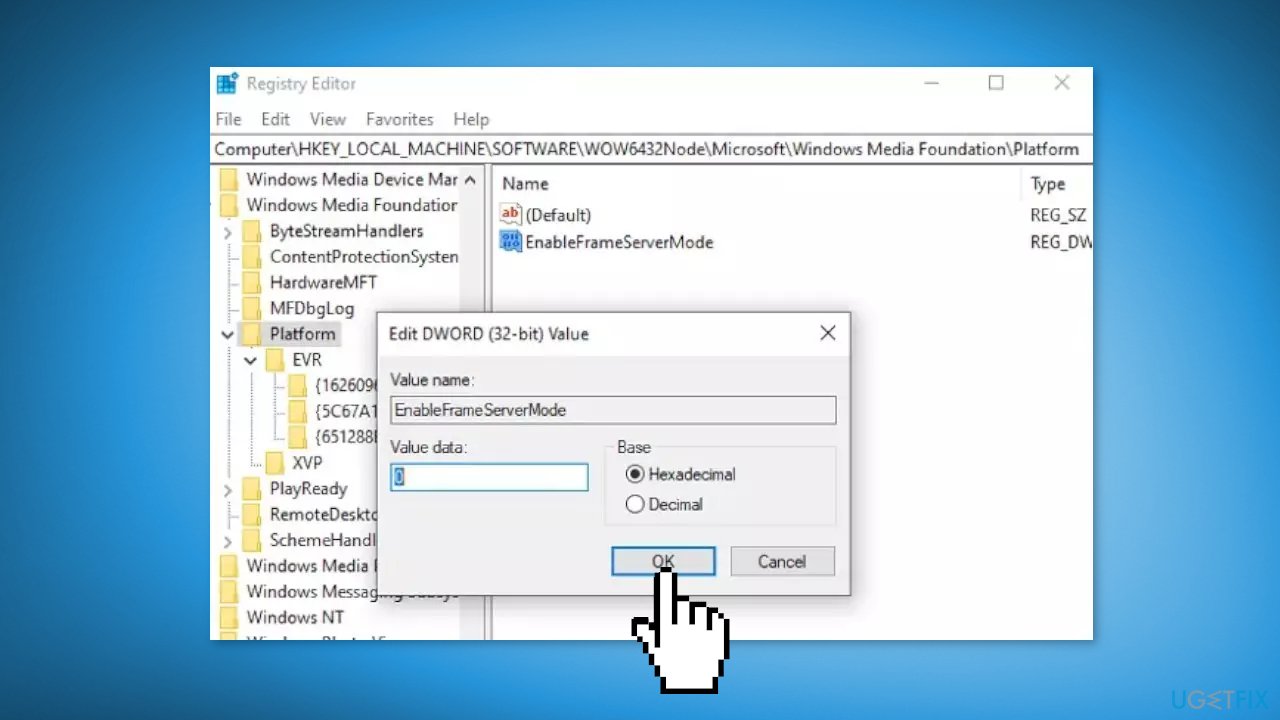
- Right-click on the right pane, then choose New > DWORD (32-bit) Value
- Type in EnableFrameServerMode under Value name
- Double-click the newly created EnableFrameServerMode entry
- Under Value data, type in 0 with the base value as Hexadecimal
- Click OK to save your changes
- Restart your computer and check if the camera is now working.
Solution 6. Reset Windows
If none of the above methods worked, try resetting Windows.
- Open the Start Menu and click on Settings
- Press on Update & security
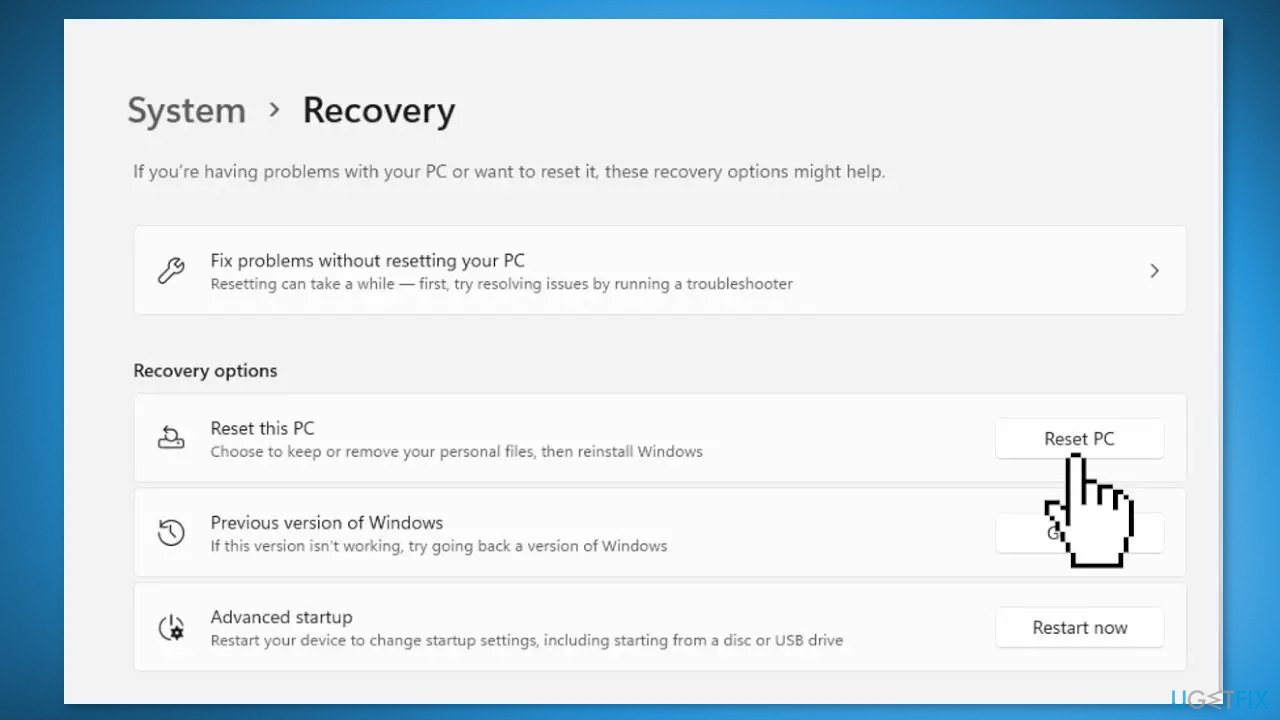
- Click on Recovery in the left pane
- In the right pane, click on Reset PC next to Reset this PC
- Click on either Keep my files (if you want the computer to be reset without losing any of the user data stored on it) or Remove everything (if you want the computer to be reset and any and all user data stored on it to be deleted
- If presented with a warning, simply click on Next
- When prompted to do so, click on Reset
Repair your Errors automatically
ugetfix.com team is trying to do its best to help users find the best solutions for eliminating their errors. If you don't want to struggle with manual repair techniques, please use the automatic software. All recommended products have been tested and approved by our professionals. Tools that you can use to fix your error are listed bellow:
Protect your online privacy with a VPN client
A VPN is crucial when it comes to user privacy. Online trackers such as cookies can not only be used by social media platforms and other websites but also your Internet Service Provider and the government. Even if you apply the most secure settings via your web browser, you can still be tracked via apps that are connected to the internet. Besides, privacy-focused browsers like Tor is are not an optimal choice due to diminished connection speeds. The best solution for your ultimate privacy is Private Internet Access – be anonymous and secure online.
Data recovery tools can prevent permanent file loss
Data recovery software is one of the options that could help you recover your files. Once you delete a file, it does not vanish into thin air – it remains on your system as long as no new data is written on top of it. Data Recovery Pro is recovery software that searchers for working copies of deleted files within your hard drive. By using the tool, you can prevent loss of valuable documents, school work, personal pictures, and other crucial files.
- ^ Device driver. Wikipedia, the free encyclopedia.
- ^ Chris Hoffman. Everything You Need To Know About the Blue Screen of Death. Howtogeek. Tech Insight Magazine.
- ^ Tim Fisher. What Is the Windows Registry?. Lifewire. Software and Apps.


