Question
Issue: How to fix Wi-Fi USB tethering not working in Windows?
I was trying to get the USB tethering to work with my phone, but it simply doesn't. I've tried reconnecting my Android phone several times but to no avail. Any tips on how to deal with this problem? I'm using Windows 10.
Solved Answer
In the digital era, staying connected to the internet has become a necessity rather than a luxury. However, for users who have a smartphone with an active internet connection, this problem can be easily bypassed using a process known as tethering. Tethering allows one device to share its internet connection with another, essentially turning the former into a portable modem or hotspot.
The most common tethering methods include Wi-Fi, Bluetooth, and USB. Among these, Wi-Fi USB tethering stands out for its simplicity and speed. This method involves connecting a smartphone to a computer via a USB cable, allowing the computer to use the smartphone's internet connection. The feature is particularly useful when other connectivity options fail or are unavailable.
However, some users have reported encountering difficulties when trying to use Wi-Fi USB tethering with Windows systems. The problem manifests differently for different people. For some, the issue arises when attempting to establish tethering for the first time. For others, the functionality might cease suddenly after having worked perfectly fine previously.
There are several reasons why tethering might not work. One common cause could be outdated or incompatible drivers. Windows relies on drivers to communicate with your phone during tethering, and if these are not up-to-date or if they don't align with your phone's specifications, the process may fail.
In some cases, the problem might stem from the operating system itself. Windows settings or configurations may interfere with tethering, or recent updates might have introduced compatibility issues. It could also be a matter of incorrect setup, as tethering requires specific settings both on the computer and the phone.
In some instances, the issue may be with the phone's operating system, perhaps due to a bug or glitch that prevents the tethering functionality from working properly. Lastly, physical issues, like faulty USB cables, cannot be overlooked. Below you will find several tips that should help you fix the Wi-Fi USB tethering not working issue on Windows. We also recommend scanning the system with a powerful, automatic PC repair tool FortectMac Washing Machine X9 before proceeding.
Quick checks to make
Before proceeding with more advanced resolutions below, we recommend you make some basic checks that might resolve the issue for you:
- Restart your computer if you haven't done so yet.
- On your phone, make sure that the Wi-Fi connection is disabled.
- Check your USB cable for damages, or try another USB cable.
- Try using a different USB slot on your PC. In some cases, USB 3.0 (blue slot) might not work if not configured correctly.
Fix 1. Run hardware troubleshooter
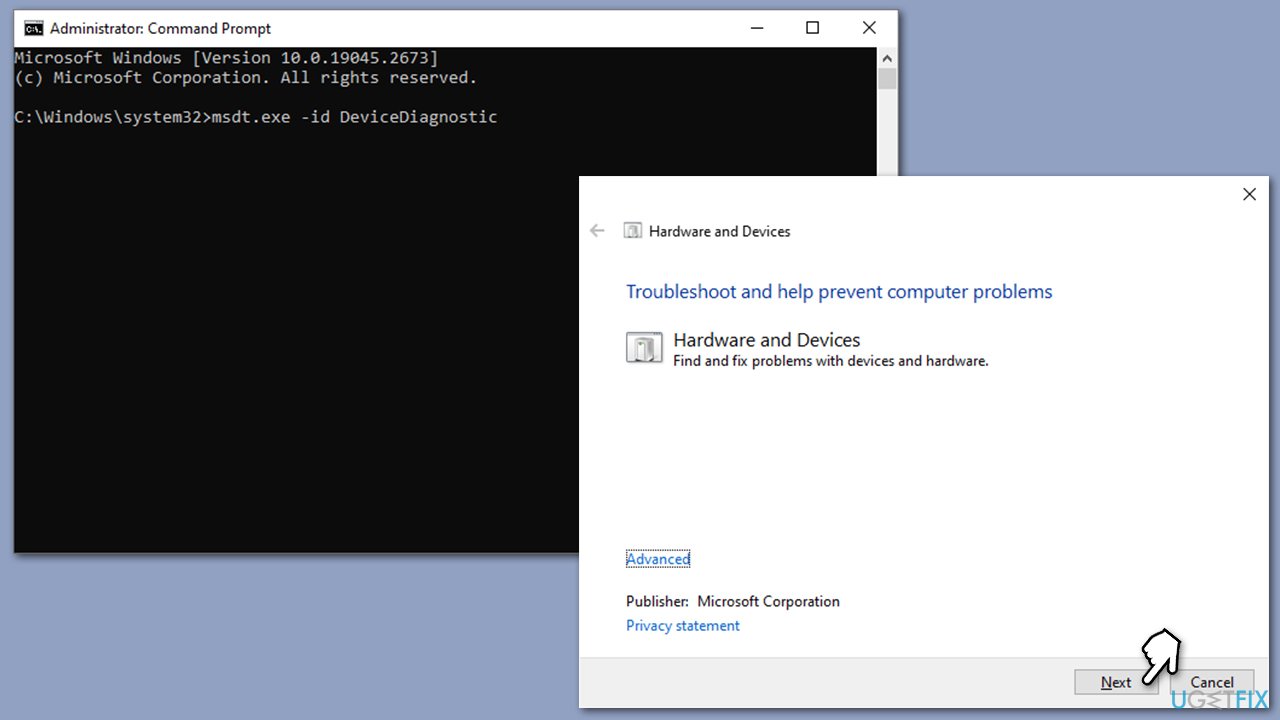
- Type cmd in Windows search.
- Right-click on the Command Prompt result and pick Run as administrator.
- Copy and paste the following command, pressing Enter after:
msdt.exe -id DeviceDiagnostic - Follow on-screen instructions to run the troubleshooter and apply the suggested fixes.
- Restart your PC.
Fix 2. Run network troubleshooter
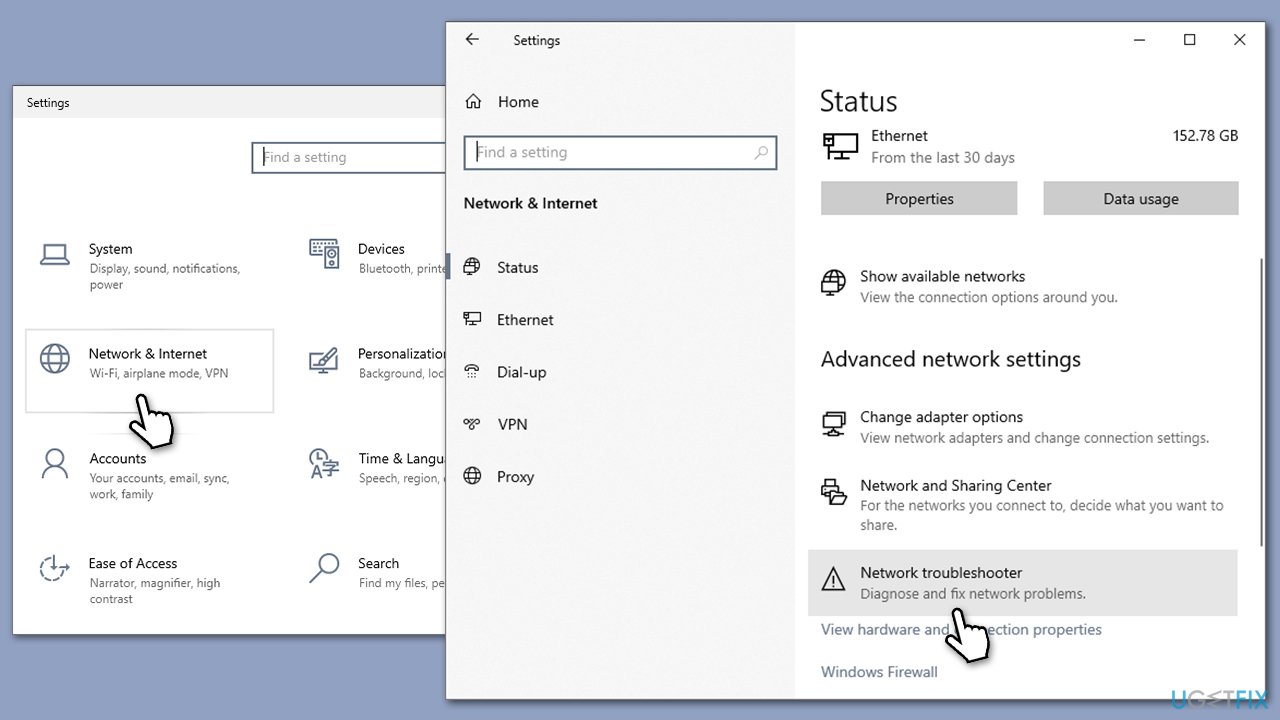
- Right-click on the Start button and select Settings.
- Go to Network & Internet section.
- Here, locate the Advanced network settings section.
- Click the Network troubleshooter to run it.
- Wait for the scan to finish, and apply the fixes.
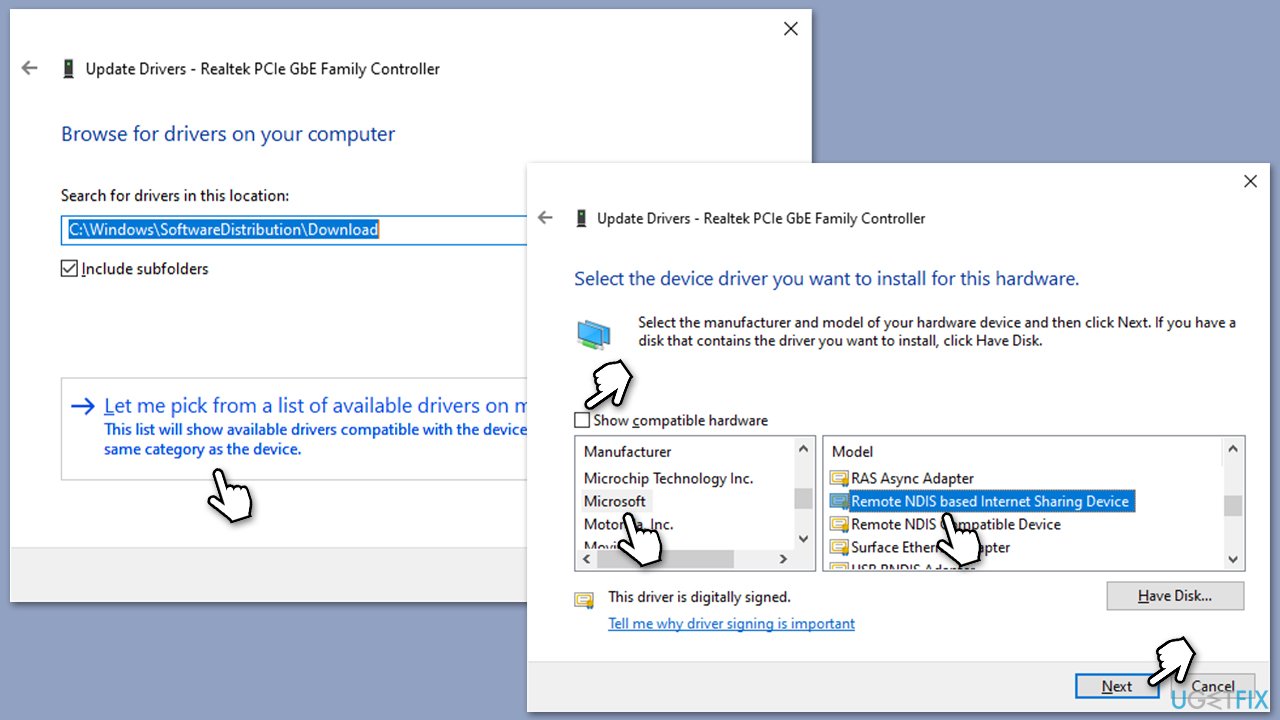
Fix 3. Manually select the NDIS driver
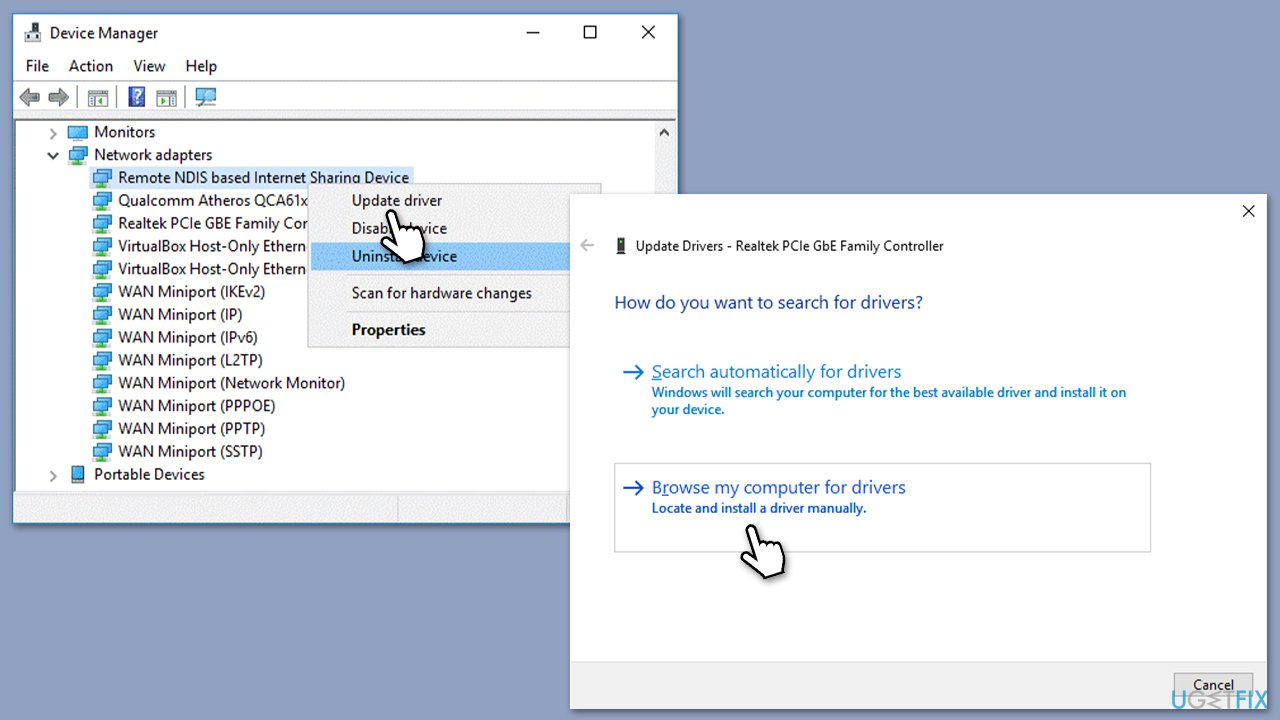
- Open Device Manager.
- Navigate to the Network Adapters section.
- Find and right-click on the Remote NDIS based Internet Sharing Device, then select Update driver.
- From the options, select Browse my Computer for driver software.
- Proceed to Let me pick from a list of device drivers on my computer.
- Make sure to deselect Show compatible hardware.
- Within the manufacturer list, find and select Microsoft.
- Finally, pick the Remote NDIS Compatible Device model, then hit Next.
Fix 4. Update your network drivers
Outdated network drivers could cause this issue. Thus, you should update them, and there are several ways you can do this. You could employ an automatic tool, such as DriverFix, which would significantly speed up the process. You can download the latest network driver from your device manufacturer or simply employ the Windows update feature (the latter is less reliable):
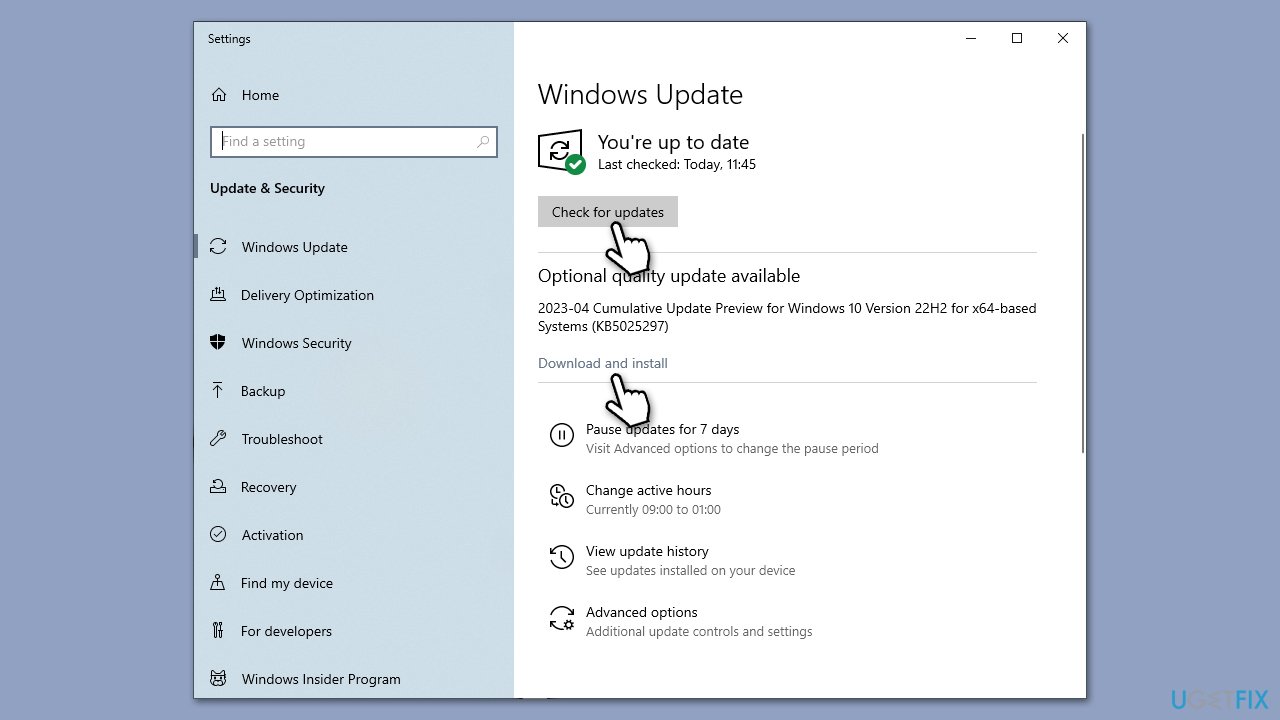
- Type Updates in Windows search and press Enter.
- Here, click Check for updates, and Windows will check if there are new updates available.
- If optional packages are offered, install them too.
- Once done, restart your PC and see if your problem is resolved.
Fix 5. Reset your internet connection settings
Note that this will reset all your internet settings to default.
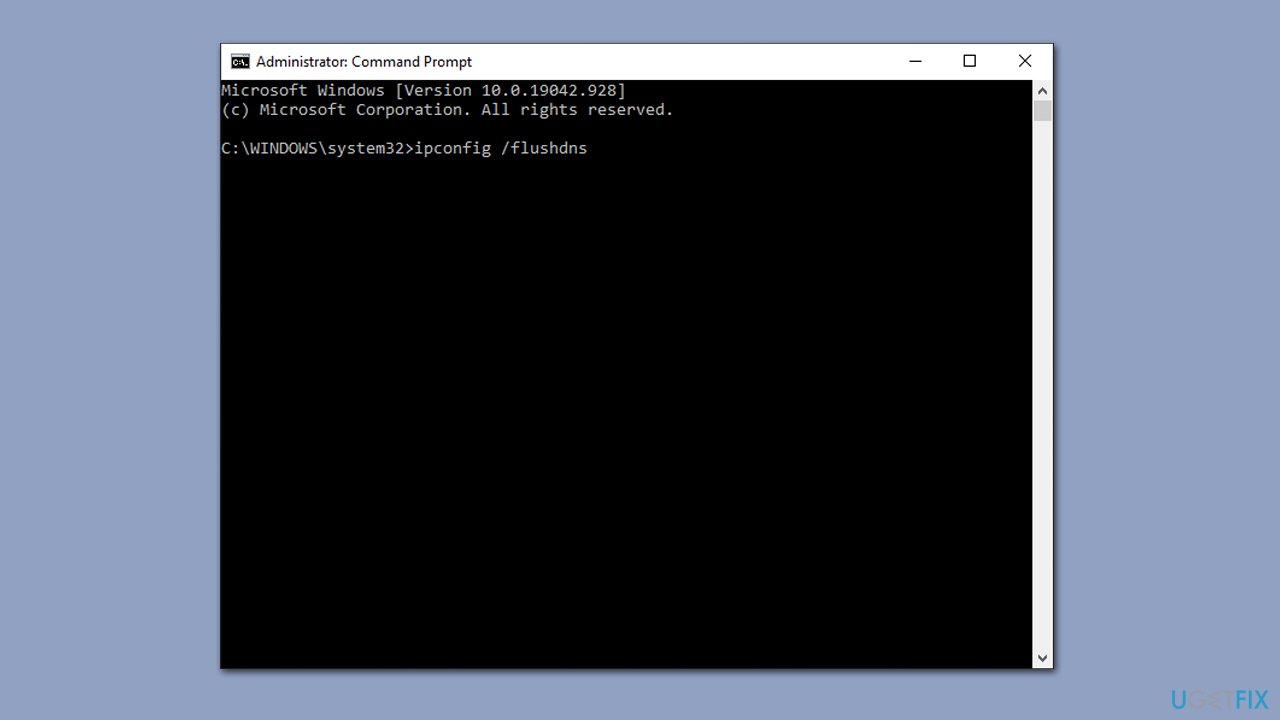
- Run Command Prompt as administrator.
- In the new window, copy and paste the following command links, pressing Enter each time:
ipconfig /flushdns
ipconfig /registerdns
ipconfig /release
ipconfig /renew
netsh winsock reset - Close Command Prompt.
Fix 6. Modify Windows Registry
Modifying Windows Registry might be risky if incorrect steps are performed, so we recommend you make a backup of it before proceeding. First, start by disabling Net Setup Service in Command Prompt:
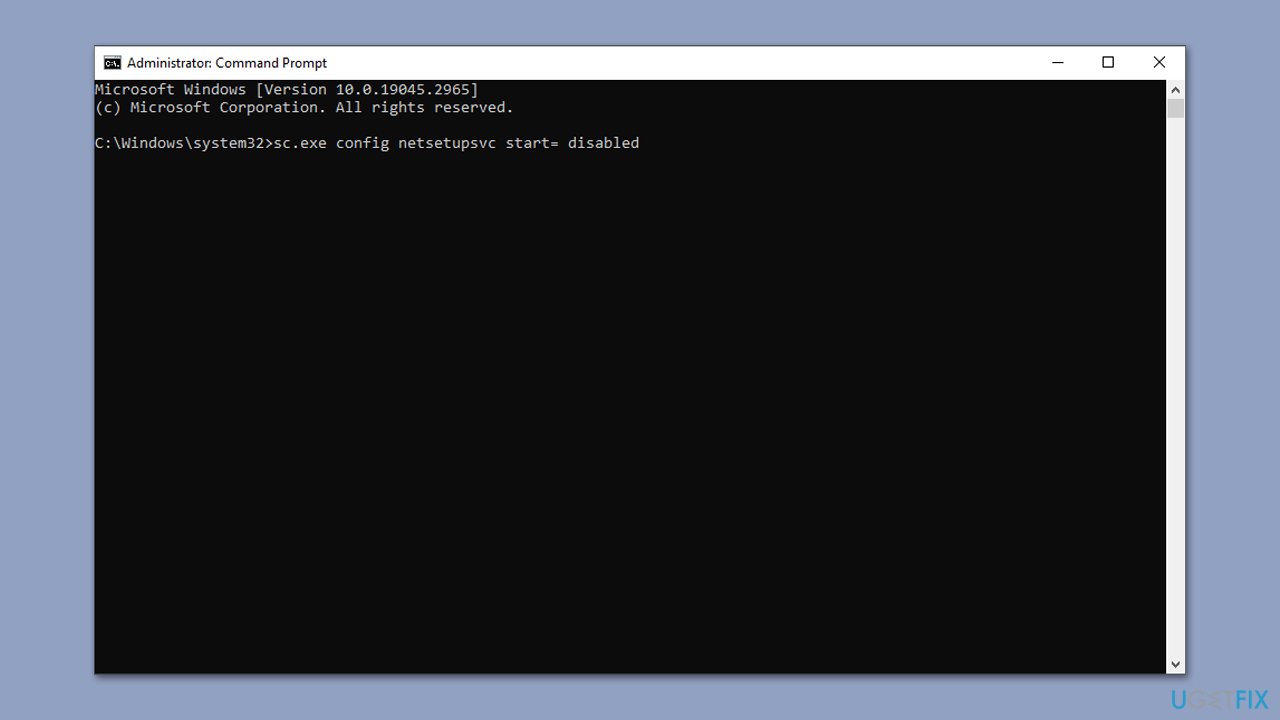
- Open Command Prompt as administrator.
- Paste in the following command and press Enter:
sc.exe config netsetupsvc start= disabled - Close down Command Prompt.
Next, reinstall the default Remote NDIS based Internet Sharing Device:
- Open Device Manager.
- Right-click Remote NDIS based Internet Sharing Device and pick Uninstall device. Confirm with Yes when prompted.
- Click on Actions (at the top) and select Scan for hardware changes.
- Close down Device Manager.
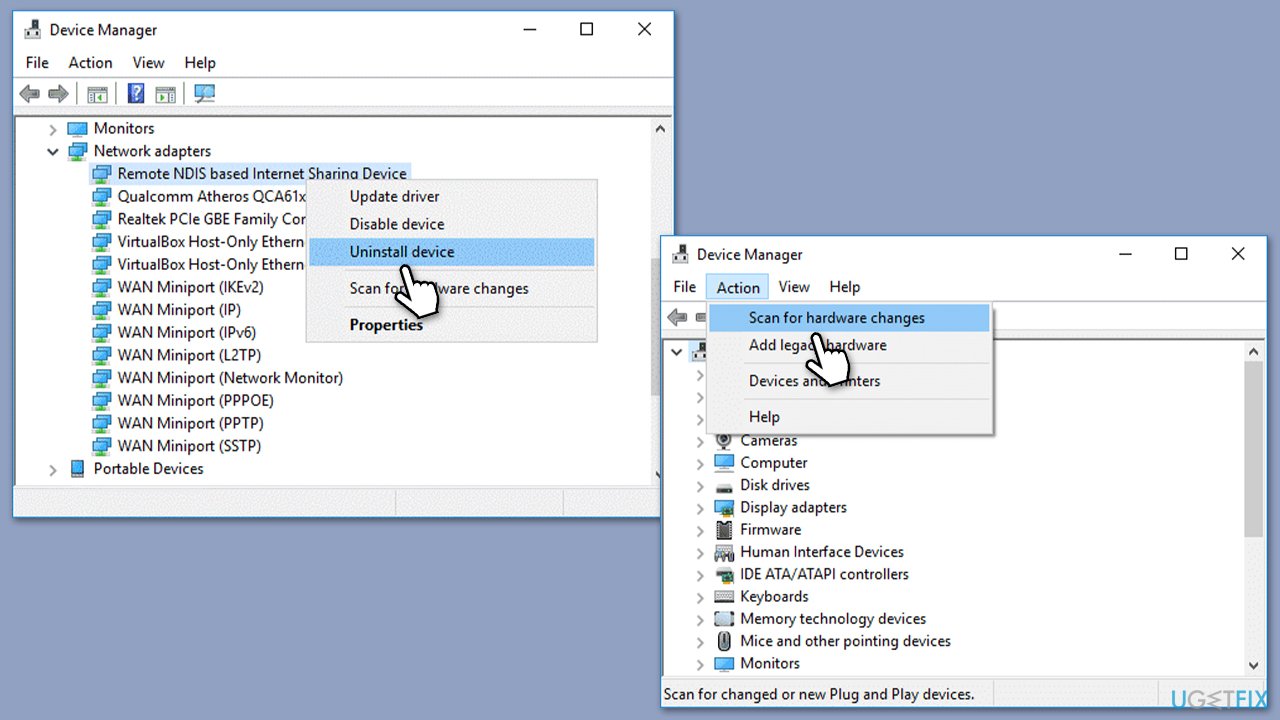
Next, modify the registry:
- Type regedit in Windows search and press Enter.
- In the UAC window, click Yes.
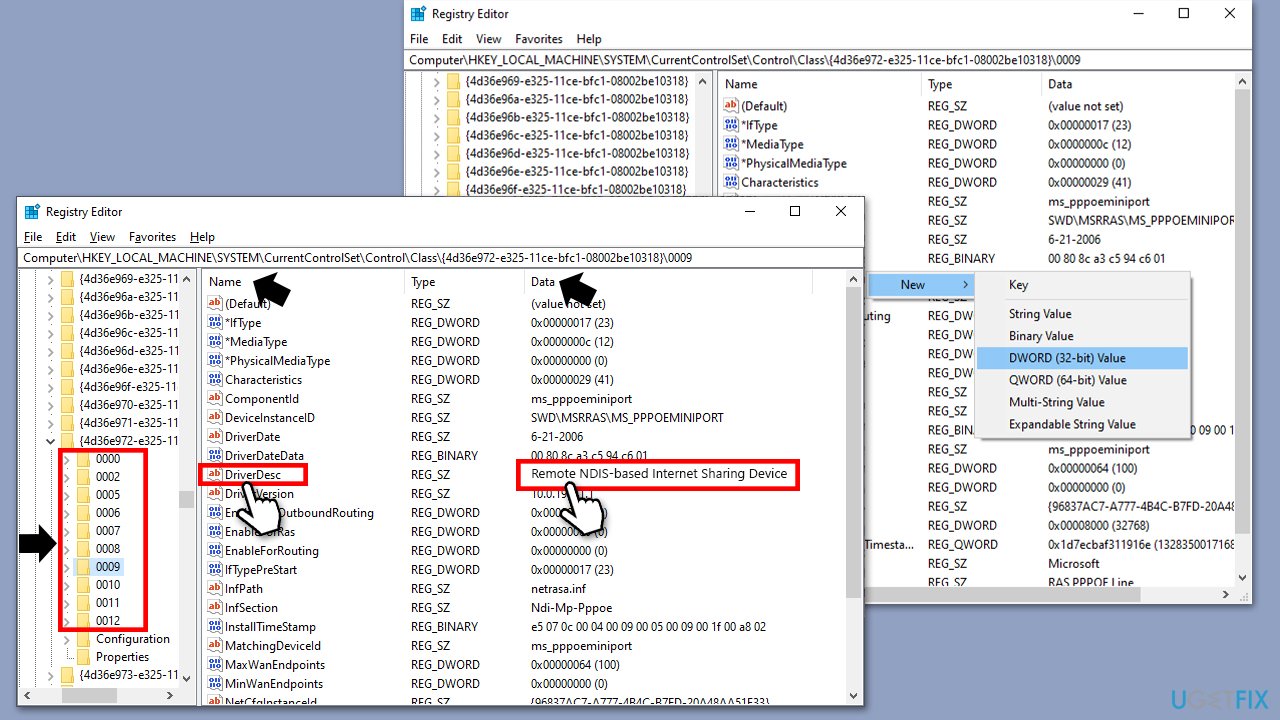
- Navigate to the following location:
HKEY_LOCAL_MACHINE\SYSTEM\CurrentControlSet\Control\Class\{4D36E972-E325-11CE-BFC1-08002BE10318} - You'll see several numbered subfolders after expanding the key. Your goal is to go through each of them and find the DriverDesc column. Once found, you need to look at its Data column – its description needs to be Remote NDIS-based Internet Sharing Device.
- In this pane, right-click on the empty space and select New > DWORD (32-bit) Value. Repeat this three times and name each of them as follows:
*IfType
*MediaType
*PhysicalMediaType
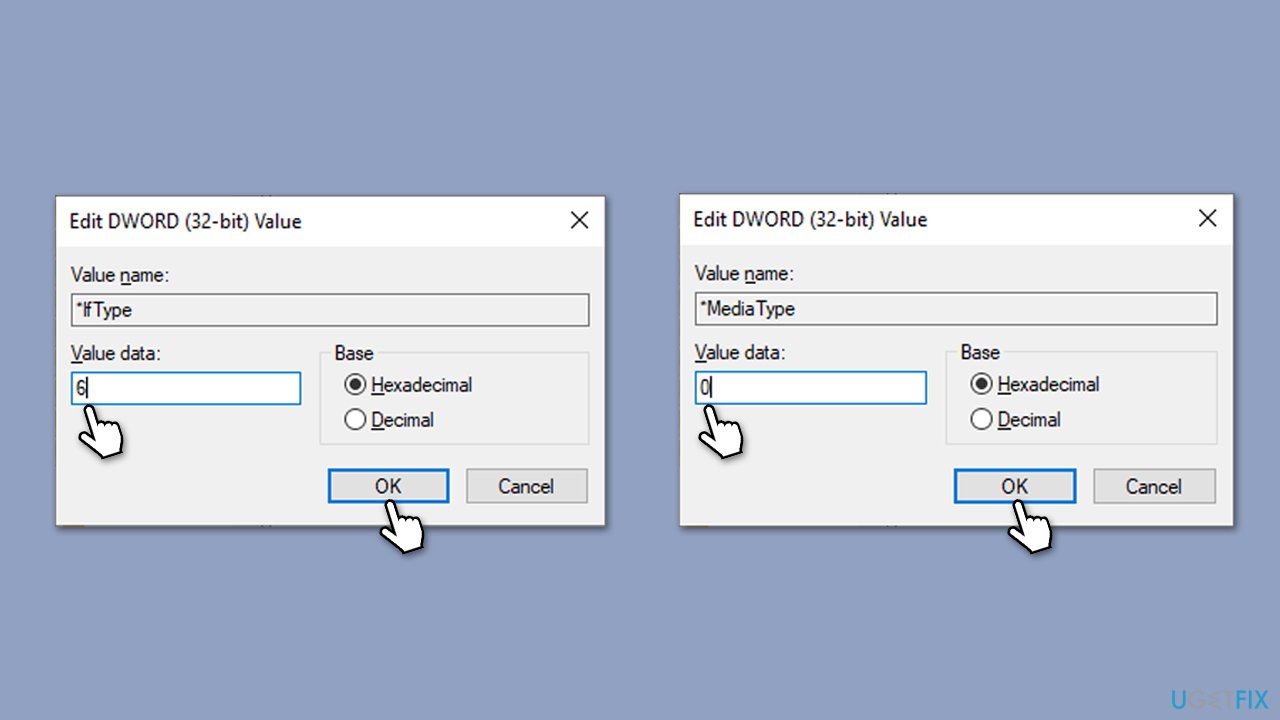
- Now double-click each of these and set the values of each as follows:
*IfType = 6
*MediaType = 0
*PhysicalMediaType = 0xe - Close down Registry Editor.
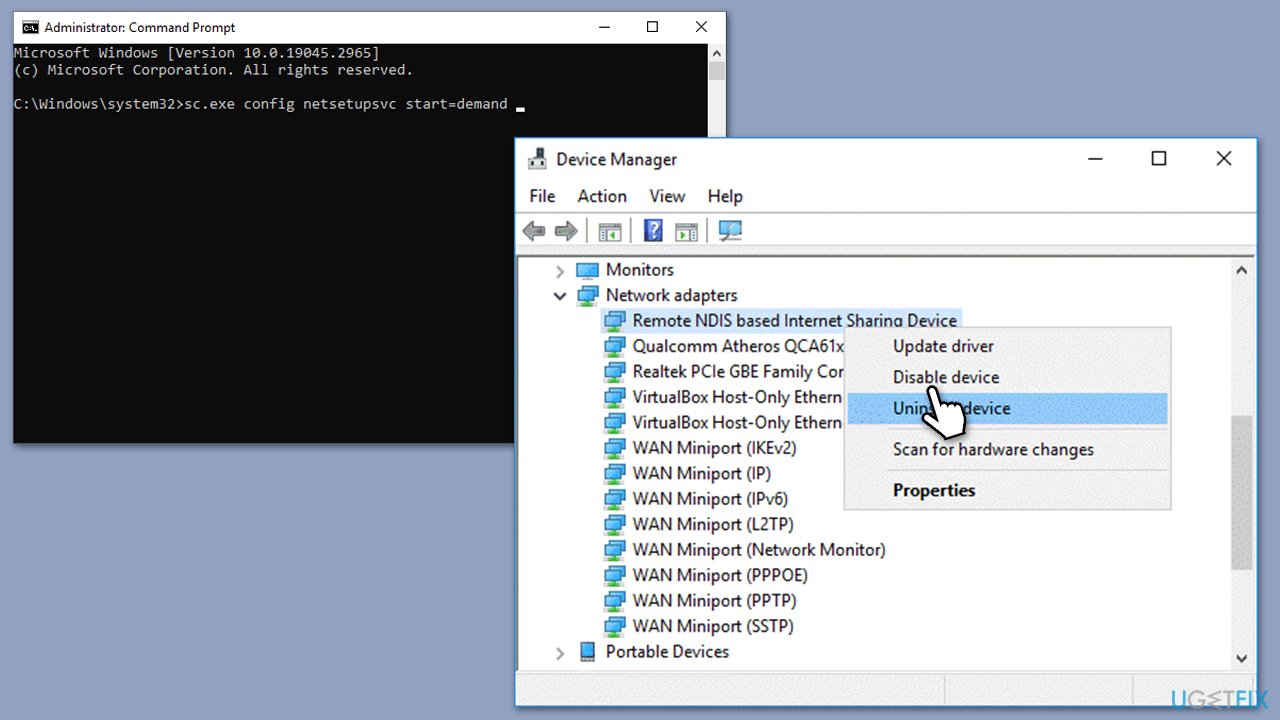
Finally, perform some finishing touches:
- Open Command Prompt as admin again and paste in the following command:
sc.exe config netsetupsvc start=demand - Press Enter and close down Command Promot.
- Open Device Manager.
- Expand Network adapters, right-click on your device, and pick Disable device.
- Right-click again and pick Enable device.
Repair your Errors automatically
ugetfix.com team is trying to do its best to help users find the best solutions for eliminating their errors. If you don't want to struggle with manual repair techniques, please use the automatic software. All recommended products have been tested and approved by our professionals. Tools that you can use to fix your error are listed bellow:
Protect your online privacy with a VPN client
A VPN is crucial when it comes to user privacy. Online trackers such as cookies can not only be used by social media platforms and other websites but also your Internet Service Provider and the government. Even if you apply the most secure settings via your web browser, you can still be tracked via apps that are connected to the internet. Besides, privacy-focused browsers like Tor is are not an optimal choice due to diminished connection speeds. The best solution for your ultimate privacy is Private Internet Access – be anonymous and secure online.
Data recovery tools can prevent permanent file loss
Data recovery software is one of the options that could help you recover your files. Once you delete a file, it does not vanish into thin air – it remains on your system as long as no new data is written on top of it. Data Recovery Pro is recovery software that searchers for working copies of deleted files within your hard drive. By using the tool, you can prevent loss of valuable documents, school work, personal pictures, and other crucial files.


