How to remove
Uninstall Browse for the Cause
from Windows
Easily uninstall Browse for the Cause on Windows 10 or 11 with our expert-tested guide. Get rid of unwanted programs swiftly and safely! Fixed in minutes.

How does How to Uninstall Browse for the Cause on Windows end up on your PC?
- Adware programs spreading on the Internet
- Browse for the Cause installed as an optional component of free software
- Software bundling technique used during installation
- Pre-checked attachments during Quick installation
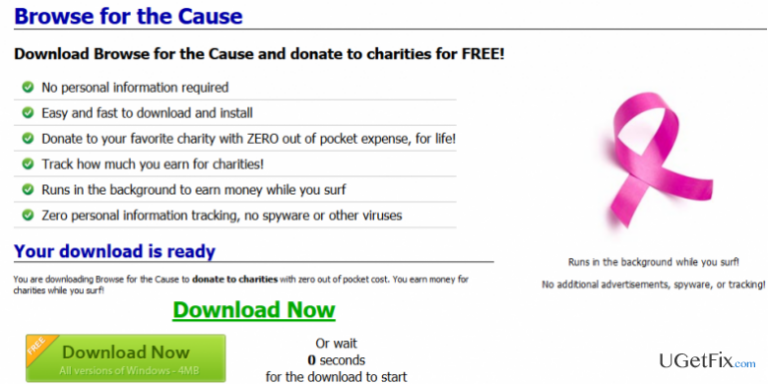
- Claims of no additional advertisements and tracking are false
Repairs Windows system files, removes malware, and restores a clean OS state — without reinstalling.
Yesterday I’ve noticed that my web browser is displaying lots of advertisements. Since I know that adware programs are actively spreading on the Internet, I’ve checked recently installed programs on Control Panel and detected Browse for the Cause application, which I have certainly didn’t install. I’ve tried to uninstall it via Control Panel, but the ads signed as “Ads by Browse for the Cause” are still covering each website I visit. Could you please help me to fix this?
According to the developers, Browse for the Cause (a.k.a. BrowseForTheCause) is a tool that allows earning money for charity while browsing on the Internet. However, such description is just a marketing technique used to attract attention of kind-hearted people. Security experts warn that Browse for the Cause is yet another potentially unwanted program (PUP) that is involved in the third-party advertising companies. While on the official web page of this program it is stated that “No additional advertisements, spyware, or tracking!” will be rendered and “No personal information required,” these claims are bogus. Once installed, Browse for the Cause malware hijacks web browsers, displays third-party advertisements, and activates tracking cookies. Consequently, non-personal information starts leaking to third-party advertisers, which is why people start receiving more and more advertisements whilst browsing. Even though such activity is not malicious, having an adware-type program on the system decreases system’s security, thus increasing the risk of virus infection.
In most of the cases, Browse for the Cause adware gets installed as an optional component of free software. Software ‘bundling’ is an actively used distribution technique, so it is very important to monitor the installation of each freeware. Additional components are pre-checked and hidden under Quick installation. Therefore, when you opt for free software, choose Advanced or Custom installation option and check if it has pre-checked attachments identified as browser add-ons, extensions or plug-ins. If some of the attachments are detected, remove the check marks before finishing the installation. To secure your PC’s system from malware, we would highly recommend installing [d1]. If, however, your Windows OS already got infected, we will explain how to uninstall Browse for the Cause in great details.
How to Uninstall Browse for the Cause?
Unfortunately, but anti-virus programs often fail to detect and remove adware and other potentially unwanted programs. That's because they are not identified as malicious and, thereby, not included in the virus database. Therefore, for the Browse for the Cause removal, you can use [d1]. In addition to that, you can also try to use [rev id="Perfect Uninstaller"], but we cannot guarantee that it will detect and remove all of the third-party files.
In addition to automatic Browse for the Cause removal, we will provide manual removal guide. This process requires a little bit of spare time and carefullness because you will have to remove all file leftovers and reset web browser.
Step 1. Uninstall Browse for the Cause app
- Click Start (bottom left corner) - Select Settings – Click System – Apps & Features.
- Find Browse for the Cause, click on it and select Uninstall. (Windows 8)
- Right-Click on the Windows logo and select Control Panel.
- Select Programs and then Uninstall a Program under Programs.
- Find Browse for the Cause, right click on it and select Uninstall. (Windows 10)
Step 2. Uninstall Browse for the Cause from the Registries:
Click Win key (or Start), type regedit in the search box, and hit Enter to open Registry Editor.
Here you should find and remove all registry entries that belong to Browse for the Cause. Search for the files located in folders:
HKEY_CURRENT_USER\Software\Browse for the Cause
HKEY_LOCAL_MACHINE\Software\Browse for the Cause
HKEY_LOCAL_MACHINE\Software\Microsoft\Windows\CurrentVersion\Run\eg ui
After that, find and delete all related files in these system folders:
C:\Program Files\Browse for the Cause
C:\Document and Settings\All Users\Application Data\Browse for the Cause
C:\Documents and Settings\%USER%\Application Data\Browse for the Cause
Step 3. Remove Browse for the Cause extension on web browser
- Open Google Chrome and click More.
- Select More Tools and then go to Extensions.
- Find Browse for the Cause extension and click Remove.
Bottom line
To uninstall Browse for the Cause, you should check and remove it from the Control Panel. Additionally, consider using advanced installation options for free software to avoid unwanted programs. If these steps do not resolve the issue, further malware removal tools may be necessary.
Frequently asked questions
To uninstall Browse for the Cause from Windows 10, go to Settings > Apps, find the program in the list, click on it, and select 'Uninstall.' Follow the on-screen instructions to complete the process.
Yes, it is safe to remove Browse for the Cause on Windows 11, as it is an unwanted program that can affect your browsing experience and system performance.
If you can't uninstall Browse for the Cause on Windows, try using the Control Panel's 'Programs and Features' to remove it, or use a reliable third-party uninstaller tool to ensure complete removal.




Report an issue
What's wrong with this guide? We review every report and update or remove content.
Report received — thank you. We'll review and fix it.
You need a free account to submit a report.
Be the first to comment