How to fix
Webcam Error After Windows 10 Anniversary Update
on Windows
Resolve webcam issues after the Windows 10 Anniversary Update effortlessly. Follow our expert-tested solutions and get your camera working in minutes.
What causes How to Fix Webcam Error After Windows 10 Anniversary Update?
- Newly programmed characteristics
- System errors
- Hardware/software incompatibilities
- Registry discrepancies
Repairs Windows system files, removes malware, and restores a clean OS state — without reinstalling.
Hi, guys! Do you have an idea why my webcam stopped working after installing Windows 10 Anniversary update?
Windows 10 Anniversary is deemed as one of the biggest updates for a reason. It has been supplemented with lots of new features, which are supposed to improve Window’s speed, functionality, and convenience. Nevertheless, it seems that newly programmed characteristics cause system errors, hardware/software incompatibilities, and similar issues that disrupt normal PC’s functionality.
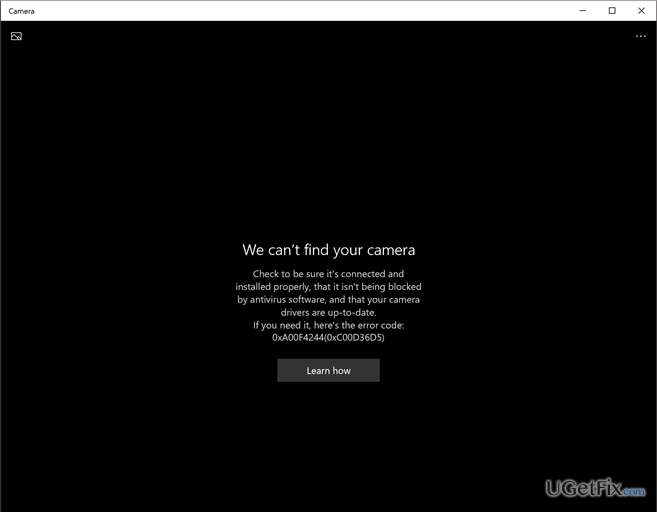
We have described a lot of issues related to Windows 10 update and this time is not an exception. Lots of people have reported that Windows 10 Anniversary Update caused their webcams, both external and built-in, to stop working. Naturally, the issue emerges when the user tries to use Skype, Open Broadcaster Software or simply tries to take a photo using the cam. For some users, the can works, but shows nothing except the black screen, while the others report about pop-up windows saying that “Camera App has crashed. ”
Microsoft is already aware of the Webcam error, but up to now no patch or update has been released. Therefore, you have to fix webcam stopped working error by yourself. At the moment, specialists have found out two methods that help to deal with this issue, i.e. you can either roll back to the previous build or repair registries. If you opt for a camera fixes right now, read the next paragraph carefully and initiate the steps provided there.
How to Fix Webcam Error After Windows 10 Anniversary Update?
Before you roll back to the previous build or start fixing registry keys, our recommendation would be to install and scan your PC with an optimization utility. Very often, Windows 10 update errors occur due to minor system incompatibilities, registry discrepancies, and similar issues. Thus, try [rev id=”Reimage”] first, and then start fixing the system manually.
Fix Webcam Stopped Working Error by Rolling Back to the Previous Built
Probably you know that intervening Registries manually is a risky thing as you may damage crucial system registries, delete something accidentally, and consequently initiate even more serious issues. Therefore, rolling back to the previous built may be a great solution for webcam error. To do this, you have to follow these simple steps:
- Hold Shift and click Power icon (lower right corner).
- Select Restart and wait until the system boots into the Advanced Mode.
- Select Troubleshoot – Advanced Options - Go to the Previous Build.
- You will receive a confirmation window asking to enter your User Account. Enter your password and select Continue.
- After that, pick out Go Back to the Previous Build.
If you have performed these steps correctly, but your webcam does not work, try changing the registry
To fix Crashed Webcam after Windows 10 Anniversary Update, amend the registry
Before you do so, check what the type of your system is. For this purpose, hold Windows key and Press E. Find This PC in the left pane and select Properties. You have to check whether the system is 32-bit or 64-bit.
Those who are using 32-bit system have to perform the following steps:
- Hold Windows Key and press R. Type regedit and click OK.
- Navigate to HKEY_LOCAL_MACHINE\SOFTWARE\Microsoft\Windows Media Foundation\Platform.
- Right-click on the subfolder of the Platform and select New > DWORD (32-bit) Value (right pane).
- Name the value EnableFrameServerMode.
- After that, click it twice and set the value to 0.
Those who are using 64-bit system have to perform the following steps:
- Hold Windows Key and press R. Type regedit and click OK.
- Navigate to HKEY_LOCAL_MACHINE\SOFTWARE\Microsoft\Windows Media Foundation\Platform.
- Right-click on the subfolder of the Platform and select New > DWORD (64-bit) Value (right pane).
- Name the value EnableFrameServerMode.
- After that, click it twice and set the value to 0.
We hope that now your webcam is working OK. If it’s not, we hope that Windows is going to release a patch soon.
Bottom line
To fix the webcam error after the Windows 10 Anniversary Update, you can either roll back to the previous build or repair the registries. It is also recommended to use an optimization utility like Reimage to address minor system incompatibilities. If these methods do not resolve the issue, further troubleshooting may be necessary.
Frequently asked questions
First, check if the webcam is enabled in Device Manager and try updating the drivers. If that doesn't work, uninstall the device and restart your computer to allow Windows to reinstall it automatically.
Ensure that your privacy settings allow apps to access the webcam by going to Settings > Privacy > Camera. Additionally, check for any pending Windows updates that might address this issue.
Yes, you can roll back the driver by going to Device Manager, right-clicking on your webcam, selecting Properties, and then the Driver tab to find the Roll Back Driver option.


Report an issue
What's wrong with this guide? We review every report and update or remove content.
Report received — thank you. We'll review and fix it.
You need a free account to submit a report.
Be the first to comment