How to fix
“DHCP is not enabled for Wi-Fi” error
on Windows
Resolve the "DHCP is not enabled for Wi-Fi" error on Windows 10 or 11 quickly with our expert-tested solutions. Fixed in minutes!
What causes How to fix “DHCP is not enabled for Wi-Fi” error in Windows?
- DHCP client is not enabled
- Incorrect network settings
- Corrupted network configuration
- Outdated network drivers
- Firewall or antivirus interference
Repairs Windows system files, removes malware, and restores a clean OS state — without reinstalling.
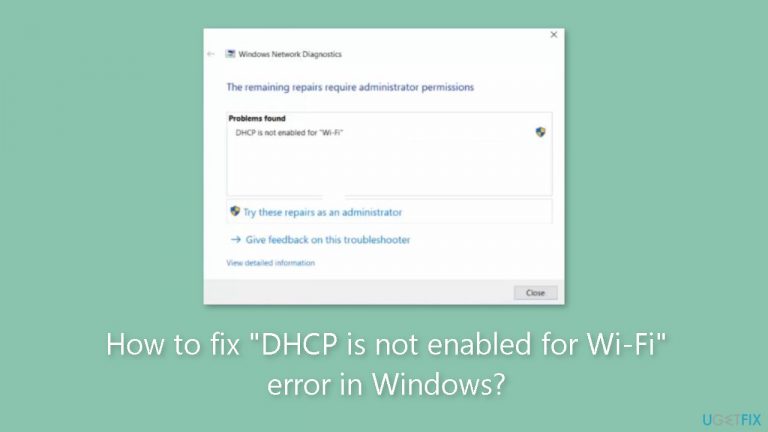
Hello. My Windows PC could not connect to the Wi-Fi so I ran the Windows Network Diagnostics tool and it says "DHCP is not enabled for Wi-Fi". How do I fix this?
Windows's "DHCP is not enabled for Wi-Fi" error message can be a significant challenge for users trying to access the Internet. This problem occurs when the Wi-Fi connection's DHCP client is not enabled. This client is in charge of dynamically allocating IP addresses and other crucial network parameters to connected devices. A solid network connection is established and maintained via DHCP, making proper operation of it necessary for a flawless Internet experience.
The Dynamic Host Configuration Protocol (DHCP) is intended to make it easier for users and administrators to configure networks. It makes sure that any device connected to a network receives an automatic IP address assignment along with other parameters like subnet masks, default gateways, and DNS server addresses. Without DHCP enabled, devices could have trouble connecting to the network correctly, which prevents them from accessing the Internet.
The implications of the "DHCP is not enabled for Wi-Fi" error can be frustrating and disruptive for users. Users may probably discover that they are unable to establish a connection to the Internet when this issue occurs. Their ability to send emails, access online services, explore websites, and engage in other online activities may be limited as a result. Tasks that largely rely on Internet connectivity for both personal and professional purposes can be adversely affected by the lack of a functioning network connection.
In this guide, you will find 7 steps that should help you fix "DHCP is not enabled for Wi-Fi" error in Windows. You can also run a maintenance tool like [d1] that can fix most system errors, BSODs,[ref en-1] corrupted files, and registry[ref en-2] issues. Otherwise, follow the step-by-step instructions provided below.

Solution 1. Run the Network Troubleshooter
- Press the Windows key + I to open the Settings menu.
- In the Settings menu, locate and click on the Troubleshoot option on the right side under the System tab.
- Within the Troubleshoot menu, find and click on Other troubleshooters.
- Look for the Network & Internet troubleshooter and click on it.
- Click Run .

- Follow the on-screen instructions provided by the troubleshooter.
- Complete the process as instructed, and consider making the recommended changes to resolve any network and internet-related issues.
Solution 2. Run the DHCP Client Service
- Open the Search bar by pressing the Windows key + S.
- Type Services in the search field and choose the corresponding search result.
- Locate the DHCP Client entry within the list of services.
- Right-click on the DHCP Client entry and choose Properties.

- From the Startup type dropdown menu, select Automatic.
- If the DHCP Client service isn't running, click the Start button.
- Click OK to save the changes.
Solution 3. Update Network Drivers
- Open the Power User menu by pressing the Windows key + X.
- Choose Device Manager from the options presented.
- Expand the Network adapters entry in the Device Manager.
- Right-click on the Wi-Fi adapter listed.
- Select Update driver from the context menu.

- Choose Search automatically for drivers.
- Wait for Windows to install the best available driver stored locally.
Solution 4. Modify the Network Adapter Settings
- Open the Run dialog by pressing the Windows key + R.
- Type ncpa.cpl in the Run dialog's text field and press Enter.
- Right-click on the active network adapter displayed.
- Choose Properties from the context menu.

- Locate and select Internet Protocol Version 4 (TCP/IPv4).
- Click on the Properties button.
- Check the radio buttons for Obtain an IP address automatically and Obtain the DNS server address automatically.
- Click OK to save the changes.
- If your network connection relies on Internet Protocol Version 6 (TCP/IPv6), make similar changes as in the previous steps.
- After making the necessary changes, restart your computer.
- Check for any improvements in your network connection.
Solution 5. Re-enable the Network Adapter and DHCP Service
- Open the Run dialog by pressing the Windows key + R.
- Type ncpa.cpl in the Run dialog.
- Click OK to proceed.
- Right-click on the currently active network adapter.
- Choose Disable from the context menu.
- Open the Services window (you can search for Services in the Start menu).
- Right-click on DHCP Client.

- Select Restart from the context menu.
- Return to the Network Connections window (you can search for Network Connections in the Start menu).
- Right-click on the same network adapter.
- This time, select Enable from the context menu.
Solution 6. Disable Proxy
- Open Settings by pressing the Windows key + I.
- Navigate to Network & Internet using the options in the navigation pane.
- Click on Proxy in the Network & Internet settings.

- Find the toggle for Automatically detect settings.
- Turn off the toggle to disable automatic proxy detection.
- Verify that there are no entries present under Manual proxy setup.
Solution 7. Reset Network Settings
- Open the Run dialog by pressing the Windows key + R.
- Type cmd in the Run dialog.
- Press Ctrl + Shift + Enter to launch Command Prompt with administrative privileges.
- Confirm the UAC prompt by clicking Yes.
- In the Command Prompt window, execute the following commands one by one, pressing Enter after each:
netsh winsock reset catalog
netsh int ip reset resetlog.txt
ipconfig /release
ipconfig /renew

- After executing the commands, restart your computer.
Bottom line
To fix the 'DHCP is not enabled for Wi-Fi' error in Windows, you can run the Network Troubleshooter, check your network settings, or update your network drivers. If these steps do not resolve the issue, consider using a maintenance tool to fix system errors or seek further technical assistance.
Frequently asked questions
To enable DHCP, go to Settings > Network & Internet > Status, click on 'Change adapter options', right-click on your Wi-Fi network, select 'Properties', then click on 'Internet Protocol Version 4 (TCP/IPv4)' and ensure 'Obtain an IP address automatically' is selected.
In Windows 11, you can fix this error by accessing Settings > Network & Internet > Advanced network settings, then under 'More settings', select 'Network reset' to restore network configurations to default.
Yes, you can run the Network Troubleshooter by right-clicking the network icon in the system tray, selecting 'Troubleshoot problems', and following the prompts to identify and fix DHCP-related issues.


Report an issue
What's wrong with this guide? We review every report and update or remove content.
Report received — thank you. We'll review and fix it.
You need a free account to submit a report.
Be the first to comment