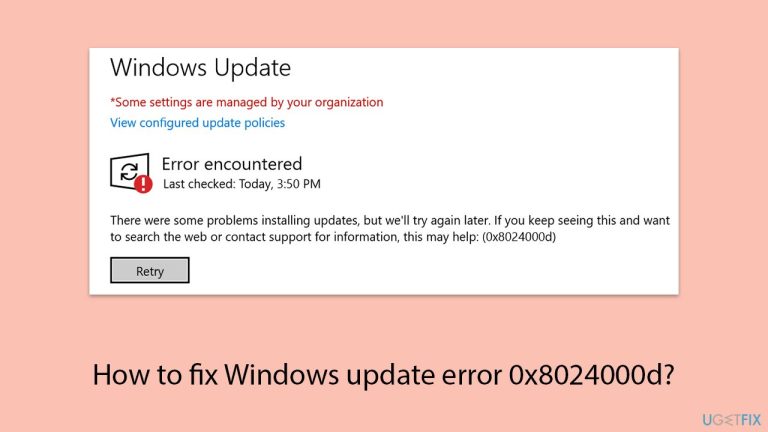
How to fix
Windows update error 0x8024000d
on Windows
Resolve Windows update error 0x8024000d effortlessly with expert-tested solutions. Get your system up-to-date in minutes with zero traces left.
What causes How to fix Windows update error 0x8024000d?
- Missing or corrupted XML data
- Malfunctioning Windows Update service
- Interference from third-party applications
- Damaged Windows elements
- Low disk space
Repairs Windows system files, removes malware, and restores a clean OS state — without reinstalling.
Hi. I've been trying to install the latest Windows update on my PC, but I keep running into error 0x8024000d. I've tried restarting a couple of times, but no luck. What's causing this, and how can I get my updates working again?
Windows Update is a computer's lifeline to being secure and up-to-date, delivering patches, performance tweaks, and new features straight from Microsoft. It's normally a smooth process - until it isn't. For some users, error code 0x8024000d is a chronic obstacle. You might see the update download, then just freeze in your tracks when it comes to installing, and you're left staring at the 0x8024000d error message with still-outdated software. It's frustrating, but you're not the only one.
So what's behind this 0x8024000d glitch, then? One of the most frequent culprits is missing or corrupted data within the files that constitute an update - specifically, the XML data Windows Update needs in order to process things correctly. If that's absent or damaged, the installation can't continue.
A second fix is a malfunction with the Windows Update service itself, which is perhaps not running or could be clogged with aged temporary files. Third-party applications, including antivirus suites, might also interfere by affecting vital update components. Even more basic system issues, such as damaged Windows elements or low disk space, might silently result in the 0x8024000d error.
Fortunately, there are ways to break through this. Potential fixes include clearing out the update cache to ditch any problematic files, restarting essential services to reset the process, or manually grabbing the update from Microsoft’s catalog to sidestep the usual hurdles.
For trickier cases tied to deeper system problems, a repair and maintenance app like [d1] could help by smoothing out underlying Windows issues, paving the way for your updates to finally install without that pesky 0x8024000d popping up again.

Fix 1. Run Windows Update Troubleshooter
- Type Troubleshoot into the Windows search bar and press Enter.
- Next, on the right side of the window, select Additional troubleshooters/Other troubleshooters.
- Scroll down to locate the Windows update option and click on it.
- Click on Run the troubleshooter/Run and allow the process to complete.
- Once it is finished, implement any recommended changes and restart your device.

Fix 2. Run Disk Cleanup
Disk Cleanup can remove corrupted caches and reclaim storage space if it's running low.
- Type Disk Cleanup in Windows search and hit Enter.
- If your Windows is installed on drive C, pick it from the list (it should be by default) and press OK.
- Click Clean up system files.
- Select your main disk again and click OK.
- Here, select the largest portions of the data used - these typically include Temporary Internet Files, Windows Update, Temporary Files, Recycle Bin, Delivery Optimization Files, and others.
- Click OK - the process should be finished shortly.

Fix 3. Check related services
- Type in Services in Windows search and press Enter.
- Locate Windows Update Service.
- If it is already running, right-click and select Restart.
- if the service is not running, double-click it to open Properties.
- Under the Startup type, select Automatic from the drop-down menu.
- Click Start, Apply, and OK.
- Locate Background Intelligent Transfer Service (BITS), Cryptographic service, and Windows Installer service, and repeat the process.

Fix 4. Check for corrupted files
Damaged system files can prevent updates from installing. Performing SFC and DISM scans can repair any corruption that might be triggering the issue.
- Type in cmd in Windows search.
- Right-click on Command Prompt and select Run as administrator.
- In the User Account Control window, click Yes.
- In the Command Prompt window, paste the following command and hit Enter:
sfc /scannow - Next, use the following commands, pressing Enter each time:
Dism /Online /Cleanup-Image /CheckHealth
Dism /Online /Cleanup-Image /ScanHealth
Dism /Online /Cleanup-Image /RestoreHealth
(Note: if you get an error executing this last command, add /Source:C:\RepairSource\Windows /LimitAccess to it and try again). - Reboot your computer.

Fix 5. Reset Windows Update Components
Resetting the Windows Update components can resolve problems caused by corrupted update services. This process can be done manually or with the help of an automated tool.
- Open Command Prompt as administrator.
- Stop the Windows Update-related services by running the following commands one at a time, pressing Enter after each one:
net stop wuauserv
net stop cryptSvc
net stop bits
net stop msiserver - Rename the SoftwareDistribution and Catroot2 folders by running the following commands:
ren C:\Windows\SoftwareDistribution SoftwareDistribution.old
ren C:\Windows\System32\catroot2 Catroot2.old
Note: If your Windows installation is not on the C drive, replace "C" with the appropriate drive letter. - Restart the Windows Update-related services by running the following commands:
net start wuauserv
net start cryptSvc
net start bits
net start msiserver - Restart your computer.

Fix 6. Install the update manually
If the automatic process fails, you can always attempt to install the update manually.
- Type in Updates in Windows search and press Enter.
- Select View update history.
- Find the update that failed with the 0x8024000d error and copy its KB number.
- Open your browser and go to Microsoft Update Catalog.
- Within the search bar, type in the KB number and clicks Search.
- Find the correct version of the update for your operating system (to check this, right-click on Start and pick System. Under Device specifications and check the System type) and click Download.
- Use on-screen guidelines to finish the installation process and restart your PC.

Fix 7. Use Media Creation Tool
This tool allows you to manually upgrade your system to the latest version of Windows without encountering further update issues.
- Visit the official Microsoft website and download Windows 10 installation media. (Windows 11 version).
- Double-click the installer and select Yes when UAC shows up.
- Agree to terms.
- Select Upgrade this PC now and select Next.
- Windows will now download all the necessary files – it might take a while.
- Agree to the terms once again and click Next.
- Before installing, ensure you are happy with your choices (otherwise, you can click the Change what to keep option).
- Click Install to begin the upgrade process.

Bottom line
To fix the Windows update error 0x8024000d, you can try clearing the update cache, restarting essential services, or manually downloading the update from Microsoft's catalog. If these solutions do not resolve the issue, consider using a repair and maintenance app to address deeper system problems.
Frequently asked questions
The error code 0x8024000d indicates that there is a problem with the update metadata on your Windows 10 or Windows 11 system, which prevents updates from being installed properly.
You can reset the Windows Update components by running the Command Prompt as an administrator and executing specific commands, such as 'net stop wuauserv' and 'net start wuauserv', to restart the update services.
Yes, you can manually download updates by visiting the Microsoft Update Catalog website, searching for the specific update, and downloading it directly for installation on your Windows 10 or Windows 11 system.


Report an issue
What's wrong with this guide? We review every report and update or remove content.
Report received — thank you. We'll review and fix it.
You need a free account to submit a report.
Be the first to comment