How to fix
Windows update error 0x80071160
on Windows
Resolve the Windows update error 0x80071160 quickly and effectively. Our expert-tested solutions for Windows 10 and 11 ensure a smooth update process.
What causes How to fix Windows update error 0x80071160?
- Corrupt Windows Update cache in the SoftwareDistribution folder
- System file corruption
- Conflicts with third-party software
- Issues with update components
- Incorrect system settings
Repairs Windows system files, removes malware, and restores a clean OS state — without reinstalling.
My Windows 10 PC shows the error 0x80071160 during Windows update attempts, which shows a message "There were problems installing updates." I restarted my computer as well as verified my network stability, but the error continues to appear while I worry about security updates. How do I solve this?
While many users don't realize that, Windows updates are among the most important features for maintaining the system's stability and security, as well as ensuring the most recent bug fixes and feature improvements are introduced.
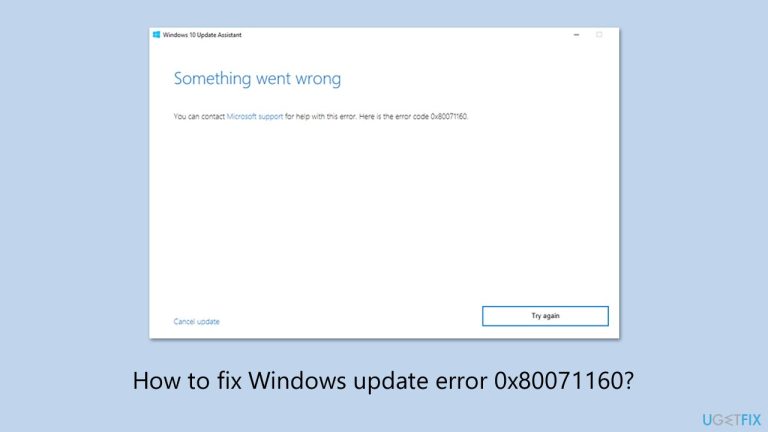
However, Windows update error 0x80071160 can stop the process completely. While it may vary, the error is usually accompanied by a message like "There were problems installing updates" or "Something went wrong," which leaves users unable to install required fixes, potentially leaving the system vulnerable or delayed access to new features.
0x80071160 error is typically a result of an issue with update components or system settings. A common reason is a corrupt Windows Update cache in the SoftwareDistribution folder where update files are kept - deleting this folder will fix the 0x80071160 error by allowing a fresh download.
System file corruption can also result in Windows update error 0x80071160, but SFC and DISM scans can resolve them and have things up and running again. Additionally, conflicts with third-party software may impede the update process, and a Clean Boot can solve this and similar issues.
The following solutions are offered below with easier methods provided first, proceeding with more complex solutions such as manual update, to fix Windows update error 0x80071160. For a quicker fix, we suggest that you use [d1], a PC repair app that can automatically fix system problems that could be responsible for this error.

Fix 1. Run Windows update troubleshooter
Update troubleshooter can sometimes automatically detect and resolve issues with the update process.
- Type Troubleshoot into the Windows search bar and press Enter.
- Next, on the right side of the window, select Additional troubleshooters/Other troubleshooters.
- Scroll down to locate the Windows update option and click on it.
- Click on Run the troubleshooter/Run and allow the process to complete.
- Once it is finished, implement any recommended fixes and restart your computer.

Fix 2. Check the services
If services related to the update process are not running, you should enable them (if they are already running, restarting them might be helpful).
- Type in Services in Windows search and press Enter.
- Scroll down to locate Windows update.
- If it is already running, right-click and pick Restart.
- If the service is not running, double-click it, and select Automatic under the Startup type from the drop-down menu.
- Click Start, Apply, and OK.
- Perform the same steps with Background Intelligent Transfer Service (BITS) and Cryptographic services.

Fix 3. Perform Disk Cleanup
- Type Disk Cleanup in Windows search and hit Enter.
- If your Windows is installed on drive C, pick it from the list (it should be by default) and press OK.
- Click Clean up system files.
- Select your main disk again and click OK.
- Here, select the largest portions of the data used - these typically include Temporary Internet Files, Windows Update, Temporary Files, Recycle Bin, Delivery Optimization Files, and others.
- Click OK - the process should be finished shortly.

Fix 4. Run SFC and DISM
If corrupted files are the issue, SFC and DISM would be able to resolve update errors.
- Type cmd in Windows search.
- Right-click on Command Prompt and select Run as administrator.
- The User Account Control (UAC) window will ask whether you want to allow changes to your computer - click Yes.
- Copy and paste this command and hit Enter:
sfc /scannow - Wait for the scan to finish.
- As soon as it finishes, Windows will report whether integrity violations were found and if they could be fixed. Regardless of the outcome, use these commands next, pressing Enter after each:
Dism /Online /Cleanup-Image /CheckHealth
Dism /Online /Cleanup-Image /ScanHealth
Dism /Online /Cleanup-Image /RestoreHealth - Close down the Command Prompt and restart your device.

Fix 5. Reset Windows update components
- Open Command Prompt as administrator.
- User Account Control window will show up - click Yes when prompted.
- Stop the BITS, Windows Update, and Cryptographic services by typing the following commands, and pressing Enter after each:
- net stop bits
- net stop wuauserv
- net stop appidsvc
- net stop cryptsvc
- To rename the SoftwareDistribution and Catroot2 folders (where Windows stores update files), type the following commands:
- ren %systemroot%\SoftwareDistribution SoftwareDistribution.old
- ren %systemroot%\system32\catroot2 catroot2.old
- regsvr32.exe /s atl.dll
- regsvr32.exe /s urlmon.dll
- regsvr32.exe /s mshtml.dll
- netsh winsock reset
- netsh winsock reset proxy
- Restart the services stopped earlier by typing the following commands:
- net start bits
- net start wuauserv
- net start appidsvc
- net start cryptsvc
- Close the Command Prompt and restart your computer, then try updating Windows again.

Fix 6. Use Media Creation Tool
Media Creation Tool can bring the system to the latest version, meanwhile repreparing any broken system components in Windows.
- Visit the official Microsoft website and download Windows 10 installation media. (Windows 11 version).
- Double-click the installer and select Yes when UAC shows up.
- Agree to terms.
- Select Upgrade this PC now and select Next.
- Windows will now download all the necessary files – it might take a while.
- Agree to the terms once again and click Next.
- Before installing, ensure you are happy with your choices (otherwise, you can click the Change what to keep option).
- Click Install to begin the upgrade process.

Fix 7. Run Clean Boot
Third-party software might prevent Windows updates from installing properly. To bypass this, try running Clean Boot as follows:
- Disable your anti-malware software temporarily and try the update again.
- If the problem persists, press Win + R, type msconfig, and hit Enter.
- Go to the Services tab and tick the Hide all Microsoft services checkbox.
- Select Disable all.
- Go to the Startup tab and click Open Task Manager.
- Here, right-click on each of the non-Windows entries and select Disable.
- Close down the Task Manager.
- Go to the Boot tab and tick the Safe boot option.
- Restart your computer and try installing the update again.

Bottom line
To fix Windows update error 0x80071160, you can run the Windows update troubleshooter, delete the SoftwareDistribution folder, and perform SFC and DISM scans. If these methods do not resolve the issue, consider performing a Clean Boot or using a PC repair app for further assistance.
Frequently asked questions
The error 0x80071160 indicates that there is a problem with the Windows Update components, often related to corrupted files or issues with the update service itself.
To fix this error on Windows 11, you can run the Windows Update Troubleshooter and reset the Windows Update components manually through Command Prompt.
Yes, running the System File Checker (SFC) can help repair corrupted system files that may be causing the 0x80071160 error on Windows 10.


Report an issue
What's wrong with this guide? We review every report and update or remove content.
Report received — thank you. We'll review and fix it.
You need a free account to submit a report.
Be the first to comment