How to fix
ExplorerExtensions.dll causes File Explorer to crash
on Windows
Resolve ExplorerExtensions.dll crashes in Windows 10 and 11 quickly with our expert-tested solutions. Get your File Explorer back to normal in minutes!

![[Fix] ExplorerExtensions.dll causes File Explorer to crash in Windows](https://ugetfix.com/wp-content/uploads/articles/askit/fix-explorerextensions-dll-causes-file-explorer-to-crash-in-windows_en-768x432.jpg)
What causes [Fix] ExplorerExtensions.dll causes File Explorer to crash in Windows?
- Corrupted ExplorerExtensions.dll
- Outdated ExplorerExtensions.dll
- Incompatibility with system components
- Corrupted system files
- Issues with third-party applications
Repairs Windows system files, removes malware, and restores a clean OS state — without reinstalling.
Hello. The File Explorer on my Windows PC keeps crashing because of the ExplorerExtensions.dll. Is there a way to fix this?
DLL (Dynamic Link Library)[ref en-1] files are required by the Windows operating system and other software programs. They contain code, data, and resources that can be utilized by numerous programs at the same time, reducing redundancy and increasing efficiency. DLL files play an important role in giving additional functionality and capabilities to the file management system.
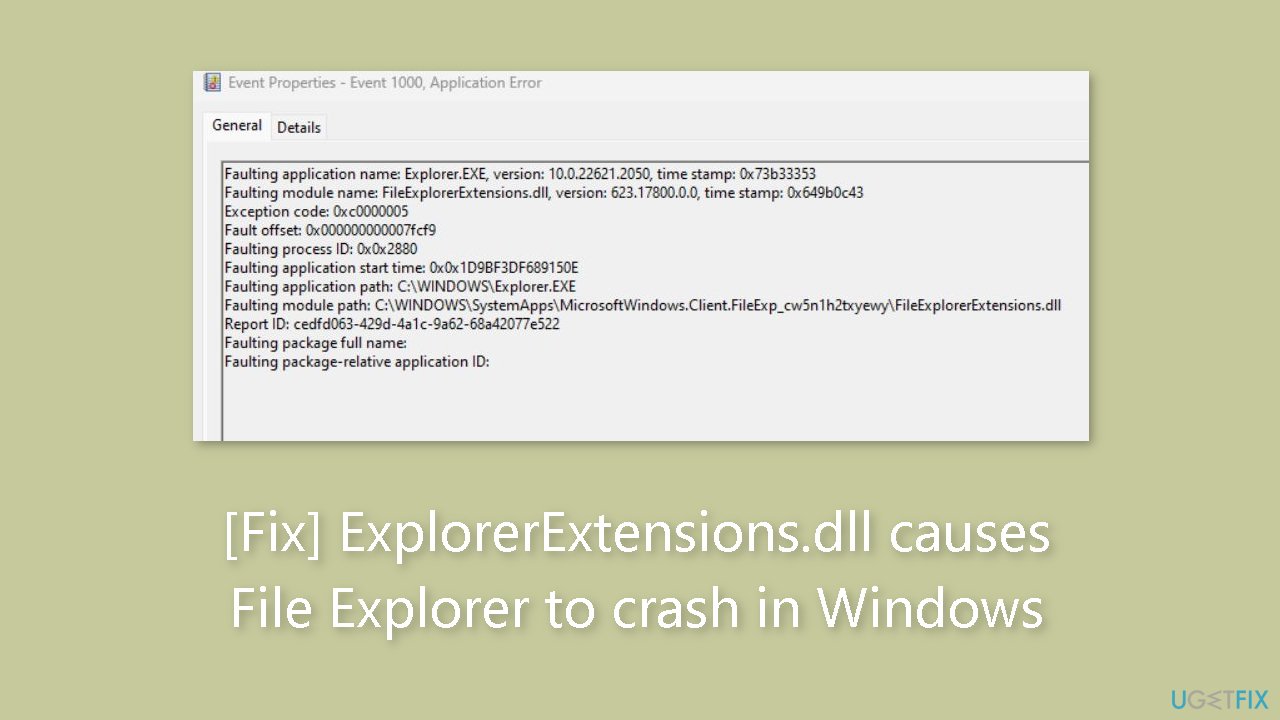
A somewhat common problem reported by certain Windows users is that ExplorerExtensions.dll or FileExplorerExtensions.dll causes File Explorer to crash. These DLL files are often in charge of adding extensions, plugins, or other functionality to the File Explorer interface. However, when these DLL files become corrupted, outdated, or incompatible with the system or other program components, they can cause File Explorer to become unstable and crash.
When users encounter this problem, attempting to use File Explorer may result in an error message or a rapid application crash. Because File Explorer is a core tool for exploring and managing files and directories on the Windows operating system, this can have a substantial influence on the user experience. Due to the continual crashing of File Explorer, users may find it impossible to access their files, conduct simple file management operations, or simply browse their system.
Users can examine a few possible solutions to this problem. Replacing the affected DLL files with fresh ones obtained from a trustworthy source, or running system file checks to fix any corrupted system files, might fix the problem. Furthermore, updating the operating system and installed software, particularly any third-party apps that may interact with File Explorer, may assist to relieve compatibility issues.
In this guide, you will find 4 steps that should help you fix ExplorerExtensions.dll and FileExplorerExtensions.dll causing File Explorer to crash. You can also run a repair tool like [d1] that can fix most system errors, BSODs,[ref en-2] corrupted files, and registry[ref en-3] issues. Otherwise, follow the step-by-step instructions below.
Solution 1. Fix Corrupted System Files
Use Command Prompt commands to repair system file corruption:
- Open Command Prompt as administrator
- Use the following command and press Enter:
sfc /scannow

- Reboot your system
- If SFC returned an error, then use the following command lines, pressing Enter after each:
DISM /Online /Cleanup-Image /CheckHealth
DISM /Online /Cleanup-Image /ScanHealth
DISM /Online /Cleanup-Image /RestoreHealth
Solution 2. Reinstall GPU Driver
Device manager:
- Press the Windows key + X on your keyboard and select Device Manager from the menu that appears.
- In the Device Manager window, expand the Display adapters section by clicking on the arrow next to it.
- Right-click on your GPU driver (e.g., NVIDIA, AMD, Intel).
- From the context menu, click on Uninstall device. A confirmation dialog might appear.
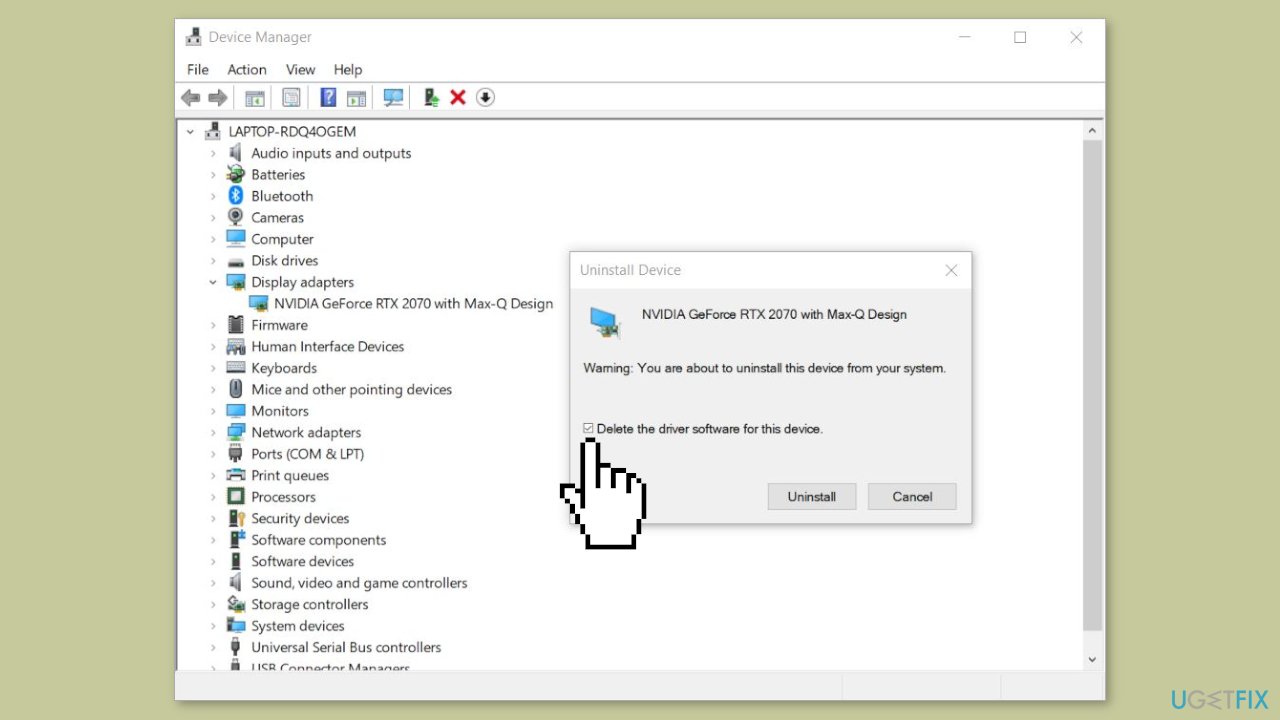
- If a confirmation dialog appears, check the box that says Delete the driver software for this device (if available).
- Click Uninstall to proceed with the uninstallation.
- Restart your PC and a new driver will be automatically installed.
Manufacturer's website:
- Press the Windows key + X on your keyboard and select Device Manager from the menu that appears.
- In the Device Manager window, expand the Display adapters section by clicking on the arrow next to it.
- Right-click on your GPU driver (e.g., NVIDIA, AMD, Intel).
- From the context menu, click on Uninstall device. A confirmation dialog might appear.
- If a confirmation dialog appears, check the box that says Delete the driver software for this device (if available).
- Click Uninstall to proceed with the uninstallation.
- Wait for the uninstallation process to complete. Your screen might flicker during this process.
- Visit the official website of your GPU manufacturer (NVIDIA, AMD, Intel) and navigate to the driver download section.
- Enter your GPU model and operating system to find the latest driver version compatible with your system.
- Download the driver installation file and save it to a location on your computer.
- Press the Windows key + X on your keyboard and select Device Manager.
- Expand the Display adapters section.
- Choose Update driver from the context menu.
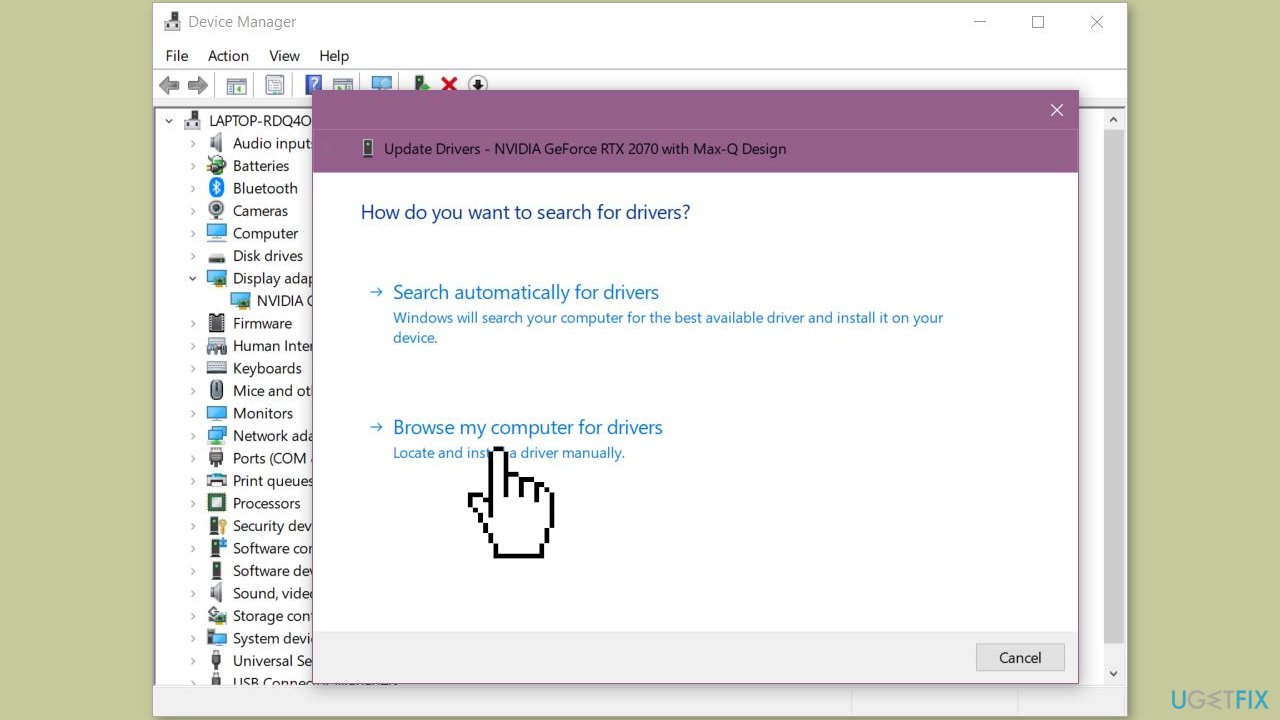
- Select Browse my computer for drivers on the next screen.
- Click Browse and navigate to the location where you saved the downloaded GPU driver.
- Select the driver file and follow the on-screen prompts to install it.
- After the driver installation is complete, restart your computer to apply the changes.
- After restarting, ensure that your GPU is properly recognized in Device Manager without any warning symbols.
Solution 3. Disable Overclocking
- Before making any changes to your computer's hardware settings, save your work and close all running applications to prevent data loss or system instability.
- Restart your computer.
- As the computer boots up, there's usually a key (like F2, F10, Delete, etc.) displayed on the screen that you need to press to access the BIOS/UEFI settings. Press the required key promptly.
- Use your keyboard's arrow keys to navigate through the BIOS/UEFI interface.
- Look for a section related to overclocking or CPU settings. The naming can vary depending on your motherboard manufacturer.
- Within the overclocking settings section, you will find options to adjust CPU clock speeds, voltages, and other parameters.
- Reset any modified values to their default settings. This could involve changing values back to their Auto or Default settings.
- After reverting the overclocking settings, navigate to the option that allows you to save changes and exit the BIOS/UEFI settings.
- Your computer will reboot with the new settings. Allow it to boot up normally.
- Check if the system stability has improved. Run tasks that previously caused issues to confirm that the overclocking has been disabled successfully.
Solution 4. Use System Restore
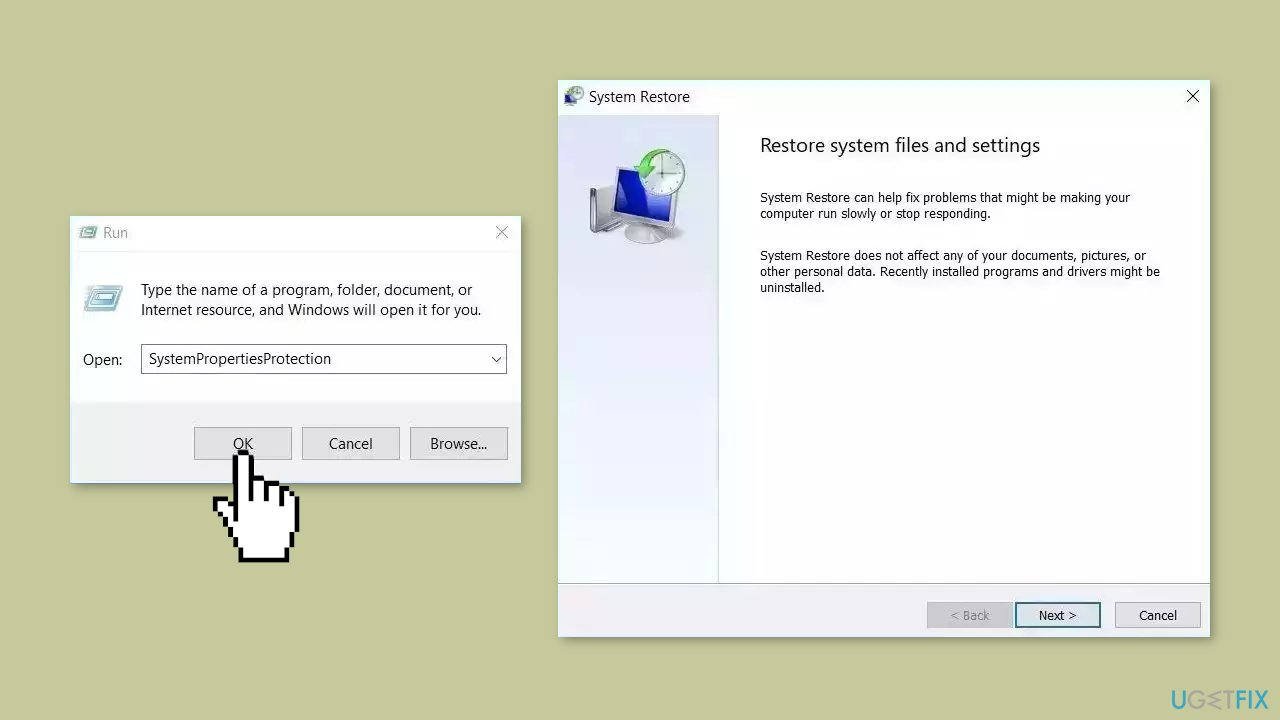
System Restore is a feature in Microsoft Windows that allows users to revert their computer's state to a previous point in time. This can be helpful if you have made changes to your system that are causing problems.
- Go to the Start menu, type restore, and click on Create a restore point.
- Click System Restore, then follow the prompts until you can select a restore point.
- Select the one you want (ideally before the issue started occurring) and go ahead with the process.
Bottom line
To resolve the crashing issue with File Explorer caused by ExplorerExtensions.dll, users can replace the affected DLL files, run system file checks, and update their operating system and installed software. If these solutions do not work, consider using a repair tool to fix system errors.
Frequently asked questions
ExplorerExtensions.dll is a dynamic link library used by Windows to enhance File Explorer's functionality. If this file is corrupted or incompatible with your system, it can lead to crashes when accessing File Explorer.
You can resolve the issue by updating your Windows to the latest version, as updates often fix bugs related to system files. Additionally, consider disabling third-party extensions that may be interacting with ExplorerExtensions.dll.
Windows 11 users should try running the System File Checker (SFC) tool to repair any corrupted system files, including ExplorerExtensions.dll. If the issue persists, resetting File Explorer settings or performing a clean boot may help.




Report an issue
What's wrong with this guide? We review every report and update or remove content.
Report received — thank you. We'll review and fix it.
You need a free account to submit a report.
Be the first to comment