How to fix
Sleep settings keep changing
on Windows
Tired of your sleep settings changing unexpectedly in Windows 10 or 11? Discover quick fixes and regain control, with expert-tested solutions!

![[Fix] Sleep settings keep changing in Windows](https://ugetfix.com/wp-content/uploads/articles/askit/fix-sleep-settings-keep-changing-in-windows_en-768x432.jpg)
What causes [Fix] Sleep settings keep changing in Windows?
- Software conflicts
- Compatibility issues
- Outdated drivers
- Malware infections
- Improper power management settings
Repairs Windows system files, removes malware, and restores a clean OS state — without reinstalling.
Hello. My Windows computer wakes up at random times even after changing the power settings. How can I fix this?
When the Sleep settings, which control when the computer enters sleep mode, are changed without the user's knowledge or consent, the issue of Sleep settings changing in Windows arises. Users who rely on consistent power management settings to save battery life or prevent data loss may find this frustrating and confusing. Depending on their needs, users can choose from several Sleep settings in Windows:
- Sleep: This setting puts the computer into a low-power state that saves all open documents and programs to memory, but turns off the display and puts the computer to sleep.
- Hibernate: This setting saves all open documents and programs to the hard drive, and then shuts down the computer. When the computer is turned on again, it restores the open programs and documents to their previous state.
- Hybrid Sleep: This setting combines the benefits of both Sleep and Hibernate. It saves all open documents and programs to both memory and the hard drive, allowing the computer to wake up quickly from Sleep mode, but also ensuring that data is not lost if the computer loses power.
If Windows' Sleep settings are constantly changing, it can have a variety of consequences for users. As an example:
- Battery life may be reduced if the computer enters Sleep mode too frequently or for too long.
- Open documents and programs may be lost if the computer enters Sleep mode unexpectedly or without saving changes.
- System performance may be affected if the computer enters Sleep mode during a task that requires a continuous operation, such as a software update or backup.
Checking for software conflicts or compatibility issues, updating drivers[ref en-1] and software, resetting power management settings, and disabling certain power management features are all possible solutions to the issue of Sleep settings changing in Windows. It's also critical to make sure the computer isn't infected with malware or other security threats that could affect system performance.
In this guide, you will find 7 steps that should help you fix changing Sleep settings in Windows. You can also use a maintenance tool like [d1] that can fix most system errors, BSODs,[ref en-2] corrupted files, and registry[ref en-3] issues. Otherwise, follow the step-by-step instructions below.

Method 1. Repair Corrupted System Files
Use Command Prompt commands to repair system file corruption:
- Open Command Prompt as administrator
- Use the following command and press Enter:
sfc /scannow
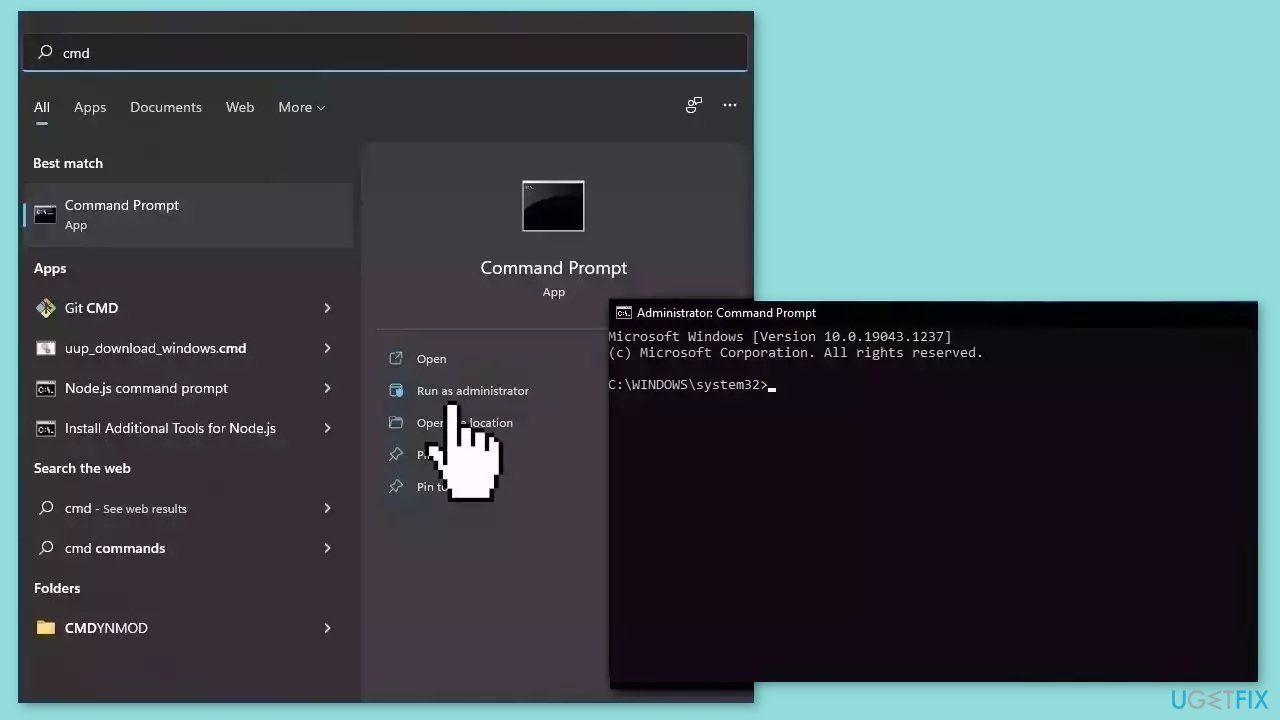
- Reboot your system
- If SFC returned an error, then use the following command lines, pressing Enter after each:
DISM /Online /Cleanup-Image /CheckHealth
DISM /Online /Cleanup-Image /ScanHealth
DISM /Online /Cleanup-Image /RestoreHealth
Method 2. Run the Power Troubleshooter
- Press the Windows key + I on your keyboard simultaneously to open the Settings app.
- Click on the Update & Security option in the Settings window.
- In the left sidebar, click on the Troubleshoot option.
- Under the Find and fix other problems section, scroll down to the Power option and click on it.
- Click on the Run the troubleshooter button.
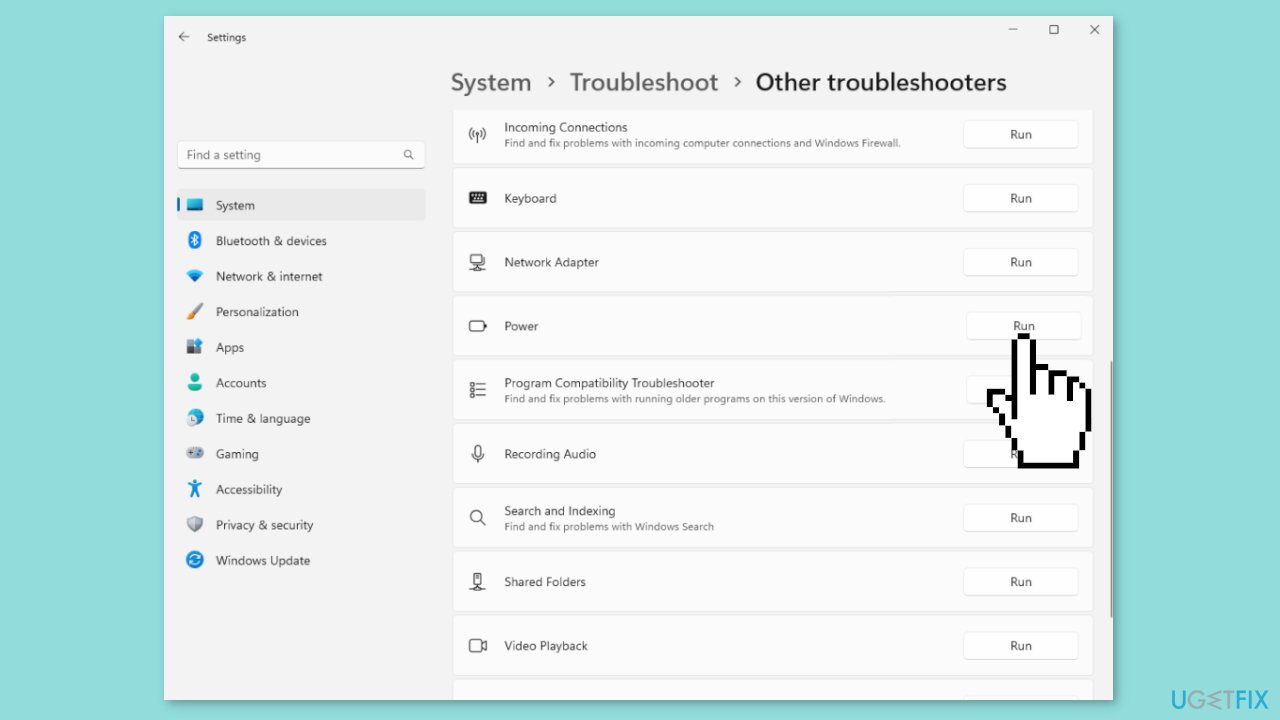
- Follow the prompts provided by the troubleshooter to diagnose and fix any power-related issues on your Windows device.
Method 3. Update the Graphics Driver
Outdated or malfunctioning display drivers can also cause game crashes. In this case, you can fix it automatically by using [rev id="DriverFix"], which will scan your PC for missing and out-of-date device drivers. Or you can update them manually:
- Press the Windows key + X keys to open the Quick Access Menu.
- Click on Device Manager from the list.
- Double-click on Display adapters to expand it.
- Right-click on the dedicated graphics card that’s active or you’re using.
- Click on Update driver.
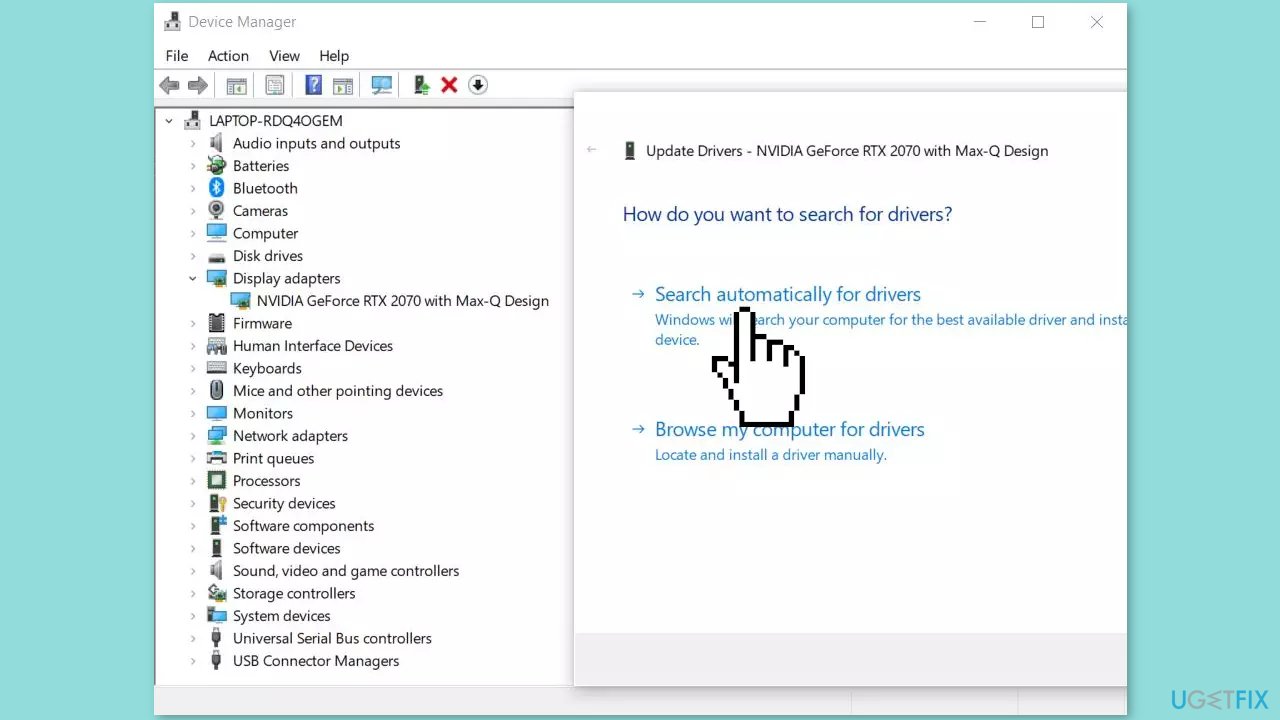
- Click on Search automatically for drivers.
- It’ll now automatically check for the available update then download and install the latest version.
- Just wait for the update to complete and reboot the PC to apply changes.
Method 4. Try Clean Boot
- Open the Search menu, type in system configuration, and press Enter
- Under the Services tab, tick the Hide all Microsoft services box
- Click on Disable all button
- Head over to the Startup tab and click on Open Task Manager
- Select a third-party program and click on Disable at the top
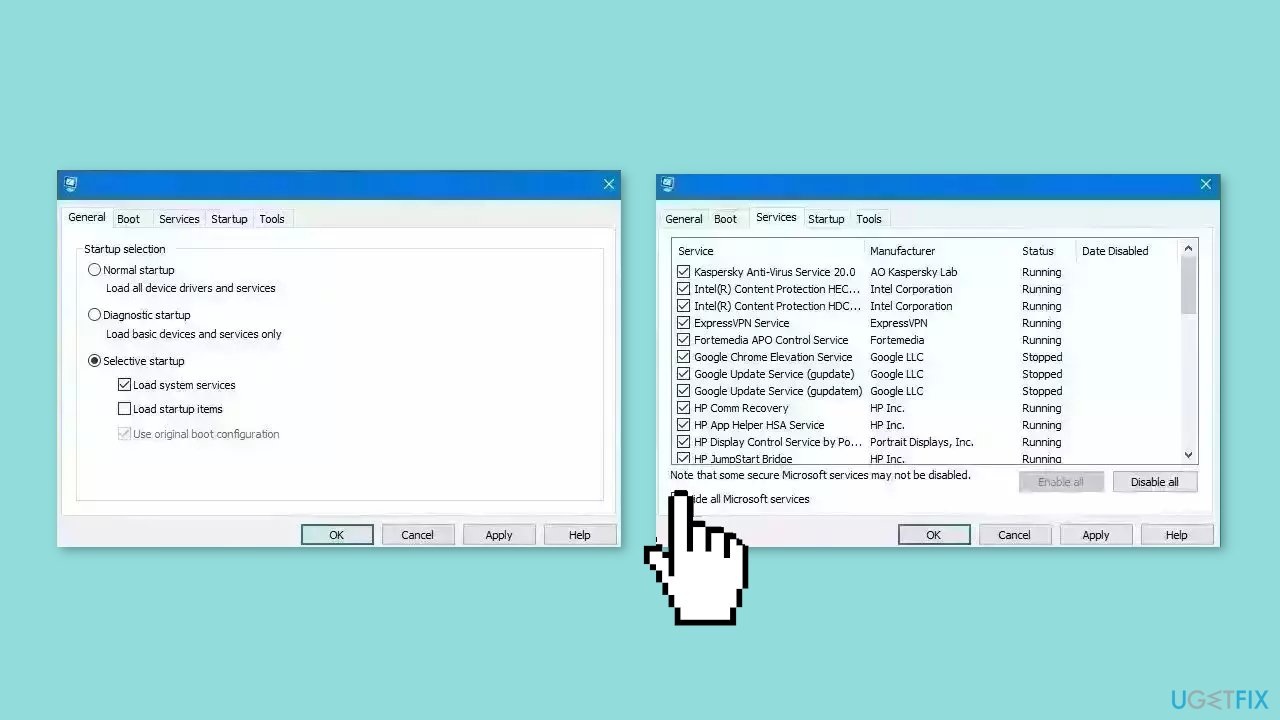
- Repeat this step to disable all third-party apps and programs
- Restart your PC to enter the clean boot state and see if the issue persists
- If the issue disappeared in the clean boot state, then you can be certain that a third-party app is causing it
- Go through all recently installed apps or programs and remove them one by one
Method 5. Perform a Malware Scan
It is possible that a malware infection may be the cause of changing Sleep settings in Windows. It is important to run a comprehensive security scan to rule out this possibility and ensure that the computer is not infected. This can help to prevent further issues with the Windows operating system and ensure that it is functioning properly.
If you have access to a security scanner, or if your organization pays for one, you can use it to scan your entire system to check for a virus infection. Otherwise, you can use Windows Defender to scan your system:
- Click on the Windows Start menu or press the Windows key on your keyboard
- Type Microsoft Defender in the search bar and click on Microsoft Defender Antivirus to open the application
- Click on the Virus & threat protection option in the left-hand menu
- Click on the Quick scan or Full scan option, depending on your preference

- If you choose Quick scan, Microsoft Defender Antivirus will scan the most vulnerable and commonly infected areas of your computer
- If you choose Full scan, Microsoft Defender Antivirus will scan your entire computer, including all files, folders, and programs
- Click on the Scan now button to start the selected scan type and wait for the scan to complete
- The time it takes will depend on the size of your hard drive and the number of files being scanned
- Once the scan is complete, you will be informed of any detected threats, and you can choose to quarantine or remove them
- If no threats are found, Microsoft Defender Antivirus will inform you that your device is secure
Method 6. Reset the Power Plan
- Click on the Start menu on your Windows device.
- In the search bar, type command and select the Run as administrator option from the context menu next to the Command Prompt.
- Type the following script in the command prompt window:
powercfg –restoredefaultschemes
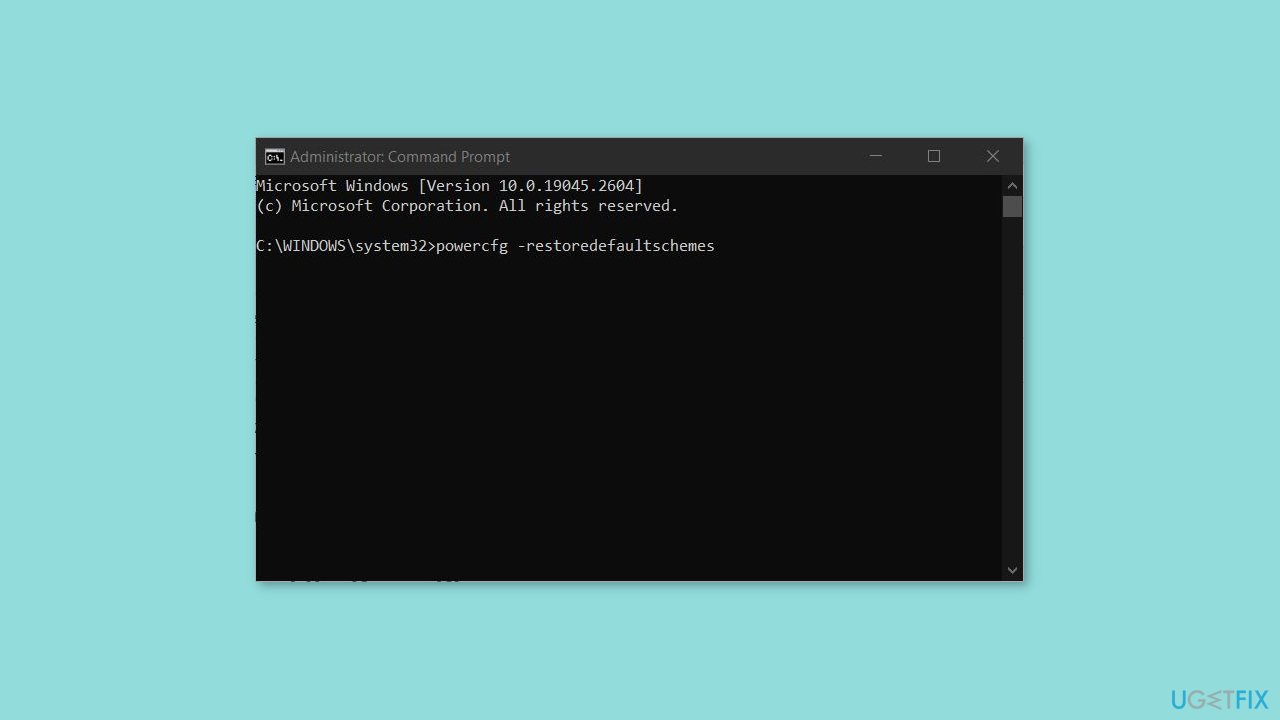
- Press the Enter key on your keyboard.
- Wait for the command to execute and complete.
- Exit the command prompt window.
- All customized power plans will now be removed.
- You can now create and customize a new power plan that suits your needs.
Method 7. Remove all ASUS Software
According to some users, the issue of Sleep settings changing in Windows can be resolved by removing all ASUS software, including Armoury Crate. Here are some more details on how to proceed:
- Open the Control Panel on your Windows device.
- Click on Programs and Features (or Add or Remove Programs, depending on your Windows version).
- Look for any ASUS software, such as Armoury Crate, in the list of installed programs.
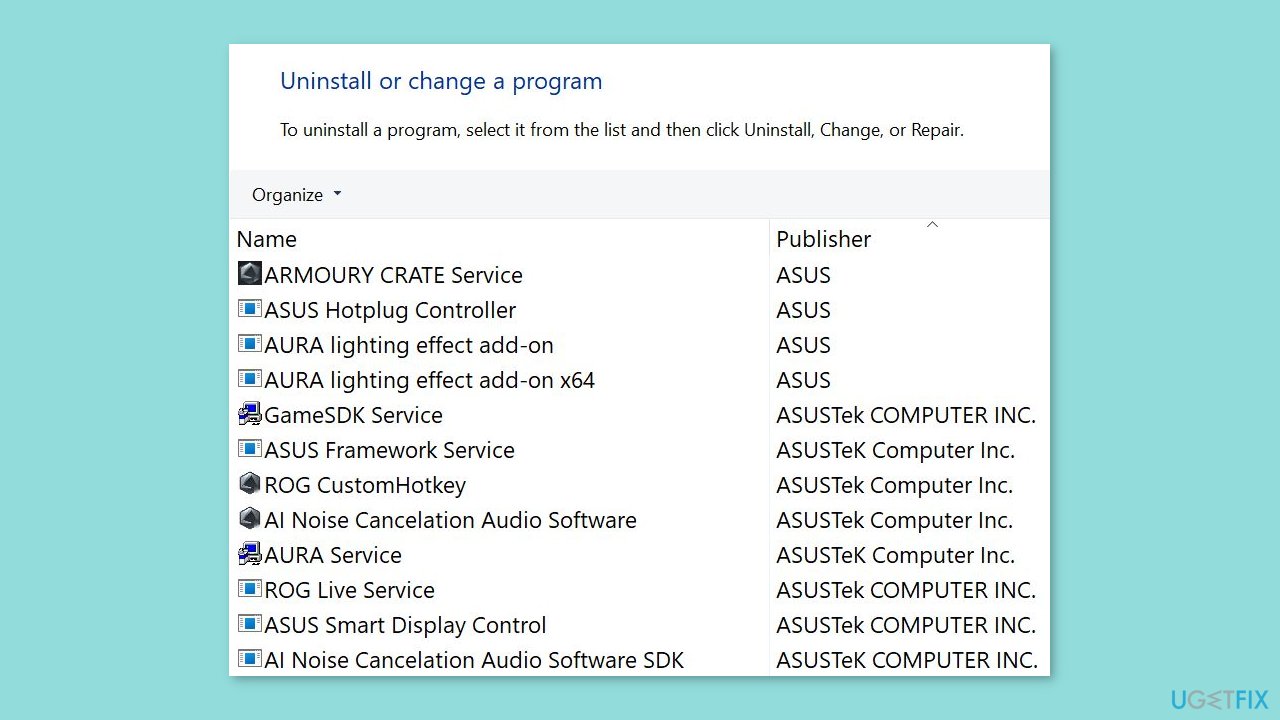
- Click on the ASUS software to select it, and then click on the Uninstall button.
- Follow the prompts provided by the uninstaller to remove the software from your device.
- Repeat the steps for any other ASUS software installed on your device.
- Once all ASUS software has been removed, restart your device.
- Check if the issue has been resolved.
Bottom line
To address the issue of Sleep settings changing in Windows, you can check for software conflicts, update drivers and software, reset power management settings, and disable certain power management features. If these solutions do not resolve the problem, consider further investigating potential malware infections or seeking additional technical support.
Frequently asked questions
Sleep settings in Windows 10 may change due to power management settings, system updates, or third-party software interference. Check your power plan settings and ensure no applications are overriding your preferences.
To prevent sleep settings from changing in Windows 11, disable any automatic adjustments in the power settings and check for any conflicting software that may influence these settings. Regularly updating your system can also help maintain stability.
If your sleep settings are not saving in Windows, try resetting the power plan to default or running the power troubleshooter. Additionally, ensure that your system is fully updated to avoid bugs affecting the settings.




Report an issue
What's wrong with this guide? We review every report and update or remove content.
Report received — thank you. We'll review and fix it.
You need a free account to submit a report.
Be the first to comment