How to fix
0x80070539 error when changing installation location
on Windows
Resolve the 0x80070539 error when changing installation locations in Windows 10 or 11 effortlessly. Expert-tested solutions, fixed in minutes!
What causes How to fix 0x80070539 error when changing installation location in Windows?
- Conflicts within the Windows Registry
- Improperly modified or corrupted Registry keys
- Inconsistencies in user profile configurations
- Inaccurate user identifiers (SIDs)
- Problems with administrative permissions
- Faulty or corrupted system files
Repairs Windows system files, removes malware, and restores a clean OS state — without reinstalling.
So recently, I purchased a game on the Xbox app, and I couldn't install it because it gave me an error. Turns out, the installation was attempted on a storage device that doesn't have enough space. When I went to change the default installation destination, I received an 0x80070539 error, and now I'm stuck. Please help.
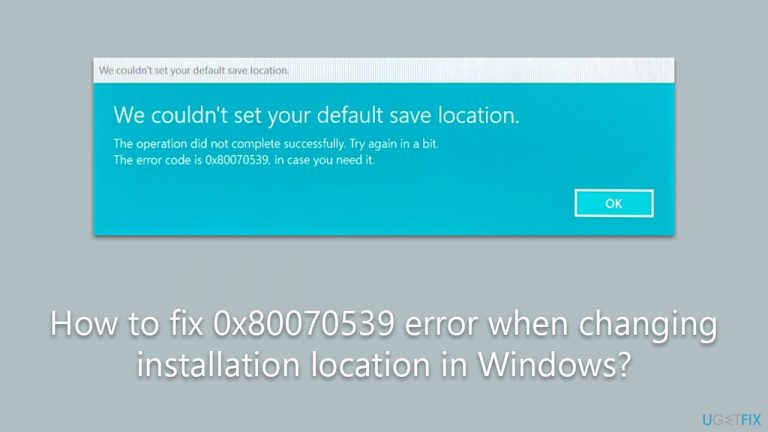
Error code 0x80070539 ("We couldn’t set your default save location") often poses challenges for Windows users seeking to customize their installation process. This error is typically encountered during an attempt to change the location of an application or game installation, thus disrupting the smooth configuration of software on the system.
Additionally, users might stumble upon this issue while copying or moving files from one location to another and when starting a Virtual machine. All of these scenarios can be equally frustrating, leading to an interrupted workflow and a potentially impaired user experience. Understanding why this occurs can provide insightful perspectives into potential solutions, which are detailed later in this article.
The error 0x80070539 generally occurs due to conflicts within the Windows Registry. This extensive database holds numerous settings and configurations for the operating system, applications, and system hardware. When a user tries to change the location of an app's installation or shift files, certain Registry keys may be affected, and when these keys are improperly modified or corrupted, the error in question can materialize.
Besides, inconsistencies in user profile configurations or permissions may also trigger this error. Inaccurate user identifiers (SIDs) or problems with administrative permissions are common culprits in such instances. Furthermore, faulty or corrupted system files can also lead to this error, underscoring the necessity of keeping the system's integral components in check.

Consequently, to rectify the issue, users may need to rename the WindowsApps folder, change permission settings, or verify their system file integrity. The detailed instructions provided below aim to guide users through these steps effectively and efficiently, thereby restoring optimal functionality.
Finally, it is crucial to mention the potential benefits of a comprehensive solution like the [d1] PC repair tool. This tool could address the underlying Windows issues that may be causing the error 0x80070539 in the first place. Not only does it offer a user-friendly interface, but it also works meticulously to detect and resolve any embedded issues, ultimately enhancing the overall system performance.
1. Reorganize WindowsApps and WpSystem folders
- Open the File Explorer and navigate to the drive you want to save new content in.
- If a WindowsApps folder is present, right-click on an empty space within the drive, create a new folder, and give it a name of your choice.
- Cut the WindowsApps folder and paste it into the newly created folder.
- Go back to Start > Settings > System > Storage > Change where new content is saved, and try changing the new content save location to the drive of your choice.
- If the error still persists, navigate back to the destination drive via File Explorer, look for the WpSystem folder, and rename it to WpSystem.old.
- After completing the above steps, try changing the new content save location again to check if the problem has been resolved.

2. Get full control of the WindowsApps folder
Before proceeding, make sure you are logged in as administrator and the Hidden Files checkmark is ticked in File Explorer settings.
- Locate the WindowsApps folder.
- Right-click on the folder and select Properties.
- Go to the Security tab and click Advanced.
- Under Owner, click Change.

- Here, type in your username (or use Administrator if you are logged in as one) and click Check names.
- Select the search result and click OK.
- Make sure you mark the Replace all child object permission entries with inheritable permission entries from this object checkbox, then click OK.
- Once done, try adding the new location again - the error should be gone.

3. Reset the state of security ID
If you have received an error 0x80070539 when trying to start a virtual machine, you should follow these steps:
- Type PowerShell in Windows search.
- Right-click on the PowerShell result and select Run as administrator.
- When UAC shows up, click Yes.
- In the new window, copy and paste the following command and press Enter:
Grant-VMConnectAccess -VMName "Name of VM that is not starting" -UserName "Domain and username of the current user"
Note: Replace the words in quotation marks with your parameters. - Close down PowerShell and try starting the VM again.
4. Run SFC and DISM
To fix corrupted system files, follow these steps:
- Type in cmd in Windows search
- Right-click on Command Prompt and select Run as administrator
- User Account Control will ask you whether you allow making changes to the system - click Yes
- In the Command Prompt window, paste the following command and hit Enter:
sfc /scannow - Next, use the following commands, pressing Enter each time:
Dism /Online /Cleanup-Image /CheckHealth
Dism /Online /Cleanup-Image /ScanHealth
Dism /Online /Cleanup-Image /RestoreHealth
(Note: if you get an error executing this last command, add /Source:C:\RepairSource\Windows /LimitAccess to it and try again). - Reboot your system.

Bottom line
To fix the 0x80070539 error, users can rename the WindowsApps folder, change permission settings, or verify their system file integrity. Following these steps can help restore optimal functionality. If none of these solutions work, further investigation into system settings may be necessary.
Frequently asked questions
The 0x80070539 error typically occurs due to permission issues or corrupted user profiles when attempting to change the installation location for applications in Windows 10.
To fix the 0x80070539 error in Windows 11, try running the Windows Store Apps troubleshooter and ensure that your user account has the necessary permissions to modify installation locations.
Yes, you can edit the registry to ensure permissions are set correctly, but be cautious, as incorrect changes can cause further issues in Windows 10 or Windows 11.


Report an issue
What's wrong with this guide? We review every report and update or remove content.
Report received — thank you. We'll review and fix it.
You need a free account to submit a report.
Be the first to comment