How to fix
“App didn’t start in required time” error
on Windows
Resolve the "App didn't start in required time" error on Windows 10 quickly and effectively with expert-tested solutions. Fixed in minutes!

What causes How to fix “App didn’t start in required time” error on Windows 10?
- File corruption
- Incorrect DNS settings
- Antivirus interference
- Outdated Windows updates
- Application-specific issues
Repairs Windows system files, removes malware, and restores a clean OS state — without reinstalling.
Hello! I have been getting the error "App didn't start in required time" from time to time. Need help!
"App didn't start in required time" is an application error, which prevails on Windows 10 OS. People are harassed by this pop-up error when trying to launch some of the inbuilt Windows apps, for example, Cortana,[ref en-2] Edge, Paint, Calculator, Windows Photo Viewer,[ref en-1] or even Store.
While sometimes this error might affect a single application only, sadly, most of the users reported that "App didn't start in required time" error is thrown when trying to open a variety of apps. There might be more than one reason why you are seeing this annoying error and not being able to launch your programs properly.
Although that sounds like a miserable experience due to which you may not be able to use a computer normally, there is a solution, which doesn’t require much time or effort. The error might appear due to some file corruption, incorrect DNS settings, and other options. Here’s what you should try for the fix:
How to fix "App didn't start in required time" error on Windows 10?
Here are some basic tips that you may try at first in order to fix "App didn't start in required time" on your Windows 10 machine:
- Reboot your PC;
- Run Windows App Troubleshooter;
- Install available Windows updates;
- Disable your antivirus temporarily;
- Run a full system scan with a professional PC optimization tool. We recommend trying [d1].
- Reinstall the application that is throwing the error (if the problem affects only one app);
If none of these steps helped and the error still persists, there might be a problem somewhere else on your computer system. For this purpose, please refer to the following fixes and complete each step exactly as required:
Fix 1. Modify DNS Settings
The culprit of “The app didn’t start in the required time” error may be incorrect DNS[ref en-3] settings. Therefore, you should check them and modify if needed:
- Click Win key + R, type cmd in the box, and hit Enter.
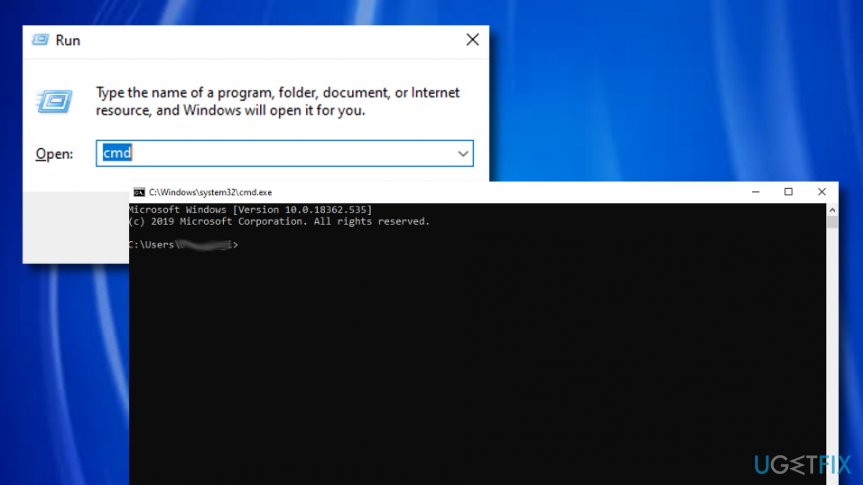
Fix 1 - When the Command Prompt opens, type ipconfig /flushdns command in it and hit Enter.
- Then close Command Prompt.
- Press Win key + R, type ncpa.cpl, and click OK to open Network Connection.
- To update DNS settings, locate your network adapter, right-click on it and select Properties.
- Find and click on the Internet Protocol Version 4 (TCP/IPv4), so that it would become highlighted in gray. Select Properties.
- Mark the Use the following DNS server addresses option.
- Enter 8.8.8.8 as the Preferred DNS server.
- Enter 8.8.4.4 as the Alternate DNS server.
- Click OK and close all remaining windows.
Fix 2. Modify security permissions for Windows folder
This method might help you to deal with "App didn't start in required time" error code on your Windows 10 computer. Complete the following guidelines to succeed in this fix:
- Open C: partition and find the Windows folder.
- Right-click on it and select Properties.
- Open the Security tab and select all application packages option under Group or user names.
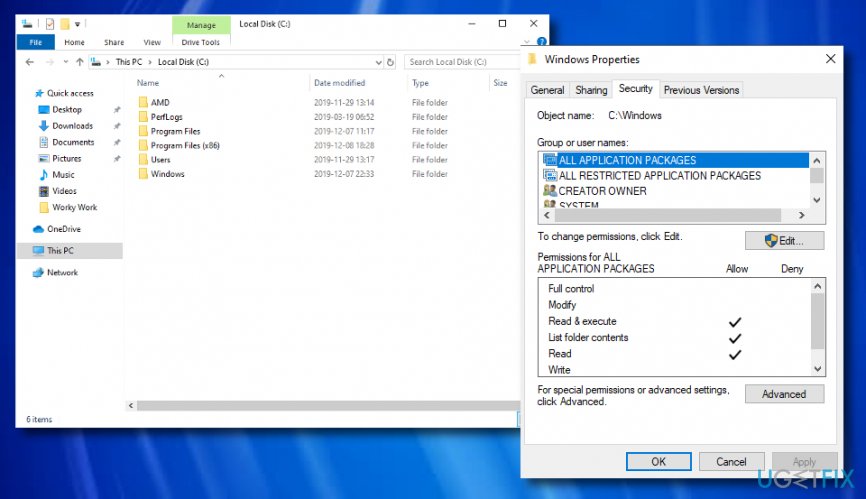
Fix 2 - Mark the checkboxes for the selected group permissions.
- Check if Read & execute, List folder contents and Read are enabled. If they are, you should do no further intervention. In case some of them were unchecked, select Advanced.
- Select Change permissions.
- You should see TrustedInstaller as the Owner by default. If the owner in your system is not TrustedInstaller, change it by selecting Change.
- Click Advanced and then Find now.
- Select your account and click OK twice.
- Click Apply and OK to save the changes.
- Click the Advanced button and then click the Change permissions button.
- Select Add and click Select a principal.
- Enter all application packages in the Enter the object name to select.
- Click Check Names and then OK.
- Set the Type to Allow, Apply to This folder, subfolders and files.
- Mark Read & execute, List folder contents and Read in basic permissions with a tick and press OK.
- Mark Replace all child object permission entries and press Apply.
- Click OK to save the changes.
- Repeat the same steps with the C:\\Users, C:\\Program Files and C:\\Program Files (x86) folders.
Fix 3. Perform an SFC scan to check for corrupted files
You might not know that there is some file corruption on your Windows computer system that has been triggering the appearance of "App didn't start in required time" error code. If you want to find out if this is the cause for your problem, try performing the below-provided steps:
- Go to Windows search and type "cmd".
- Select the Command Prompt option and click to run as administrator.
- Afterward, type sfc /scannow after the blinking cursor and hit the Enter key.
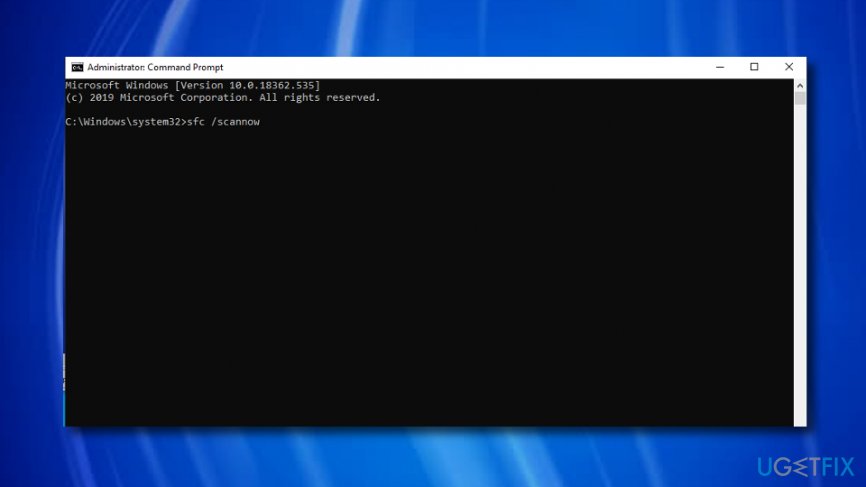
Fix 3 - Wait for the command to finish and reboot your computer system.
Bottom line
To fix the 'App didn't start in required time' error on Windows 10, you can try rebooting your PC, running the Windows App Troubleshooter, installing available updates, temporarily disabling your antivirus, or running a full system scan. If the problem persists, consider modifying your DNS settings or reinstalling the affected application.
Frequently asked questions
You can try restarting your computer, ensuring your Windows 10 is up to date, and checking for app-specific updates. Additionally, running the app in compatibility mode may help.
Yes, a slow or unstable internet connection can cause apps to fail to start in the required time, particularly for online applications. Ensure your connection is stable and try again.
You can run the System File Checker tool by opening Command Prompt as an administrator and typing 'sfc /scannow'. This will scan and repair any corrupted system files that may be causing the error.




Report an issue
What's wrong with this guide? We review every report and update or remove content.
Report received — thank you. We'll review and fix it.
You need a free account to submit a report.
Be the first to comment