How to fix
Audiodg.exe stopped working error
on Windows
Resolve the Audiodg.exe stopped working error on Windows 10 and 11 effortlessly. Expert-tested solutions to get your audio back up and running, fixed in…

What causes How to fix Audiodg.exe stopped working error in Windows?
- Issue with RGB Fusion
- Problem with Windows NVMe driver
- Corrupted Realtek Audio Driver
- Duplicate audio drivers
- Malfunctioning audio processing components
Repairs Windows system files, removes malware, and restores a clean OS state — without reinstalling.
Hello. I recently started experiencing the Audiodg.exe stopped working error in Windows. Can someone help me understand why this occurs?
Windows is one of the most popular operating systems. Many different people choose it for its user-friendly interface, customization abilities, and built-in troubleshooters. Windows is used by gamers, corporate entities, and regular people. There are thousands of components running in the background that keep it running smoothly. However, some problems can arise when even one of the components starts malfunctioning.
Some users report receiving the Audiodg.exe stopped working error. It is a normal part of the system otherwise known as the Windows Audio Device Graph Isolation process. It is responsible for the operating system’s audio engine. The file is used for any audio processing and Digital Signal Processing (DSP).[ref en-1]
Those affected by the Audiodg.exe stopped working error say that most often it would appear while playing video games. Some suggest that the error could be triggered by an issue with RGB Fusion and Windows NVMe driver. In this guide, you will find 4 methods that could help you fix this.
You can also use a maintenance tool like [d1] if you want to avoid a lengthy troubleshooting process. This powerful software can fix most system errors, BSODs,[ref en-2] corrupted files, and registry[ref en-3] issues. Otherwise, follow the step-by-step instructions below.
Method 1. Reinstall the Realtek Audio Driver
- Go to Device Manager
- Expand Sound, video and game controllers
- Locate the audio driver Realtek High Definition Audio
- Right-click on it and select Uninstall device from the drop-down menu
- Check the option with Delete the driver software for this device and hit the uninstall button
- Go to the View tab and click on Show hidden devices from the drop-down menu
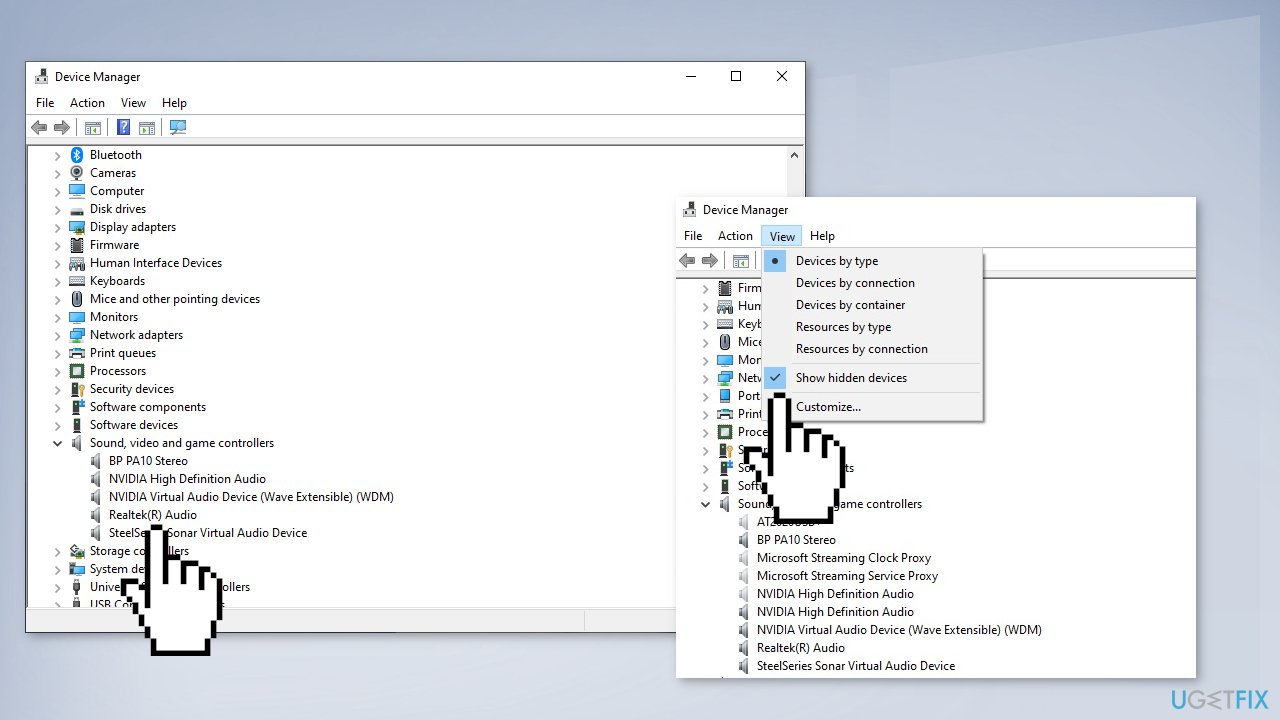
- Search for duplicate audio drivers
- Right-click on them and hit the Uninstall option
- Restart the system
- You can also use a dedicated utility, like rev id="DriverFix"] that can find the best drivers for your device and update them automatically
Method 2. Uninstall RGB Fusion
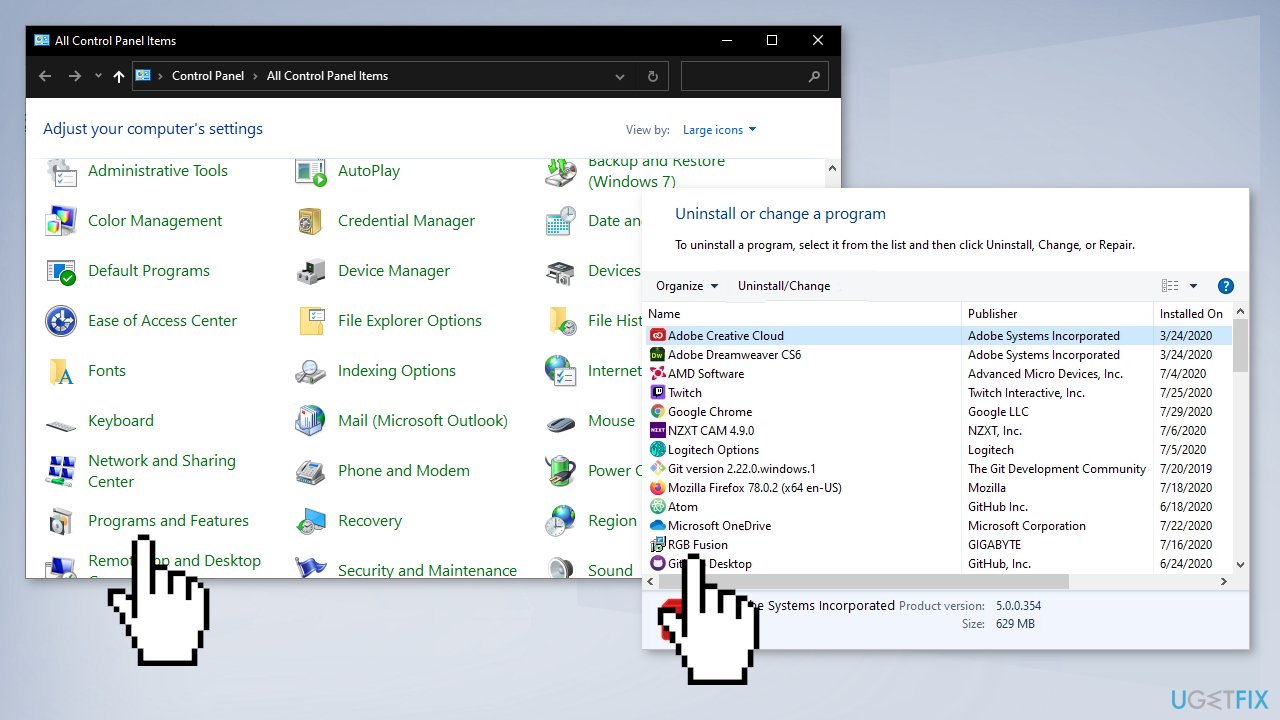
- Go to Start Menu, then click on the Control Panel
- Go to Programs and features and find Gigabyte RGB fusion in the list
- Right-click and choose Uninstall
Method 3. Turn off Fast Startup
- Right-click the Start button, click Search and find the Control Panel
- Choose Power Options and click on Choose what the power buttons do
- Press on the Change settings that are currently unavailable option
- Uncheck Turn on fast startup (recommended)
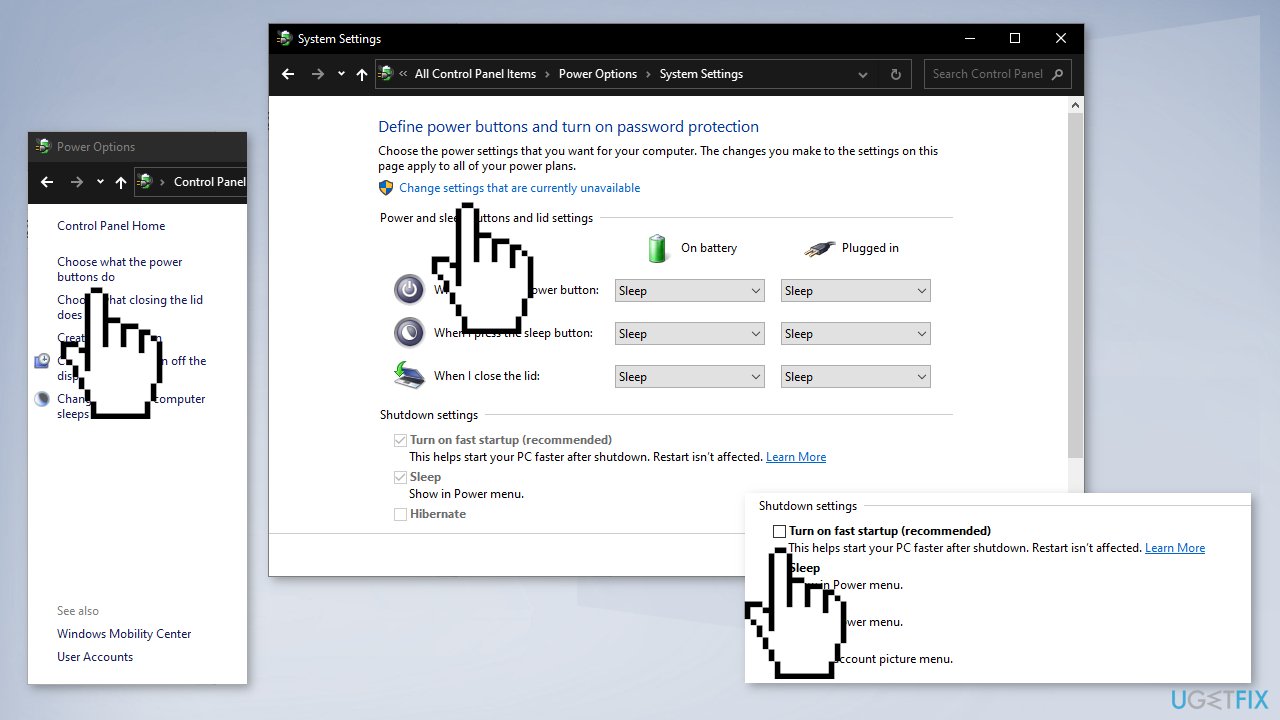
- Click Save changes
- If you want to re-enable fast startup, check the Turn on fast startup option
Method 4. Use System Restore
- Press Windows key + S and type Restore
- Click on the Create a Restore Point option
- Click on the System Restore button and hit Next
- You can also pick Choose a different restore point if the option is available
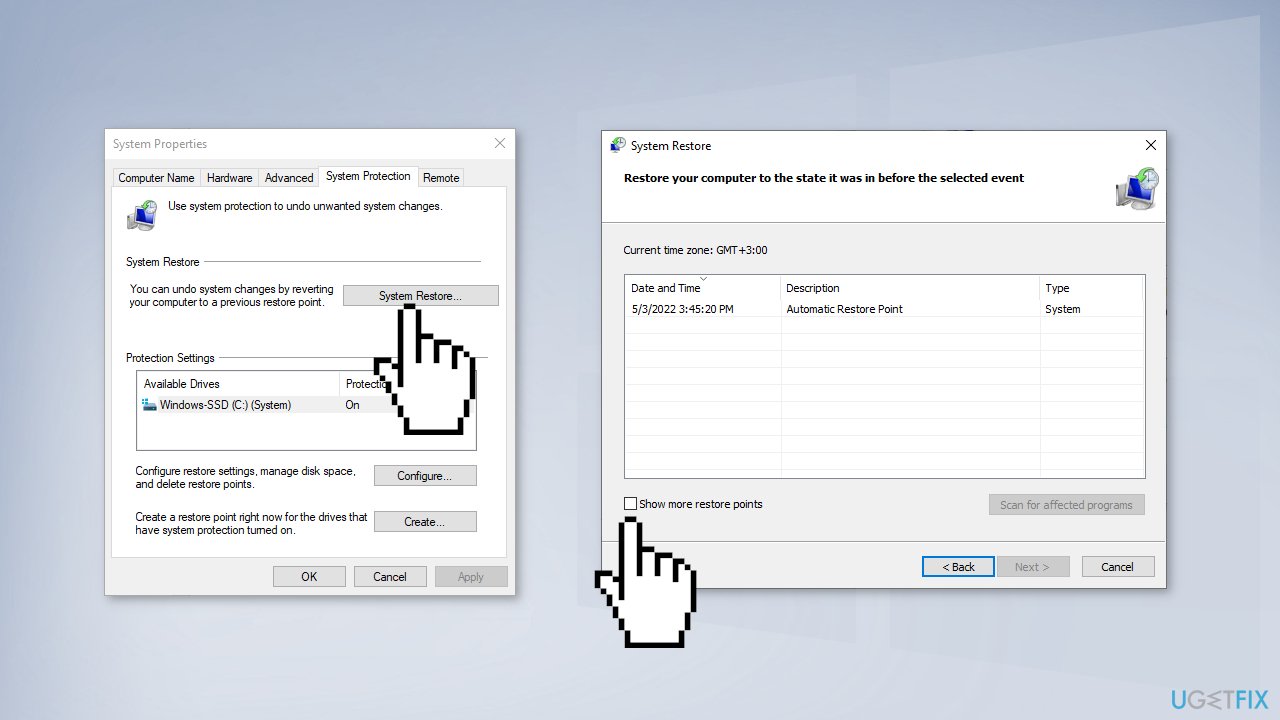
- Select the restore point that you want to enable and click Next
- The system should start initiating the changes and reboot
Bottom line
To fix the Audiodg.exe stopped working error, you can try reinstalling the Realtek Audio Driver or uninstalling RGB Fusion. If these methods do not resolve the issue, consider using a maintenance tool or further troubleshooting steps.
Frequently asked questions
The Audiodg.exe stopped working error in Windows 10 can be caused by outdated audio drivers, corrupted audio settings, or third-party audio enhancements conflicting with the system's default audio settings.
To update your audio drivers in Windows 11, go to Device Manager, expand the 'Sound, video and game controllers' section, right-click your audio device, and select 'Update driver'.
If Audiodg.exe continues to crash on Windows, try disabling audio enhancements in the sound settings, running the Audio Troubleshooter, or performing a system file check to repair any corrupted system files.




Report an issue
What's wrong with this guide? We review every report and update or remove content.
Report received — thank you. We'll review and fix it.
You need a free account to submit a report.
Be the first to comment