How to fix
Destiny 2 error code weasel
on Windows
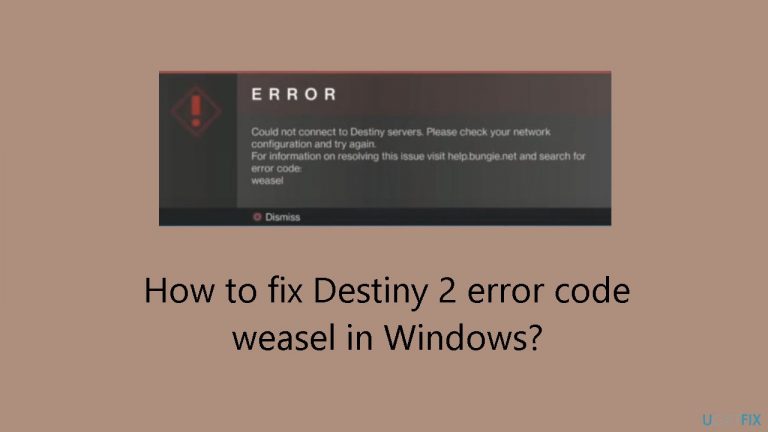
Resolve the Destiny 2 error code weasel on Windows 10 or 11 effortlessly with expert-tested solutions and screenshots for quick fixes.
What causes How to fix Destiny 2 error code weasel in Windows?
- Network-related issues
- Faulty game files
- Corrupted cache
- Account ban confusion
- Dynamic online environment
Repairs Windows system files, removes malware, and restores a clean OS state — without reinstalling.
Hello. I tried playing Destiny 2 on my Windows PC but I keep getting the "error code: weasel" message. Is there a way to fix this?
The popular first-person shooter game Destiny 2 has seen its fair share of problems on the Windows operating system. The majority of these problems are usually simple, but one specific error code called "weasel" - stands out for being unclear about what it means.
For a while, players who encountered the weasel error code may have been confused by suggestions from a Google search that the code was linked to an account ban. Though it might also originate from problems like faulty game files or caching, new discoveries suggest that the issue is mainly network-related.
There is some confusion about the weasel error in Destiny 2, which has made players a little impatient. It is difficult for users to identify the error's primary cause and, consequently, come up with workable fixes when there isn't a clear characterization of the problem.
Players are questioning the accuracy and impartiality of account bans because to the possibility that the weasel error is linked to them. The Destiny 2 community may get uneasy as a result of this vagueness, which may negatively affect affected individuals' overall gameplay experiences.
Players frequently look for fixes for the weasel error that go beyond the standard troubleshooting procedures. Even though the issue is mostly network-related, it becomes crucial to look into any possible problems with corrupt game files or cache. Because online gaming environments are dynamic and Destiny 2 updates frequently, players can experiment with different strategies to fix the weasel error.
In this guide, you will find 6 steps that should help you fix Destiny 2 error code weasel in Windows. You can also run a maintenance tool like [d1] that can fix most system errors, BSODs,[ref en-1] corrupted files, and registry[ref en-2] issues. Otherwise, follow the step-by-step instructions below.

Solution 1. Verify Integrity of Game Files
- Launch the Steam app and navigate to Library.
- Right-click on Destiny 2 in the game list.
- Select Properties from the context menu.
- Go to the Installed Files tab.
- Click on Verify integrity of game files.

- After completion, relaunch Steam.
- Run Destiny 2.
- Check for any improvements.
Solution 2. Whitelist the Game in Windows Firewall
- Press the Windows key + S to open Search.
- Type Allow an app through Windows Firewall in the search bar.
- Click the relevant result.
- Click the Change settings button.
- Ensure that Destiny 2 and the platform have both the Private and Public checkboxes ticked.
- If not found, click on Allow another app at the bottom.

- Click the Browse button.
- Navigate to the app launcher’s location, select the .exe file, and click Open.
- Click on Add.
- Tick the checkboxes for Private and Public, then click OK to save the changes.
Solution 3. Change DNS Server
- Press the Windows key + R to open Run.
- Type ncpa.cpl in the text field and hit Enter.
- Locate the active network adapter, right-click on it, and select Properties.

- Choose Internet Protocol Version 4 (TCP/IPv4), and click the Properties button.
- Select Use the following DNS server addresses and input the following:
Preferred DNS server: 8.8.8.8
Alternate DNS server: 8.8.4.4
- Click OK to save the changes.
- Reboot the PC.
- Check for any improvements.
Solution 4. Enable UPnP
- Open your router settings using a web browser. The internal IP address is usually printed on the router’s backside.
- Go to the Advanced Network tab, and then select Advanced.

- Tick the checkbox for Enable UPnP and save the changes.
- Relaunch Destiny 2 and check whether the error code "weasel" is fixed.
Solution 5. Reinstall Destiny 2
- Press the Windows key + R to open Run.
- Type appwiz.cpl in the text field and click OK.
- Select Destiny 2 from the list of apps.

- Click the Uninstall button and follow the on-screen instructions to complete the process.
- Once done, reboot the PC.
- Download Destiny 2 again.
Solution 6. Contact Support
If all else fails, reaching out to Bungie support is an option, although user feedback suggests it might not be a pleasant experience. If you suspect an unjust ban, submit a support ticket for further assistance.
Additionally, during the wait for a response, consider contacting your Internet Service Provider (ISP) to investigate potential network issues. If there's an unstable connection, improve Wi-Fi signal strength or consider upgrading to a faster plan.

Bottom line
To fix the Destiny 2 error code weasel, players can verify the integrity of game files, check for network issues, and consider running maintenance tools. If these steps do not resolve the issue, further investigation into the network settings and game updates may be necessary.
Frequently asked questions
The Destiny 2 error code weasel typically occurs due to network connectivity issues, server problems, or corrupted game files on Windows 10 and Windows 11.
To troubleshoot the weasel error, check your internet connection, restart your router, and verify the game files through the Battle.net launcher on Windows 10 or Windows 11.
Yes, reinstalling Destiny 2 can resolve the weasel error by ensuring that all game files are intact and up-to-date on Windows 10 or Windows 11.


Report an issue
What's wrong with this guide? We review every report and update or remove content.
Report received — thank you. We'll review and fix it.
You need a free account to submit a report.
Be the first to comment