How to fix
Device Setup Manager service (DsmSvc) high CPU
on Windows
Resolve high CPU usage by Device Setup Manager (DsmSvc) on Windows 10 and 11 with our expert-tested solutions. Fixed in minutes!


What causes How to fix Device Setup Manager service (DsmSvc) high CPU in Windows?
- Corrupted system files
- Malware infection
- Improper device installation
- Outdated Windows version
- Excessive background processes
Repairs Windows system files, removes malware, and restores a clean OS state — without reinstalling.
Hello. I suddenly noticed that my PC (it's running Windows 10 version 22H2) has become very slow. So I opened Task Manager and found that Device Setup Manager service is using 50 - 80% of CPU. I don't think this is normal, although I am not sure what to do about this.
Device Setup Manager service (also known as DsmSvc) is a Windows service responsible for managing device installation and setup. Its purpose is to ensure that devices are properly installed and configured on Windows. While being a basically mandatory system, it can sometimes cause high CPU usage, which can negatively impact the performance of your device.
High CPU usage can cause the computer to run slowly and may make it difficult to perform tasks such as opening programs or browsing various websites. There are several possible solutions to this issue, including disabling the DsmSvc service and running a system scan for malware. In some cases, reinstalling the operating system or upgrading to the latest version of Windows may be the only choice, unfortunately.
In this guide, you will find 8 steps that should help you fix Device Setup Manager service (DsmSvc) high CPU in Windows. Manual troubleshooting steps might be quite exhausting for many less proficient computer users.
If you are one of them or you prefer a quicker solution, you can use an automatic maintenance tool like [d1] that can fix most system errors, BSODs,[ref en-1] corrupted files, registry[ref en-2] issues, or clear cookies, and cache.[ref en-3] Otherwise, follow the step-by-step instructions below.

Solution 1. Fix Corrupted System Files
Use Command Prompt commands to repair system file corruption:
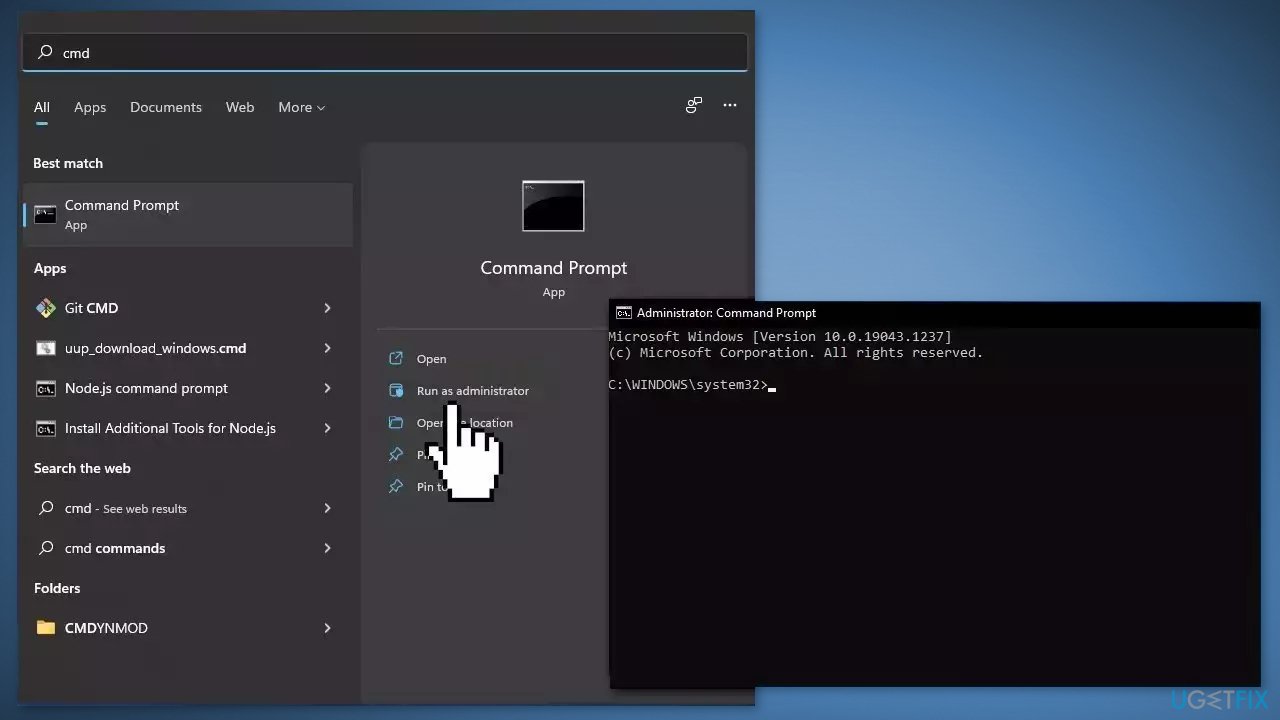
- Open Command Prompt as administrator
- Use the following command and press Enter:
sfc /scannow
- Reboot your system
- If SFC returned an error, then use the following command lines, pressing Enter after each:
DISM /Online /Cleanup-Image /CheckHealth
DISM /Online /Cleanup-Image /ScanHealth
DISM /Online /Cleanup-Image /RestoreHealth
Solution 2. Scan System for Malware
It is possible that a malware infection may be the cause of DsmSvc using high amounts of CPU. It is important to run a comprehensive security scan to rule out this possibility and ensure that the computer is not infected. This can help to prevent further issues with the Windows operating system and ensure that it is functioning properly.
If you have access to a security scanner, or if your organization pays for one, you can use it to scan your entire system to check for a virus infection. Otherwise, you can use Windows Defender to scan your system:
- Select Start and go to Settings
- Open Update & Security, and click on Windows Security and then Virus & threat protection
- Under Current threats, select Quick scan (or in early versions of Windows 10, under Threat history, select Scan now)
- Wait for the scan to finish and follow the on-screen instructions

Solution 3. Run Windows Update Troubleshooter
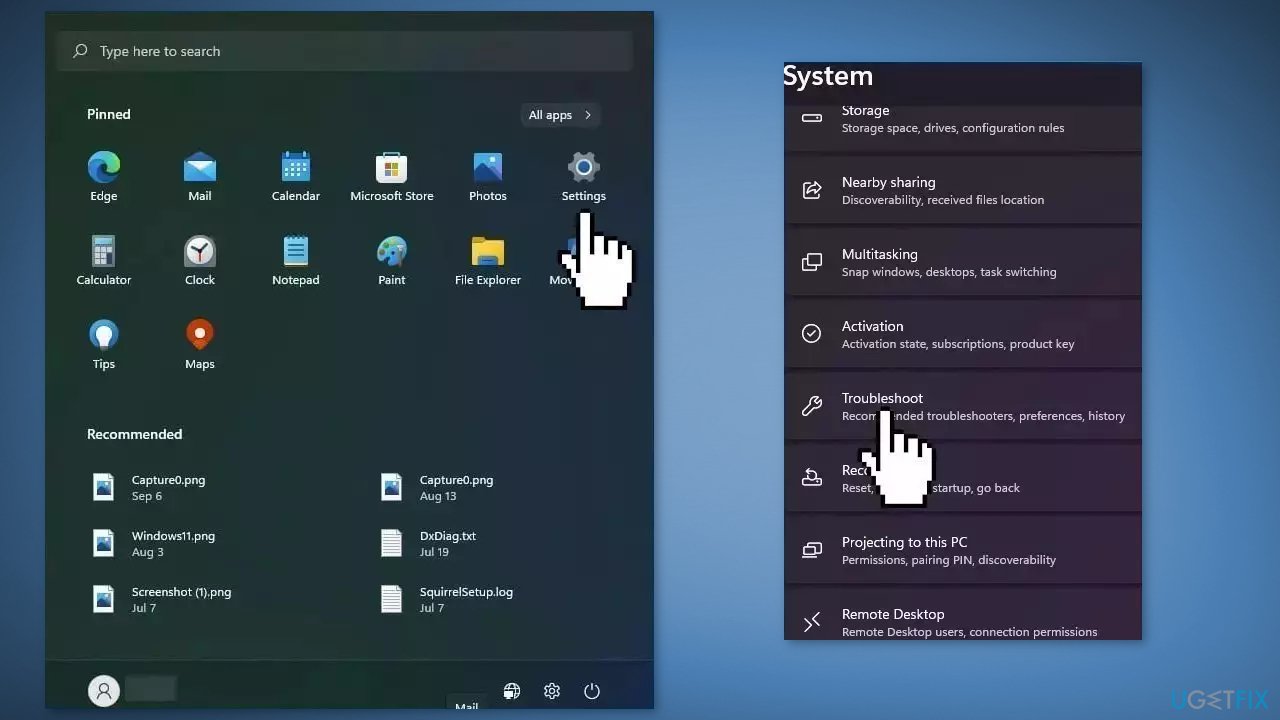
- Click the Windows button and select Settings
- Select System from the left pane, then scroll down on the right pane, and click on Troubleshoot
- Click on Other troubleshooters
- Locate the Windows Update troubleshooter and hit the Run button
Solution 4. Clear Windows Update Cache
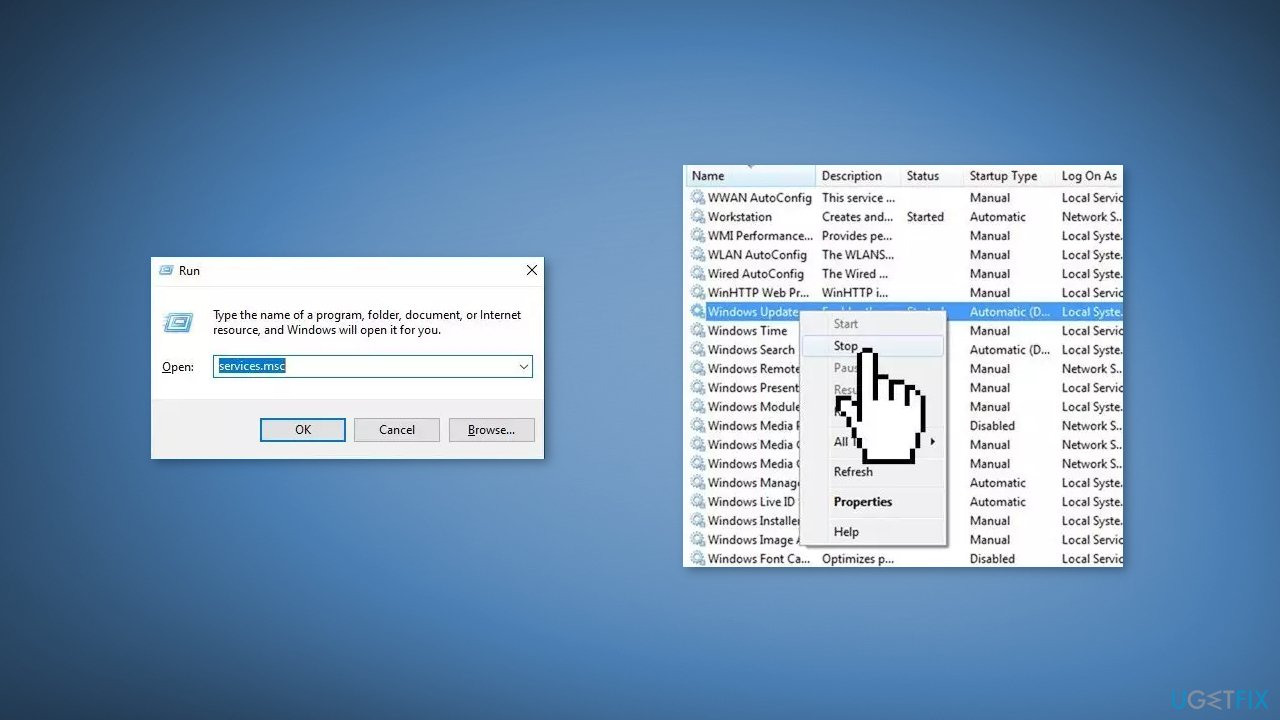
- Press the Windows key + R to open the Run command box
- Type services.msc and click OK
- In the Services control panel locate the Windows Update service
- Right-click on the Windows Update service and select Stop
- Now open Windows Explorer and navigate to: C:\Windows folder
- Find the SoftwareDistribution folder and Delete its contents
Solution 5. Disable DsmSvc Service
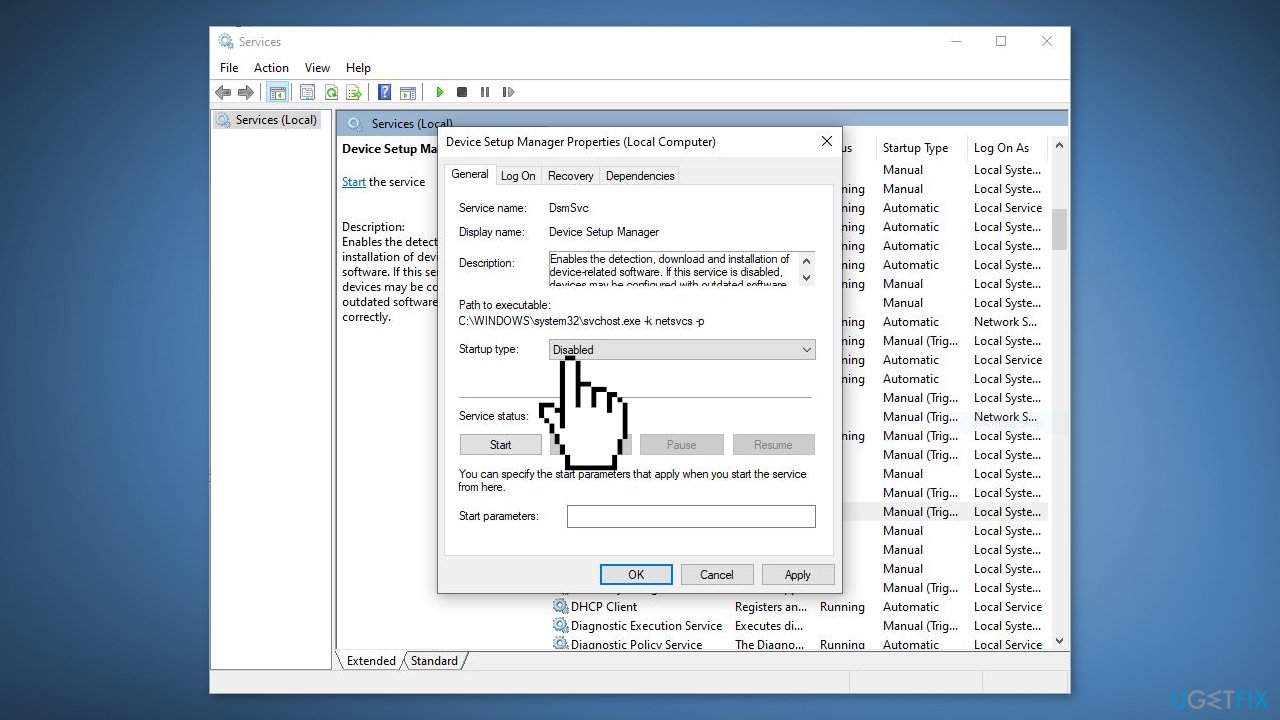
- Type services in the search bar and launch the Services utility
- Find Device Setup Manager in the list
- Double-click on it, set the Startup type to Disabled, and click Apply
Note: DsmSvc plays a crucial role in the proper functioning of devices connected to a Windows computer. It is responsible for detecting, downloading, and installing the necessary software for devices to work properly. When this service is disabled, devices may not function correctly due to outdated software or lack of proper configuration.
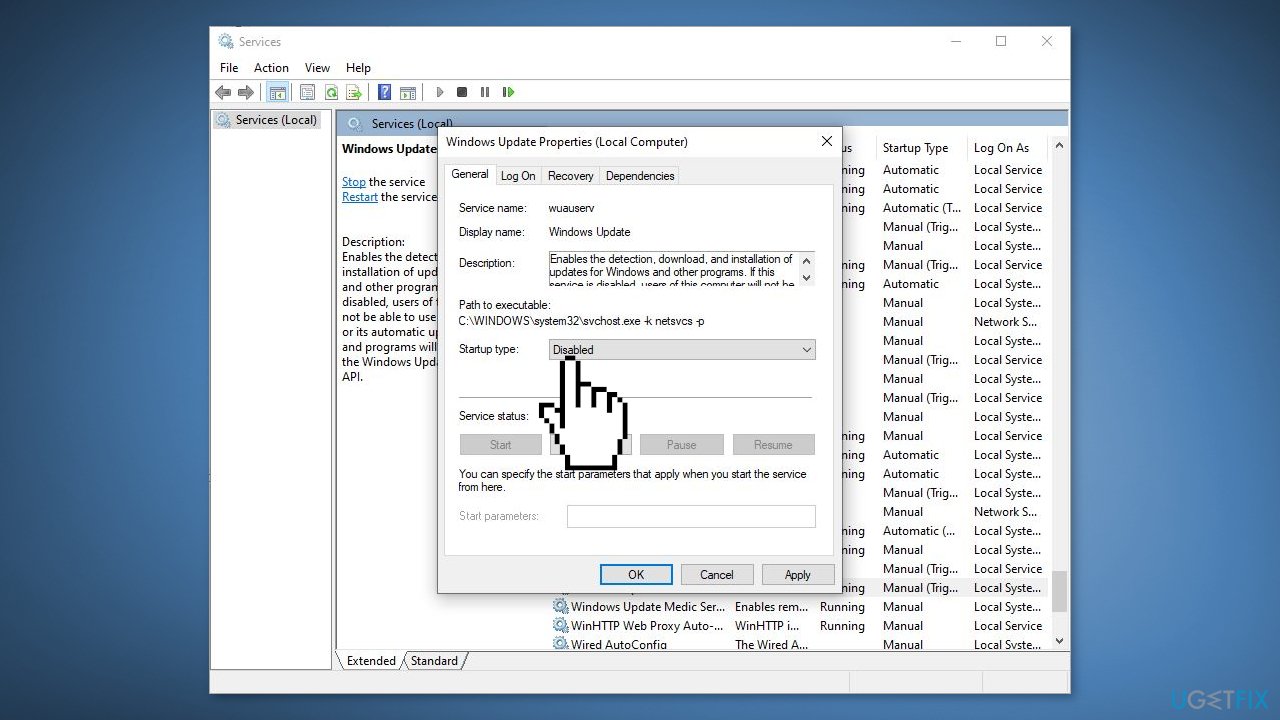
Solution 6. Disable Windows Update Service
- Type services in the search bar and launch the Services utility
- Find Windows Update in the list
- Double-click on it, set the Startup type to Disabled, and click Apply
Solution 7. Use System Restore
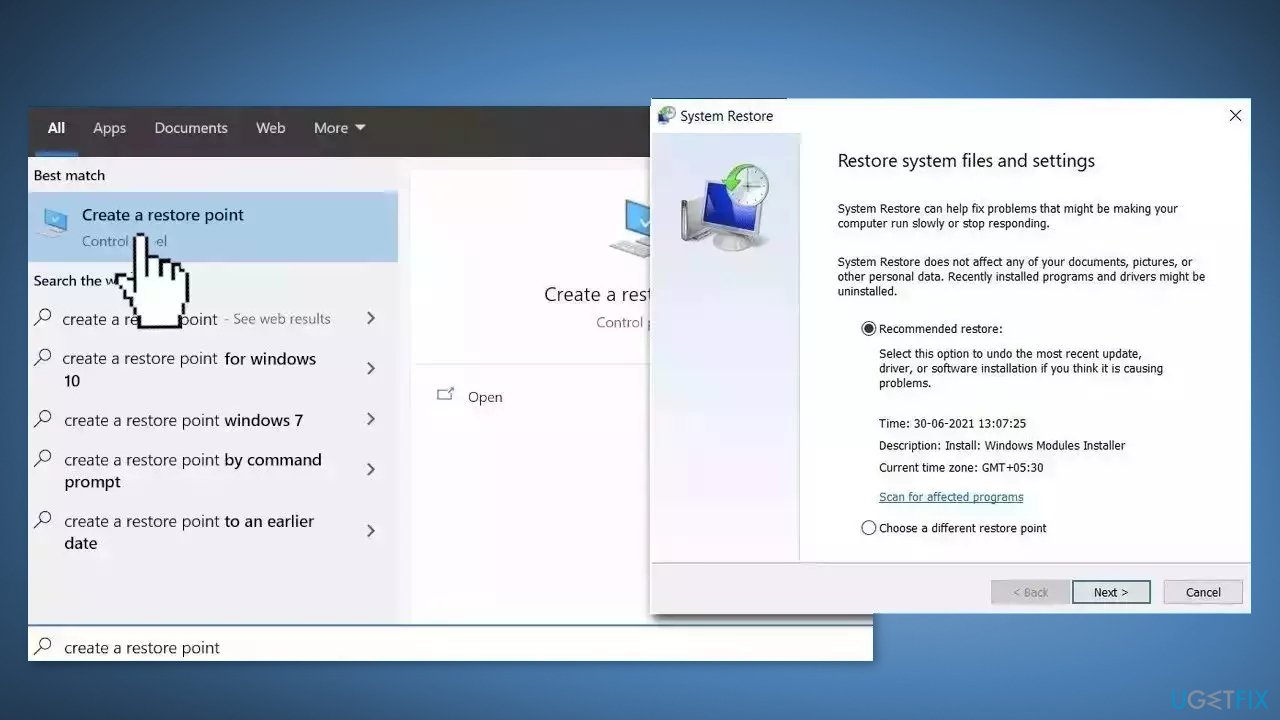
System Restore is a feature in Microsoft Windows that allows users to revert their computer's state to a previous point in time. This can be helpful if you have made changes to your system that are causing problems.
- Go to the Start menu, type restore, and click on Create a restore point
- Click System Restore, then follow the prompts until you can select a restore point
- Select the one you want (ideally before the issue started occurring) and go ahead with the process
Solution 8. Repair Install Windows
- Visit the official Microsoft website to download Windows 11 or Windows 10 Installation Media
- Run the Media Creation Tool and select Create Installation Media for another PC
- Select your USB drive
- Let the Process complete of writing the Installation files to the USB drive
- Click Finish
- On the PC you wish to upgrade, Press Windows + E to open the File Explorer
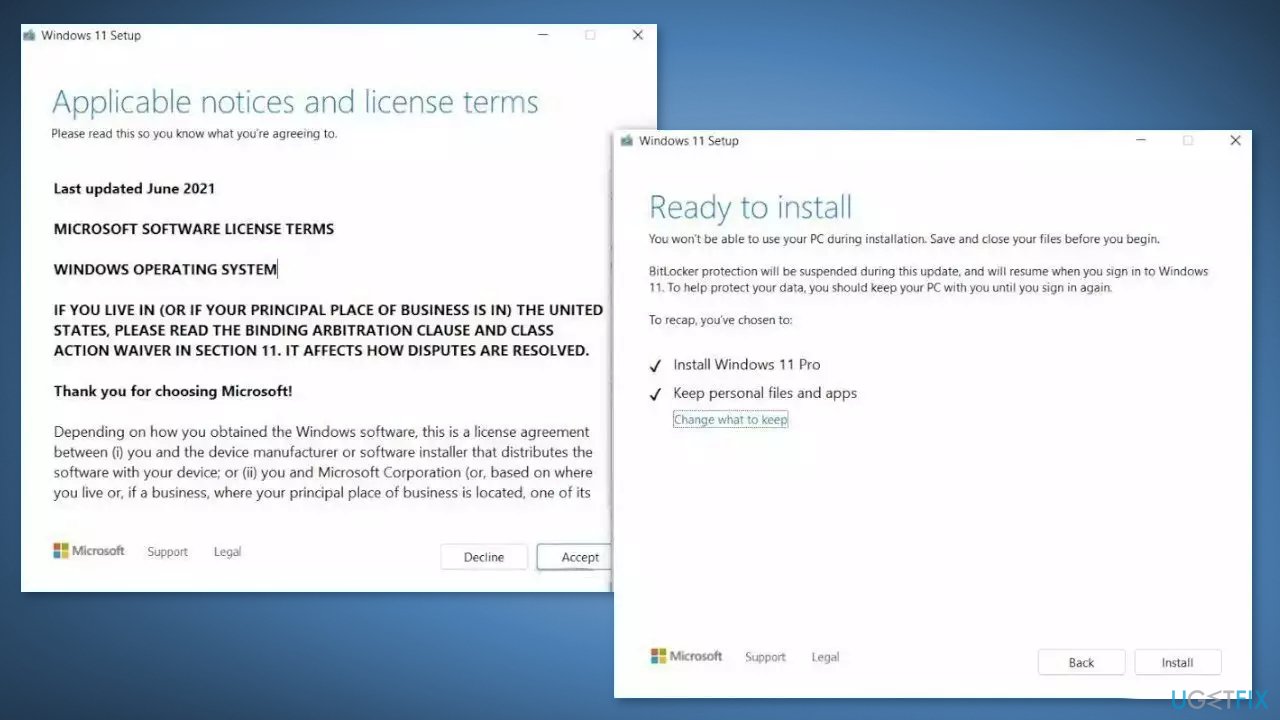
- Open the Removable drive and click Setup.exe
- Accept the license terms on the next screen
- Confirm the Upgrade options – Files, apps and Settings are kept
- Click Install, and the upgrade should start
Bottom line
To fix the high CPU usage by the Device Setup Manager service, you can repair corrupted system files using Command Prompt, scan your system for malware, or consider reinstalling the operating system. If these solutions do not resolve the issue, upgrading to the latest version of Windows may be necessary.
Frequently asked questions
High CPU usage by the Device Setup Manager service can be caused by a corrupt device driver or ongoing device setup processes that are stuck or malfunctioning.
You can restart the Device Setup Manager service by opening the Services app, locating 'Device Setup Manager', right-clicking it, and selecting 'Restart'.
Yes, you should check for pending Windows updates and ensure that all device drivers are up to date, as outdated drivers can contribute to high CPU usage.




Report an issue
What's wrong with this guide? We review every report and update or remove content.
Report received — thank you. We'll review and fix it.
You need a free account to submit a report.
Be the first to comment