How to fix
Msvcr10.dll missing
on Windows
Resolve the msvcr10.dll missing error on Windows 10 and 11 effortlessly. Follow our expert-tested guide and get your system running smoothly in minutes.


What causes How to fix msvcr10.dll missing in Windows?
- File has been deleted or moved
- Program is looking for a version not on the system
- File is corrupt due to hardware failure or virus infection
- Program is incompatible with the version of Windows
- Issues with the registry
Repairs Windows system files, removes malware, and restores a clean OS state — without reinstalling.
Hello. I tried to open a couple of apps on Windows but every time I receive an error that says msvcr10.dll is missing. Is there anything I can do to fix this?
The msvcr10.dll file is a dynamic link library file that is part of the Microsoft Visual C++ Redistributable Package. It is used by applications that are compiled with Visual C++. If you receive an error message stating that the msvcr10.dll file is missing, it may be because the file has been deleted or moved from its original location, or it may be because the program you are trying to run is looking for a version of the file that is not on your system.
The truth is, missing .dll file errors can be caused by a variety of factors in Windows. One potential cause of missing .dll file errors is if the file itself is corrupt. This can happen due to a hardware failure or a virus infection. In some cases, the program you are trying to run may be incompatible with your version of Windows. This can happen if the program was designed for an older version of the operating system.
Finally, problems with the registry can also cause .dll file errors. The registry is a database that stores information about all the programs and hardware on your computer. If there is an issue with the registry, it can cause .dll file errors and other problems. In this guide, you will find 8 steps that should help you fix msvcr10.dll missing in Windows.
Manually troubleshooting the issue can be time-consuming. To save time and effort, you may want to consider using a maintenance tool like [d1] that is specifically designed to fix common system errors, blue screen of death (BSOD),[ref en-1] corrupted files, registry[ref en-2] problems or clear cookies and cache.[ref en-3] If you prefer to manually troubleshoot the issue, you can follow the step-by-step instructions provided below.

Solution 1. Fix Corrupted System Files
Use Command Prompt commands to repair system file corruption:
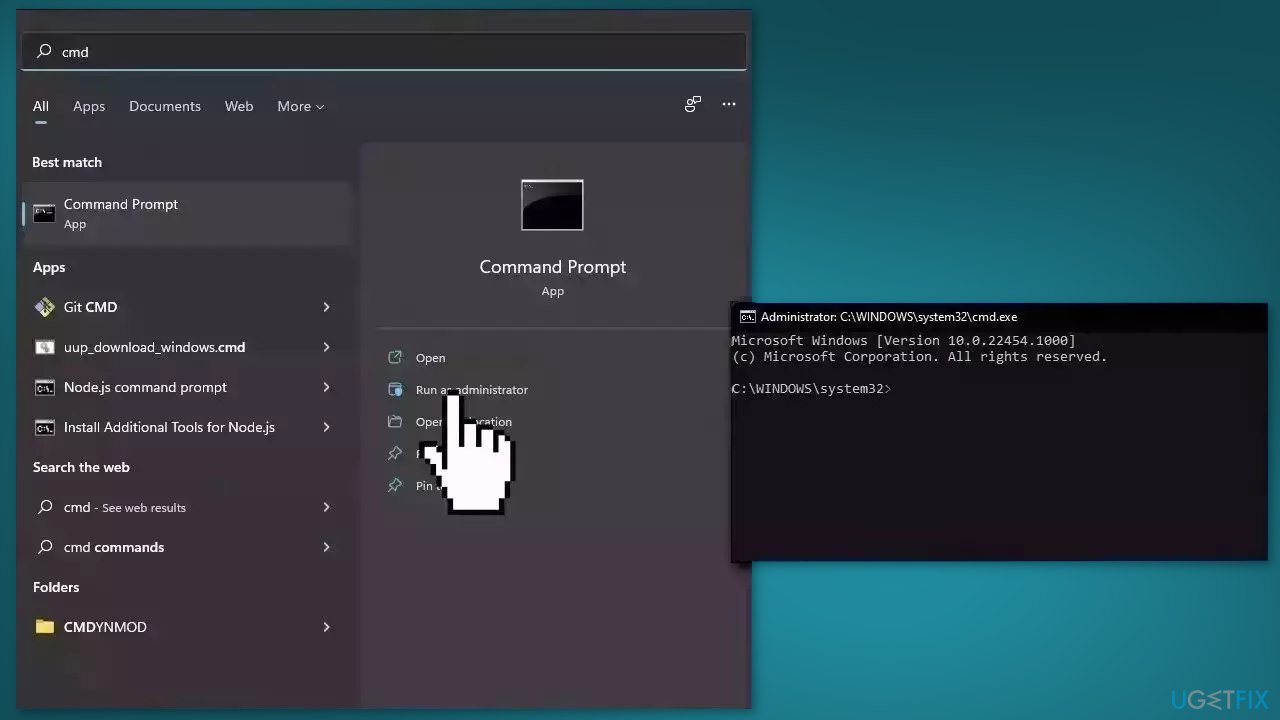
- Open Command Prompt as administrator
- Use the following command and press Enter:
sfc /scannow
- Reboot your system
- If SFC returned an error, then use the following command lines, pressing Enter after each:
DISM /Online /Cleanup-Image /CheckHealth
DISM /Online /Cleanup-Image /ScanHealth
DISM /Online /Cleanup-Image /RestoreHealth
Solution 2. Update Windows
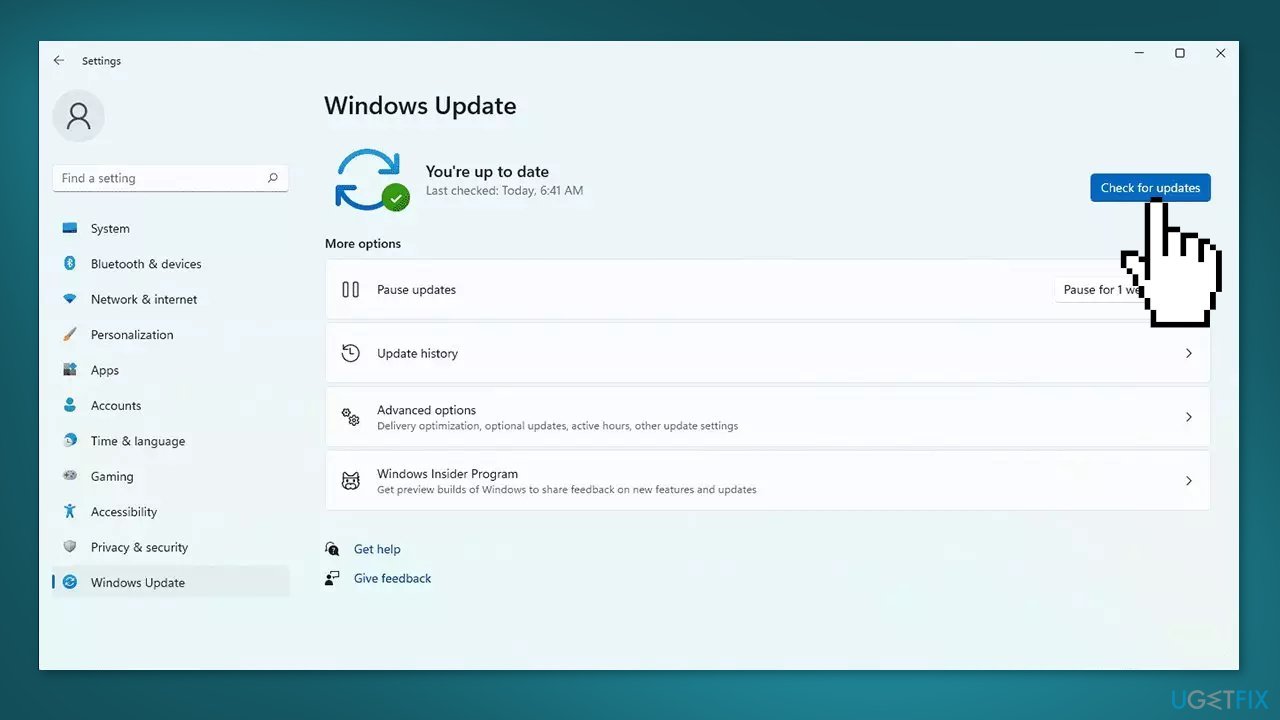
- Click Start and select Settings
- Go to the Windows Update section
- Click Check for updates and wait
- Go to the Advanced options and install optional updates
- Reboot your system
Solution 3. Reinstall the Problematic Program
- Open the Start menu and click on Settings
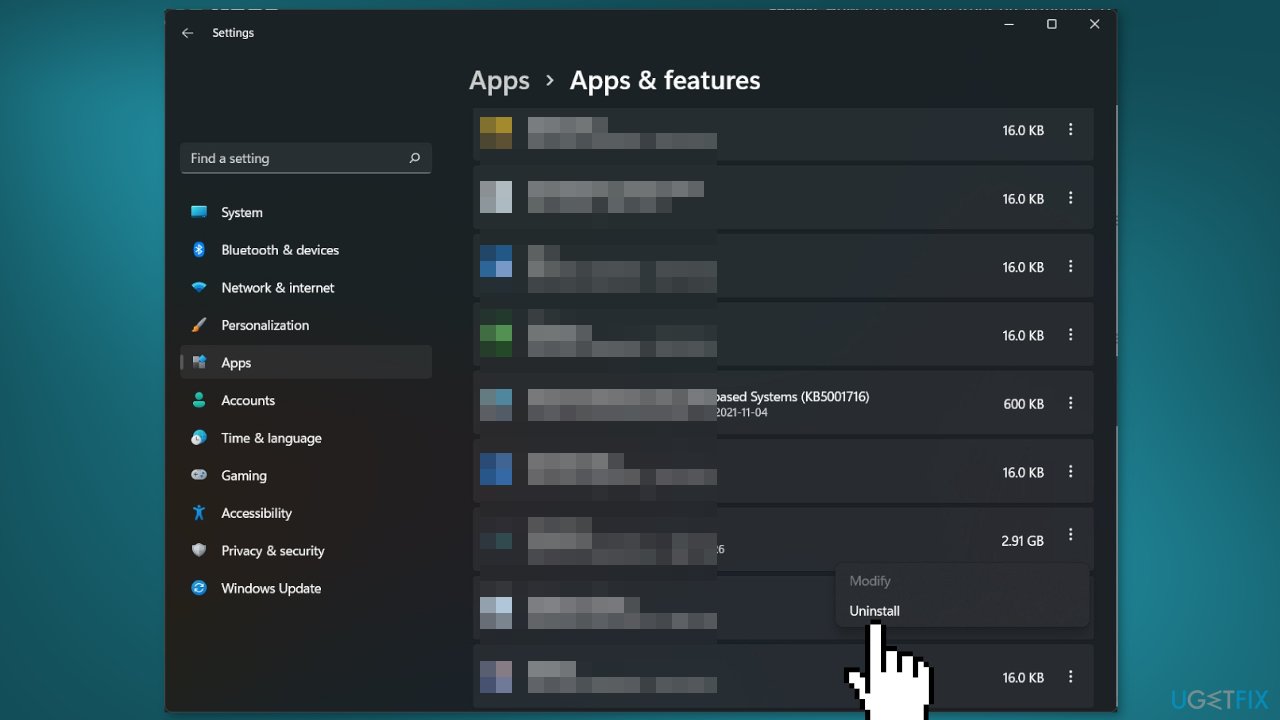
- Click on Programs and Features
- Locate the program you want to reinstall in the list of installed programs and select it
- Click on the Uninstall button
- Follow the prompts to uninstall the program
- Once the program has been uninstalled, restart your computer
- Reinstall the program by inserting the installation media (e.g., CD or DVD) or by downloading it from the internet
- Once the installation is complete, restart your computer again
- Launch the program to ensure it is functioning properly
Solution 4. Install Visual Studio 2012
- Go to the Visual Studio 2012 download page
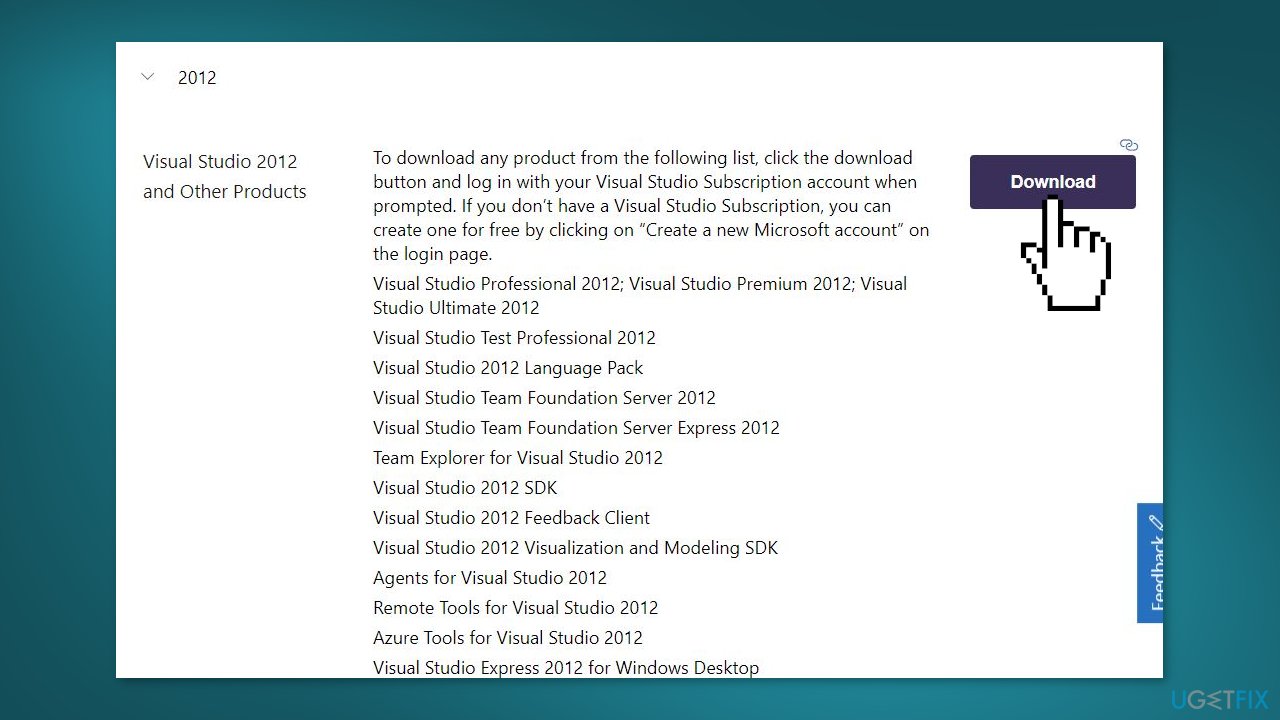
- Click on the Download button for Visual Studio 2012
- Choose the edition of Visual Studio 2012 you want to install
- Click on the Download button for the selected edition
- Save the installation file to your computer
- Double-click on the installation file to begin the installation process
- Follow the prompts to install Visual Studio 2012
Solution 5. Restore msvcr10.dll from Recycle Bin
It is possible that the msvcr10.dll file was accidentally deleted. Go to the Recycle Bin and check if it is there:
- Open the Recycle Bin by double-clicking on its icon on the desktop
- Locate the msvcr10.dll file in the list of items
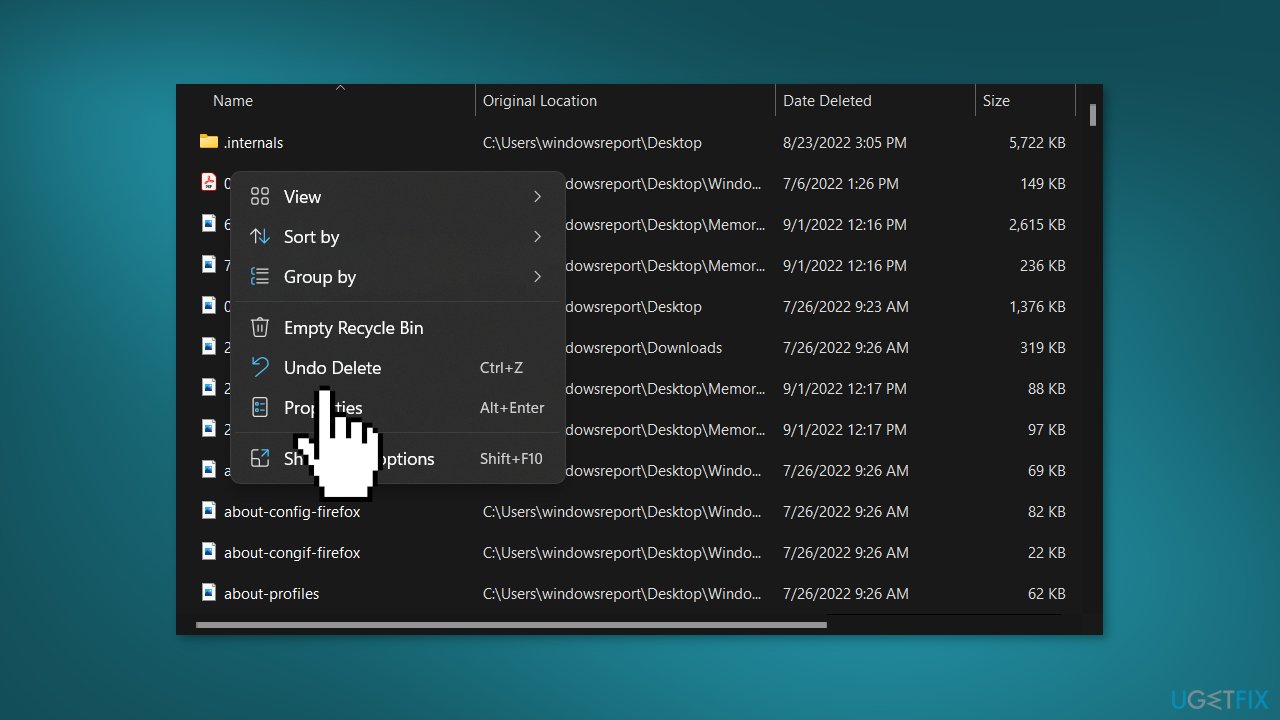
- Right-click on the msvcr10.dll file and select Restore or Undo Delete from the context menu
- The msvcr10.dll file will be restored to its original location
Solution 6. Use System Restore
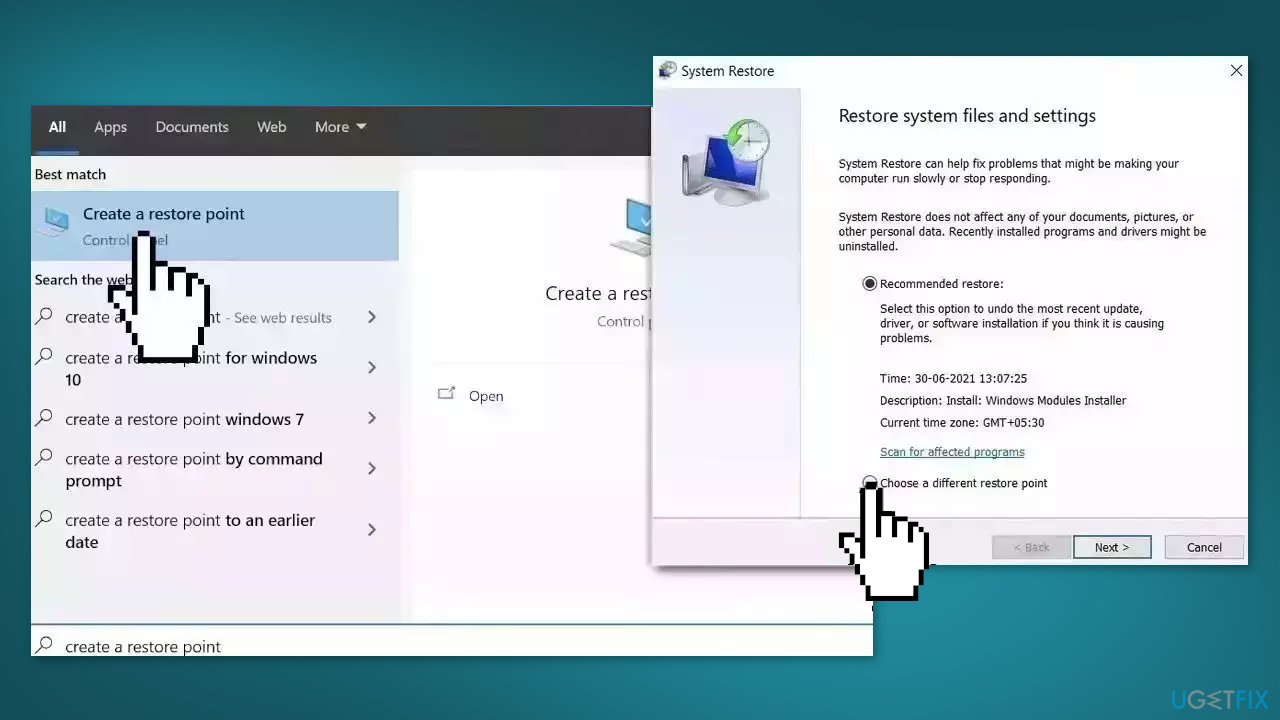
System Restore is a feature in Microsoft Windows that allows users to revert their computer's state to a previous point in time. This can be helpful if you have made changes to your system that are causing problems.
- Go to the Start menu, type restore, and click on Create a restore point
- Click System Restore, then follow the prompts until you can select a restore point
- Select the one you want (ideally before the issue started occurring) and go ahead with the process
Solution 7. Scan System for Viruses
If the above methods have not resolved the missing msvcr10.dll error, it is possible that a malware infection may be at fault. It is important to run a comprehensive security scan to rule out this possibility and ensure that the computer is not infected. This can help to prevent further issues with the Windows operating system and ensure that it is functioning properly.
If you have access to a security scanner, or if your organization pays for one, you can use it to scan your entire system to check for a virus infection. Otherwise, you can use Windows Defender to scan your system:
- Select Start and go to Settings
- Open Update & Security, and click on Windows Security and then Virus & threat protection
- Under Current threats, select Quick scan (or in early versions of Windows 10, under Threat history, select Scan now)
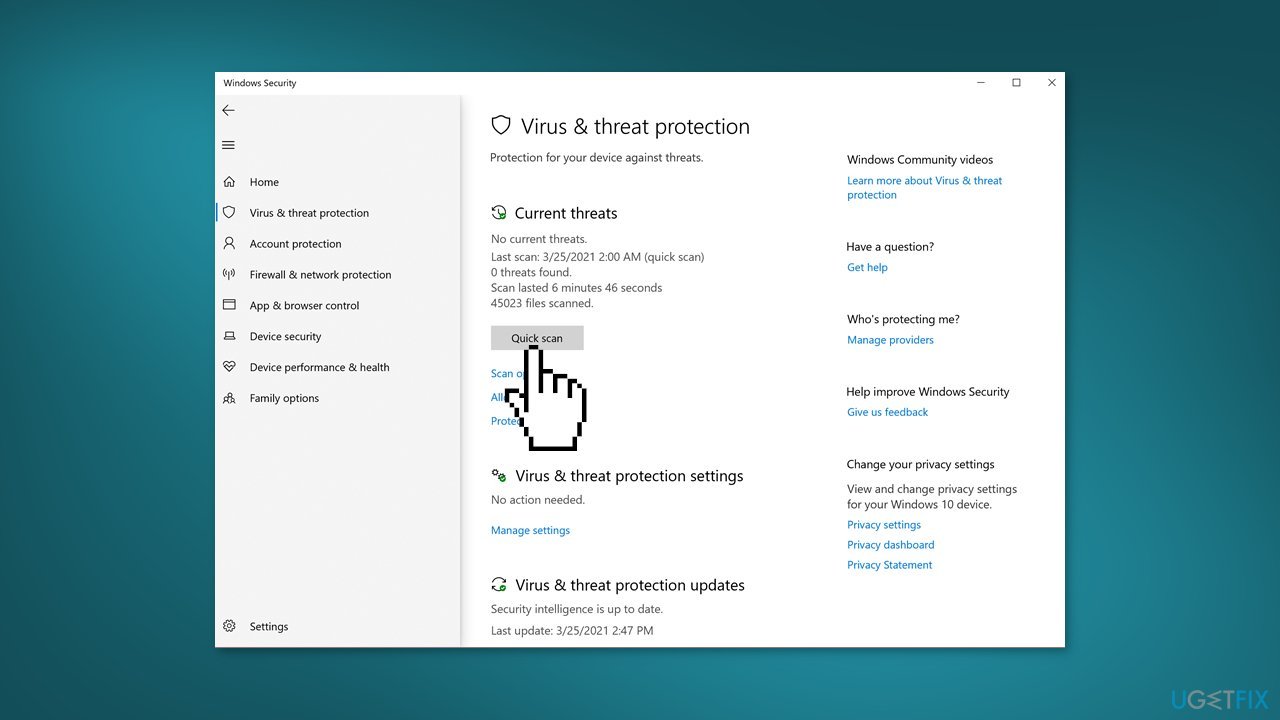
- Wait for the scan to finish and follow the on-screen instructions
Solution 8. Repair Install Windows
- Visit the official Microsoft website to download Windows 11 or Windows 10 Installation Media
- Run the Media Creation Tool and select Create Installation Media for another PC
- Select your USB drive
- Let the Process complete of writing the Installation files to the USB drive
- Click Finish
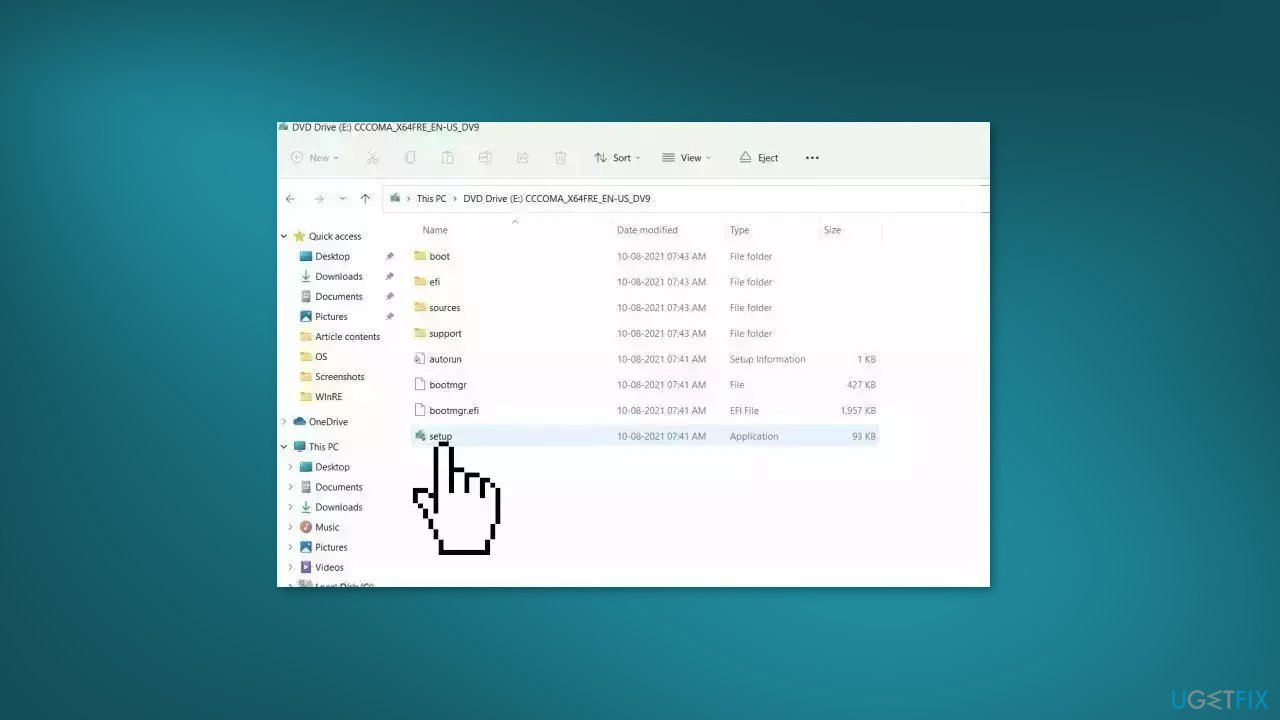
- On the PC you wish to upgrade, Press Windows + E to open the File Explorer
- Open the Removable drive and click Setup.exe
- Accept the license terms on the next screen
- Confirm the Upgrade options – Files, apps and Settings are kept
- Click Install, and the upgrade should start
Bottom line
To fix the msvcr10.dll missing error, you can repair corrupted system files using Command Prompt commands, consider using a maintenance tool, or manually troubleshoot the issue. If none of these solutions work, further investigation may be needed to identify the underlying problem.
Frequently asked questions
The msvcr10.dll missing error in Windows 10 is often caused by a corrupted or incomplete installation of software that relies on this DLL file. Additionally, malware infections can also lead to the deletion or corruption of this file.
To restore the msvcr10.dll file on Windows 11, you can reinstall the Microsoft Visual C++ Redistributable package, which includes this DLL. Alternatively, running a system file checker scan using 'sfc /scannow' in the Command Prompt can help repair missing or corrupted system files.
No, it is not safe to download msvcr10.dll from third-party websites, as these files may be outdated or infected with malware. It's recommended to fix the error by using official Microsoft resources or tools.




Report an issue
What's wrong with this guide? We review every report and update or remove content.
Report received — thank you. We'll review and fix it.
You need a free account to submit a report.
Be the first to comment