How to fix
Rotation Lock grayed out
on Windows
Resolve the Rotation Lock issue in Windows 10 or 11 effortlessly. Get your device back to normal with expert-tested solutions, fixed in minutes!
What causes How to fix Rotation Lock grayed out in Windows?
- Software conflicts
- Outdated device drivers
- Incorrect system settings
- Lack of Windows updates
Repairs Windows system files, removes malware, and restores a clean OS state — without reinstalling.
Hello. I wanted my Windows laptop to change rotation automatically but the Rotation Lock option is grayed out. Why is it not available? Any suggestions would be appreciated.
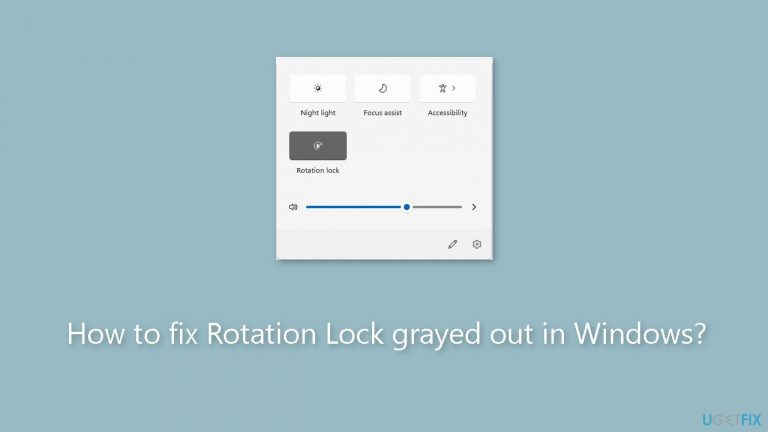
Users may find it aggravating when the Rotation Lock feature in Windows is grayed out, especially if they frequently use tablets or convertible laptops. Similar to how it operates on smartphones, the Rotation Lock feature is intended to align the screen's alignment with the device. This feature is practical since it enables users to quickly convert between portrait and landscape modes, improving their devices' overall adaptability and usability.
However, users may have substantial negative effects in a number of ways if Rotation Lock is rendered unusable due to being grayed out. The device's capacity to automatically change the screen orientation is first and foremost hampered, which can be annoying when users switch between various tasks or applications. For instance, some users may find that reading documents or browsing the web in portrait mode is more comfortable, whilst viewing videos or playing games are suitable for landscape mode. Users must constantly manually change the orientation when Rotation Lock is unavailable, which disrupts user interaction and slows down productivity.
Furthermore, people who depend on their gadgets for productivity and multitasking may find this issue particularly troublesome. When a user wants to use several programs at once, having the screen orientation locked in one position can make it difficult for them to efficiently arrange and view content.
Possible solutions for this issue may include troubleshooting steps to identify and resolve software conflicts, updating device drivers,[ref en-1] or modifying system settings. In this guide, you will find 5 steps that should help you fix Rotation Lock option grayed out in Windows. You can also run a maintenance tool like [d1] that can fix most system errors, BSODs,[ref en-2] corrupted files, and registry[ref en-3] issues. Otherwise, follow the step-by-step instructions below.

Solution 1. Install Windows Updates
- Click Start on the taskbar.
- Select the Setting app pinned to the Start menu.
- Click Windows Update on the left side of Settings.
- Press the Check for updates button to download and install new patch updates.

Solution 2. Modify the Display Orientation Settings
- Press the Windows key + I to open Windows Settings.
- Choose System from the list of options available.
- Select Display from the left pane.
- In the right pane, locate the Display orientation section.

- Expand the dropdown under it and choose Portrait from the menu.
- Close the Settings window.
- Check if the display orientation has changed to Portrait.
- Type Control Panel in Windows search and click Open.
- In the Control Panel window, expand the dropdown for View by and choose Small icons.
- Click on Tablet PC settings.
- In the following dialog, click on Go to Orientation.
- Choose your preferred orientation from the options provided.
- Click Apply and then OK to save the changes.
- Close the Control Panel.
Solution 3. Update or Reinstall Display and Sensor Drivers
You can also use a dedicated utility like [rev id="DriverFix"] that can find the best drivers for your machine and install them automatically.
Update drivers:
- Type Device Manager in Windows Search and click Open.
- In the Device Manager window, locate and expand the Display adapters section.
- Right-click on your display card driver.
- Choose Update driver from the context menu.
- Select Search automatically for drivers.

- The system will automatically install the updated driver software.
- Once the updated driver version is installed, expand the Sensors section.
- Update the accelerator driver from there.
- After all updates are installed, close the Device Manager.
- Check if the issue is resolved.
Reinstall drivers:
- If the error persists, return to the Device Manager window.
- Expand the Display adapters section.
- Right-click on your display card driver.
- Choose Uninstall device from the context menu.
- Follow the on-screen procedure to complete the uninstall process.
- Once done, restart your PC.
- The new driver will be automatically installed upon restarting your computer.
Solution 4. Restart the Sensor Monitoring Service
- Open a Run dialog by pressing the Windows key + R.
- Type services.msc in the Run dialog and press Enter.
- In the Services window, locate the Sensor Monitoring Service.
- Right-click on the Sensor Monitoring Service and choose Properties from the context menu.
- In the Properties dialog, click on the Stop button.
- Wait for a few seconds to allow the service to stop.

- After stopping, select Start to restart the service.
- Ensure that the Startup type is set to Automatic.
- Click Apply and then OK to save the changes.
Solution 5. Modify the Windows Registry
- Press the Windows key + R to open Run.
- Type regedit in the Run dialog and press Enter.
- Click Yes in the User Account Control prompt.
- In the Registry Editor, navigate to the following location:
Computer\HKEY_LOCAL_MACHINE\SOFTWARE\Microsoft\Windows\CurrentVersion\AutoRotation

- Right-click in an empty space in the right pane.
- Choose New and then DWORD (32-bit) Value.
- Rename this new value as LastOrientation.
- Double-click on LastOrientation.
- In the dialog that appears, type 0 in the text field under Value data and click OK.
- Create another DWORD value and name it SensorPresent.
- Double-click on SensorPresent.
- In the dialog that appears, type 1 in the text field under Value data and click OK.
- Finally, close the Registry Editor.
- Restart your PC to apply the changes.
Bottom line
To fix the Rotation Lock option being grayed out, you can install Windows updates, troubleshoot software conflicts, and update your device drivers. If these steps do not resolve the issue, consider running a maintenance tool to fix system errors.
Frequently asked questions
The Rotation Lock may be grayed out if your device does not support automatic screen rotation or if the feature is disabled in the device settings. Check your display settings and ensure that your device's sensors are functioning properly.
To enable Rotation Lock in Windows 11, go to Settings > System > Display and make sure the 'Rotation Lock' toggle is available and your device is in tablet mode if applicable. If it's still grayed out, verify that your graphics drivers are up to date.
If Rotation Lock remains unavailable, try updating your device drivers, or check for Windows updates that may fix the issue. Additionally, consider running the Hardware and Devices troubleshooter to identify any underlying problems.


Report an issue
What's wrong with this guide? We review every report and update or remove content.
Report received — thank you. We'll review and fix it.
You need a free account to submit a report.
Be the first to comment