How to fix
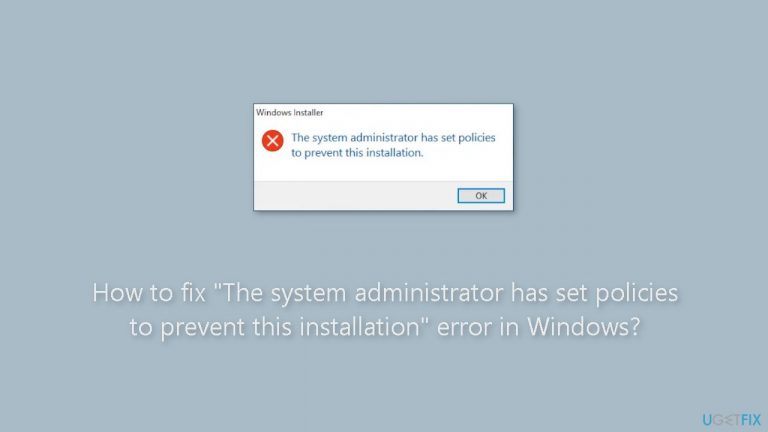
“The system administrator has set policies to prevent this installation” error
on Windows
Resolve "The system administrator has set policies to prevent this installation" error on Windows 10/11 effortlessly. Expert-tested solutions await!
What causes How to fix “The system administrator has set policies to prevent this installation” error in Windows?
- Special policies or restrictions set by the local administrator
- Group policies preventing software installation
- User Account Control (UAC) settings causing issues
- Lack of permissions to install software
- Existing software updates or upgrades being blocked
Repairs Windows system files, removes malware, and restores a clean OS state — without reinstalling.
Hello. When I try to install new apps I keep getting the "administrator has set policies to prevent this installation" error. Is there a way to get rid of it?
Windows users frequently run into the "The system administrator has set policies to prevent this installation" error when attempting to install software packages. This error message indicates that special policies or restrictions that block the installation of particular software have been put in place on the system, either by the local administrator or through group policies.
The inclusion of such restrictions can have a significant impact on users in a variety of ways. For starters, it can prevent users from installing necessary or desirable applications on their own, limiting their capacity to tailor their computing environment to their specific requirements. This could reduce productivity and restrict access to critical tools and programs. Furthermore, users may encounter issues updating existing software or applying crucial upgrades, which may jeopardize system security and performance.
The error message might also be confusing for users who are unfamiliar with system setups or group policies, as it may leave them wondering why the installation is being prevented. Users have a few options for dealing with this problem. One alternative is to contact the system administrator or IT support staff for assistance in installing the requested software or, if necessary, altering the restrictive rules.
Another option is to verify and alter the User Account Control (UAC) settings, which are occasionally the source of the issue. Changing the UAC settings, on the other hand, should be done with caution because it can have an impact on the overall security of the system.
In this guide, you will find 6 steps that should help you fix "The system administrator has set policies to prevent this installation" error. You can also try a repair tool like [d1] that can fix most system errors, BSODs,[ref en-1] corrupted files, and registry[ref en-2] issues. Otherwise, follow the step-by-step instructions below.

Method 1. Run the Setup File as an Administrator
- Locate the setup file for the software you want to install.
- Right-click on the setup file.
- A context menu will appear.
- From the context menu, select Run as administrator.

- The software installation process will now start with elevated privileges.
Method 2. Enable Windows Admin Account
- Press the Windows key to open the Start menu.
- Type cmd in the search bar to find Command Prompt.
- Right-click on Command Prompt in the search results.
- From the context menu, select Run as administrator.
- In the Command Prompt window, type: Net user Administrator /active: yes and press Enter.

- Wait for the command to execute and display the command completed successfully message.
- To disable the administrator account, type: Net user Administrator /active: no and press Enter.
- Close the Command Prompt window.
- Press the Windows key + L to view the lock screen.
- Click on the Administrator account to log in to the built-in administrator account.
Method 3. Disable User Account Control
- Press the Windows key + R to open the Run dialog.
- Type control in the Run dialog and click OK to open the Control Panel.
- In the Control Panel, click on User Accounts.
- Click on User Accounts again.
- Next, click on Change User Account Control settings.

- By default, the User Account Control is set to notify you only when apps try to make changes to your computer.
- To disable the feature, drag the slider all the way to the bottom and set it to Never notify.
- Click OK to save the changes.
- Click Yes if prompted by UAC (User Account Control) one last time to confirm the changes.
Method 4. Run or Restart the Windows Installer Service
- Right-click on the Start button to open a context menu.
- From the menu, select the Search shortcut.
- Input a services search phrase in the search field.
- Click on the Services app that is found by the search tool.
- In the Services window, locate and double-click on Windows Installer to view its property settings.
- If the Windows Installer service is currently stopped, click the Start button to start it. Alternatively, you can select Stop and then Start to restart the Windows Installer service.

- After making any necessary changes, select Apply and then click OK to save the Windows Installer service settings.
Method 5. Edit the Installer Registry Key
- Click on the taskbar magnifying glass or Search box.
- Type a regedit search term to locate the Registry Editor app.
- Select Registry Editor to launch the app.
- Inside the Registry Editor address bar, input the following path: HKEY_LOCAL_MACHINE\Software\Policies\Microsoft\Windows\
- If the Installer subkey is not visible, right-click the Windows key and select New > Key.
- Enter Installer as the name for the new key.
- Right-click the Installer key and select New > DWORD (32-bit) Value.
- Name the new DWORD as DisableMSI.
- Double-click DisableMSI inside the Installer key.
- Ensure that the value of DisableMSI is set to 0.

- Click OK to apply the DisableMSI value.
- Close the Registry Editor.
- Restart your PC to apply the changes.
Method 6. Change Group Policy Settings
- Press the Windows key + R to open the Run dialog.
- Input gpedit.msc in the Run dialog and click OK to open the Local Group Policy Editor.
- Double-click on Computer Configuration and then Administrative Templates in the left sidebar of the Group Policy Editor.
- Navigate to Windows Components > Windows Installer to access policy settings.
- Double-click the Turn off Windows Installer policy setting.
- Select Enabled if the option isn't already set.
- Click Never on the Disable Windows Installer drop-down menu.

- Click Apply and then OK to save the policy settings.
- Double-click Windows Settings > Security Settings in the Group Policy sidebar.
- Right-click Software Restriction Policies and select Delete Software Restriction Policies if available.
- Click Yes to confirm the deletion of software restriction policies.
- Optionally, you can create a new software restriction policy in the Group Policy Editor.
- Right-click Software Restriction Policies and select New Software Restriction Policies.
- Double-click Enforcement.
- Select the All users except local administrators radio button.
- Click Apply and then OK in the Enforcement Properties window.
- Open Command Prompt with administrator rights using the search utility.
- Enter and execute the command: gpupdate /force for updating the policy.
- Exit the Command Prompt app and restart Windows to apply the changes.
Bottom line
To fix the 'The system administrator has set policies to prevent this installation' error, you can contact your system administrator, adjust User Account Control settings, or use a repair tool. If these methods do not resolve the issue, consider following the detailed step-by-step instructions provided in the guide.
Frequently asked questions
This error typically occurs due to restrictions set by Group Policy or Windows Registry that prevent software installations. It can happen if your user account lacks the necessary privileges or if certain security settings are enabled.
To fix this issue on Windows 11, you can try running the installer as an administrator or modify Group Policy settings to allow software installations. Additionally, checking for any active antivirus software blocking the installation can also help.
Yes, you can temporarily disable User Account Control (UAC) or adjust the Local Group Policy Editor settings to bypass the installation policy error on both Windows 10 and Windows 11. However, be cautious as changing these settings can expose your system to potential risks.


Report an issue
What's wrong with this guide? We review every report and update or remove content.
Report received — thank you. We'll review and fix it.
You need a free account to submit a report.
Be the first to comment