How to fix
Windows 11 upgrade error 0xC1900101 – 0x60016
on Windows
Resolve the Windows 11 upgrade error 0xC1900101 - 0x60016 quickly with expert-tested solutions that restore your system seamlessly. Fixed in minutes!

What causes How to fix Windows 11 upgrade error 0xC1900101 – 0x60016?
- Incompatible devices
- Drivers
- Third-party antivirus program
- Messed-up system settings
- Games or programs
- Waste files from uninstalled programs
Repairs Windows system files, removes malware, and restores a clean OS state — without reinstalling.
Hello. I have been trying to upgrade from Windows 10 to Windows 11 but I have not been successful. The installation process gets interrupted at about 60%. My device meets all the needed requirements so I have no idea what the issue could be. Any tips would be appreciated.
Windows is one of the most popular operating systems in the world created by Microsoft. The newest version recently came out - Windows 11, and as users rush to upgrade, they encounter various errors. Recently, a new upgrade 0xC1900101 - 0x60016 error was reported by a user that tried to update from Windows 10 Pro 21H1 build 19043.1288 to Windows 11. Many people do not realize that the upgrade is not available for everyone and the eligible systems have to meet specified requirements.[ref en-1]
The other reason that people fail the upgrade is that they do not realize that a lot of free space is needed in order for the update to install. If users have completed all the required steps before starting the installation process, the cause for the 0xC1900101 - 0x60016 error can be quite complicated. It is unclear what exactly is causing these upgrade errors, and many users are left searching for answers in online forums.
You should note that Windows 10 will be supported until 2025, so there is no need to rush the upgrade if it is not working for you. You can also read an article we wrote about all the know issues of Windows 11. You can choose to be patient and wait until all the upgrade issues are fixed instead of getting frustrated. The causes of this error might be incompatible devices, drivers,[ref en-2] games, programs, or waste files that need to be deleted when programs are uninstalling so the troubleshooting process can take a long time.
The issue could also be caused by a third-party antivirus program, drivers, or messed-up system settings. In this article, we provide seven methods that could fix the Windows 11 upgrade error 0xC1900101 - 0x60016. If none of those steps will work, the last option you will have is to reset the system entirely.
Besides the technical requirements, you should also ensure that there are no underlying issues on your system - malware[ref en-3] infections, software conflicts, system errors, and more. In order to find and fix these issues, we strongly recommend running a PC repair and maintenance tool [d1]. It might find the cause automatically, so you do not have to go through a lengthy manual troubleshooting process.
Solution 1. Run Windows Update Troubleshooter
- Press Windows + I to launch the Settings app
- Select Update & Security thereafter Troubleshoot from the left column
- Click on Additional troubleshooters
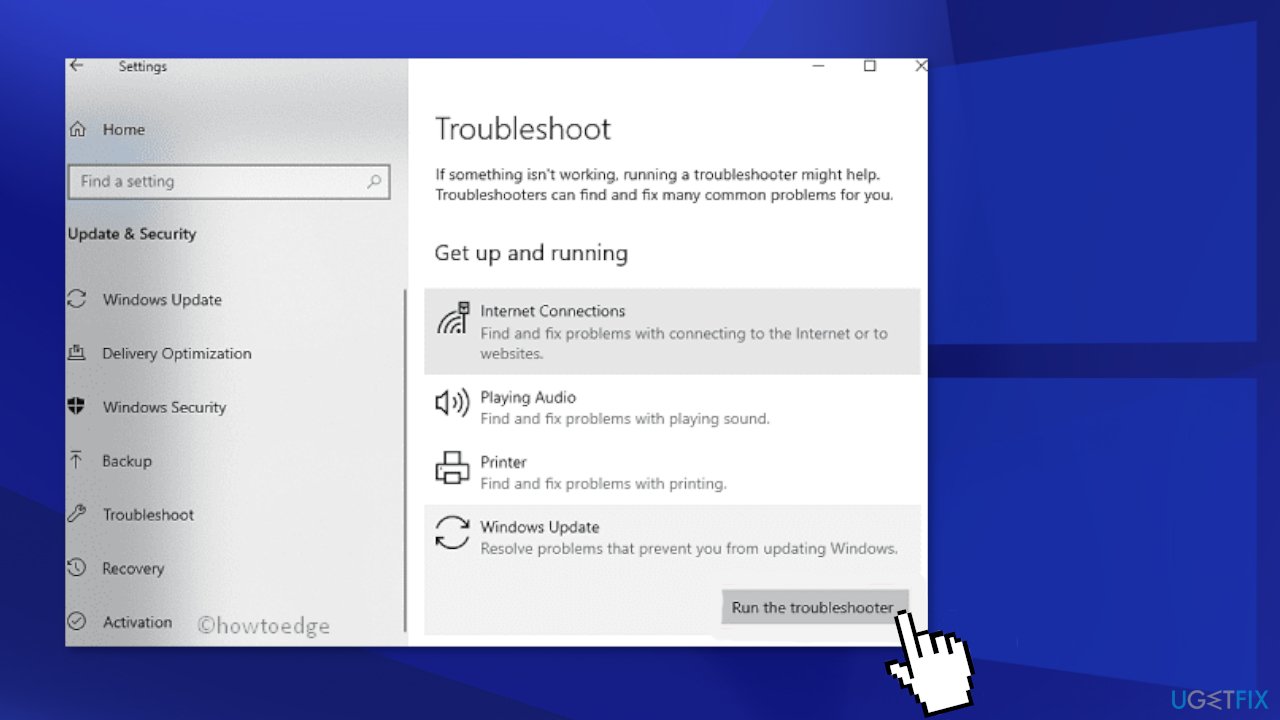
- Moving further, click Windows Update and hit Run the troubleshooter
- Hit Next and follow the on-screen instructions
- If this tool provides you a fix, hit Apply this fix
- Do not forget to restart your PC
Solution 2. Remove Virtualbox.exe
- Open This PC via File Explorer, type virtualbox.exe in the search box, then press Enter to start searching
- Right-click on VirtualBox.exe, then click Open file location
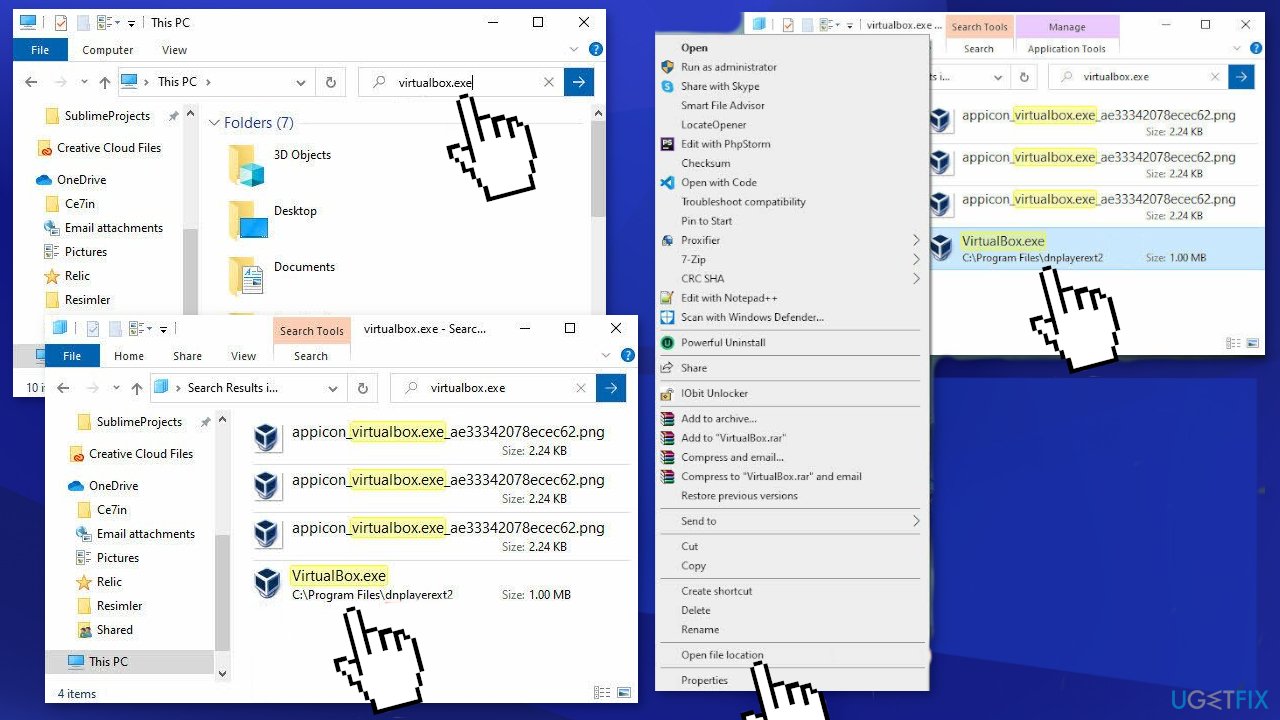
- Click the up arrow icon that, and go up to the container directory (in our case, it is Program Files)
- In your case, the parent directory and the program may differ. For example, it might be
BlueStacksinstead ofdnplayerext. If it is installed on your PC, you need to uninstall it first
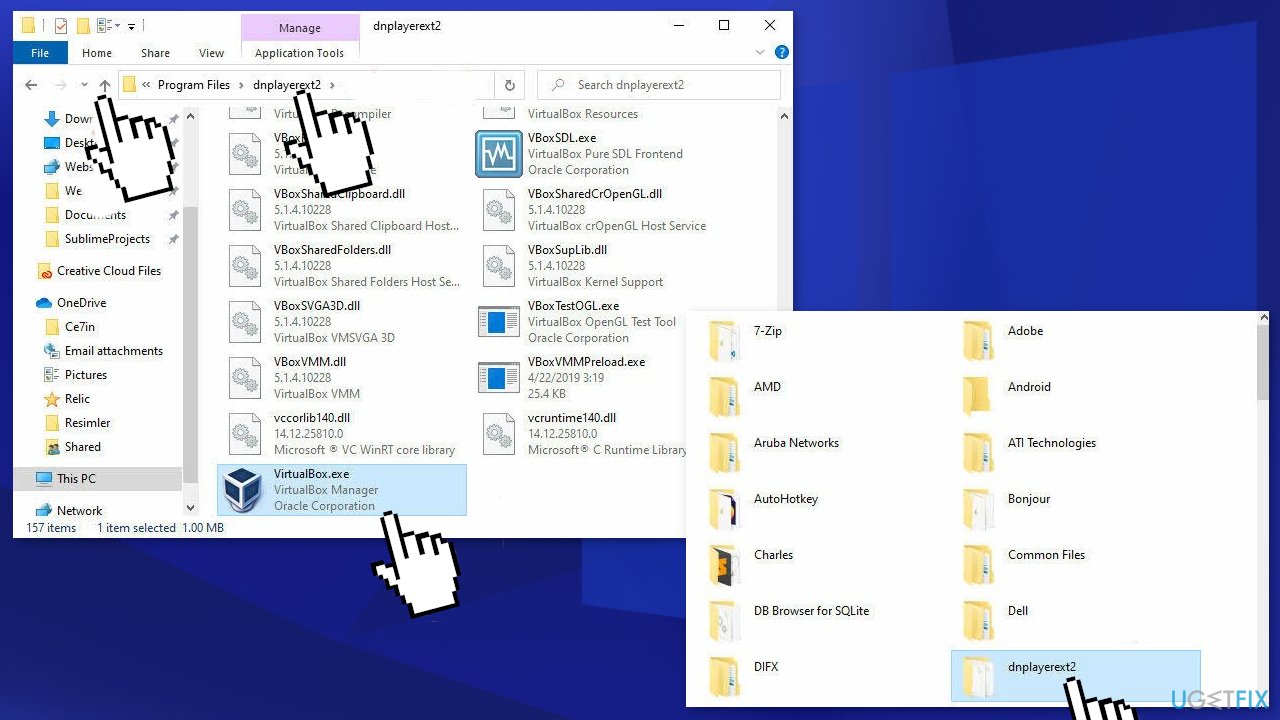
- Delete the parent directory
Solution 3. Update faulty Driver
- Press Windows + X together to launch the Power menu
- Select Device Manager from the list and expand each section to find the faulty driver (The Yellow exclamation mark next to the driver signifies that the chosen driver is problematic)
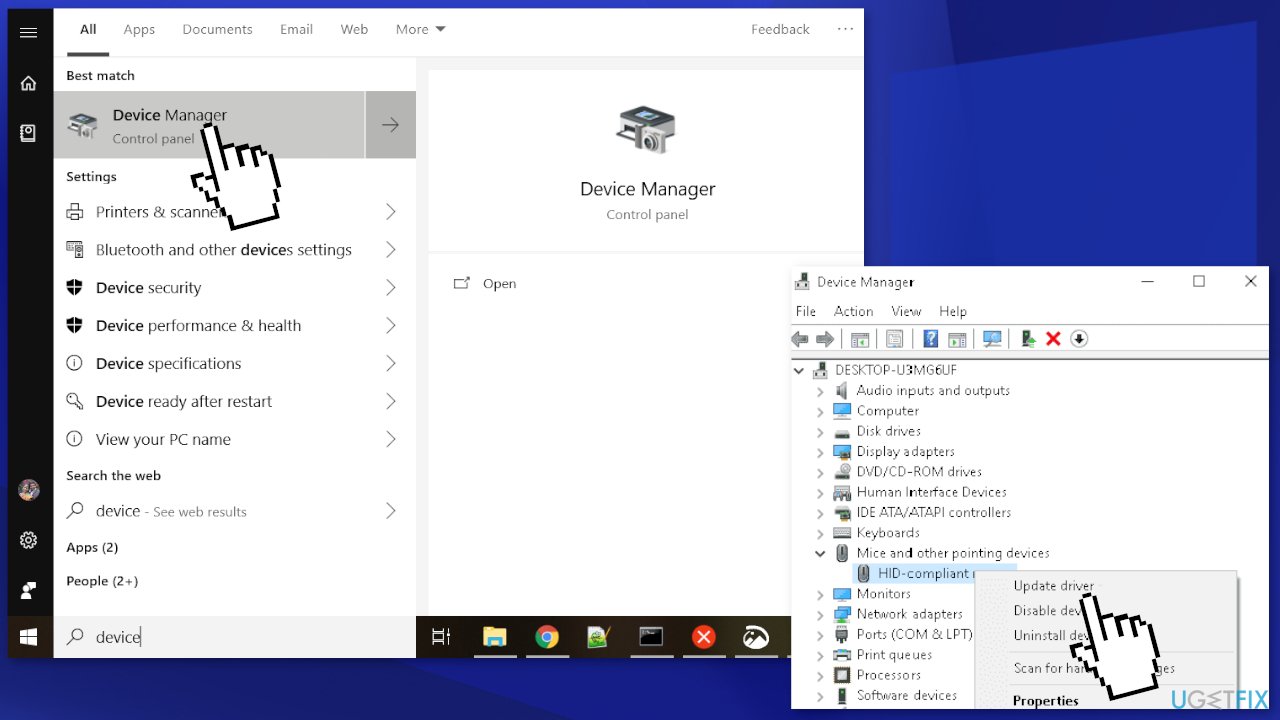
- Right-click on it and select Update driver
- Click Search automatically for drivers and let the system search for any pending updates
- After updates are installed, reboot your PC
Solution 4. Disable Network Adapters
- Press the Window key + R to start the Run dialog
- Type
devmgmt.mscin the text field, and hit OK to launch Device Manager
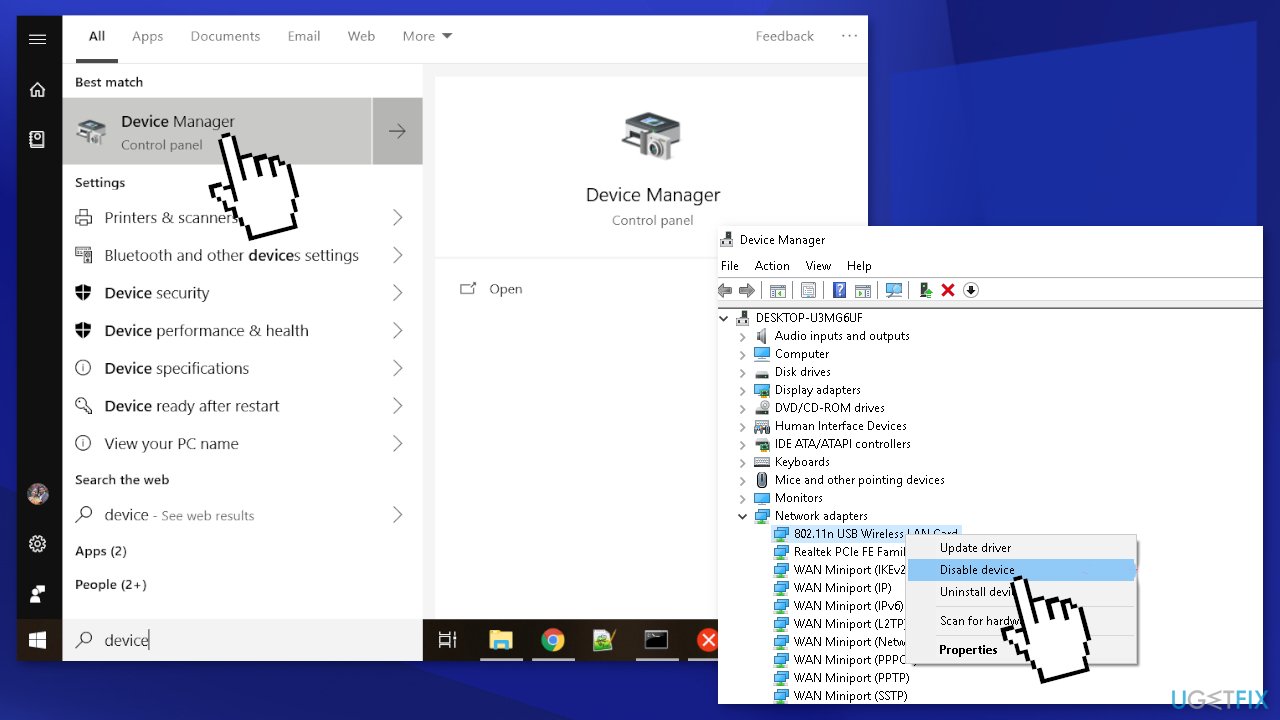
- On the subsequent screen, locate and expand the Network Adapters section
- Right-click on each entry and select Disable device using the context menu. Repeat this process until you disable all the drivers under this category
- Restart your PC
Solution 5. Repair corrupted files
- Press Windows + X keys altogether to launch the Power menu
- Select Run option on the list and type cmd in the text box
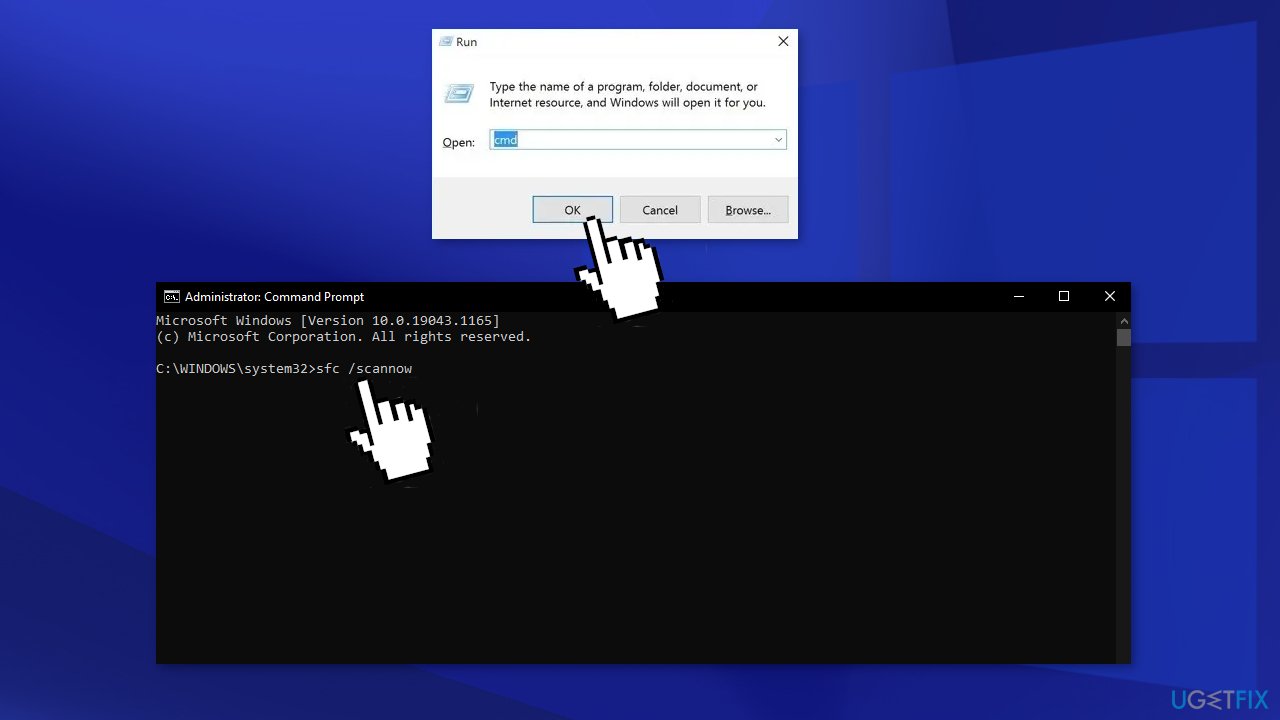
- Now press Ctrl + Shift + Enter to open Command Prompt as Admin
- If the UAC dialog appears up, click Yes to authorize the access
- On the elevated console, type the following command, and press Enter:
sfc /scannow
- Reboot
Solution 6. Uninstall recently installed applications
- Launch Control Panel
- Proceed to Programs & Features
- The system will land on the page where you can uninstall or change a program
- Select the recently installed program, and hit the Uninstall button
- When the confirmation window, appears, hit Uninstall again
- Press Windows + X, and select Apps & Features
- On the succeeding page, scroll below and find the recently installed programs
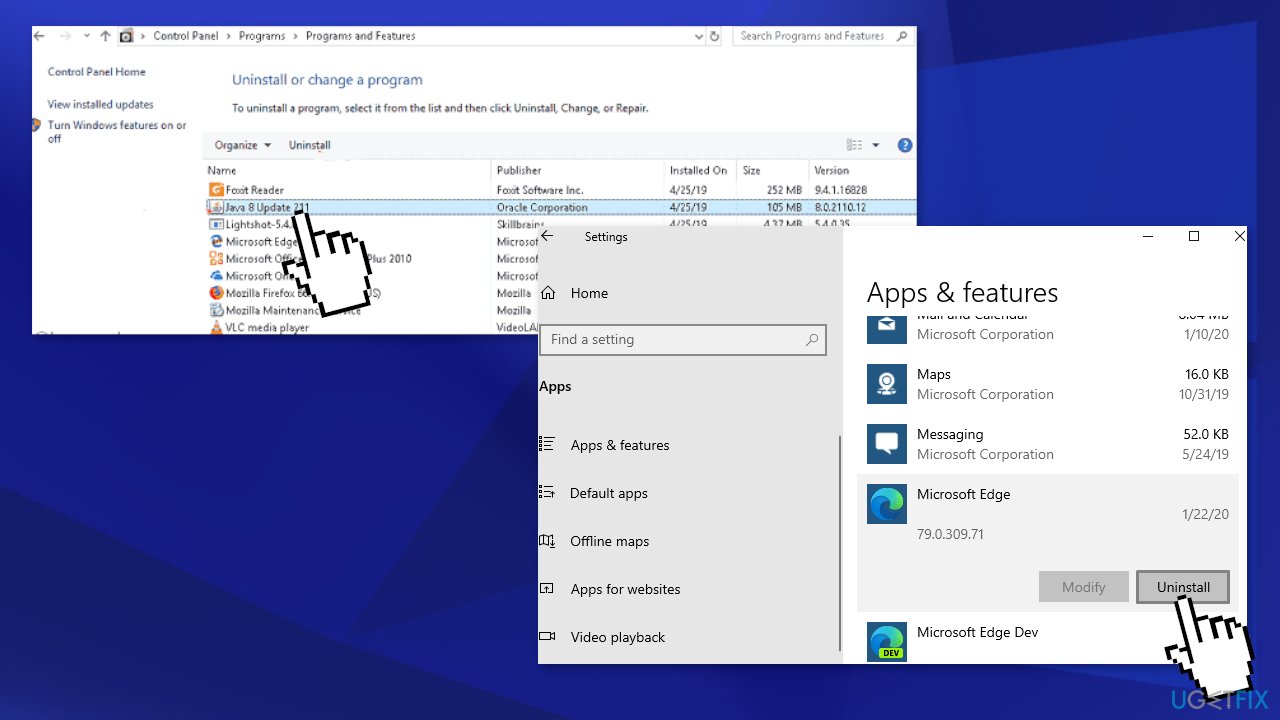
- Click to expand an application and hit Uninstall
Solution 7. Reset Windows
- Navigate to Settings and select Update & Security
- Click Recovery
- Click on Reset this PC
- Click Get started under Reset this PC
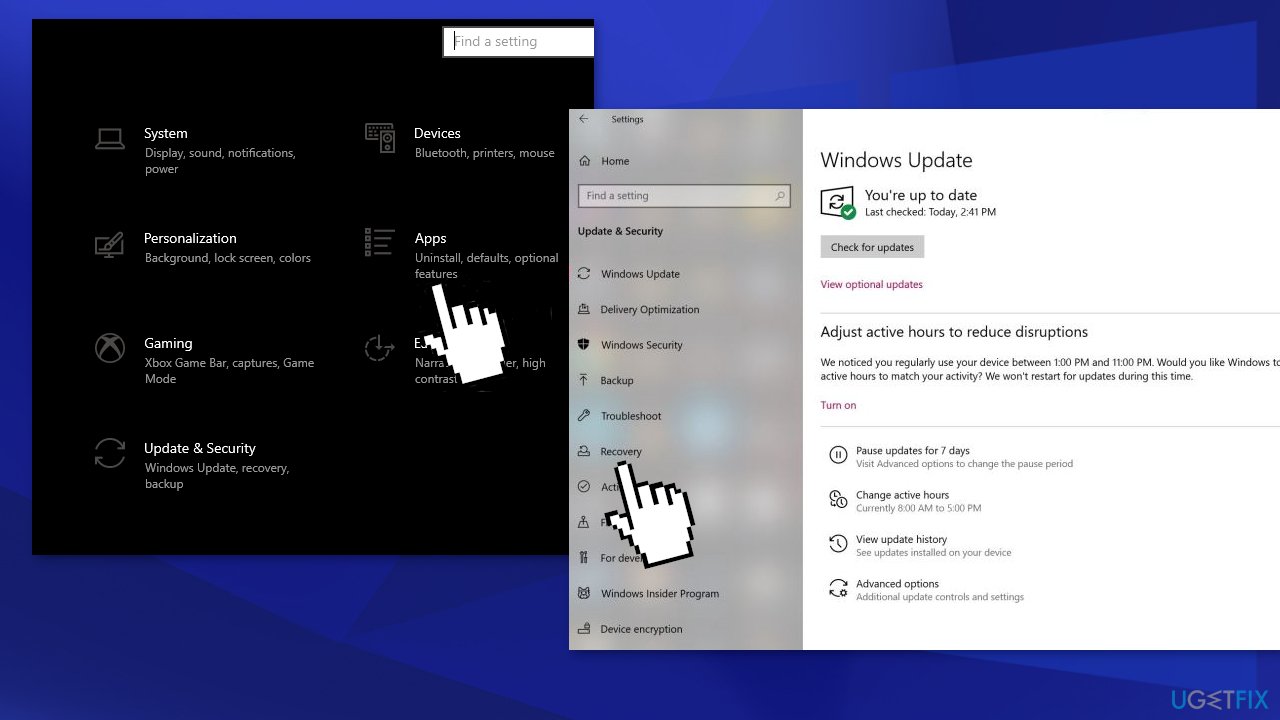
- Click either Keep my files or Remove everything, depending on whether you want to keep your data files intact. If not, Remove everything will do as it says: delete all of your files, photos, and programs. Either way, all of your settings will return to their defaults and apps will be uninstalled
- Click Next if Windows warns you that you won't be able to roll back to a prior version of the OS
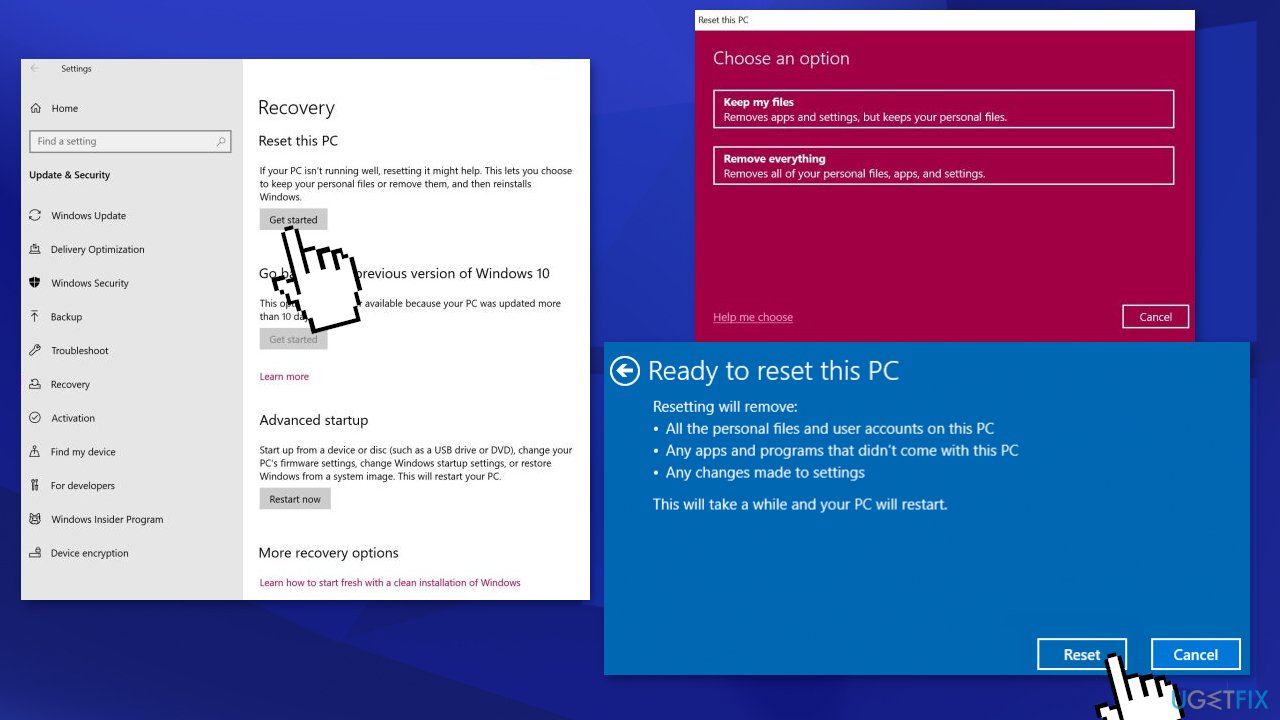
- Click Reset when prompted; Windows will then restart and take several minutes to reset itself
Bottom line
This article provides seven methods to fix the Windows 11 upgrade error 0xC1900101 - 0x60016, including checking for incompatible devices and ensuring sufficient free space. If none of these steps work, the last option is to reset the system entirely.
Frequently asked questions
This error typically occurs due to incompatible drivers or hardware issues that prevent the upgrade process from completing successfully on Windows 11.
To fix this error, ensure all your drivers are updated, especially for graphics and network devices, and disconnect any unnecessary peripherals before attempting the upgrade again.
Yes, you can use the PC Health Check tool provided by Microsoft to verify if your system meets the requirements for Windows 11 and identify any potential compatibility issues.




Report an issue
What's wrong with this guide? We review every report and update or remove content.
Report received — thank you. We'll review and fix it.
You need a free account to submit a report.
Be the first to comment