How to fix
Windows could not start the remote desktop service error
on Windows
Resolve the "Windows could not start the remote desktop service" error quickly and easily on Windows 10 or Windows 11. Expert-tested solutions await!

What causes How to fix Windows could not start the remote desktop service error?
- Corrupted system files
- Issues with system restore
- Problems with the remote desktop service configuration
- Background processes interfering with remote desktop service
- Missing or damaged registry entries
Repairs Windows system files, removes malware, and restores a clean OS state — without reinstalling.
Hello. I tried to connect to another computer remotely but I got an error "Windows could not start the remote desktop service." How do I fix this? Any tips would be appreciated.
Windows is one of the most popular operating systems in the world. People love it for its user-friendly interface, customization abilities, built-in troubleshooters, and much more. However, it relies on thousands of processes running in the background to work smoothly. If even one of these processes goes rogue, people can experience issues when trying to use a Windows machine.
Recently, users have reported a "Windows could not start the remote desktop service" error. Remote desktop service is one of the components of Microsoft Windows that allow a user to initiate and control an interactive session on a remote computer or virtual machine over a network connection. The error may appear when users are trying to connect to another device remotely. The error is known to appear on Windows 10 and Windows 11.
In this guide, you will find 6 steps that could help you fix Windows could not start the remote desktop service error. However, troubleshooting can be a lengthy process, so you can also scan your machine with a maintenance tool like [d1]. It can fix various system errors, BSODs,[ref en-1] corrupted files, and registry[ref en-2] issues. Otherwise, follow the instructions below.
Solution 1. Repair Corrupted System Files
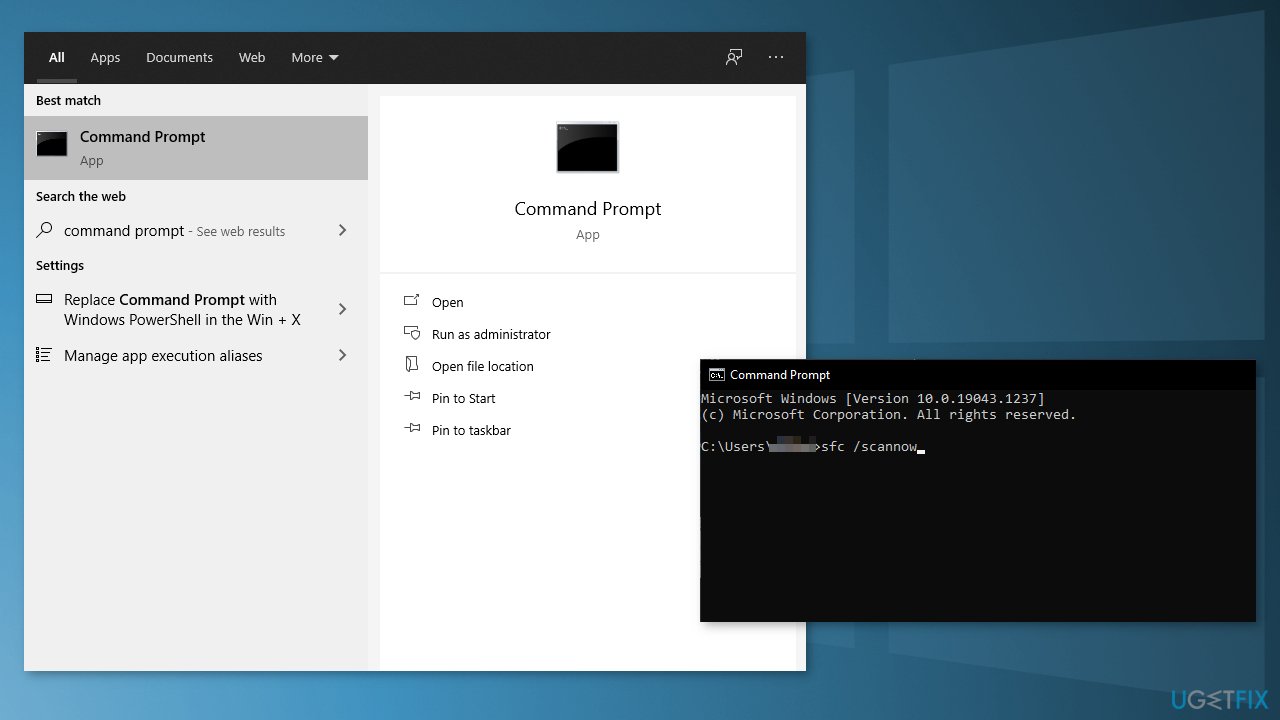
Use Command Prompt commands to repair system file corruption:
- Open Command Prompt as administrator
- Use the following command and press Enter:
sfc /scannow
- Reboot your system
- If SFC returned an error, then use the following command lines, pressing Enter after each:
DISM /Online /Cleanup-Image /CheckHealth
DISM /Online /Cleanup-Image /ScanHealth
DISM /Online /Cleanup-Image /RestoreHealth
Solution 2. Run System Restore
- Launch Control Panel, select System and Security
- Click on System from the list
- Choose System Protection
- Head over to System Protection tab and click on System Restore
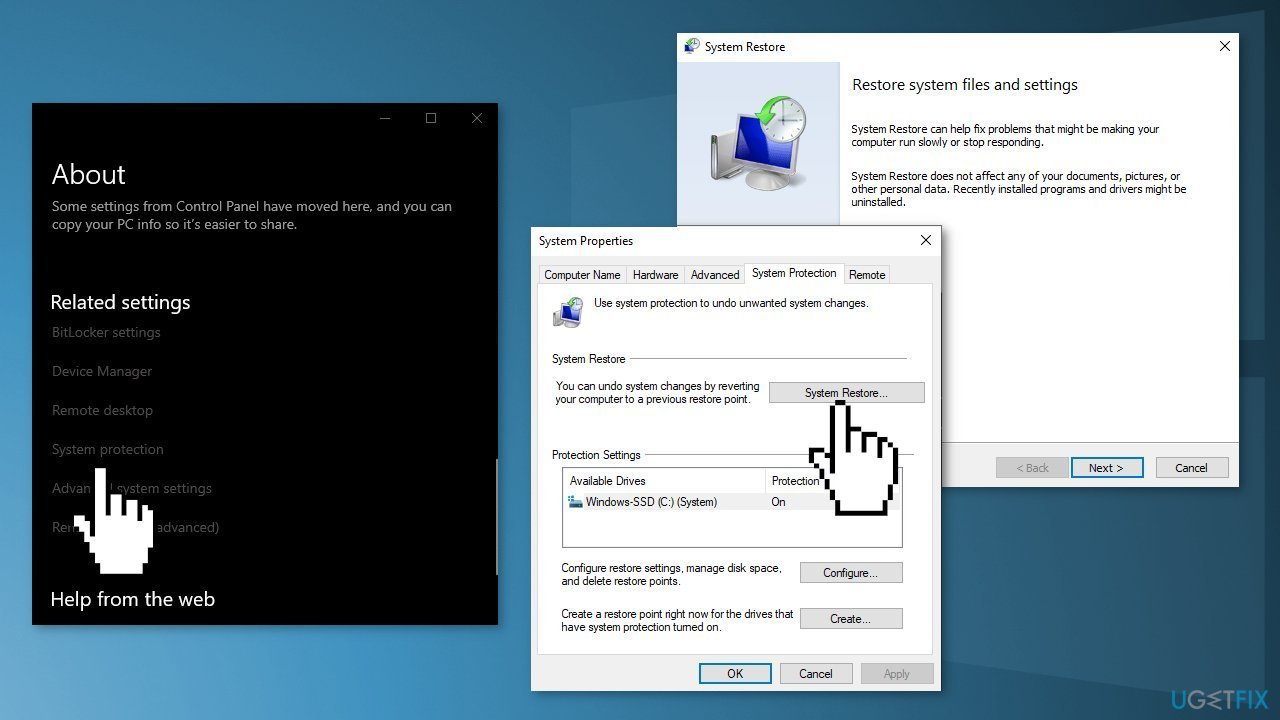
- Follow the on-screen instructions to proceed. Your screen should display a confirmation prompt, choose Recommend Restore
- Once the process is completed, your operating system will move to a previous point in time
Solution 3. Disable IPv6 Protocol
- Use the shortcut, Windows Key + X to open the Control Panel
- Open Network and Internet
- Open Network and Sharing Center
- Click Change Adapter Settings
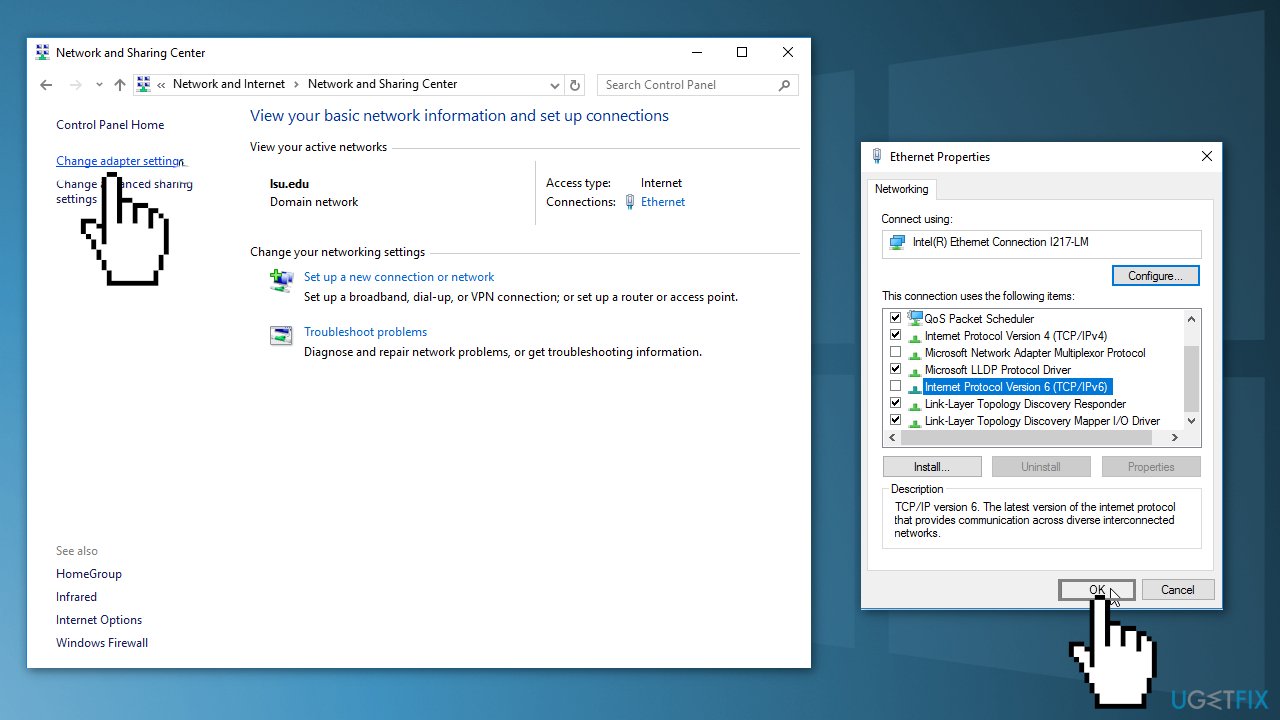
- Right-click your connection and go to Properties
- Uncheck the box next to Internet Protocol Version 6 (TCP/IPv6) to disable it
- Select OK to confirm the change
Solution 4. Enable Remote Assistance
- Right-click on the This PC icon on your desktop and then click Properties
- Click Remote settings
- In the System Properties window, go to the Remote tab and make sure the Allow Remote Assistance connections to this computer check box is checked
- Next, click Advanced
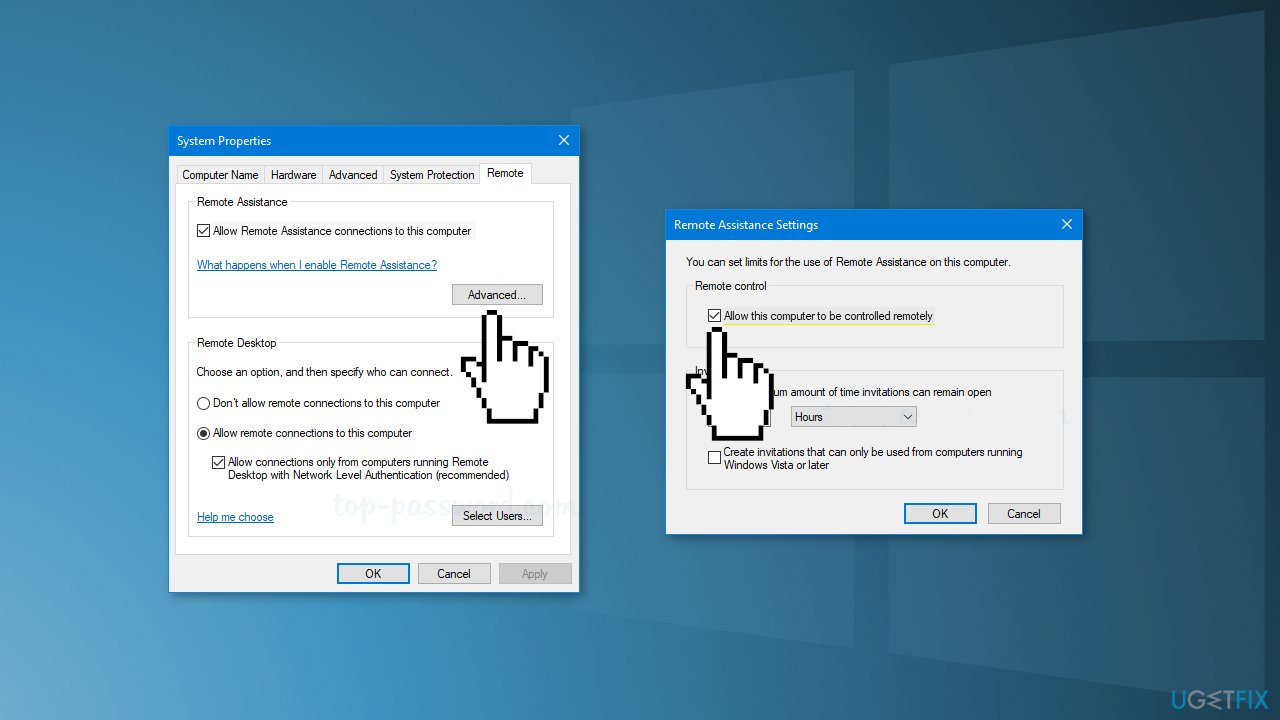
- If you clear the Allow this computer to be controlled remotely checkbox, the helpers can see your screen, but not take control of your PC
- Click OK to save your changes
Solution 5. Disable Custom Scaling
- Press Windows key + I to open the Settings
- Click on System from the options to your left and then click on Display
- Select Turn off custom scaling and sign out
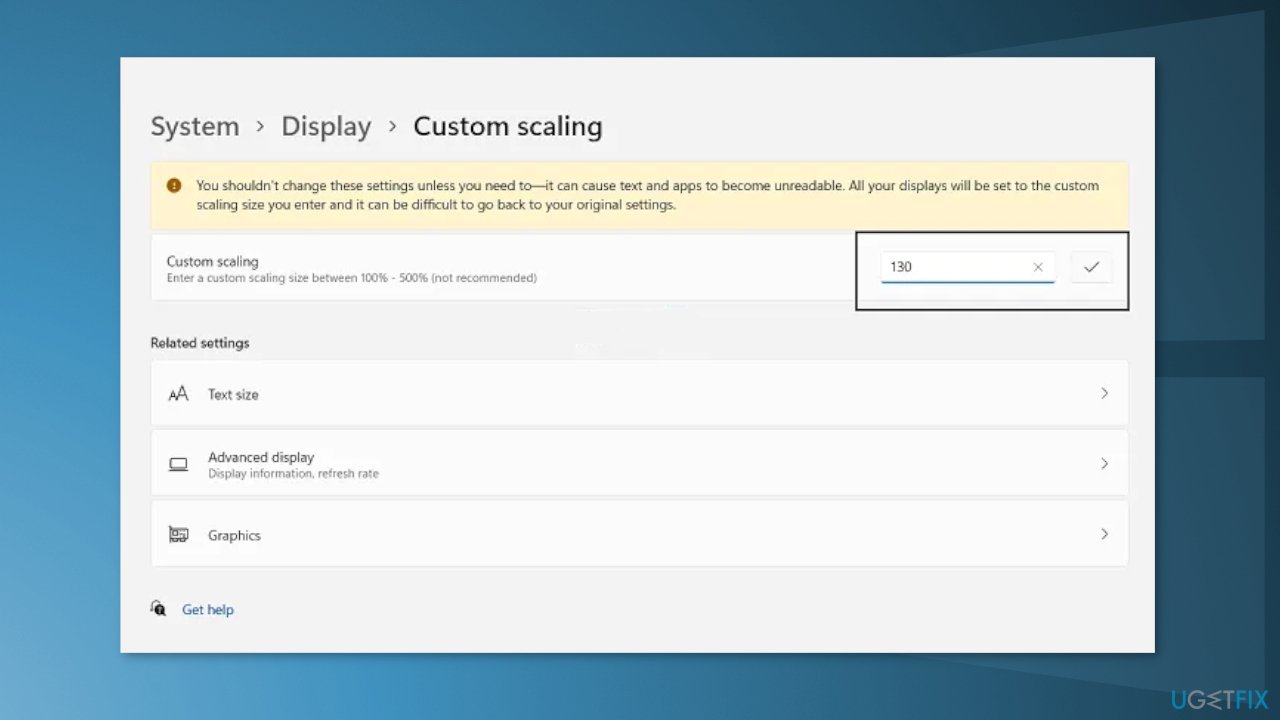
- This will sign you out and the new settings will be saved
Solution 6. Create a new User Account
- Right-click the Windows Start menu button
- Select Control Panel and go to User Accounts
- Click on Manage another account
- Select Add a new user in PC settings
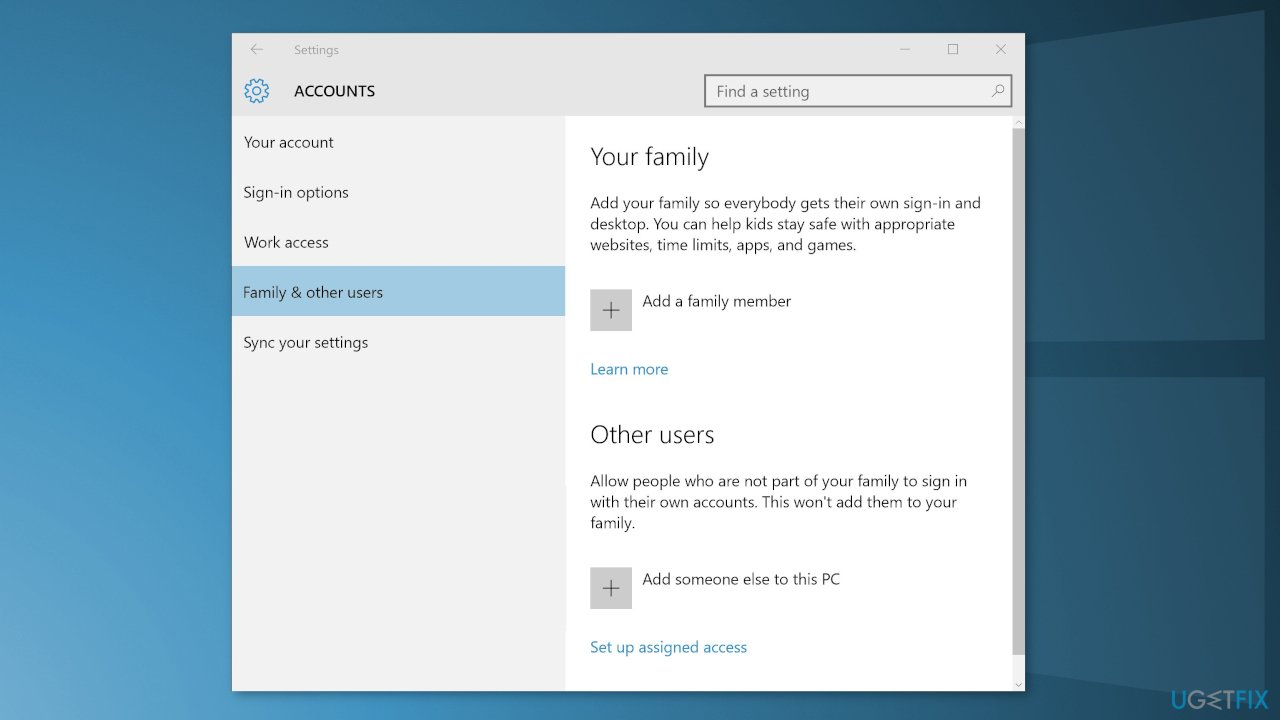
- Use the Accounts dialog box to configure a new account
Bottom line
To fix the 'Windows could not start the remote desktop service' error, you can repair corrupted system files using Command Prompt, run a system restore, or check the remote desktop service configuration. If these solutions do not resolve the issue, consider using a maintenance tool to scan your machine for further problems.
Frequently asked questions
This error can occur due to misconfigured services, corrupted system files, or issues with the Remote Desktop Services configuration in Windows 10.
You can restart the Remote Desktop Services by running 'services.msc', locating 'Remote Desktop Services', right-clicking it, and selecting 'Restart'.
If it's disabled, you can set it to 'Automatic' by right-clicking on 'Remote Desktop Services' in 'services.msc', selecting 'Properties', and changing the Startup type.



Report an issue
What's wrong with this guide? We review every report and update or remove content.
Report received — thank you. We'll review and fix it.
You need a free account to submit a report.
Be the first to comment