How to fix
Windows installation error 0x8007025D
on Windows
Resolve the Windows installation error 0x8007025D efficiently with expert tips and solutions for Windows 10 and 11. Fixed in minutes!

What causes How to fix Windows installation error 0x8007025D?
- Broken ISO image files
- Malfunctioning memory
- Faulty hardware
- Corrupt drivers
- Corrupted update cache
Repairs Windows system files, removes malware, and restores a clean OS state — without reinstalling.
Hello. I tried to clean install Windows but it failed with 0x8007025D error code. What should I do to fix this?
Many customers are frustrated by Windows installation error 0x8007025D, especially when trying to do a clean install of the operating system. Nevertheless, this error number is not limited to clean installs; it can also appear in other situations and impede Windows from operating without a hitch. When installing Windows via USB or during regular Windows updates, users frequently run across this error and get a message saying the system is unable to install the necessary files.
The occurrence of the setup error 0x8007025D seems to be confined to specific situations, pointing towards potential triggering factors. Among the factors that have been found to contribute to this issue include broken ISO image files, malfunctioning memory, faulty hardware, corrupt drivers, and corrupted update cache. This error's appearance draws attention to the possible harm it might do to users by interfering with the Windows operating system's regular installation and update procedures.
Effective troubleshooting of error 0x8007025D requires an understanding of the underlying issues. When faced with this issue, users may need to investigate remedies for defective hardware, driver conflicts, memory difficulties, damaged update caches, and verify the integrity of the ISO image file used for installation. Due to the error's complex nature, a thorough method must be used to pinpoint and fix the particular problem that is impacting every user.
In this guide, you will find 4 steps that should help you fix Windows installation error 0x8007025D. You can also run a maintenance tool like [d1] that can fix most system errors, BSODs,[ref en-1] corrupted files, and registry[ref en-2] issues, or clear cookies and cache[ref en-3] automatically. Otherwise, follow the step-by-step instructions provided below.
Method 1. Run the Windows Update Troubleshooter
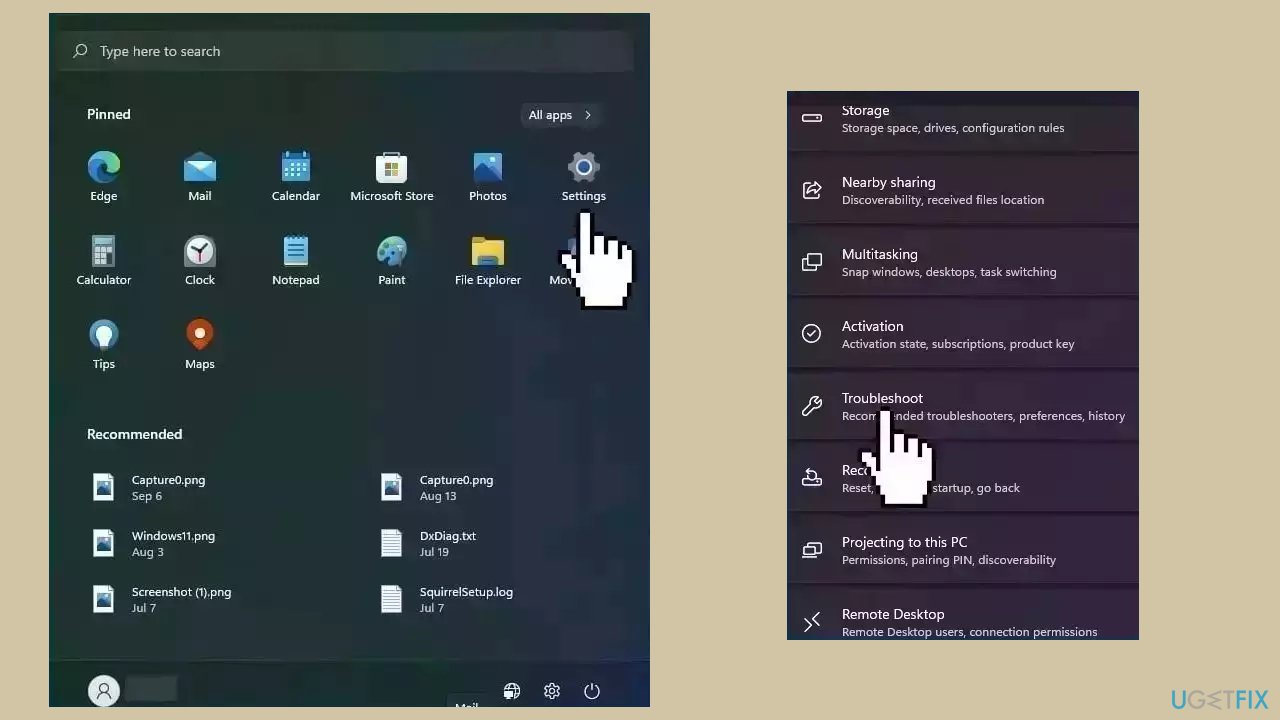
- Press the Windows key + I to open Windows Settings.
- Within the Windows Settings, navigate to the System tab.
- Scroll down the options in the System tab and locate Troubleshoot; click on it.
- Inside the Troubleshoot screen, find and select the Other troubleshooters option.
- A list of various troubleshooters will be displayed.
- Look for the Windows Update troubleshooter in the list.
- Click on the Run button associated with the Windows Update troubleshooter.
- Allow the troubleshooter to complete its process.
- Once the troubleshooter finishes, check your computer to determine if the issue has been resolved.
Method 2. Run Windows Memory Diagnostic Tool
If the 0x8007025D error is caused by a faulty memory issue, conduct a memory diagnostic for your RAM. If any bad RAM is detected, replace it with a new module and attempt the installation again.
- Press the Windows key + R to open the Run dialog box.
- Type mdsched.exe and press Enter.
- The Windows Memory Diagnostic window will open.
- In the Memory Diagnostic window, click on Restart now and check for problems (recommended).
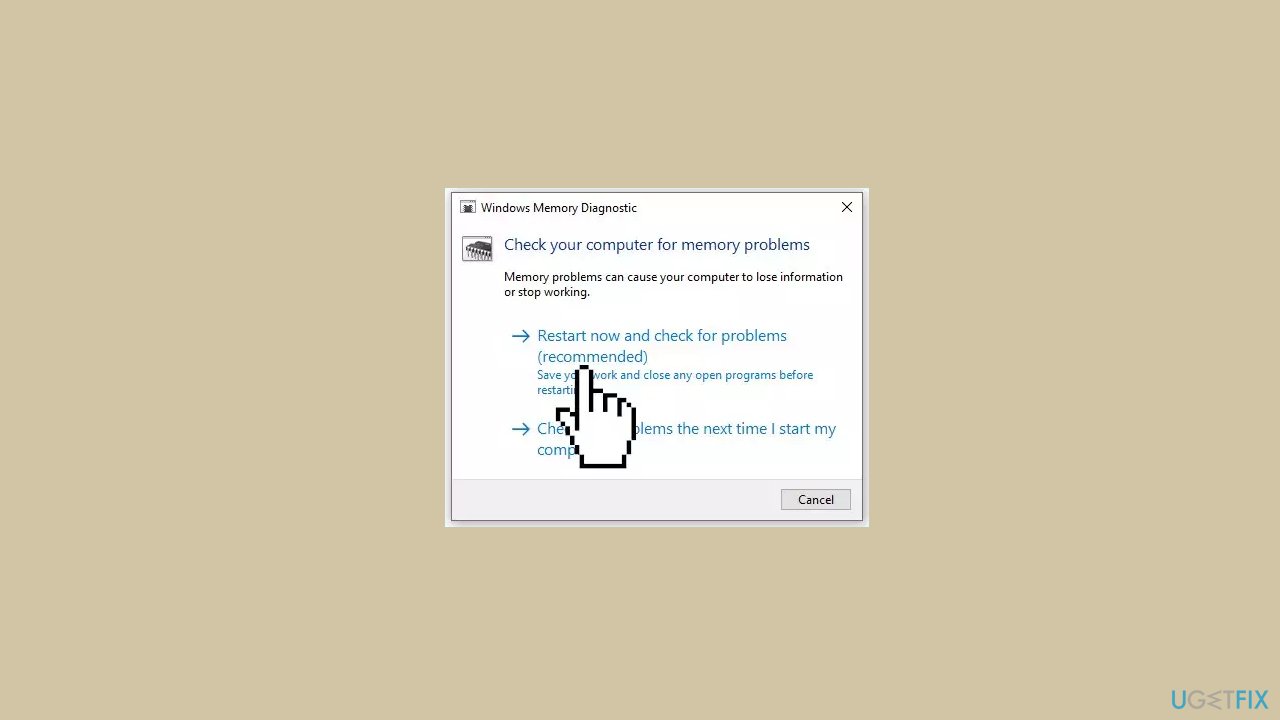
- The computer will restart, and the memory test tool will launch.
- A blue screen will display, indicating the progress of the memory test.
- Wait for the test to complete; the duration depends on your memory configuration.
- Once the test concludes, Windows will resume starting up.
- After a few minutes, a pop-up may appear displaying the test results.
Method 3. Reduce the Drive Size and Format It
Certain users encountered a failed Windows installation when using a 480GB SSD. However, success was achieved by switching to a smaller SSD, like installing Windows on a 125GB partition. Consider changing to a smaller drive size and attempting the steps accordingly.
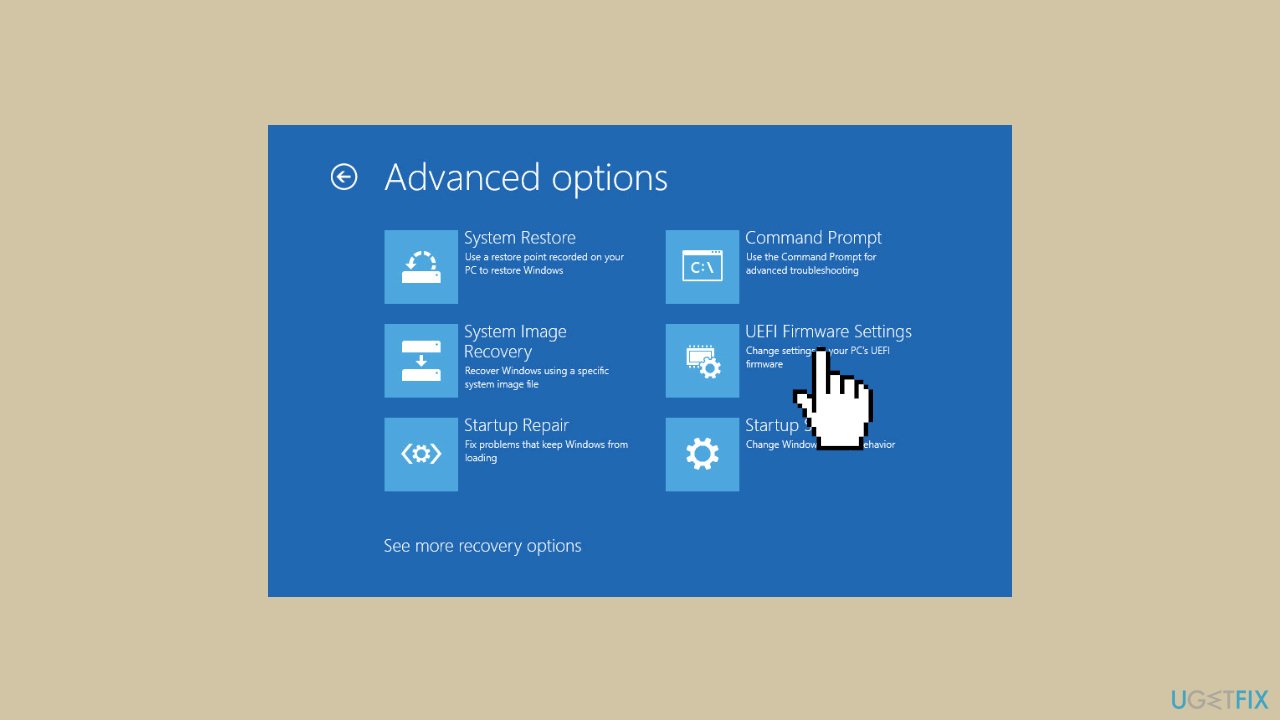
- Enter Windows Recovery.
- Click on Troubleshoot.
- Select Advanced options.
- Choose UEFI Firmware Settings and click Restart.
- Enter the BIOS.
- Locate the Boot tab or System Configuration tab.
- Enable Boot Mode to Legacy supported.
- Confirm choices and exit, following on-screen instructions.
- On the Boot Manager page choose USB hard drive (UEFI).
- Select your OS version.
- Wait for files to load.
- In the Windows Setup window click on the custom option.
- Choose the desired partition.
- Click on New > Apply.
- Click Format for both new and primary partitions.
- Click Next to complete the installation process.
Method 4. Disable Antivirus Temporarily
Antivirus software is designed to safeguard your computer against virus infections. However, its robust features may occasionally lead to conflicts with operations like Windows updates or software installations. To address this, temporarily disable both your third-party antivirus and Windows Defender, and then proceed with the installation.
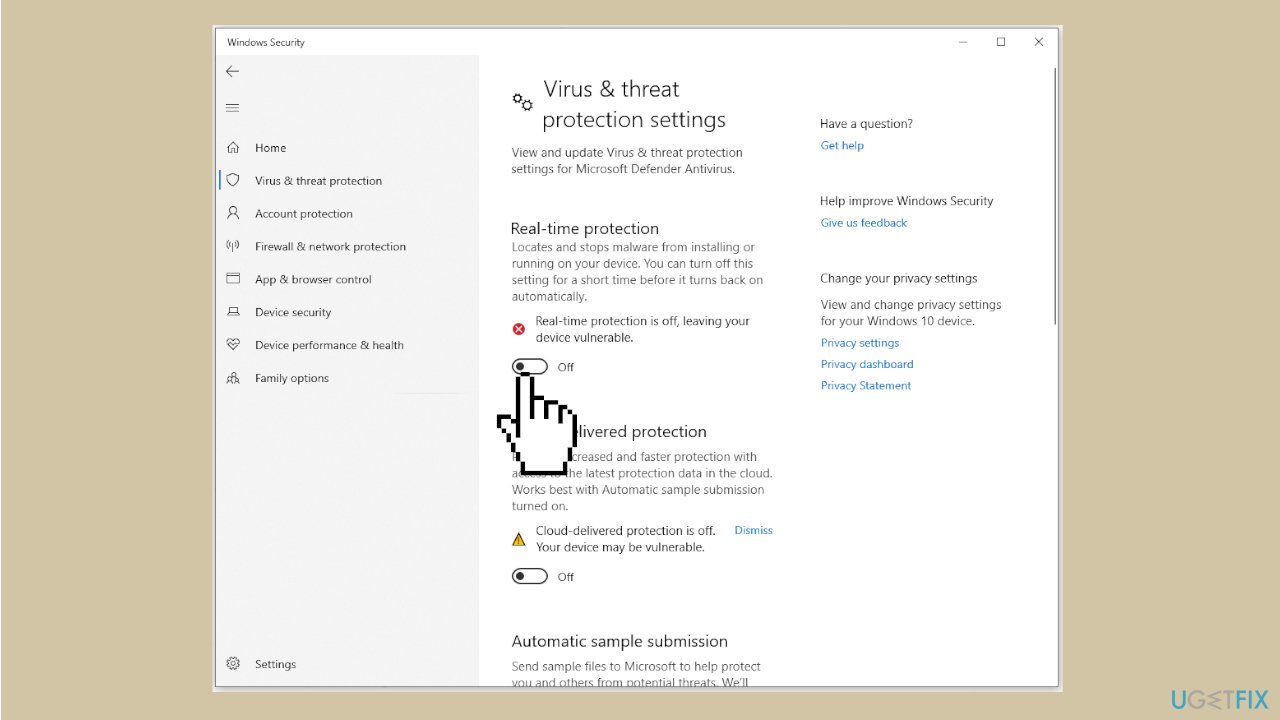
- Open the Search bar and type Virus & threat protection.
- Select the corresponding result to open it.
- Under Virus & threat protection, click on Manage settings.
- Turn off the option for Real-time protection.
Bottom line
To fix Windows installation error 0x8007025D, users should investigate defective hardware, driver conflicts, memory issues, and verify the integrity of the ISO image file. Running the Windows Update Troubleshooter is also recommended. If these methods do not resolve the issue, consider using a maintenance tool or seeking further assistance.
Frequently asked questions
This error typically occurs due to issues with the installation media, corrupt files, or hardware problems such as a failing hard drive. Ensuring that your installation media is properly created and testing your hardware can help resolve this issue on Windows 10 or Windows 11.
To troubleshoot this error, you can try using a different USB drive for installation, check your hard drive for errors, or adjust your BIOS settings. Additionally, ensure that your system meets the requirements for Windows 10 or Windows 11 installation.
While there is no guaranteed way to bypass this error, you can attempt to change the installation USB port or use a different USB drive, as well as ensuring that your system's RAM is functioning correctly. If the problem persists, consider performing a clean installation of Windows 10 or Windows 11 after addressing any hardware issues.




Report an issue
What's wrong with this guide? We review every report and update or remove content.
Report received — thank you. We'll review and fix it.
You need a free account to submit a report.
Be the first to comment