How to fix
Windows Modules Installer Worker high CPU usage
on Windows
Solve high CPU usage from Windows Modules Installer Worker in Windows 10 and 11. Get expert-tested solutions to optimize your performance today!

What causes How to fix Windows Modules Installer Worker high CPU usage in Windows?
- Processing of a large Windows update
- Corrupted system files
- Glitches in the update process
- Conflicts within the system's architecture
Repairs Windows system files, removes malware, and restores a clean OS state — without reinstalling.
Hello, I have been having issues with my CPU usage and noticed that a huge amount of it is used by Windows Modules Installer Worker. Any idea what is causing it and how to resolve it?
The Central Processing Unit (CPU) is a critical computer component responsible for executing program instructions. CPU usage, therefore, becomes a pivotal metric in assessing the health and efficiency of a PC. It represents the amount of processing power of various applications and system processes used at any given time.
A balanced CPU usage provides optimal functionality for a computer, where resources are adequately allocated without overburdening the processor. However, in some cases, certain processes may exhibit abnormally high CPU usage, which can significantly impact system performance and stability.
Windows Modules Installer Worker high CPU usage is a problem that quite a few users have to deal this. This component plays a key role in handling Windows updates and optional component installation, modification, and removal.
Its primary function is to ensure that your system remains up-to-date with the latest security patches and performance improvements. Under normal circumstances, this process operates in the background, consuming a moderate to low amount of CPU resources.
However, Windows Modules Installer Worker high CPU usage was spotted by some. This spike in usage can be attributed to several factors, including the processing of a large or significant Windows update, which demands considerable computing power. In other cases, it might indicate underlying issues such as corrupted system files or glitches in the update process itself.
Usually, allowing the Windows Modules Installer Worker to complete its task would resolve the issue automatically, especially if it's related to a recent update. However, if the problem persists, it might indicate deeper system issues. These could range from corrupted Windows files to conflicts within the system's architecture. In such scenarios, exploring the system troubleshooting options we provide below is advised.
If you would rather go for a more hands-off approach, we recommend employing [d1] PC repair tool, which is designed to find corrupted system components and restore them to their previous state. It is also capable of cleaning various junk files, removing trackers from the system, and fixing registry issues, DLL errors, BSODs, etc.
Fix 1. Run the Windows Update Troubleshooter
This tool is designed to identify and fix common issues associated with Windows updates. It scans the system and automatically applies necessary fixes, potentially resolving the high CPU usage caused by update-related problems.
- Type Troubleshoot in Windows search and press Enter.
- Select Additional troubleshooters/Other troubleshooters.
- Find Windows Update from the list.
- Click it and select Run the troubleshooter/Run.
- Restart your PC when the process is finished.

Fix 2. Perform a Clean Boot
Initiating a Clean Boot starts Windows with minimal drivers and startup programs. This helps in identifying if background applications are causing the issue.
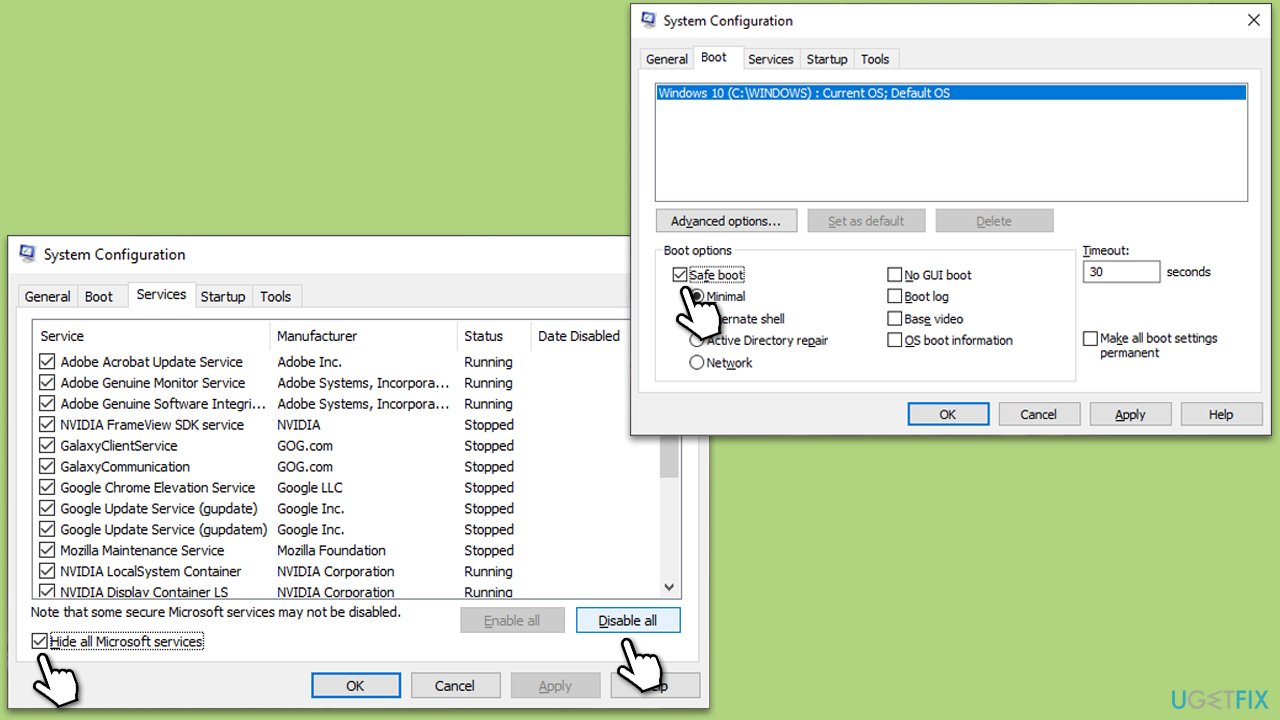
- Press Win + R, type msconfig, then press Enter.
- Select the Services tab and tick the Hide all Microsoft services checkbox.
- Pick Disable all.
- Go to the Startup tab and click Open Task Manager.
- Here, right-click on each of the non-Windows entries and select Disable.
- Close down the Task Manager.
- Go to the Boot tab and tick the Safe boot option.
- Reboot your system.
- If the problem is gone, it means that background applications are causing the issue. Try enabling half of them and starting the PC, then checking whether the issue has been resolved. Then continue this process until you identify the culprit.
Fix 3. Check for system file corruption
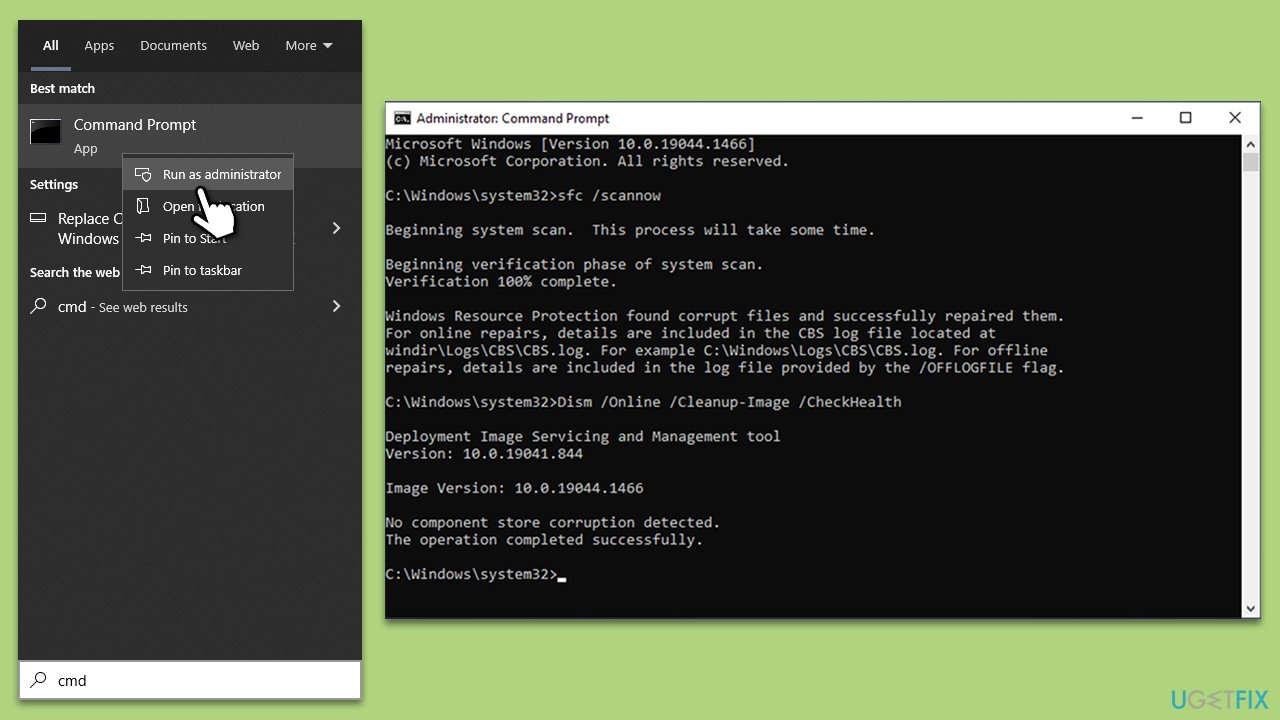
Corrupted files might often cause various malfunctions, including unprecedented CPU usage of certain processes. Running SFC and DISM scans can usually address this.
- Type cmd in Windows search.
- Right-click on Command Prompt and select Run as administrator.
- Type in the following command and press Enter:
sfc /scannow - When done, run the following commands as well:
dism /online /cleanup-image /scanhealth
dism /online /cleanup-image /checkhealth
dism /online /cleanup-image /restorehealth
(Note: if you get an error executing this last command, add /Source:C:\RepairSource\Windows /LimitAccess to it and try again). - Restart your system.
Fix 4. Update Windows manually
Sometimes, manually updating Windows can resolve issues with the Windows Modules Installer Worker high CPU.
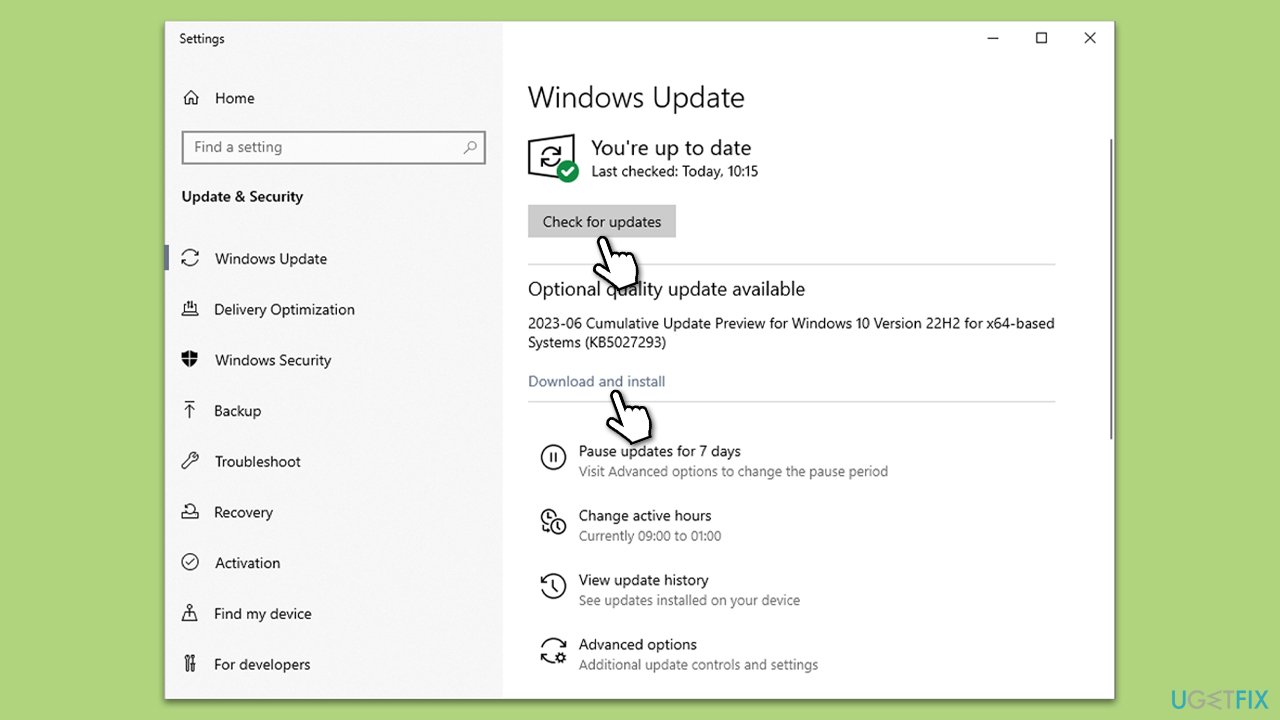
- Type Updates in Windows search and press Enter.
- Here, click Check for updates.
- Wait till all the files are downloaded and installed.
- If optional updates are available, install them too.
- Finally, restart your computer to implement the changes.
Fix 5. Uninstall the most recent update
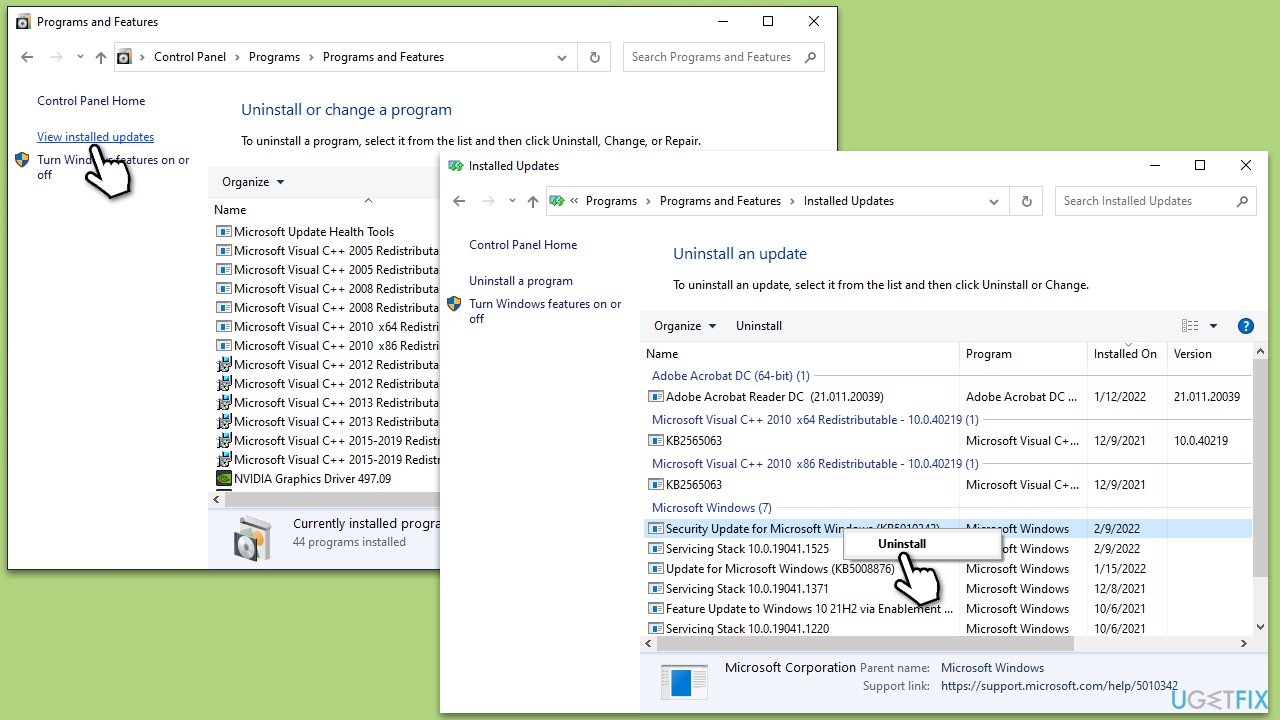
If your system has all the recent updates installed, you can try uninstalling them. Note that this is only possible for a limited time after the latest update is applied.
- Type Control Panel in Windows search and press Enter.
- Select Programs > Uninstall a program.
- Click on View installed updates on the left side of the window.
- Sort all the updates by date.
- Right-click on the most recent update and select Uninstall.
- Proceed with on-screen instructions.
- Then, type Updates in Windows search and press Enter.
- Click Pause the updates for 7 days (in Windows 11, you can pick a different time period).
- Install updates only once the issue is addressed by Microsoft.
Fix 6. Disable automatic updates
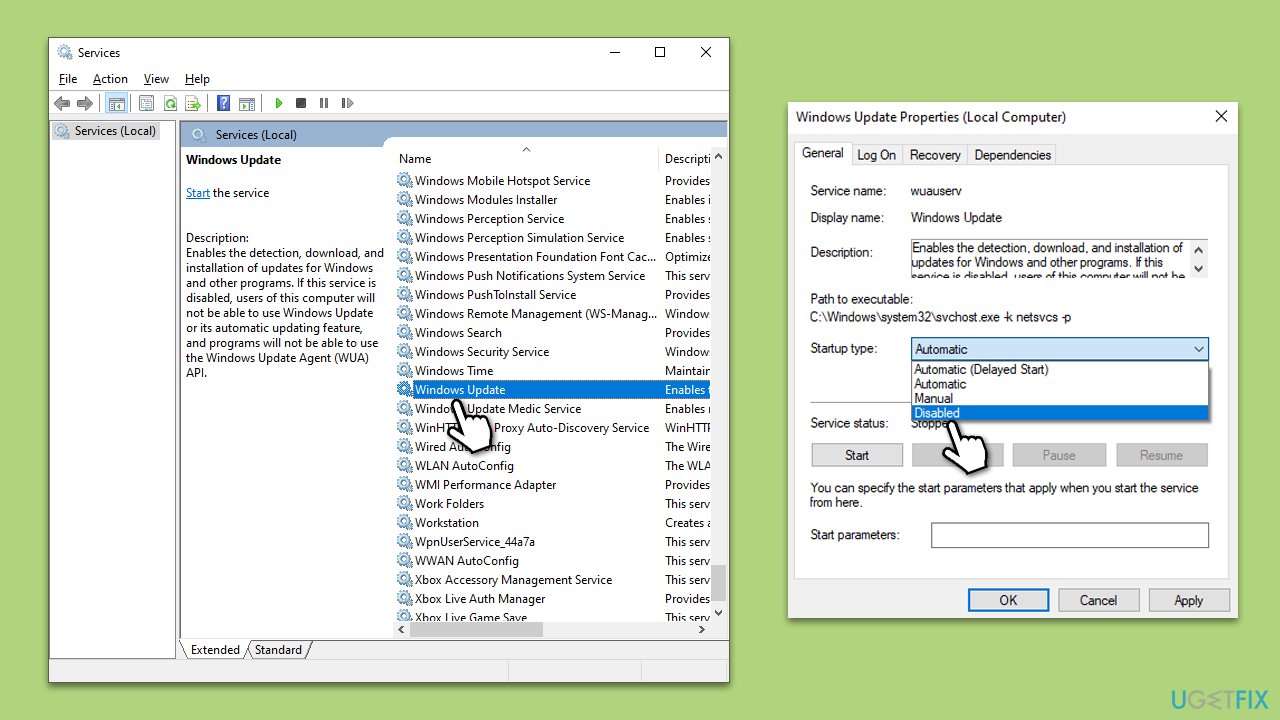
Temporarily disabling automatic updates can help in managing CPU resources. Note that this is a temporary solution, as Windows updates are critical for system's security and stability. Once the issue is addressed by Microsoft, revert this change.
- Type Services in the Windows search bar and hit Enter.
- Scroll down to find the Windows Update service and double-click it.
- In the Properties window, click on the drop-down menu (under Startup type) and pick Disabled.
- Click Apply and OK.
Fix 7. Run Disk Cleanup
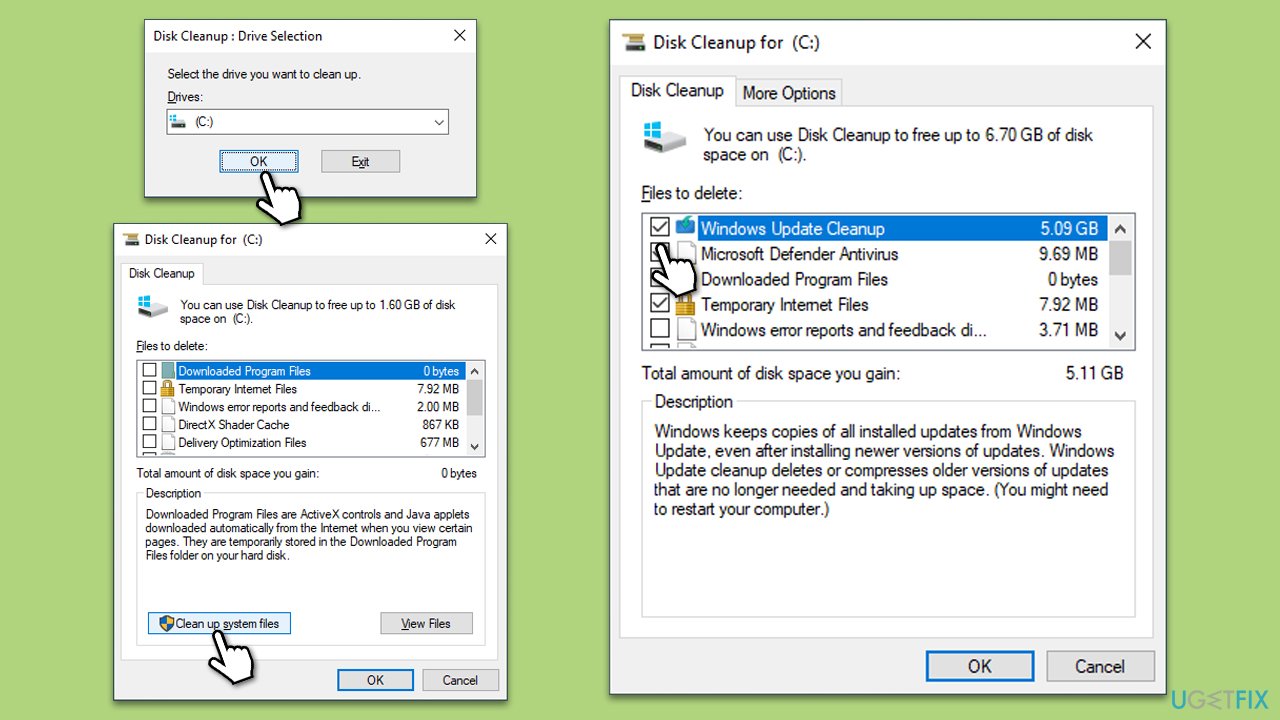
Disk Cleanup helps in removing temporary files and system files, which might be causing high CPU usage.
- Type Disk Cleanup in Windows search and hit Enter
- If your Windows is installed on drive C, pick it from the list (should be by default) and press OK
- Click Clean up system files
- Select your main disk again and click OK
- Here, select the largest portions of the data used - these typically include Temporary Internet Files, Windows Update, Temporary Files, Recycle Bin, Delivery Optimization Files, and others.
- Click OK and wait for the cleanup process to finish.
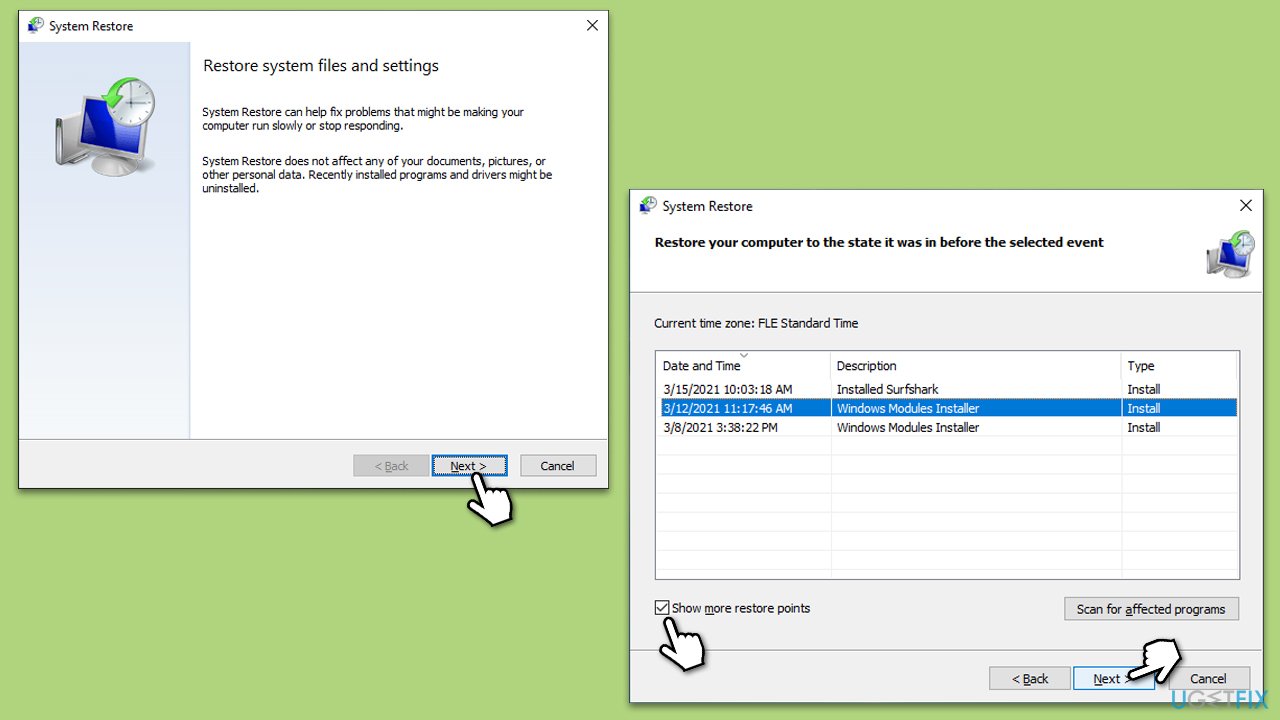
Fix 8. Restore Windows to an earlier point
System Restore can revert system files and settings to an earlier point, potentially resolving high CPU usage issues.
- Type in Create a Restore point in Windows search and hit Enter.
- In the System Protection tab, pick System restore.
- Click Next.
- Click Show more restore points (if available).
- Pick the time before the problem occurred and click Next.
- Your computer will reboot.
Bottom line
To resolve high CPU usage by Windows Modules Installer Worker, allow the process to complete, troubleshoot system issues, or use a PC repair tool to fix corrupted components. If the problem persists after these steps, further investigation into deeper system issues may be necessary.
Frequently asked questions
High CPU usage by Windows Modules Installer Worker in Windows 10 is often caused by ongoing updates or system maintenance tasks. This process is responsible for installing and managing Windows updates, which can lead to increased CPU load during these activities.
To reduce CPU usage of Windows Modules Installer Worker in Windows 11, you can try pausing Windows updates temporarily or scheduling them for a time when you're not using your computer. Additionally, ensuring that your system is fully updated can help minimize the workload.
Disabling Windows Modules Installer Worker in Windows 10 is not recommended as it can prevent important updates from being installed, potentially compromising system security and performance. Instead, consider managing your update settings to alleviate high CPU usage.




Report an issue
What's wrong with this guide? We review every report and update or remove content.
Report received — thank you. We'll review and fix it.
You need a free account to submit a report.
Be the first to comment