How to fix
Disable or enable File History
on Windows
Easily manage File History settings in Windows 10 or 11 to protect your files. Optimize your system with expert-tested tips and guidance.
Why does How to disable or enable File History in Windows occur?
- Increasing cybersecurity threats
- Ransomware attacks
- Data theft or encryption from phishing
- Lack of user familiarity with File History
- File History not enabled by default in Windows 10
Repairs Windows system files, removes malware, and restores a clean OS state — without reinstalling.
Hello. I have heard that you can back up files with a Windows tool File History. How can I do that?
With increasing cybersecurity threats, more and more people are looking into ways to keep their data safe. As ransomware[ref en-1] attacks skyrocket in numbers, people want to know how to back up their files. Thousands of people and companies get their data stolen or encrypted after encounters with phishing websites, emails, and other scams that use social engineering techniques.[ref en-3]
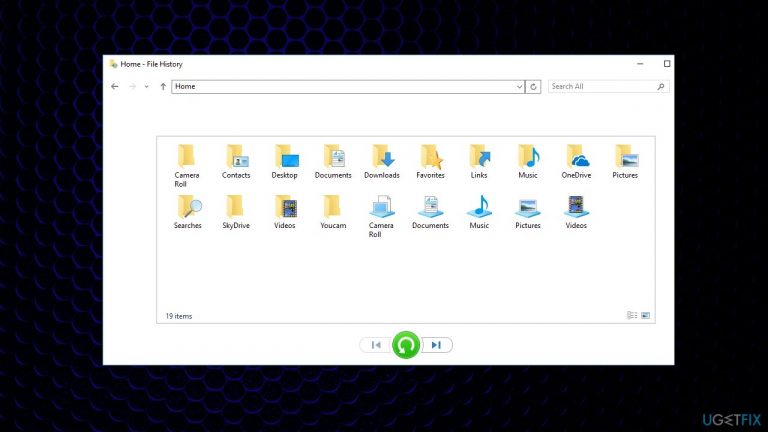
For Windows users, this can be made easy with the File History tool. Unlike the Backup and Restore function, File History automatically backs up your files. Even though the tool will not save all of the files on your PC, it can save data, like photos, videos, documents, libraries, folders to an external or internal drive.
Users can choose at white time intervals the tool will perform the backup, together with additional settings for adding and removing files for backup. File History will also ignore the files that are used by other applications during the backup process.
You can also use other precautionary measures in preserving your data. A tool like [d1] can fix a lot of system errors, file corruption, registry issues, and other complicated PC problems. It will keep the health of your system in good shape and fix the serious damage caused by virus infections, like BSoDs.[ref en-2]
By default, File History is not enabled in Windows 10, so as most users are unfamiliar with it, only a few know how to use it. In this article, you will find a couple of different methods that you can use to access File History, enable or disable it on Windows 10.

Method 1. Windows Settings
- Press the Windows + I keys to open the Windows Settings
- Click on the Update & Security option

- Select the Backup option and click on the Add a drive button to add a drive for backup

- It will show both internal and external drives that can be used for File History backup. Choose the one you want
- Click on more settings
- You can click the Back up now button to start the backup without scheduling. You can also schedule backup with different timing and set the keeping backup time
- Down below you can click on Add a folder under Back up these folders to include folders in File History backup. By default, it will add user folders to the list. You can exclude folders by clicking the Add a folder under the Exclude these folders option. You can also click on the folder and then choose the remove option

- To disable the File History in Windows Settings, go to back up options and click on the Automatically back up my files toggle to turn it off. This will stop the automatic backup
- To completely stop File History, go to more options under the toggle. Scroll down to the bottom and click on the Stop Using Drive button. This will remove the backup drive and disable the Full History backup

Method 2. Control Panel
- Press the Windows + R keys to open the Run dialog
- Type control and press Enter
- Change the View by option to get all the Control Panel Settings
- Click on the File History setting

- Click on the Turn On button to enable the File History backup
- Once the File History backup is enabled you can get access to the additional settings
- You can click the select drive and choose the drive that you want to set for backup

- In the Advanced settings, you can set the backup schedule timing and keeping the time of files

- To disable File History through Control Panel just go to the same File History setting and click on the Turn Off button
Method 3. Local Group Policy Editor
- Press the Windows and R keys to open a Run dialog
- Type gpedit.msc in the box and click Ok
- In the Group Policy Editor, navigate to the following policy:
Computer Configuration\\ Administrative Templates\\ Windows Components\\ File History
- Double-click on the setting named Turn off File History

- Change the toggle from Not Configured to Enabled
- Save the changes, click on Apply button. This will disable the access to the File History feature completely
- To Enable it back, just change the Toggle option back to Not Configured or Disabled

Method 4. Registry Editor
- Press the Windows key and R key to open a Run dialog
- Type regedit and press Enter
- Choose the Yes option for UAC (User Account Control) prompt
- Navigate to the following key in the Registry Editor window:
HKEY_LOCAL_MACHINE\\Software\\Policies\\Microsoft\\Windows\\FileHistory
- In the FileHistory key, create a new value by right-clicking on the right pane and choosing New > DWORD (32-bit) Value

- Name the value as Disabled
- Double-click on the Disabled value and set the value data to 1. This will disable the access to File History completely

- To enable access, you can simply delete the new value or set the value data to 0
Bottom line
To enable or disable File History in Windows 10, you can access it through Windows Settings by navigating to Update & Security and selecting Backup. If you encounter issues, consider using a tool to fix system errors or consult additional resources. If none of these solutions work, further troubleshooting may be necessary.
Frequently asked questions
To disable File History, go to Settings > Update & Security > Backup, and toggle off the 'Automatically back up my files' option.
To enable File History, navigate to Settings > Update & Security > Backup, and click on 'Add a drive' to select a drive for backups.
Yes, you can configure File History settings by going to Control Panel > File History, where you can choose what to back up and set backup frequency.


Report an issue
What's wrong with this guide? We review every report and update or remove content.
Report received — thank you. We'll review and fix it.
You need a free account to submit a report.
Be the first to comment