How to fix
“WLAN extensibility module has stopped” network error
on Windows
Resolve the "WLAN extensibility module has stopped" error in Windows 10 or 11 effortlessly. Enjoy seamless connectivity with expert-tested solutions!
What causes How to fix “WLAN extensibility module has stopped” network error in Windows?
- Malfunction of the WLAN extensibility module
- Outdated drivers
- Corrupted system files
- Incorrect system preferences
- Issues with network adapter settings
Repairs Windows system files, removes malware, and restores a clean OS state — without reinstalling.
Hello. My Windows PC is not connecting to the internet, and I get the "WLAN extensibility module has stopped" error. Is there a way to fix this?
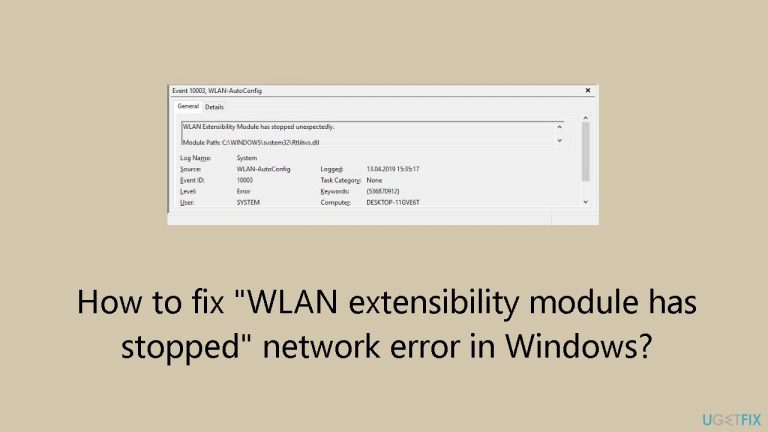
The Windows network error "WLAN extensibility module has stopped" can seriously impair a device's ability to use wireless network connections. To manage and enable these connections, the WLAN extensibility module is essential. Several connectivity problems may arise when this module has a malfunction and stops working correctly, making it challenging for users to create and keep a reliable wireless connection.
Users who encounter this error may have trouble establishing new connections to Wi-Fi networks or may experience sporadic outages in their current connections. This may show up as inconsistent or sluggish internet performance, frequent disconnections, or complete inability to connect to wireless networks. For people who depend on wireless access for business, communication, or other online activities, the effects are most noticeable.
Beyond only being inconvenient, the "WLAN extensibility module has stopped" error can also cause productivity loss, impede online collaboration, and aggravate users who depend significantly on a reliable internet connection. In instances where a steady and dependable network connection is critical, such as during virtual meetings, file transfers, or streaming, this error can be extremely irritating.
Addressing the root reasons associated with the WLAN extensibility module is frequently necessary to resolve the problem. Although there are several possible fixes, to get back to normal activities, users might need to investigate troubleshooting techniques including changing system preferences, updating drivers, or reinstalling the module.
In this guide, you will find 7 steps that should help you fix "WLAN extensibility module has stopped" network error in Windows. You can also run a maintenance tool like [d1] that can fix most system errors, BSODs,[ref en-1] corrupted files, and registry[ref en-2] issues. Otherwise, follow the step-by-step instructions below.

Solution 1. Run the Network Adapter Troubleshooter
- Press the Windows key to open the Start menu.
- Click on Settings in the Start menu.
- Within Settings, select System.

- Choose Troubleshoot from the options in the System menu.
- Click on Other troubleshooters.
- Look for the Network Adapter troubleshooter in the list.
- Click on the Run button next to the Network Adapter troubleshooter.
Solution 2. Run the Internet Connections Troubleshooter
- Press the Windows key to open the Start menu.
- Click on Settings in the Start menu.
- Navigate to System and click on it.
- Choose Troubleshoot from the options in the System menu.
- Click on Other troubleshooters.
- Locate Internet connections in the list.

- Click Run.
- Follow the onscreen prompts to complete the troubleshooting process.
Solution 3. Run the Hardware and Devices Troubleshooter
- Press the Windows key to open the Start menu.
- Type cmd in the search bar.
- Right-click on Command Prompt in the search results and select Run as administrator.
- In the Command Prompt window, type the following command: msdt.exe -id DeviceDiagnostic and press Enter.

- In the Hardware and Devices dialog that appears, click on Next.
- The tool will initiate a scan for any hardware problems and recommend a fix.
- Once the scan is complete, try the task again and check if the WLAN Extensibility Module has stopped error persists.
Solution 4. Restart the WLAN Service
- Press the Windows key + R to open the Run command.
- Type services.msc in the Run dialog and press Enter.
- In the Services window, find the WLAN AutoConfig service.
- Double-click on the WLAN AutoConfig service to open its Properties.
- Go to the General tab.

- In the Startup type section, choose Automatic from the drop-down options.
- Click on the Start button to initiate the service.
- Click Apply and then OK to save the changes.
Solution 5. Reinstall the Network Adapter Driver
- Click on the Start Menu icon.
- Type Device Manager in the search bar and click on Open.
- In the Device Manager window, locate your Network adapter.
- Right-click on the Network adapter and choose Uninstall device.
- Confirm the uninstallation in the subsequent confirmation dialog.
- Restart your PC to allow the drivers to be automatically reinstalled.

You can also use a dedicated utility like [rev id="DriverFix"] that can find the best drivers for your machine and install them automatically.
Solution 6. Disable Specific Driver Updates
- Right-click on the Start button and select Device Manager.
- Locate any conflicting drivers within your network drivers, right-click on it, and choose Properties.
- In the Properties window, go to the Details tab.
- In the Property drop-down menu, click on Hardware ID.
- Select all the IDs, then copy and paste the data into any text editor.
- Press the Windows key, type gpedit.msc, and select Run As Administrator.
- Navigate to Computer Configuration/Administrative Templates/System/Device Installation/Device Installation Restrictions.

- Choose Prevent installation of devices that match any of these device IDs.
- In the Policy window, click Enabled and then Show.
- Copy the IDs one by one from the saved document and paste them into separate Volume columns.
- Save changes and exit Group Policy Editor.
- Upon the next update, an error prompt should confirm that the tweaks were successful, and the selected drivers won’t install anymore.
Solution 7. Delete Registry Keys
- Press the Windows key + R to open the Run dialog.
- Type regedit and click OK or press Enter to launch Registry Editor.

- In Registry Editor, navigate to the following key in the left pane: HKEY_LOCAL_MACHINE/SYSTEM/CurrentControlSet/Control/Class/{4d36e972-e325-11ce-bfc1-08002be10318}/0010
- Search for the IHVExtensions key and delete it along with all its subkeys.
- Close Registry Editor.
- Restart your PC to apply the changes.
Bottom line
To resolve the 'WLAN extensibility module has stopped' error, users can run the Network Adapter Troubleshooter, update drivers, or reinstall the WLAN module. If these steps do not work, consider using a maintenance tool to fix system errors.
Frequently asked questions
This error typically occurs due to outdated or corrupted network drivers, or conflicts with third-party software. Ensuring your drivers are up to date can often resolve this issue.
You can update your network drivers by going to Device Manager, expanding the Network adapters section, right-clicking your wireless adapter, and selecting 'Update driver'.
Yes, you can reset your network settings by going to Settings > Network & Internet > Status, and clicking on 'Network reset' at the bottom of the page.


Report an issue
What's wrong with this guide? We review every report and update or remove content.
Report received — thank you. We'll review and fix it.
You need a free account to submit a report.
Be the first to comment