How to fix
Explorer.exe not starting on startup
on Windows
Resolve the Explorer.exe startup issue on Windows 10 and 11 effortlessly. Get your system running smoothly again with expert-tested solutions.

What causes How to fix Explorer.exe not starting on startup in Windows?
- Corrupted system file
- Conflicting program or service
- Virus or malware infection
- Temporary system errors or glitches
Repairs Windows system files, removes malware, and restores a clean OS state — without reinstalling.
Hello. I turned on my Windows computer but the screen was blank. Why is this happening and what do I do?
Explorer.exe is a critical component of the Windows operating system that manages the file system, taskbar, desktop, and Start menu as well as providing the graphical user interface (GUI). It is the primary process that controls the graphical user interface of Windows, and users may be unable to use their computers properly if it is not present.
When Explorer.exe fails to launch on startup, it can result in a variety of problems, including a blank desktop, a missing taskbar or icons, and the inability to access files and folders. This problem can be caused by a number of factors, including a corrupted system file, a conflicting program or service, or a virus or malware infection.
This problem can have a significant impact because it can prevent users from accessing their files and folders and from properly using their computers. It can also cause frustration and a loss of productivity, particularly for users who rely on computers for work.
A system file check, a virus or malware scan, disabling conflicting programs or services, and restarting the Explorer.exe process are all possible fixes for this issue. Other solutions may include updating or reinstalling drivers,[ref en-1] performing a system restore, or reinstalling Windows. Before attempting any of these options, it is always a good idea to back up important data.
In this guide, you will find 7 steps that should help you fix Explorer.exe not starting on startup. If you want to avoid a lengthy troubleshooting process you can use a maintenance tool like [d1] that can fix most system errors, BSODs,[ref en-2] corrupted files, and registry[ref en-3] issues. Otherwise, follow the step-by-step instructions below.
Method 1. Restart your PC
If you encounter a black screen caused by Explorer.exe, the first thing you should do is restart your computer. Not only does this clear the RAM and processor cache, but it also fixes temporary system errors and glitches. Because the desktop is blank, you won't be able to restart normally, such as from the Start Menu. Instead, press Ctrl + Alt + Del and select Restart from the power options in the bottom right corner.
Method 2. Fix Corrupted System Files
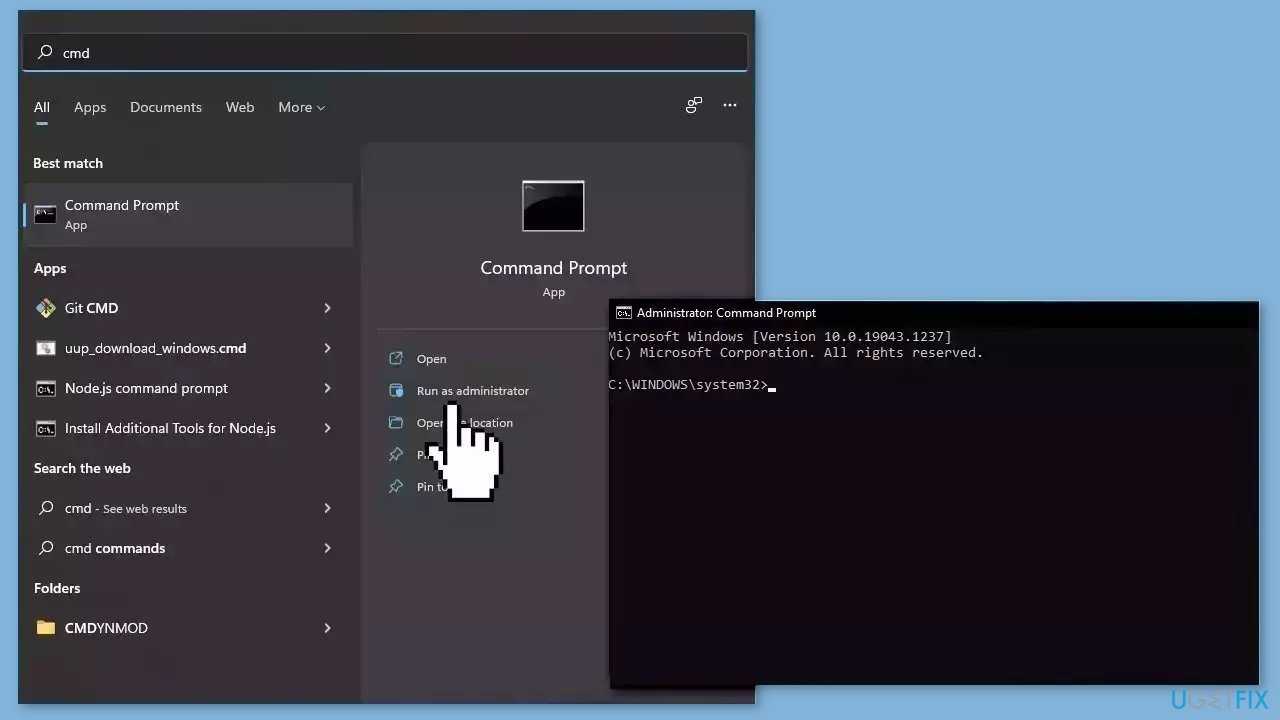
Use Command Prompt commands to repair system file corruption:
- Open Command Prompt as administrator
- Use the following command and press Enter:
sfc /scannow
- Reboot your system
- If SFC returned an error, then use the following command lines, pressing Enter after each:
DISM /Online /Cleanup-Image /CheckHealth
DISM /Online /Cleanup-Image /ScanHealth
DISM /Online /Cleanup-Image /RestoreHealth
Method 3. Update Graphics Driver
Outdated or malfunctioning display drivers can also cause game crashes. In this case, you can fix it automatically by using [rev id="DriverFix"], which will scan your PC for missing and out-of-date device drivers. Or you can update them manually:
- Press the Windows key + X keys to open the Quick Access Menu.
- Click on Device Manager from the list.
- Double-click on Display adapters to expand it.
- Right-click on the dedicated graphics card that’s active or you’re using.
- Click on Update driver.
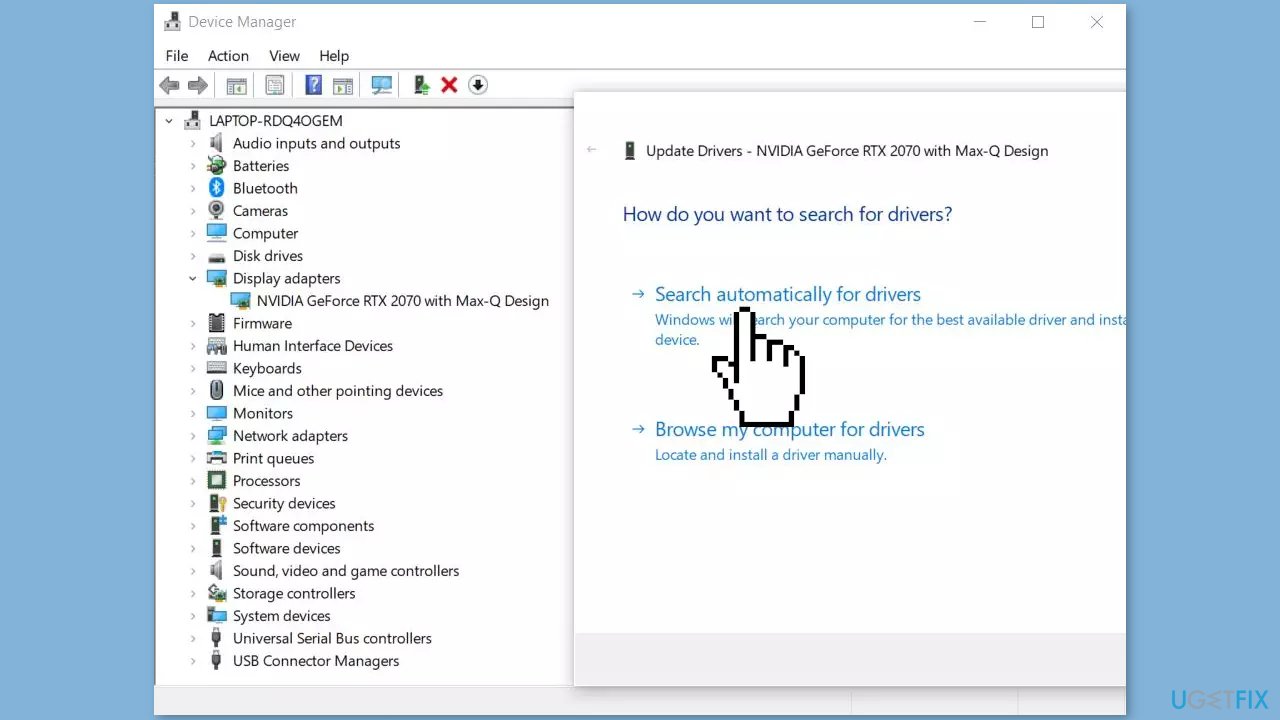
- Click on Search automatically for drivers.
- It’ll now automatically check for the available update then download and install the latest version.
- Just wait for the update to complete and reboot the PC to apply changes.
Method 4. Turn off Fast Startup
- Press the Windows key to open the Start Menu.
- In the search bar, type Control Panel, and press Enter.
- Change the View by to Category.
- In the Control Panel, navigate to System and Security > Power Options.
- Select the Choose what the power button does from the left sidebar.
- Click on the Change settings that are currently unavailable option.
- Uncheck the Turn on fast startup box.
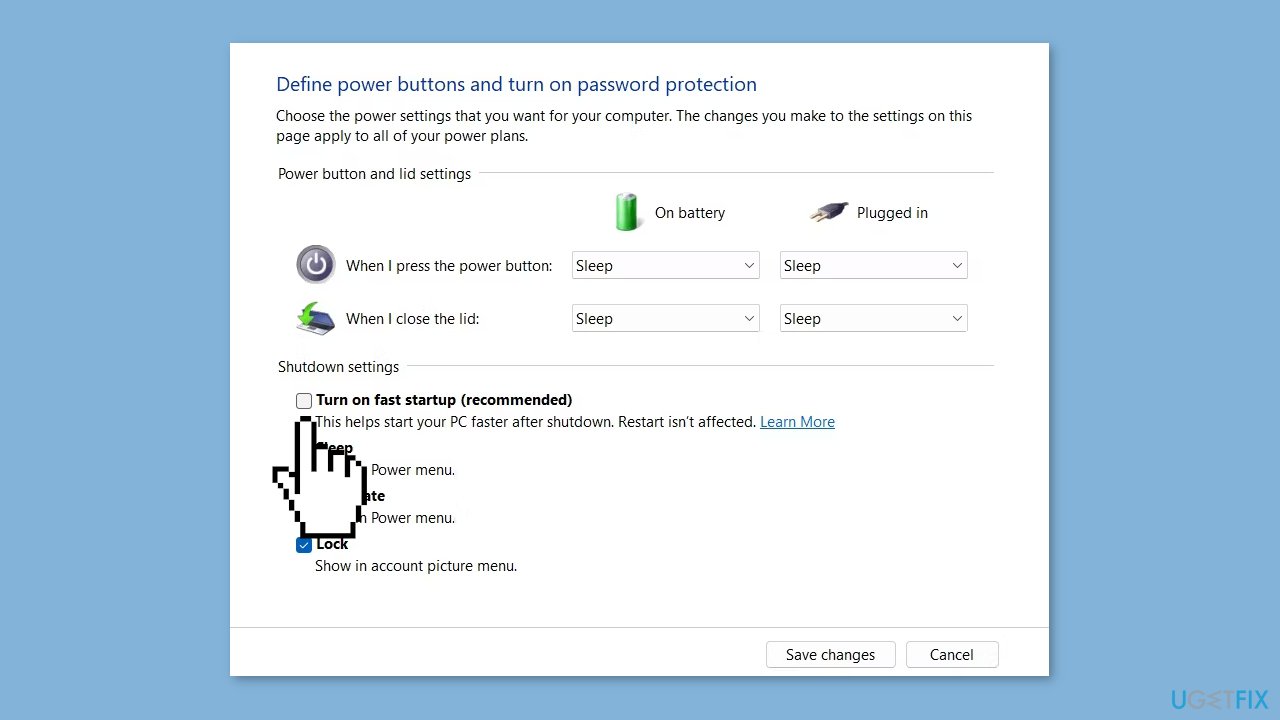
- Click the Save changes button.
- Restart your computer.
Method 5. Rename your PC
- Press the Windows key + I hotkeys to open the Settings menu.
- Choose System from the left sidebar, and then select About from the right pane.
- Click the Rename this PC button next to the current name of your computer.
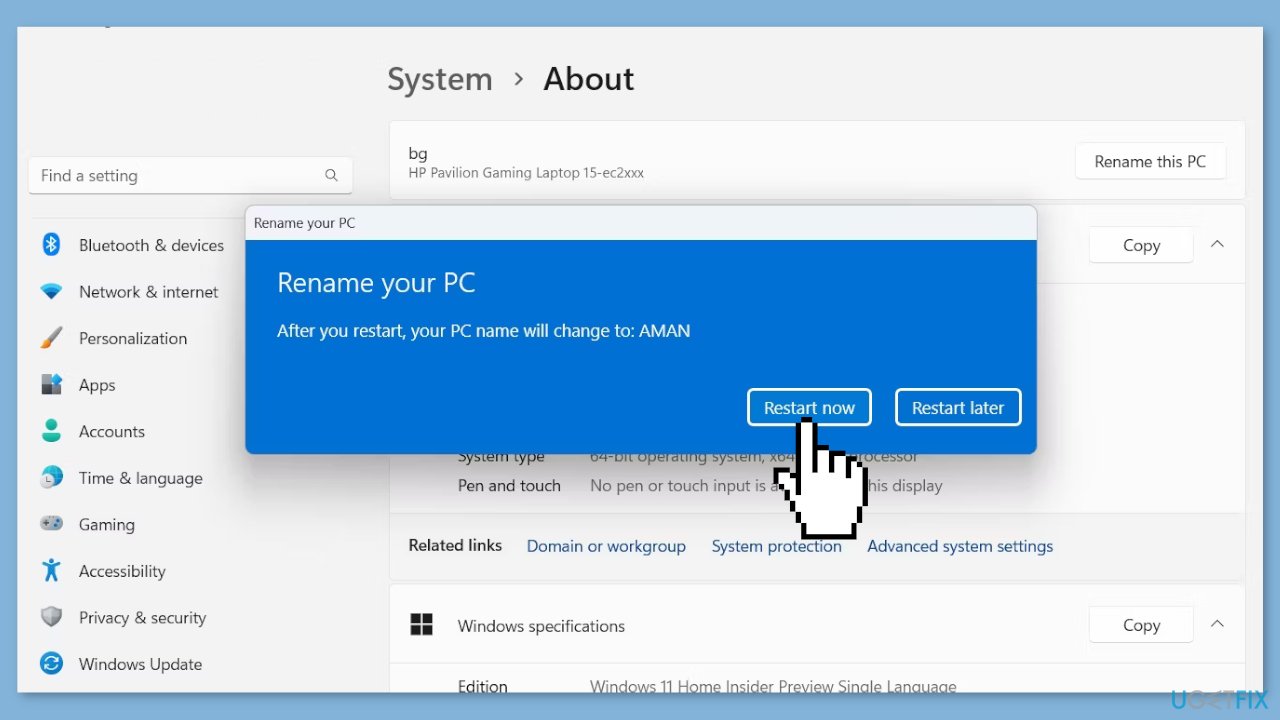
- Enter a new name for your PC, and then click Next.
- Choose Restart now to restart your computer with the new name.
Method 6. Check Windows Services
- Press the Windows key + R key to open the Run dialog box.
- Type services.msc in the search bar and click OK.
- In the Services window, locate and double-click on the App Readiness service.
- Click the drop-down icon next to Startup type and choose Disabled from the list.
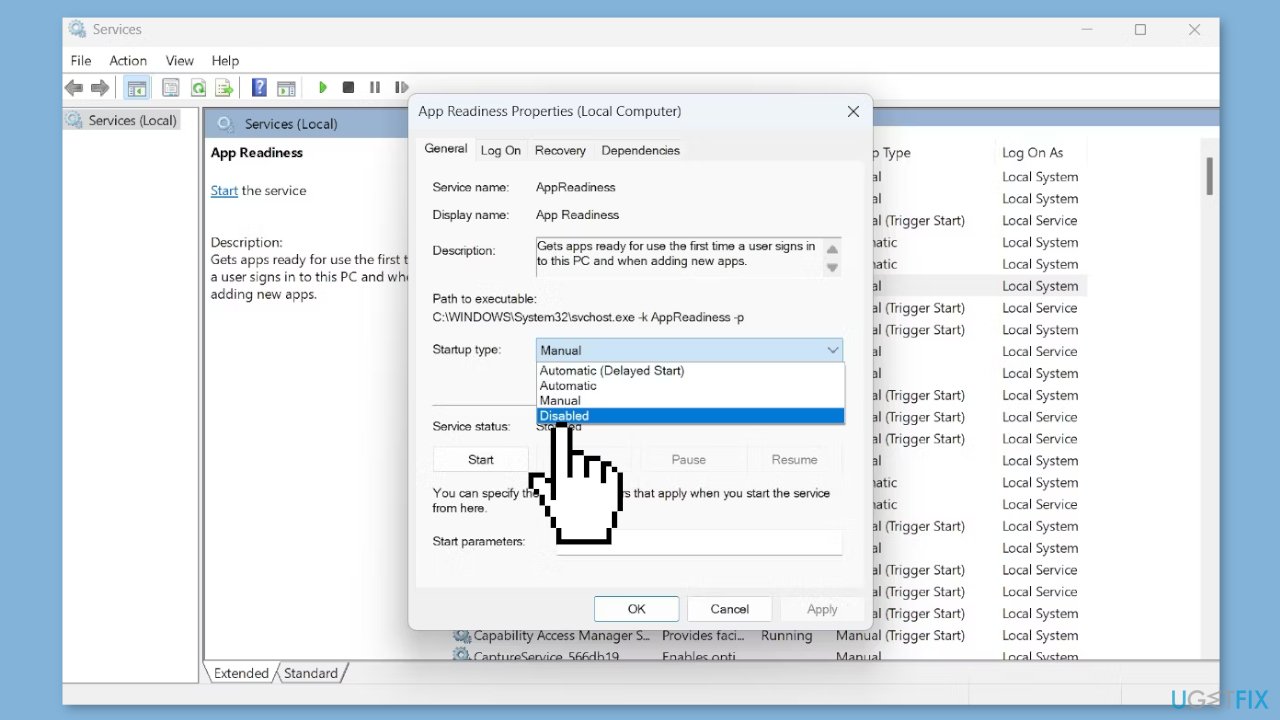
- Click Apply, and then click OK to save the changes.
- Restart the computer and check if the problem persists.
- If the problem persists, press the Ctrl + Shift + Esc hotkeys to open the Task Manager.
- Click the Run new task option at the top of the Task Manager window.
- In the Create new task window that appears, type sihost.exe and click OK.
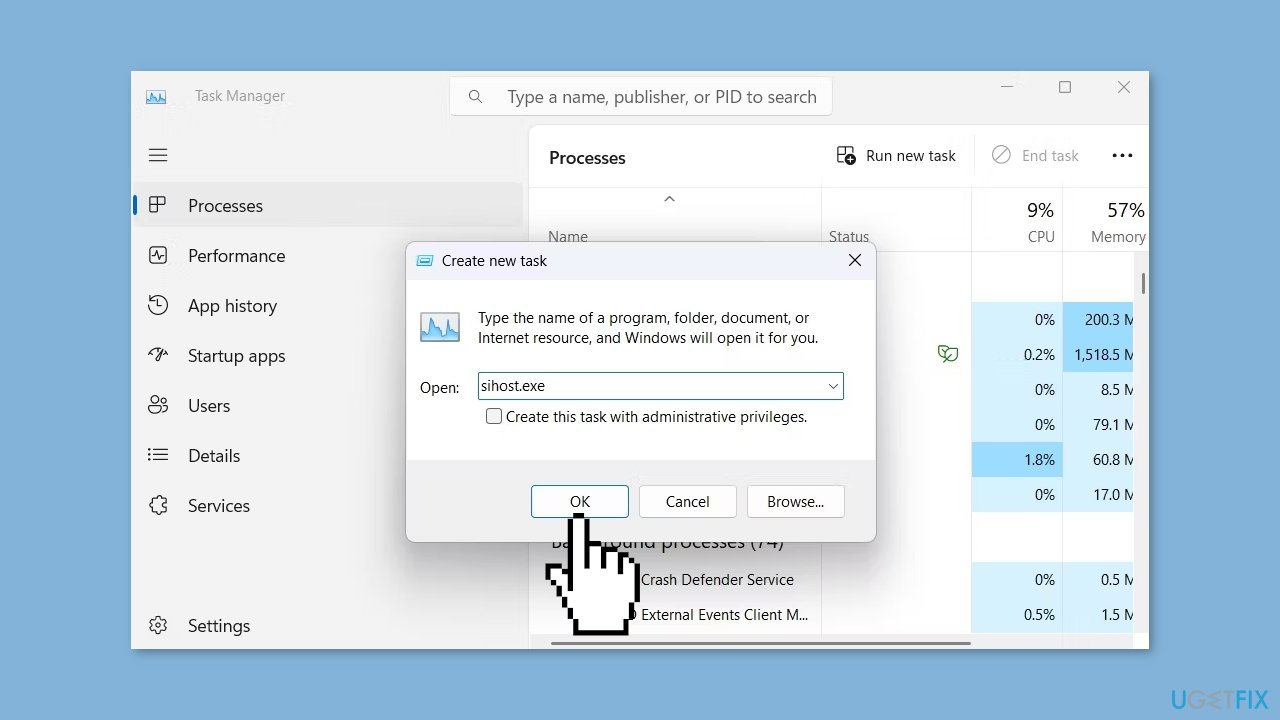
- If running through the Task Manager wasn't helpful, open the Services window again.
- Locate and right-click on the Shell Infrastructure Host service.
- Choose the End task option from the context menu.
- The service will start automatically upon restarting your computer.
Method 7. Modify the Registry
The registry is a critical component of the Windows operating system that contains system and application information and settings. Users can easily restore previous settings and configurations if something goes wrong by creating a backup before making any changes to the registry. Backups allow you to undo changes and return to a previous state, which is useful in the event of a system failure or data loss. You can find instructions on how to do this in our How to back up and restore the Windows registry? guide.
- Open the Run dialog box, type regedit, and click OK.
- In the Registry Editor, navigate to the following location: HKEY_CURRENT_USER\SOFTWARE\Microsoft\Windows NT\CurrentVersion\Winlogon
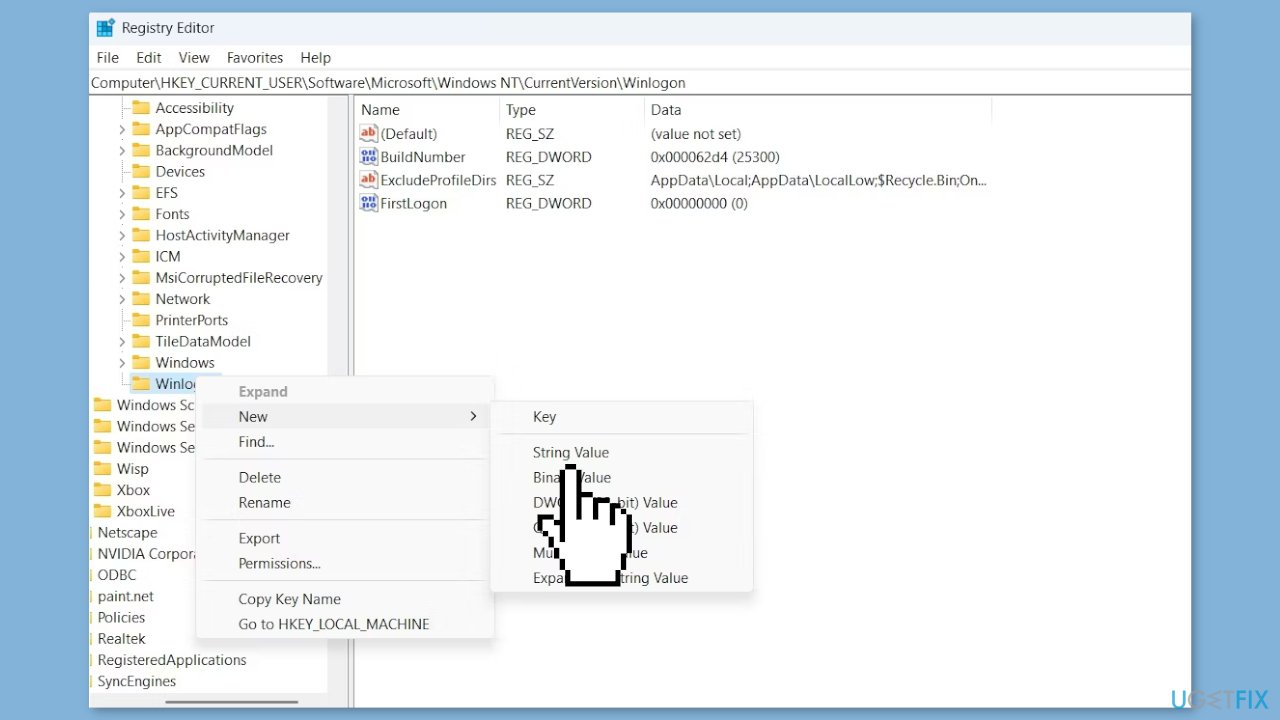
- Right-click on Winlogon in the left panel, hover the cursor to New, and choose String Value from the context menu.
- Name the value Shell.
- Double-click on the Shell string value in the right pane.
- Type C:\Windows\explorer.exe in the Value data box.
- Click OK to save the changes.
Bottom line
To fix Explorer.exe not starting on startup, you can try restarting your PC, performing a system file check, scanning for viruses, or disabling conflicting programs. If these methods do not resolve the issue, consider updating or reinstalling drivers, performing a system restore, or reinstalling Windows.
Frequently asked questions
You can try enabling the 'Windows Explorer' in the Task Manager's Startup tab or using the 'sfc /scannow' command in Command Prompt to repair system files.
Press Ctrl + Shift + Esc to open Task Manager, click on 'File' > 'Run new task', type 'explorer.exe', and hit Enter to start it manually.
Ensure that your system is up-to-date and check the Task Manager for any conflicting applications that might prevent Explorer.exe from launching.




Report an issue
What's wrong with this guide? We review every report and update or remove content.
Report received — thank you. We'll review and fix it.
You need a free account to submit a report.
Be the first to comment