How to fix
DISM error 0x800F081F
on Windows
Resolve DISM error 0x800F081F in Windows 10 or 11 efficiently. Follow our expert-tested solutions for a smooth experience, fixed in minutes!

What causes How to fix DISM error 0x800F081F in Windows?
- DISM cannot locate the files required to repair the Windows image
- The source files are not found in their default location
- Users may not have specified an additional location for repair files
- Corrupted system files that need replacement
- Issues with Windows updates or specific software installations
Repairs Windows system files, removes malware, and restores a clean OS state — without reinstalling.
Hello. I tried to use the command prompt as an Administrator and run the "Dism /Online /Cleanup-Image /RestoreHealth" command but I received a message saying "Error: 0x800f081f The source files could not be found." Any possible fixes would be welcome.
Windows is one of the most popular operating systems created by Microsoft and used by home users and big corporations. The customizability and troubleshooting solutions make it easy to use. Of course, sometimes, the automatic troubleshooters do not help and users have to fix certain errors manually. Looking for causes is not always easy as some errors are more complicated than others.
Users sometimes come across the 0x800F081F error after trying to run the "DISM /Online /Cleanup-Image /RestoreHealth" command, in order to repair the Windows image. The full message states this:
Error 0x800f081f, The source files could not be found.
Use the "Source" option to specify the location of the files that are required to restore the feature
Even though users seem to specify the location of the files, they still receive the 0x800F081F error. Some of the similar problems users encounter are Windows 10 update error 0x800f081f and Error Code 0x800F081F while installing Microsoft .NET Framework 3.5.
The "DISM /RestoreHealth" command is used to repair problems and replace damaged files. If DISM[ref en-1] cannot locate the files required to repair the Windows image,[ref en-2] the process will fail. Sometimes users need to specify an additional location as a repair source of the appropriate files.
Error 0x800F081F indicates that "The source files could not be found" on Windows. This error message basically states that DISM was unable to find the files required to fix the online Windows image in their default location. The issue can be resolved by running a component clean-up, SFC Scan, or providing DISM with a location that contains the files it needs.
Troubleshooting manually could take a while because it is unclear what exactly is causing the issue. To avoid this long process you can try using an automatic solution [d1]. The repair tool can identify the damaged system components, fix BSODs,[ref en-3] and registry issues by scanning the system. This software could also be used to free up space by clearing cookies and cache, which should boost the device's performance.
Below you will find a few methods that could fix the 0x800F081F error and let you update your system. Note that this will take a while, so please follow all of the steps very carefully:
Method 1. Run performance troubleshooter
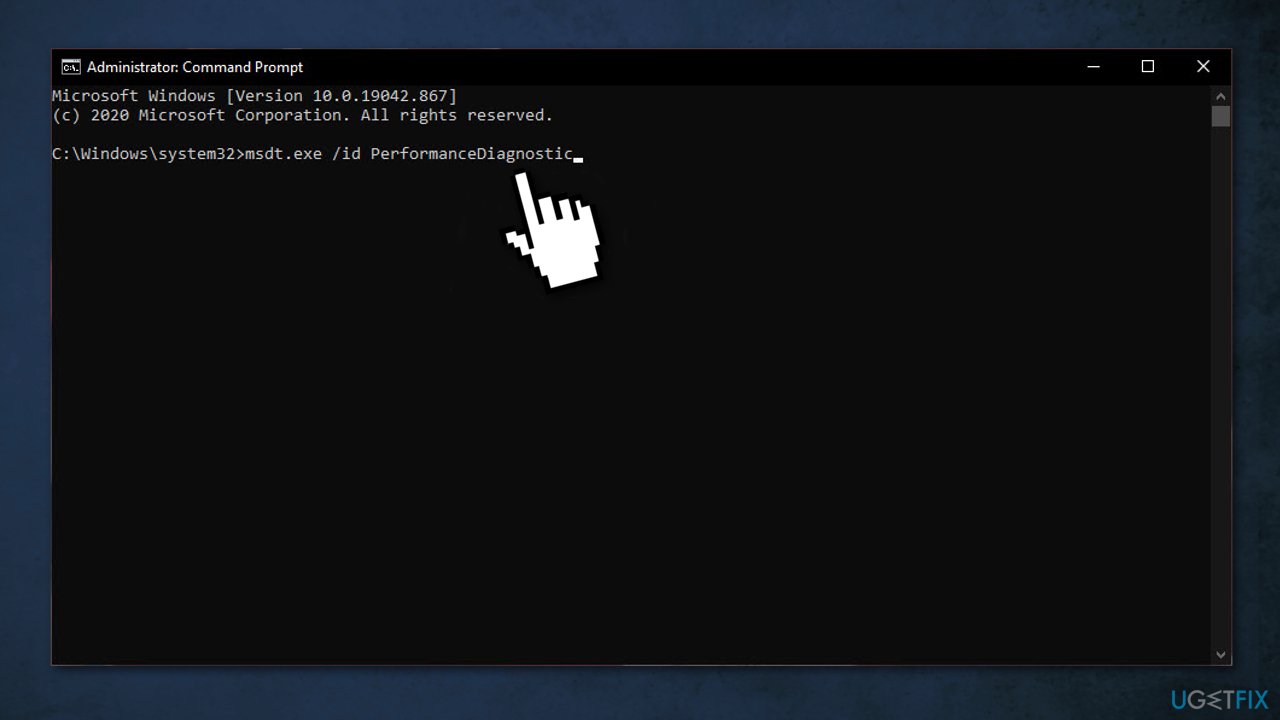
- Search for Command Prompt in Windows search box
- Right-click on it and Run as administrator
- Type msdt.exe /id PerformanceDiagnostic and hit Enter
- Restart the PC for changes to be applied
Method 2. Adjust for best performance
- Open Control Panel using Windows search
- Navigate to System and Security, then System
- Click on Advanced system settings
- Go to the Advanced tab under System Properties windows
- Select Settings under the Performance column
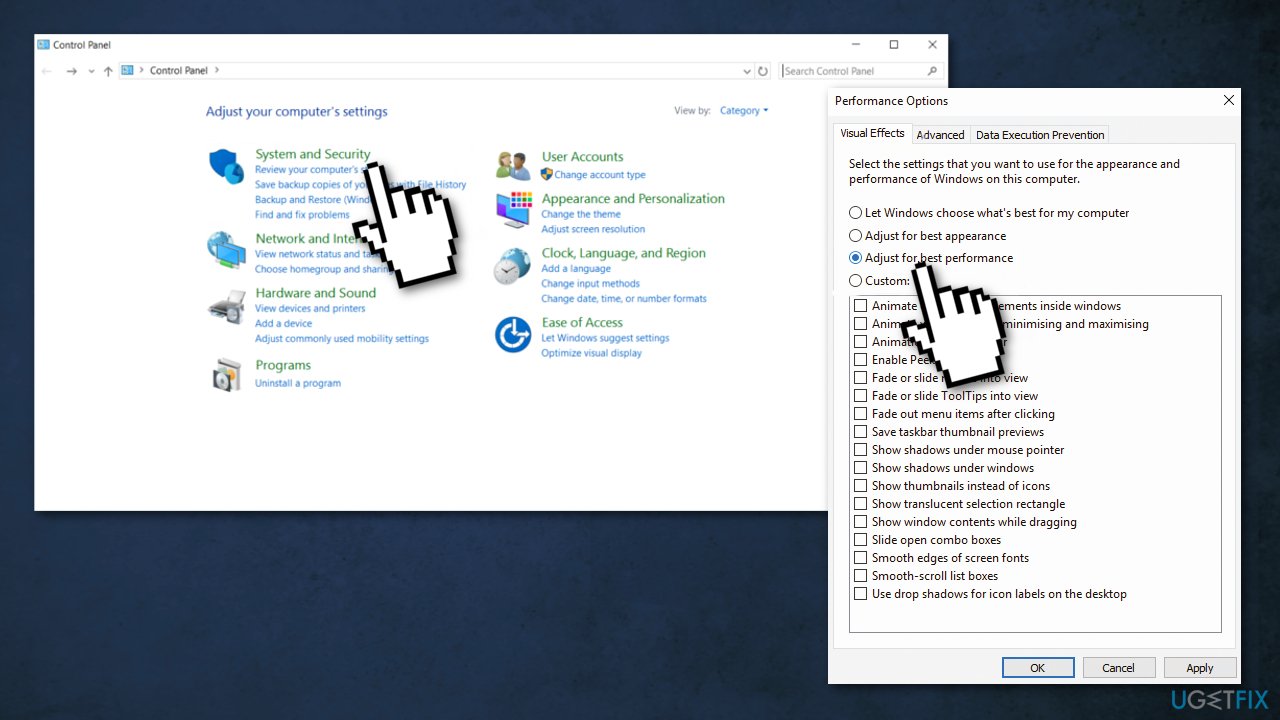
- Under the Visual effects column, select Adjust for best performance
- Click on Apply and then OK
Method 3. Clean boot
Clean boot is one of the troubleshooting techniques that help identify if an app is causing the issue. It is usually performed when non-Microsoft products cause software conflicts. A clean boot helps in the easy start-up of OS by only loading essential files and programs:
- Press Windows + R, type msconfig, and hit Enter
- Go to Services tab and tick the Hide all Microsoft services checkbox
- Select Disable all
- Go to Startup tab and click Open Task Manager
- Here, right-click on each of the non-Windows entries and select Disable
- Close down the Task Manager
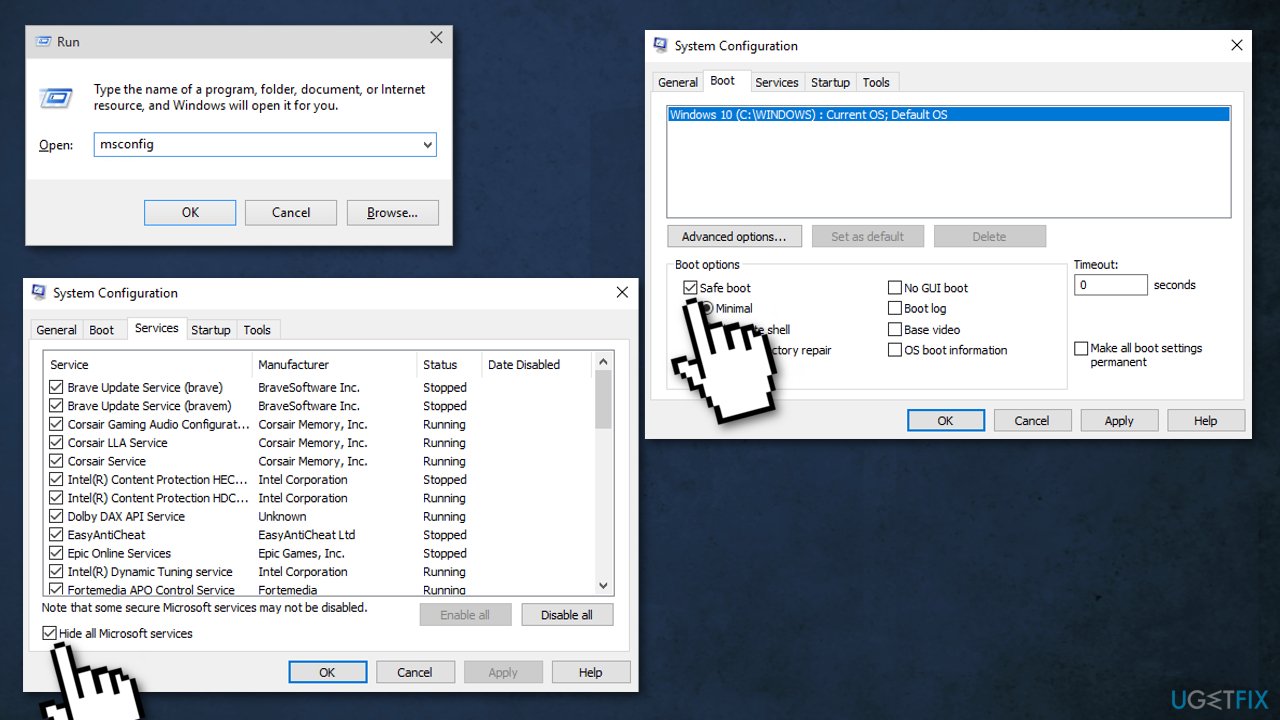
- Go to Boot tab and tick the Safe boot option
- Click Apply, OK, and restart your computer
Method 4. Perform a Component Cleanup
- Open the Start Menu, type cmd, right-click and Run as Administrator
- In the command prompt, type the following commands in the same order:
dism.exe /online /Cleanup-Image /StartComponentCleanup
sfc /scannow
- Wait for these commands to run, then type in the following command and hit Enter:
Dism /Online /Cleanup-Image /RestoreHealth
-
Check if Dism /Online /Cleanup-Image /RestoreHealth works
Method 5. Use Windows installation media in ISO format
If none of the above methods fixed the problem for you, this last one should definitely get rid of the error:
- Get Media Creation Tool
- Choose Create installation media for a another PC and click Next
- Press Next at Select Language, architecture and edition screen
- Select ISO file and press Next
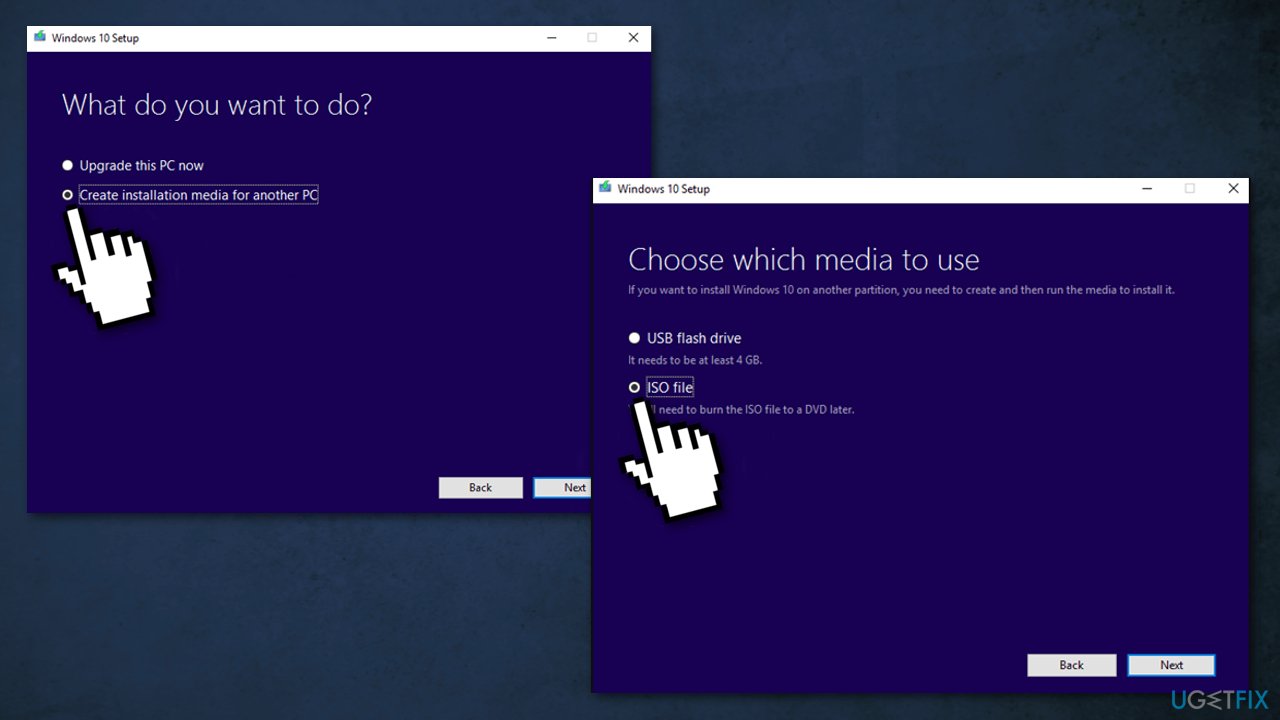
- Choose a download location for the Windows ISO file and click Save
- Right-click at the Windows ISO file you downloaded and choose Mount
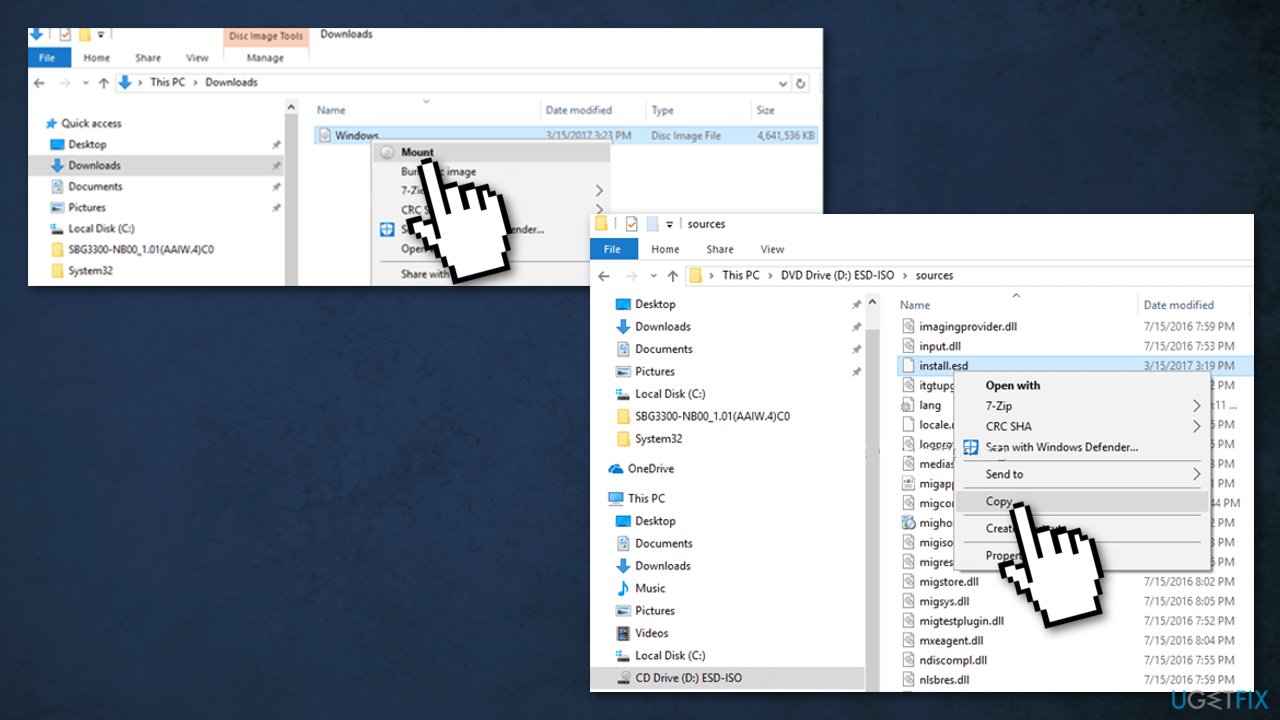
- From the mounted Windows ISO file, copy the install.esd file from the sources folder (e.g. D:\\sources\\install.esd) to the root folder of drive C:\\
- Right-click on the Start menu and select Command Prompt (Admin)
- Type cd\\ to go to the root folder of drive C:\\
- Then type the following command and press Enter, in order to find which images are inside the install.esd file:
dism /Get-WimInfo /WimFile:install.esd
- According to your Windows 10 installed version take note of the index number
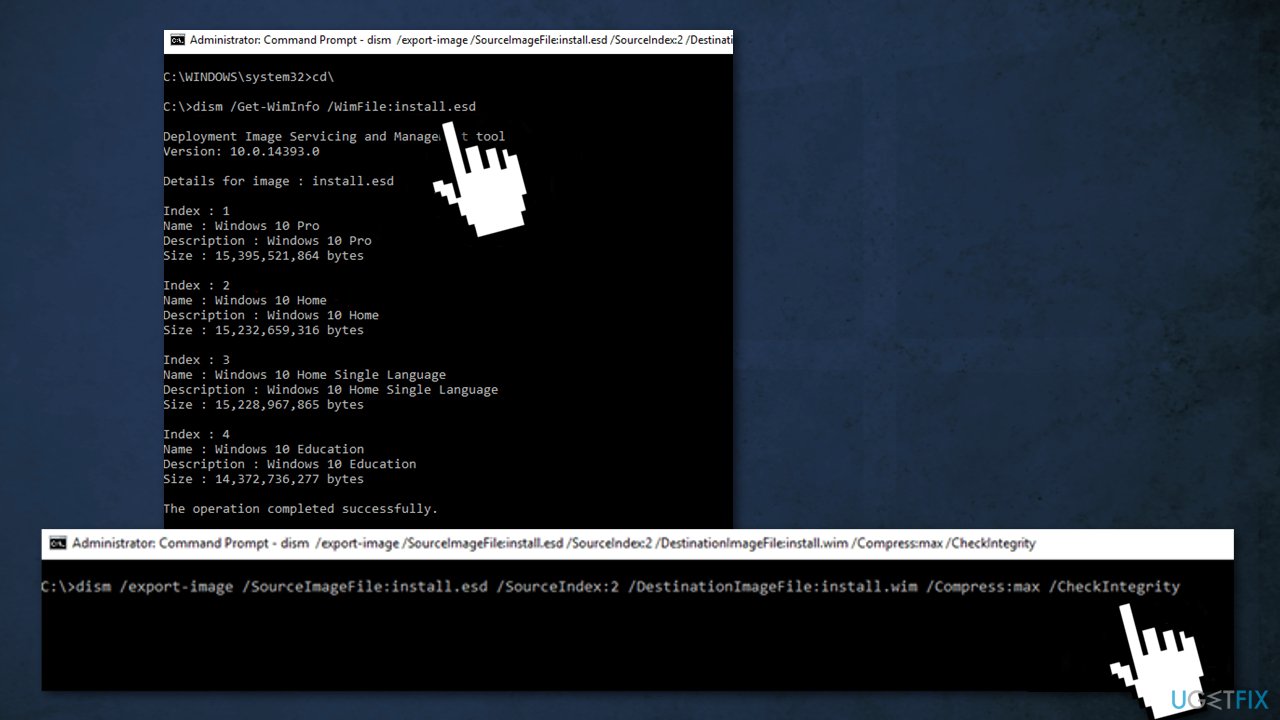
- Then give the command below to extract the corresponding to your Windows version install.wim file (Index number):
dism /export-image /SourceImageFile:install.esd /SourceIndex:IndexNumber /DestinationImageFile:install.wim /Compress:max /CheckIntegrity
- For this example (for a Windows 10 Home based computer) extract the install.wim file with Index number=2. So, the command will be:
dism /export-image /SourceImageFile:install.esd /SourceIndex:2 /DestinationImageFile:install.wim /Compress:max /CheckIntegrity
- Right-click at the Start menu and select Command Prompt (Admin)
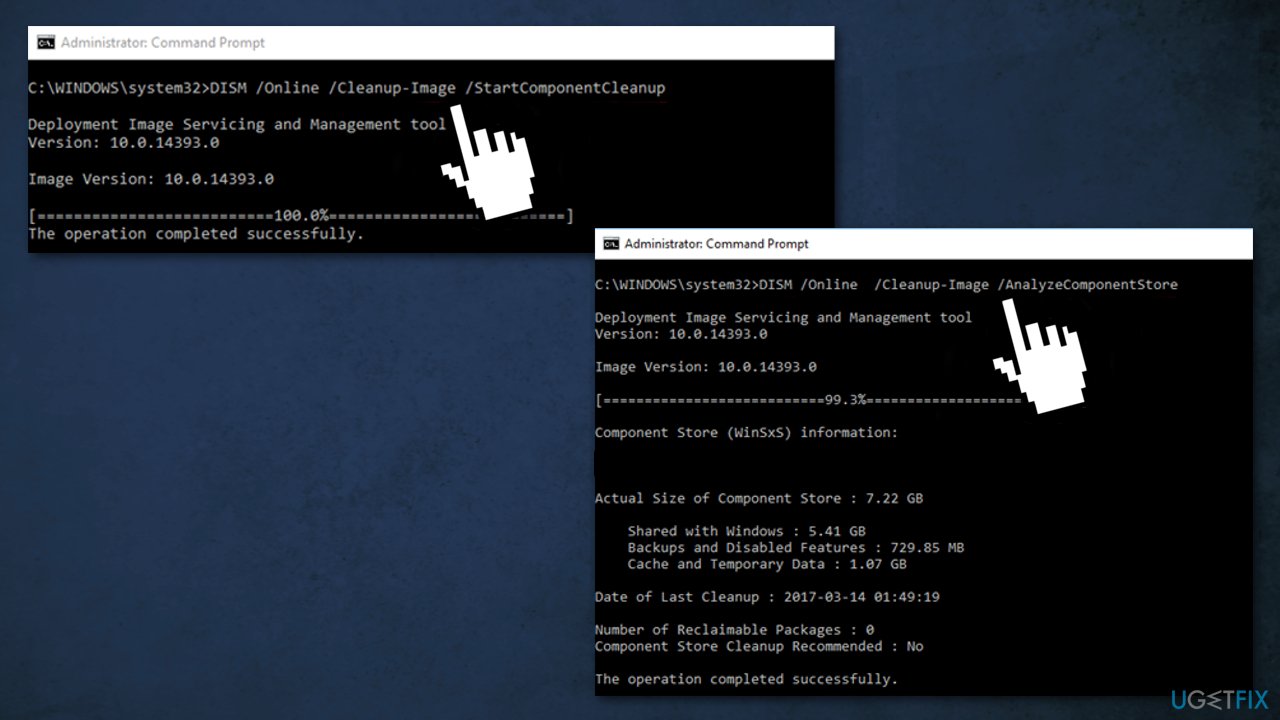
- Type the following command and press Enter:
DISM /Online /Cleanup-Image /StartComponentCleanup
- When the operation is completed, type the following command and press Enter:
DISM /Online /Cleanup-Image /AnalyzeComponentStore
- Repair the Windows image by specifying the C:\\install.wim as the source by giving this command:
DISM /Online /Cleanup-Image /RestoreHealth /Source:WIM:c:\\install.wim:1 /LimitAccess
- When the RestoreHealth process is completed, type the following command and press Enter to complete the repair process:
sfc /scannow
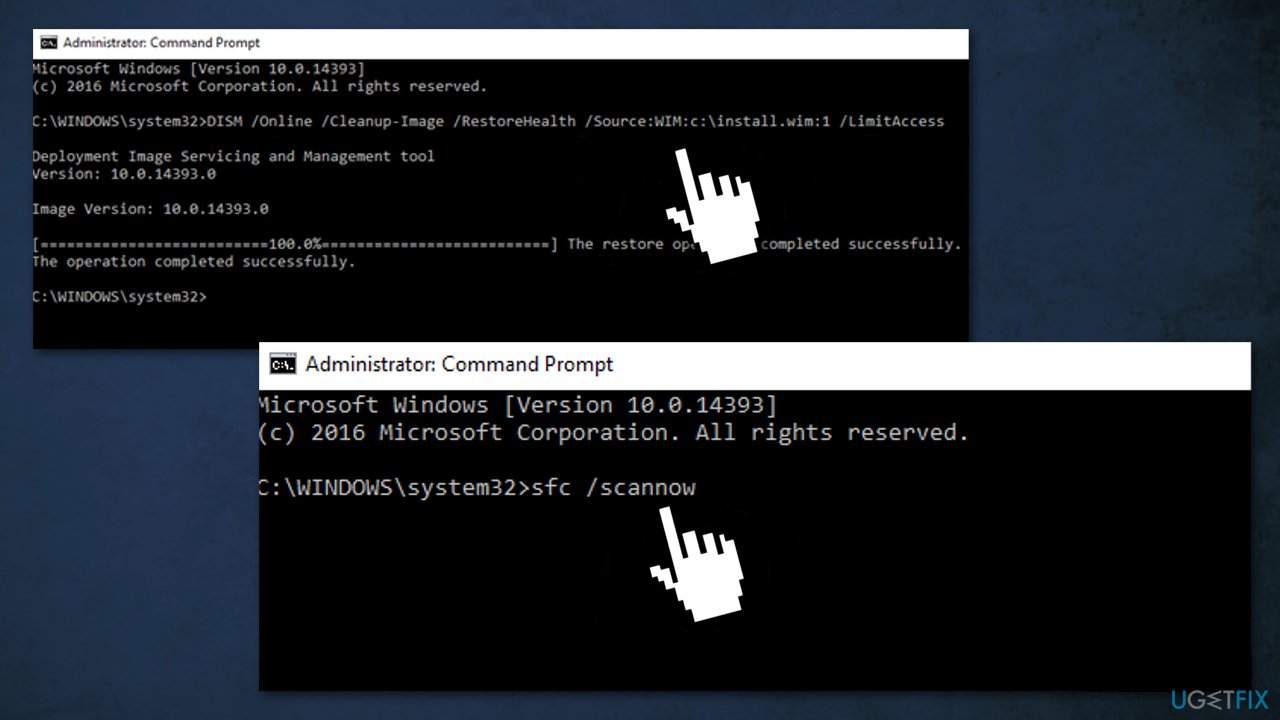
- When the SFC scan is completed, the process is done
Bottom line
To resolve the DISM error 0x800F081F, users can perform a component clean-up, run an SFC scan, or provide DISM with a specific location containing the necessary files. If these solutions do not work, consider using an automatic repair tool to identify and fix system issues.
Frequently asked questions
This error typically indicates that the DISM tool cannot find the necessary files to repair the Windows image, which may be due to missing or corrupted files.
You can resolve this error by using the Windows installation media to provide the required files or by ensuring your Windows Update components are functioning properly.
Yes, you can run the command 'DISM /Online /Cleanup-Image /RestoreHealth' in an elevated Command Prompt, ensuring that your system is connected to the internet for necessary file downloads.




Report an issue
What's wrong with this guide? We review every report and update or remove content.
Report received — thank you. We'll review and fix it.
You need a free account to submit a report.
Be the first to comment