How to fix
100% disk usage after upgrading to Windows 11
on Windows
Resolve high disk usage issues after upgrading to Windows 11 with expert-tested solutions. Boost your PC's performance and enjoy seamless operation. Fix…

![[Fix] 100% disk usage after upgrading to Windows 11](https://ugetfix.com/wp-content/uploads/articles/askit/fix-100-disk-usage-after-upgrading-to-windows-11_en-768x432.jpg)
What causes [Fix] 100% disk usage after upgrading to Windows 11?
- MSI mode causing high disk usage
- Third-party security program interference
- Corrupted files
- Registry issues
- System errors
Repairs Windows system files, removes malware, and restores a clean OS state — without reinstalling.
Hello. After I upgraded from Windows 10 to Windows 11, my disk usage has gone up to 100%. My computer is extremely slow. Is there anything I can do?
Windows 11 was released by Microsoft at the end of 2021. Many users have rushed to upgrade from Windows 10 to try out the newest version. It features an updated user interface, design, and many other things. However, a lot of people were met with problems instead of a smooth experience.
We previously wrote about Windows Defender won't open, WiFi icon missing, Windows 11 is slow after an update, and many other errors. Recently, some people have been experiencing a new issue - 100% disk usage after upgrading to Windows 11. It causes users' PCs to run very slow which makes it almost impossible to use the machines for any task.
Some users found that the 100% disk usage could be caused by the MSI mode.[ref en-1] However, for other people, the issue was caused by a third-party security program so it seems like there is no single culprit for this problem. In this guide, you will find 6 steps that could help you fix the 100% disk usage after upgrading to Windows 11.
Troubleshooting can be a lengthy process, so you can use a maintenance tool like [d1]. It can fix various system errors, BSODs,[ref en-2] corrupted files, and registry[ref en-3] issues. Otherwise, follow the step-by-step instructions below.
Method 1. Check Disk
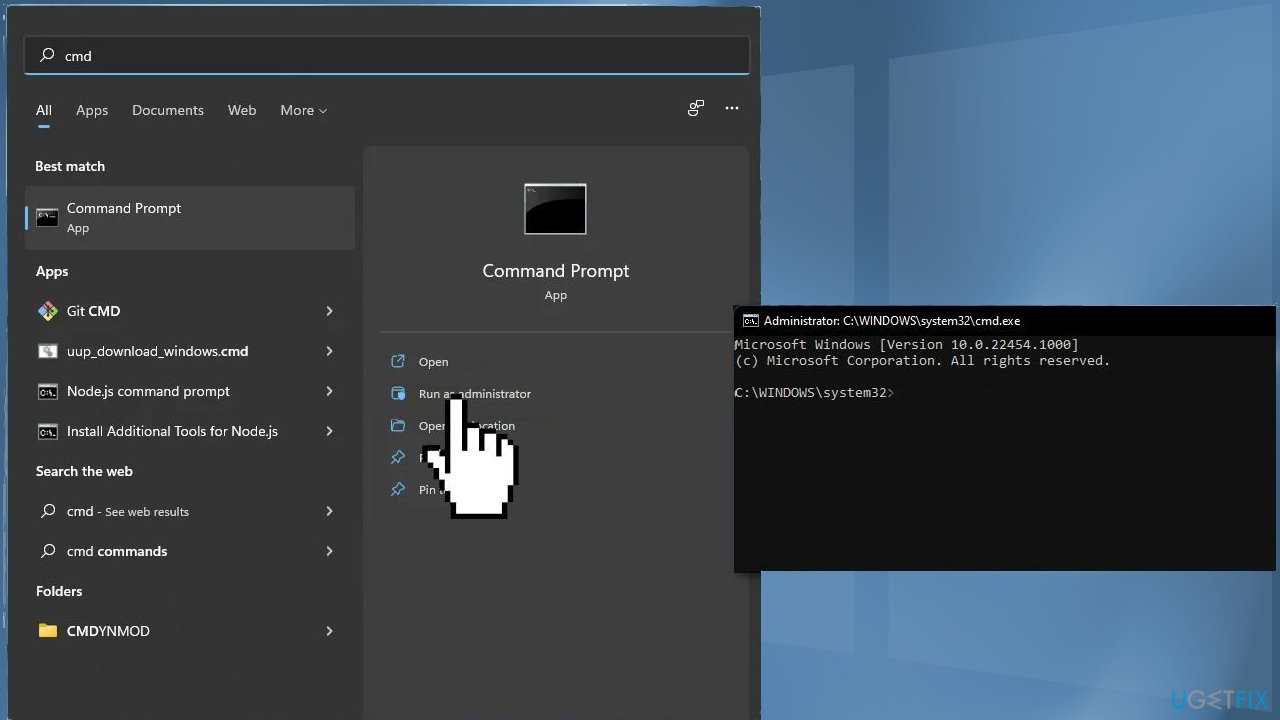
- Open the Command Prompt and click on the Run as administrator
- Then, type this command and press Enter:
chkdsk C: /f /r /x
- Close the Command Prompt
Method 2. Change MSISupported Value
- Press Windows key + R to open the Run box
- Type devmgmt.msc and hit Enter to open the Device Manager
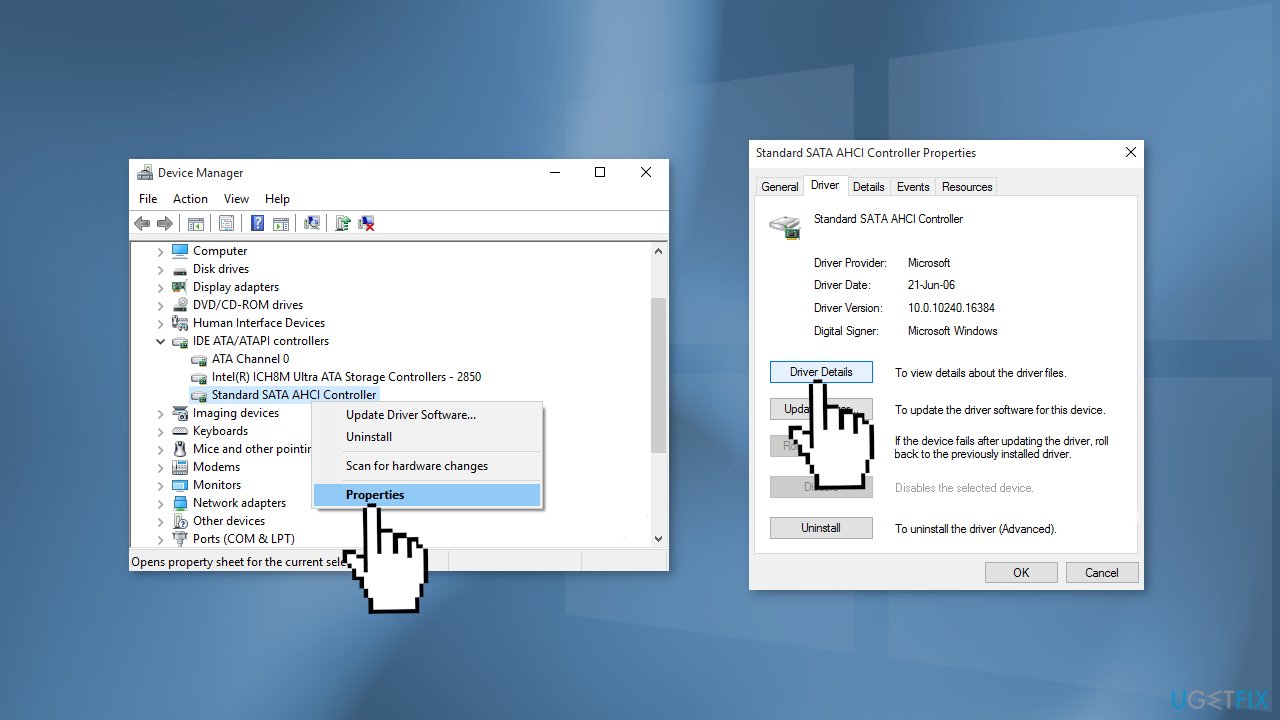
- Expand IDE ATA/ATAPI controllers and right-click on Standard SATA AHCI Controller, select Properties
- Switch to Driver tab and click Driver Details
- If the Driver File Details window shows storahci.sys driver listed there, it means you can disable MSI mode
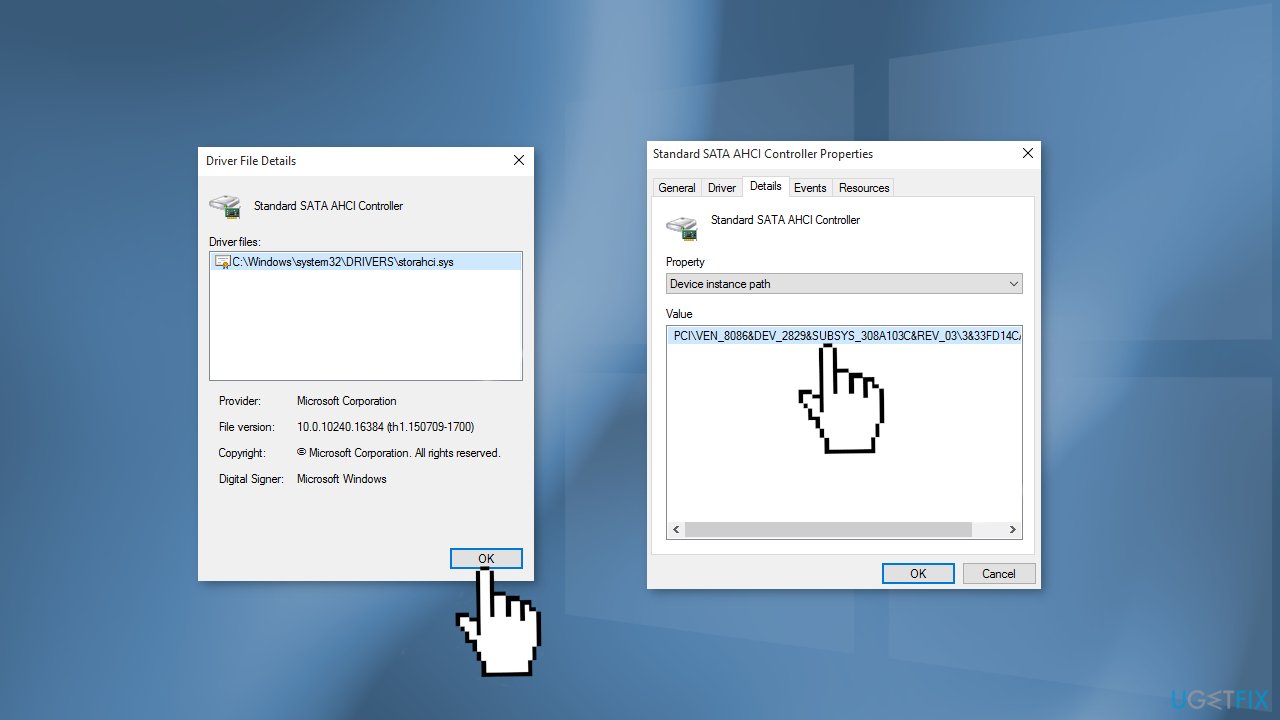
- Switch to Details tab and select Device instance path from the drop-down and note down the Value mentioned there
- Press Windows key + R, type in regedit and press Enter
- Navigate to following registry key:
HKEY_LOCAL_MACHINE\SYSTEM\CurrentControlSet\Enum\PCI\<AHCI Controller Value>\Device Parameters\Interrupt Management\MessageSignaledInterruptProperties
Note - Substitute <AHCI Controller Value> with the value you noted in the Details tab
- In the right pane of MessageSignaledInterruptProperties key, look for the registry DWORD (REG_DWORD) named MSISupported
- Double click on the DWORD to modify its value
- Set the Value as 0 and click OK
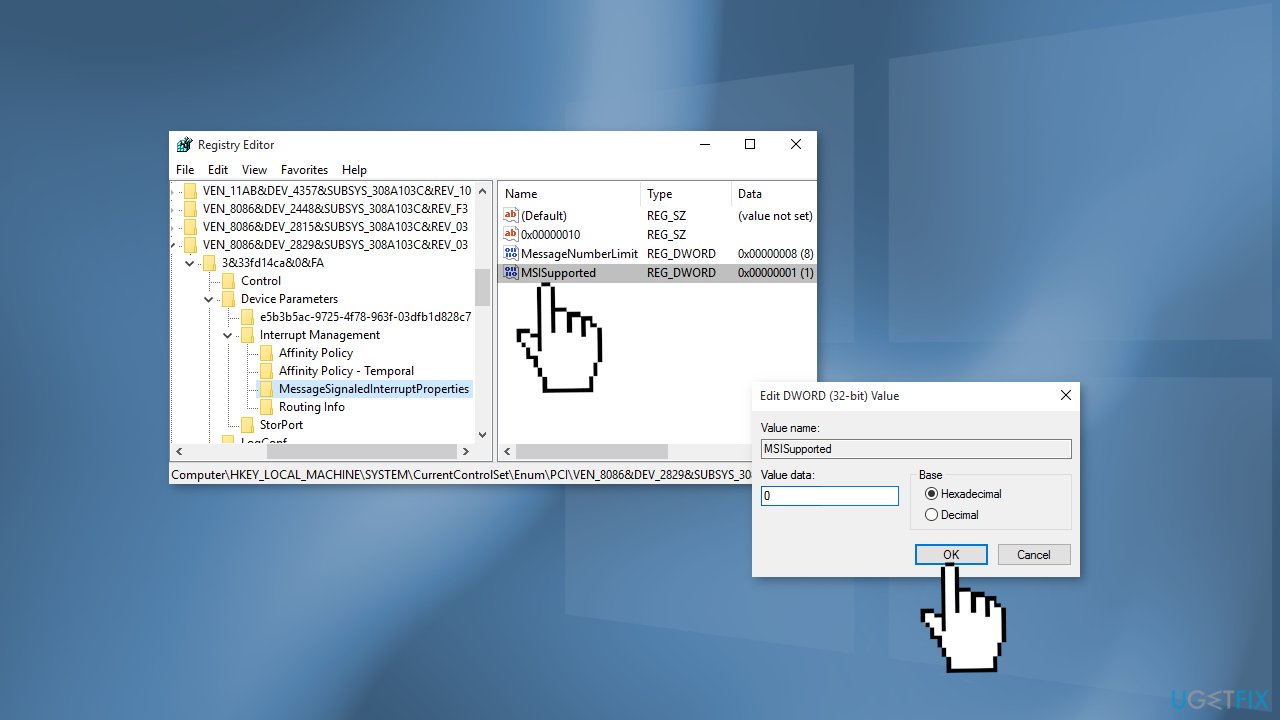
- Close the Registry Editor and reboot
Method 3. Disable Hibernate File
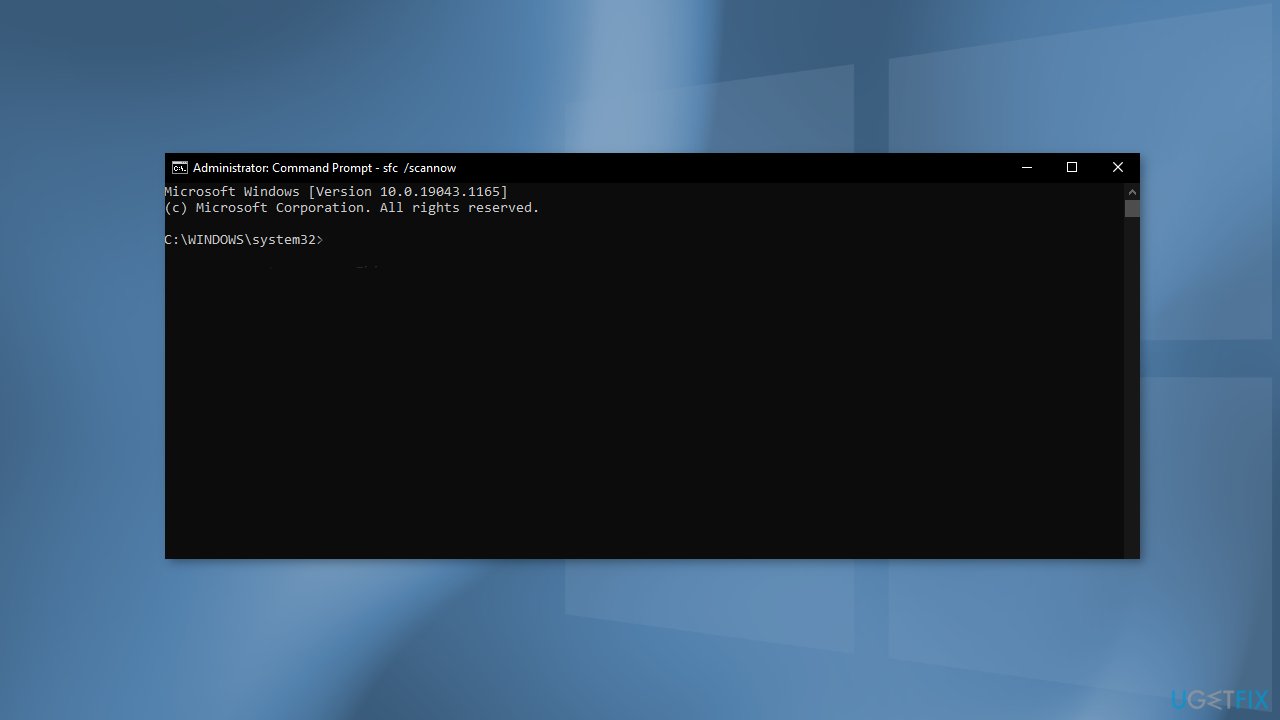
- Open the Command Prompt as Administrator
- Type in the following command and press Enter:
powercfg hibernate off
- Close the Command Prompt
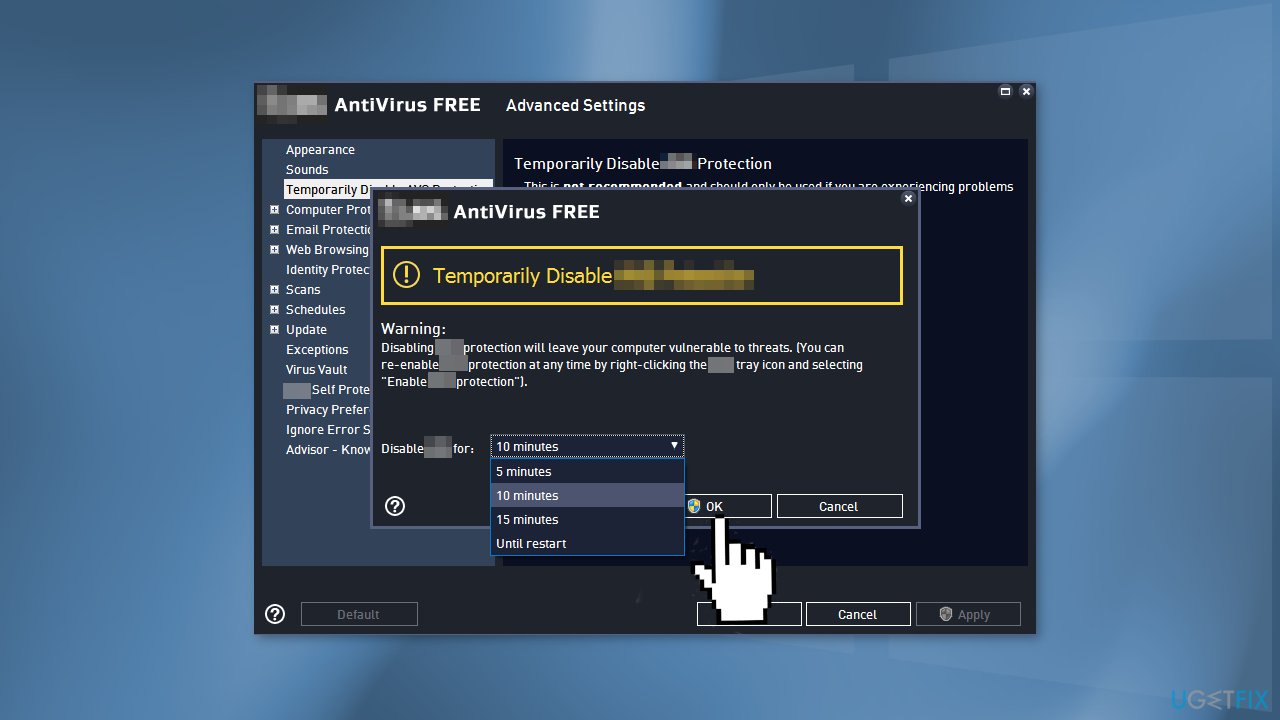
Method 4. Disable Antivirus Software
In some cases, third-party antivirus software can cause unwanted symptoms. If you have any installed, go to their settings and disable them temporarily to see if you notice any changes.
Method 5. Reset the Virtual Memory
- Open the Run box by pressing the Windows key + R
- Type sysdm.cpl and hit Enter
- Click on the Advanced tab
- In the Performance tab, tap on the Settings
- Now go to the Advanced settings tab
- In the Virtual memory section, click on Change to change the paged file size
- Uncheck the option Automatically manage paging file size for all drives so you can adjust it manually
- You have to select the drive which you have installed Windows 11 into
- Then, click on Custom size
- Then, set the Initial size and the Maximum size accordingly
Note - You can calculate the approximate size of the parameters using this formula: Initial Size (MB) = the recommended size (MB) Maximum Size = 1.5*1024*(Installed RAM in MB)
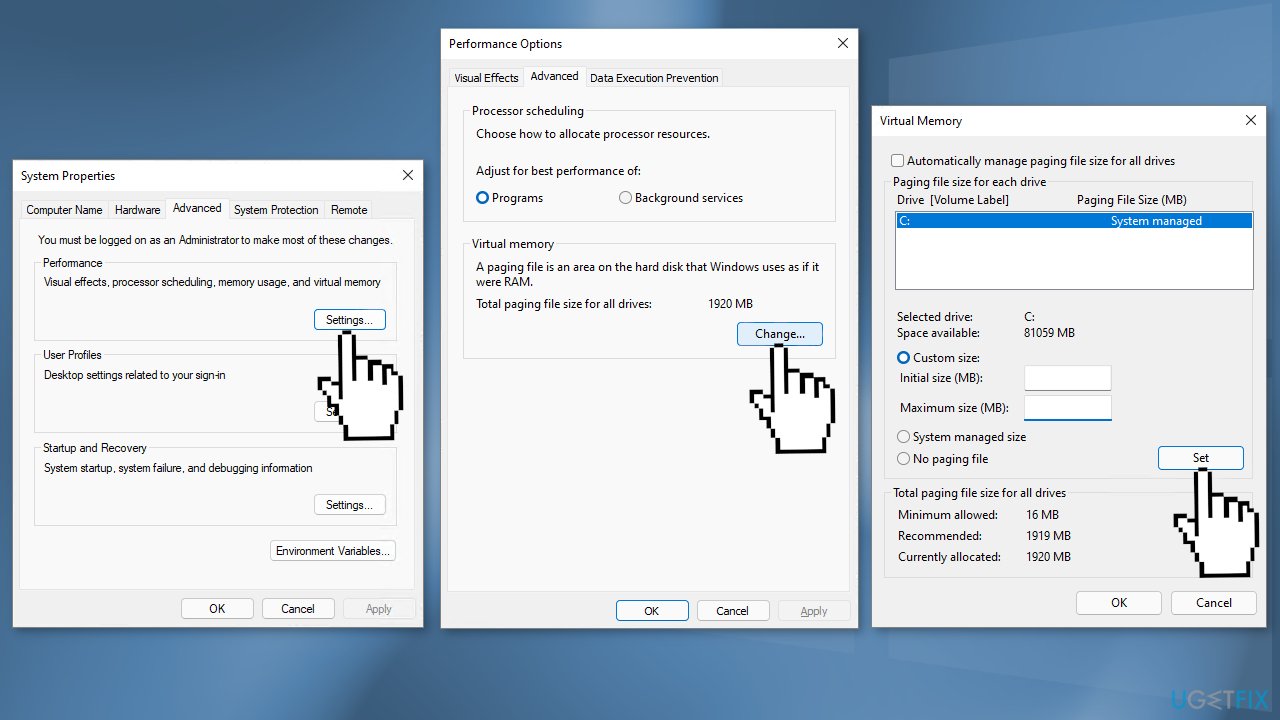
- Click OK to save the settings
- Come back to the Performance Options window, click on Apply and then click OK to save the changes
- Restart your computer
Method 6. Delete All Temp Files
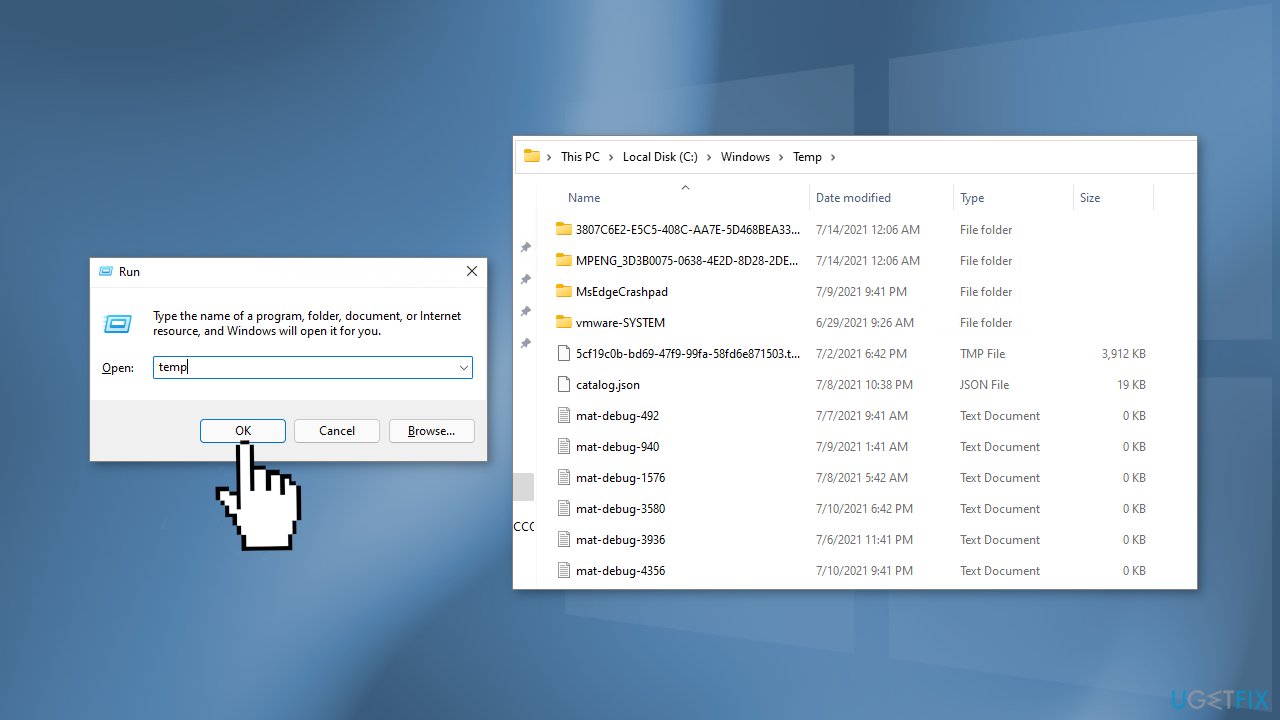
- Press the Windows key + R at the same time, type temp and hit Enter
- It will list all the temp files on your computer
- Select and delete all of them
- Check if the issue was fixed
Bottom line
This guide provides several methods to address 100% disk usage after upgrading to Windows 11, including checking the disk for errors, changing the MSISupported value, and using a maintenance tool. If these steps do not resolve the issue, further troubleshooting may be necessary.
Frequently asked questions
Common causes include Windows Search, Superfetch, and background system processes that may not be optimized for Windows 11 yet.
You can reduce disk usage by disabling unnecessary startup programs, adjusting Windows Search settings, or temporarily disabling Superfetch.
Yes, it is generally safe to disable Windows Search, but this may affect search functionality; you can re-enable it later if needed.



Report an issue
What's wrong with this guide? We review every report and update or remove content.
Report received — thank you. We'll review and fix it.
You need a free account to submit a report.
Be the first to comment