
How to fix Quick Access Menu missing in Windows 11?

Prefer to fix it yourself? The manual steps follow.
6 methods in this guide
Hello. The Quick Access Menu on my Windows 11 laptop suddenly went missing. Is there a way to fix this? Any suggestions would be appreciated.
The Quick Access menu is a feature in the Windows operating system that allows users to access frequently used files and folders quickly and easily. It is located on the left side of the File Explorer window, just below the favorites section. One of the main benefits of the Quick Access Menu is that it provides quick and easy access to frequently used files and folders.
This can save users a lot of time and effort by allowing them to access these items without having to navigate through the entire file system. The Quick Access Menu is also customizable, so users can add or remove items from the list as needed. However, some users encountered an issue when the Quick Access Menu disappeared in Windows 11.
Unfortunately, this is not a known bug and it is unknown what exactly causes it. The Quick Access Menu could go missing because of missing Windows updates, corrupted system files, or messed up settings after Windows installation. In this guide, you will find 6 steps that should help you fix Quick Access Menu missing in Windows 11.
However, the manual troubleshooting process can be lengthy.
Method 1. Update Windows
- Click Start and select Settings
- Go to the Windows Update section
- Click Check for updates and wait
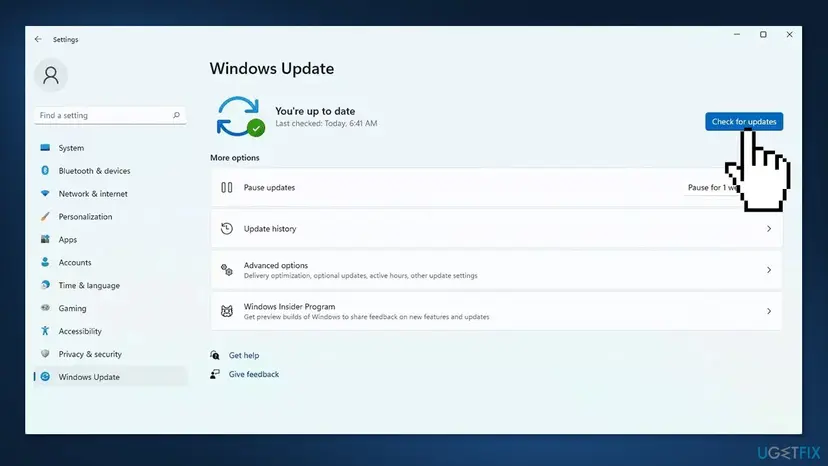
- Go to the Advanced options and install optional updates
- Reboot your system.
Method 2. Fix Corrupted System Files
Use Command Prompt commands to repair system file corruption:
- Open Command Prompt as administrator
- Use the following command and press Enter:
sfc /scannow
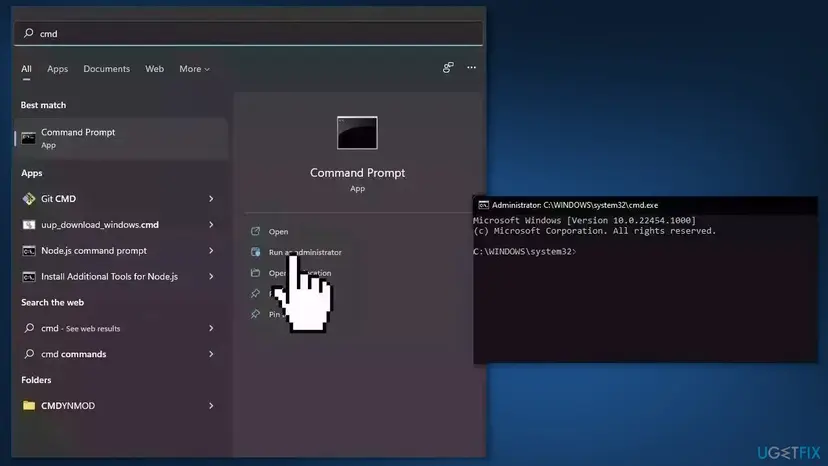
- Reboot your system
- If SFC returned an error, then use the following command lines, pressing Enter after each:
DISM /Online /Cleanup-Image /CheckHealth
DISM /Online /Cleanup-Image /ScanHealth
DISM /Online /Cleanup-Image /RestoreHealth
Method 3. Clear File Explorer History
- Press the Windows key + E to open File Explorer
- Click on the action button, then click on Options
- Under File Options, select the General tab, then go under Privacy and click on the Clear button
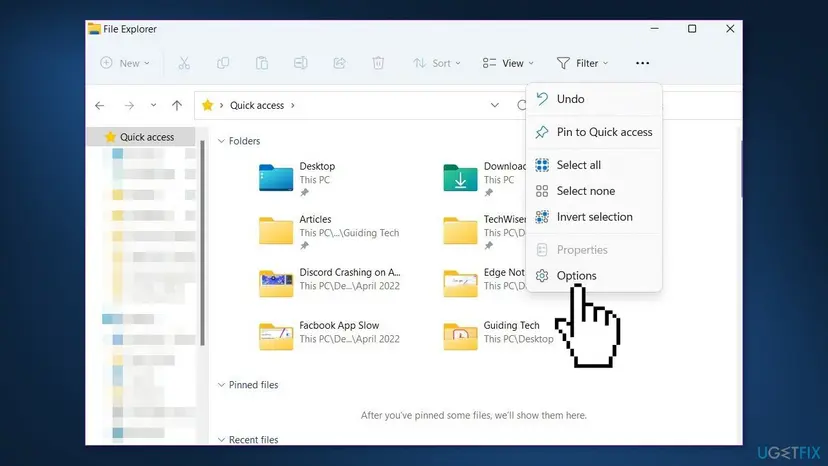
- Wait for the operation to complete
Method 4. Enable Navigation Pane Options
- Press the Windows key + R to open the Run dialog box
- Type control.exe folders inside the dialog box and press Ctrl + Shift + Enter
- At the User Account Control (UAC), click Yes to grant admin access
- Go to the View tab and scroll down to the Navigation pane
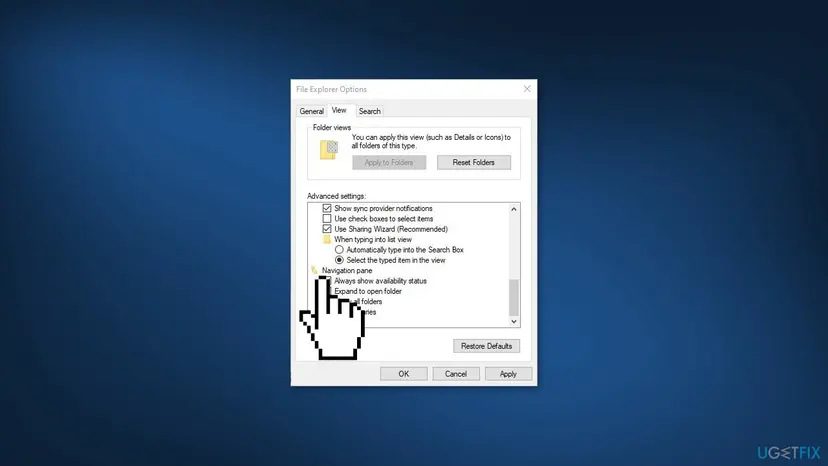
- Enable every item under Navigation pane and click Apply to save the changes
- Restart your PC
Method 5. Re-pin all Quick Access Items
- Press the Windows key + R to open the Run dialog box
- Type cmd, then press Ctrl + Shift + Enter to open a Command Prompt with admin access
- Click Yes to grant admin access at the User Account Control (UAC).
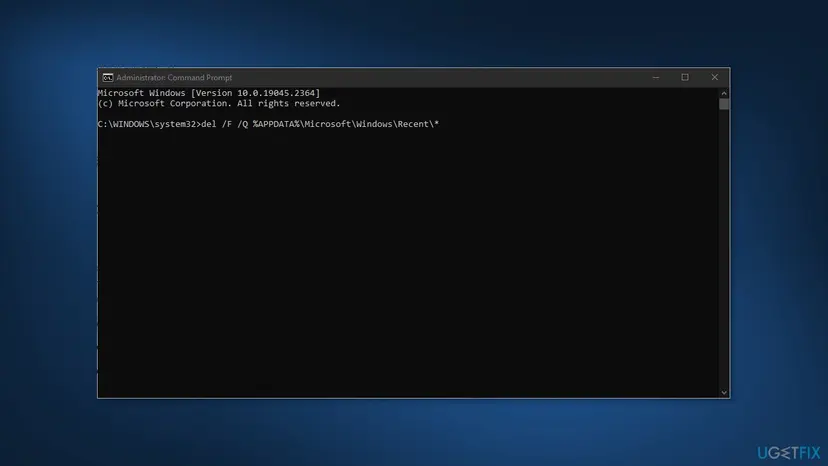
- Type the following commands in the same order and press Enter after each one to delete the Recent, Automatic Destinations, and Custom Destinations folders within the Quick Access menu:
del /F /Q %APPDATA%\Microsoft\Windows\Recent\*
del /F /Q %APPDATA%\Microsoft\Windows\Recent\AutomaticDestinations\*
del /F /Q %APPDATA%\Microsoft\Windows\Recent\CustomDestinations\
- Reboot your PC
Method 6. Repair Install Windows
- Visit the official Microsoft website to download Windows 11 Installation Media
- Run the Media Creation Tool and select Create Installation Media for another PC
- Select your USB drive
- Let the Process complete of writing the Installation files to the USB drive
- Click Finish
- On the PC you wish to upgrade, Press Windows + E to open the File Explorer
- Open the Removable drive and click Setup.exe
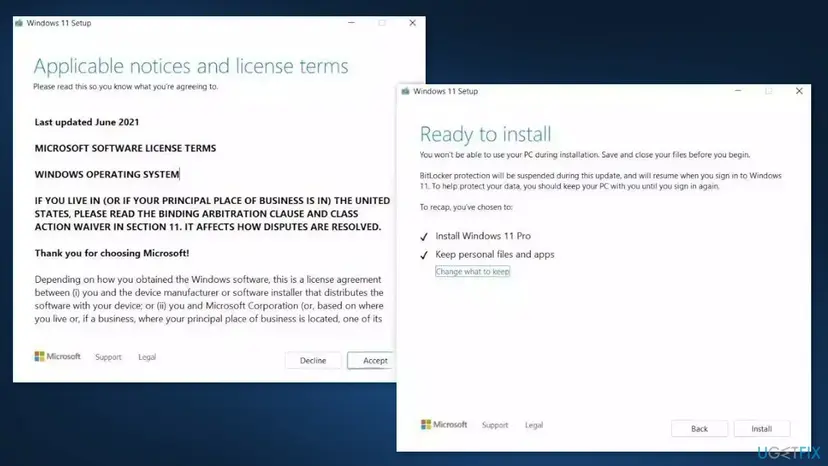
- Accept the license terms on the next screen
- Confirm the Upgrade options – Files, apps and Settings are kept
- Click Install, and the upgrade should start
Did this fix work?
One click, no account. It tells the next reader which guides are worth their time.
Questions and experiences: fix Quick Access Menu missing in Windows 11
Still broken, or found a fix we did not cover? Ask here: members and our editors answer. Reading is open; writing needs a free account.
…