How to fix
“Windows Installation has failed” when upgrading Windows
on Windows
Resolve the "Windows Installation has failed" error when upgrading to Windows 10 or 11 quickly and efficiently. Expert-tested solutions await!
What causes How to fix “Windows Installation has failed” when upgrading Windows?
- Corrupted system files
- Absence of an enabled Trusted Platform Module (TPM)
- Insufficient disk space
- Interference from antivirus software
Repairs Windows system files, removes malware, and restores a clean OS state — without reinstalling.
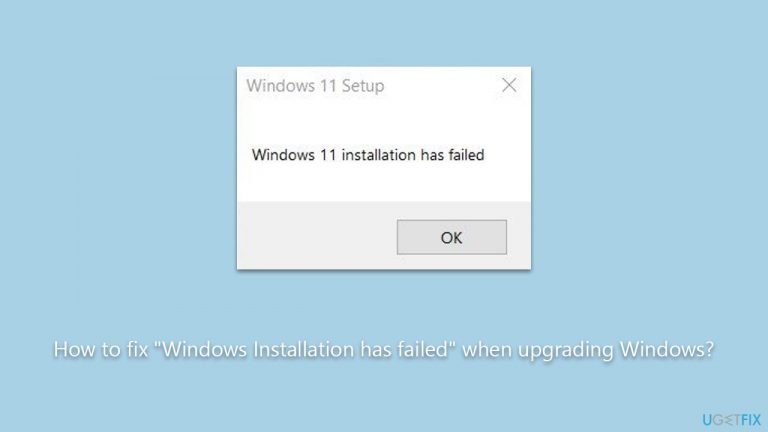
I am unable to upgrade to Windows 11. Every time I try, I receive an error "Windows Installation has failed." Please provide solutions on how to fix this.
Many individuals opt to upgrade their operating system from Windows 10 to Windows 11 due to the new features and improvements it offers. This transition to Windows 11 provides a more streamlined user experience, stronger security measures, and an updated interface.
However, during this upgrade process, a notable challenge that you might face is the "Windows Installation has failed" error. Encountering this error can be frustrating, as it prevents you from accessing the advantages of the latest OS version.
Several reasons can trigger the "Windows Installation has failed" error during the upgrade. One frequent issue is corrupted system files, which show up with regular computer usage. As a result, some system files can become damaged or go missing, causing disruptions during the upgrade.
Another factor can be the absence of an enabled Trusted Platform Module (TPM). Windows 11 mandates specific hardware requirements, and an enabled TPM is among them. If your computer's TPM isn't activated or doesn't meet the standards, the installation might fail.

Insufficient disk space is another possible cause. Windows 11 requires a certain amount of free space to install successfully. If your computer doesn't have enough space, the installation process may be interrupted. Moreover, certain antivirus software can interfere with the upgrade. Some security programs might view the upgrade process as suspicious activity, blocking or halting the installation.
To help address these underlying issues with the Windows operating system, consider using the [d1] PC repair tool, which is designed to diagnose and rectify such problems automatically.
Fix 1. Use Disk Cleanup
Clearing temporary files and unnecessary system junk can help free up space, which can be crucial during a Windows installation. A clean disk can often prevent installation errors related to insufficient storage.
- Type Disk Cleanup in Windows search and hit Enter
- If your Windows is installed on drive C, pick it from the list (should be by default) and press OK
- Click Clean up system files
- Select your main disk again and click OK
- Here, select the largest portions of the data used - these typically include Temporary Internet Files, Windows Update, Temporary Files, Recycle Bin, Delivery Optimization Files, and others.
- Click OK and wait for the cleanup process to finish.

Fix 2. Run SFC and DISM scans
System File Checker (SFC) and Deployment Image Servicing and Management (DISM) are tools designed to repair corrupted system files. Running these scans can fix potential issues causing the installation to fail.
- Type in cmd in Windows search.
- Right-click on Command Prompt and select Run as administrator.
- When User Account Control shows up, click Yes.
- In the Command Prompt window, paste the following command and hit Enter:
sfc /scannow - Next, use the following commands, pressing Enter each time:
Dism /Online /Cleanup-Image /CheckHealth
Dism /Online /Cleanup-Image /ScanHealth
Dism /Online /Cleanup-Image /RestoreHealth
(Note: if you get an error executing this last command, add /Source:C:\RepairSource\Windows /LimitAccess to it and try again). - Reboot your system.

Fix 3. Enable TPM in BIOS
A Trusted Platform Module (TPM) is a security component required by Windows 11. Enabling it can resolve installation issues related to hardware requirements.
- Right-click on Start and pick Settings.
- Go to the Update & Security section.
- Pick Windows security on the left side.
- If you can't see the Security processor option on the list, the TPM might be disabled.
- To enable it, you should go to Settings > Update & Security > Recovery > Advanced Startup > Restart now.
- After a restart go to Troubleshoot > Advanced options > UEFI Firmware Settings > Restart.
- These settings can also be found in the submenu in BIOS under Advanced, Trusted Computing, or Security sections.
- Look through the options and enable TPM.
- Once done, reboot your system and try upgrading.

Fix 4. Enable Secure Boot
Secure Boot is a security standard that ensures your PC boots using only trusted software. Enabling it can enhance the upgrade's success rate.
- In the Windows sign-in screen, press and hold the Shift key, then click Power > Restart.
- After a reboot, you will be presented with several options - select Troubleshoot.
- Go to Advanced options.
- Next, select UEFI Firmware settings - your PC will boot into BIOS.
- Go to the Security section and enable Secure Boot.
- Press F10 to save these changes and reboot the PC.

Note that, if your system doesn't meet the Windows 11 requirements, you can always attempt to bypass these restrictions by using Registry Editor, although attempt this at your own risk. Insufficient hardware requirements might result in Windows running slowly or some features not working (correctly).
Fix 5. Disconnect all the external drives, apart from Windows ISO
External drives can interfere with the installation process. Disconnecting them can streamline the installation.
- Eject and disconnect all external storage devices (USB drives, SD cards).
- Keep only the drive or USB containing the Windows ISO connected.
Fix 6. Uninstall security and similar software
Some security software might block the upgrade process, thinking it's suspicious.
- Open Control Panel.
- Navigate to Programs and Features.
- Find your security software from the list.
- Right-click on it and choose Uninstall.
- Follow the prompts to complete the uninstallation.
- Repeat this process for any other programs that might interfere with the upgrade.
- Once done, restart your device.

Fix 7. Update BIOS
An outdated BIOS can cause compatibility issues with newer operating systems. Note that an incorrect update process might result in issues, so make sure you perform this correctly or refer to somebody who has experience in this.
- Identify your current BIOS version. You can do this by opening the System Information in Windows.
- Visit the manufacturer's website for your motherboard.
- Locate the latest BIOS update and compare it to your current version.
- If a newer version is available, download it.
- Follow the manufacturer's specific instructions for updating the BIOS. This process varies between manufacturers and can be complex.
- After the update, restart your computer.

Bottom line
To fix the 'Windows Installation has failed' error, you can use Disk Cleanup to free up space, ensure your TPM is enabled, and check for any interfering antivirus software. If these solutions do not resolve the issue, consider using a PC repair tool to diagnose and rectify underlying problems.
Frequently asked questions
First, ensure that your system meets the minimum requirements for Windows 10 and that you have enough disk space. If the issue persists, consider running the Windows Update Troubleshooter to identify and fix potential problems.
Yes, resetting your PC can help resolve this error, but make sure to back up your data first. You can initiate the reset from the Recovery settings in Windows 11.
Yes, ensure that all pending Windows updates are installed before attempting the upgrade again, as missing updates can cause installation failures. You can check for updates in the Windows Update section of the Settings app.


Report an issue
What's wrong with this guide? We review every report and update or remove content.
Report received — thank you. We'll review and fix it.
You need a free account to submit a report.
Be the first to comment