How to fix
Windows couldn’t automatically bind the IP protocol stack to the network adapter
on Windows
Resolve the "Windows couldn't automatically bind the IP protocol stack" error on Windows 10 and 11 effortlessly. Expert-tested solutions await you!

![[Fix] Windows couldn’t automatically bind the IP protocol stack to the network adapter](https://ugetfix.com/wp-content/uploads/articles/askit/fix-windows-couldnt-automatically-bind-the-ip-protocol-stack-to-the-network-adapter_en-768x432.jpg)
What causes [Fix] Windows couldn’t automatically bind the IP protocol stack to the network adapter?
- Updating drivers
- Installing third-party VPN software
- Issues with Wi-Fi adapter driver
- Problems with Ethernet adapter driver
- Corrupted system components
Repairs Windows system files, removes malware, and restores a clean OS state — without reinstalling.
Hello. After installing the latest drivers for my wifi adapter, I got the "Windows couldn't automatically bind the IP protocol stack to the network adapter" error. Any ideas on how to fix this issue?
Windows is one of the most popular operating systems created by Microsoft. It has built-in troubleshooters designed to quickly diagnose and automatically solve various computer problems related to the Internet connection, Bluetooth, sound, printing, updates, and much more. The troubleshooters are easy to understand and use and are a great help.
Troubleshooters are built into the Control Panel on Windows 10, 8, and 7, so almost all Windows users can take advantage of them. On Windows 10 Creators Update,[ref en-1] most troubleshooters are available through the Settings app.
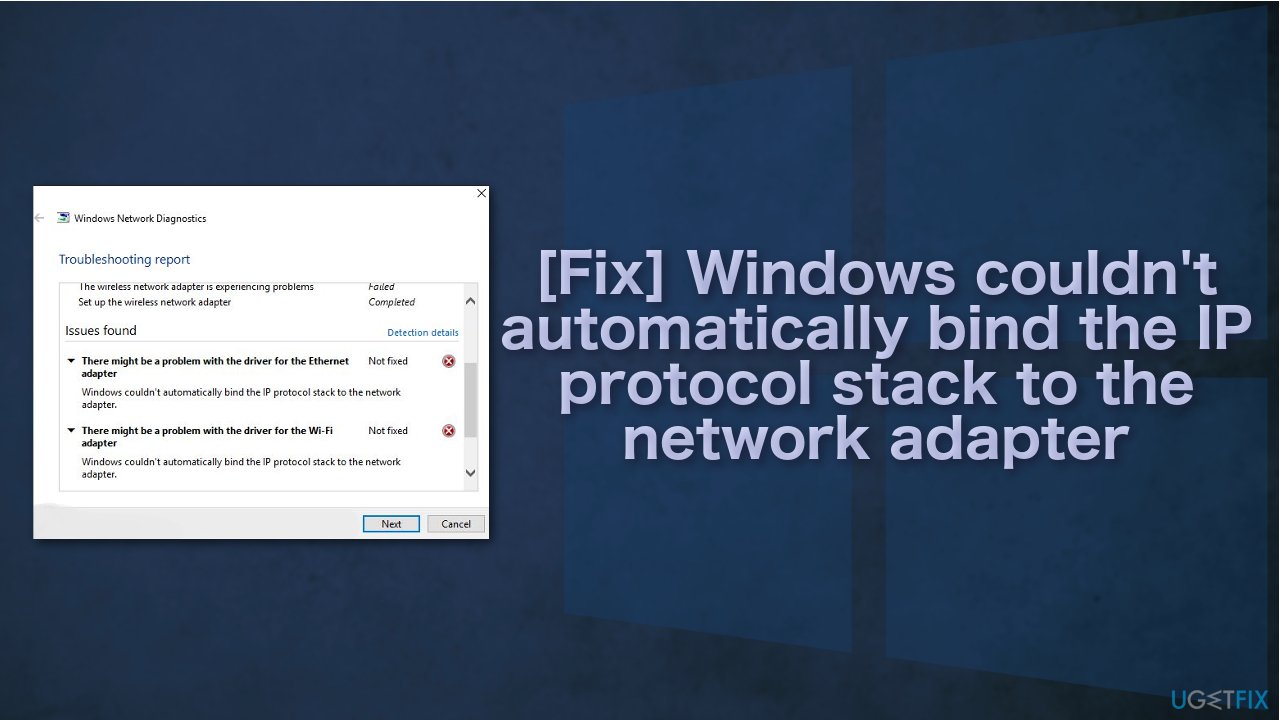
Troubleshooters can fix problems automatically most of the time. However, they can give errors too rather than fixing them. Users have come across the "There might be a problem with the driver for the Wi-Fi adapter" (or Ethernet adapter) which states that "Windows couldn't 'automatically bind the IP protocol stack to the network adapter."
In this case, users have trouble connecting to the Internet, and the troubleshooter is not able to fix the problem and does not offer any solutions. Hence, it means people need to identify the cause and fix it manually. For most, the issue started occurring after updating drivers, Windows, and installing a third-party VPN software.[ref en-2] If the problem is the VPN, you might need to disable the VPN client or uninstall it completely.
Going through all the possible solutions could take a while, so you can try using an automatic solution [d1] - the repair tool that can identify the damaged system components, fix the Blue screen of death,[ref en-3] and registry issues by scanning the system. This software could also be used to free up space by clearing cookies and cache, which should boost the device's performance.
In this guide, you will find a few manual methods that could fix the "Windows couldn’t automatically bind the IP protocol stack to the network adapter" error. Keep in mind that this could take a while, so be patient and follow the steps carefully:
Solution 1. Revert to the default Network Adapter settings
One of the most common troubleshooting methods is to revert your Windows to the default network adapter properties settings. By doing so, your network connection only uses the required items:
- Press Windows + R to open the Run box
- Type ncpa.cpl and hit Enter to open the Network Connections windows
- Right-click on the network adapter and select Properties
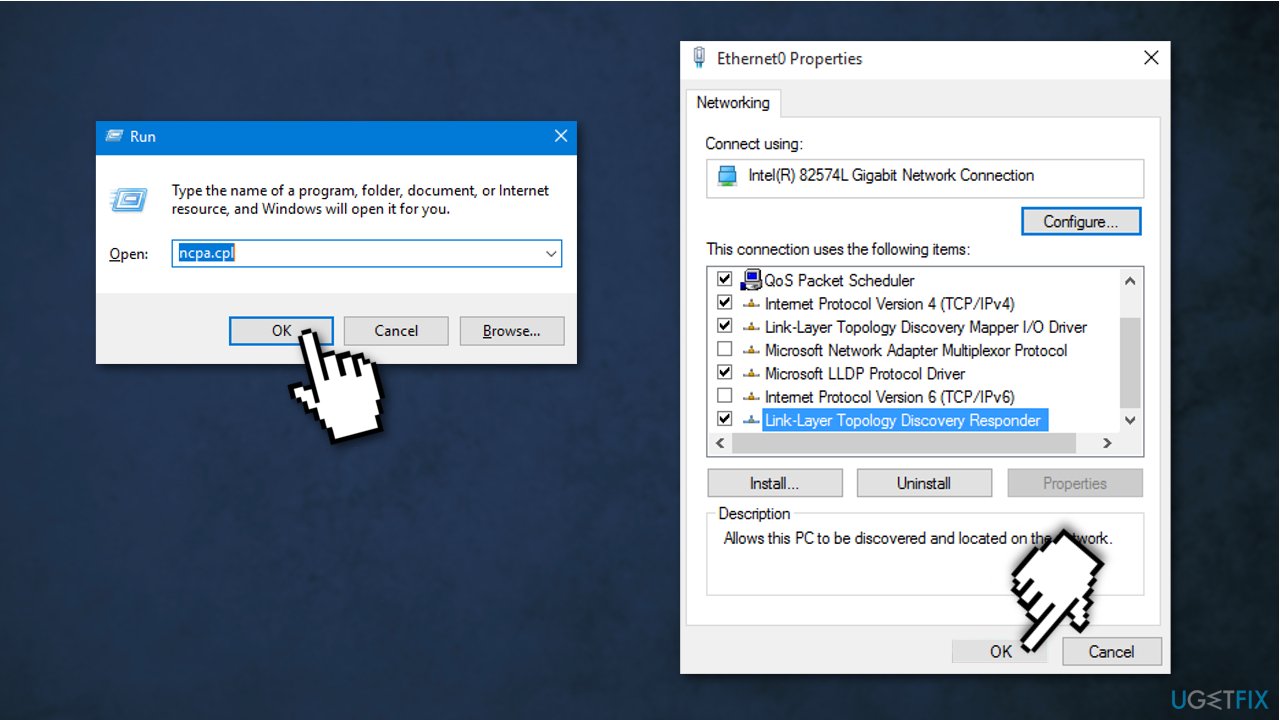
- Choose the Networking tab and tick the boxes next to the items listed below:
File and Printer Sharing for Microsoft Networks
QoS packet scheduler
Link-Layer Topology Discovery Responder
Internet Protocol Version 4 (TCP/IPv4)
Link-Layer Topology Discovery Mapper I/O driver
Internet Protocol Version 6 (TCP/IPv6)
Microsoft LLDP Protocol Driver
Client for Microsoft Networks
- Click OK to save changes
- Connect your PC to the network
Solution 2. Reset the IP and clear DNS cache
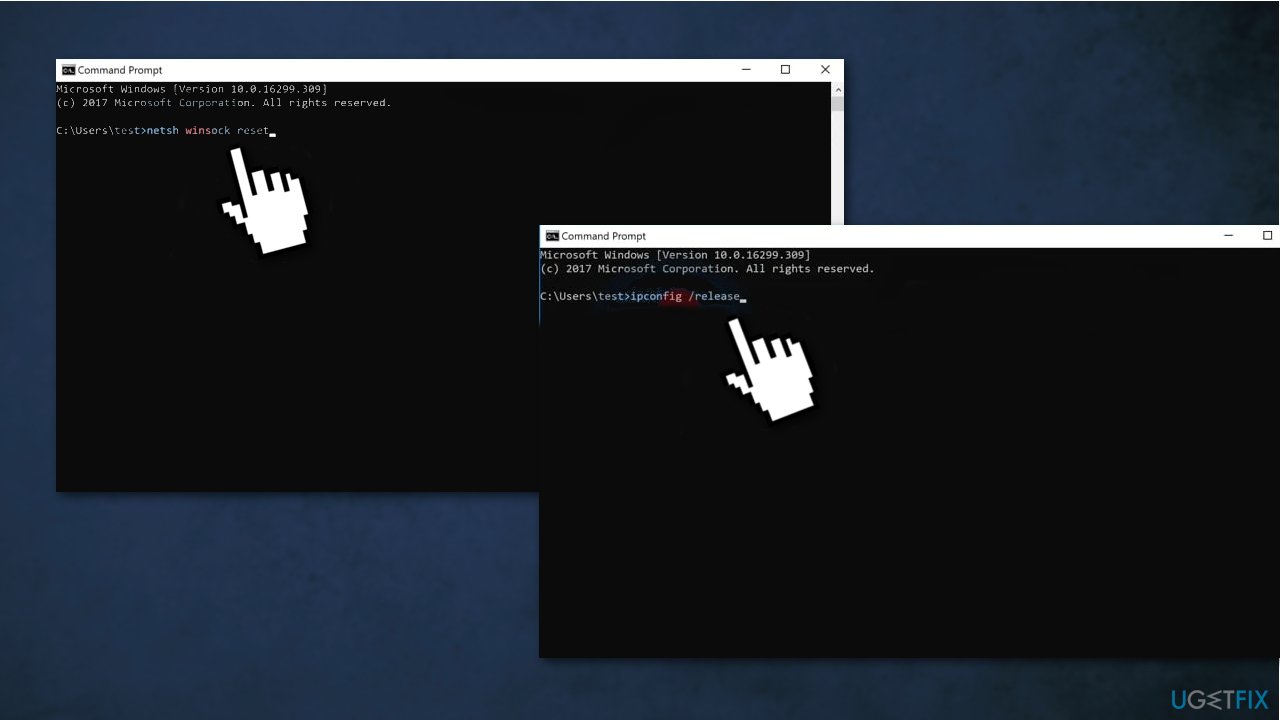
- Type Command Prompt in the search and select Run as administrator
-
Type these commands in the window and press Enter after each one:
netsh winsock reset
netsh int ip reset - Restart
- Type these commands and press Enter after each one:
ipconfig /release
ipconfig /flushdns
ipconfig /renew - Restart the computer and try connecting to the network
Solution 3. Change the startup type of WLAN AutoConfig Service
Disabled WLAN AutoConfig service can cause various network issues. If you recently installed a third-party network application, this service might be affected:
- Press Windows + R keys to open the Run box
- Type services.msc in the box and hit Enter
- Double-click on the WLAN AutoConfig service
- Change the Startup type to Automatic
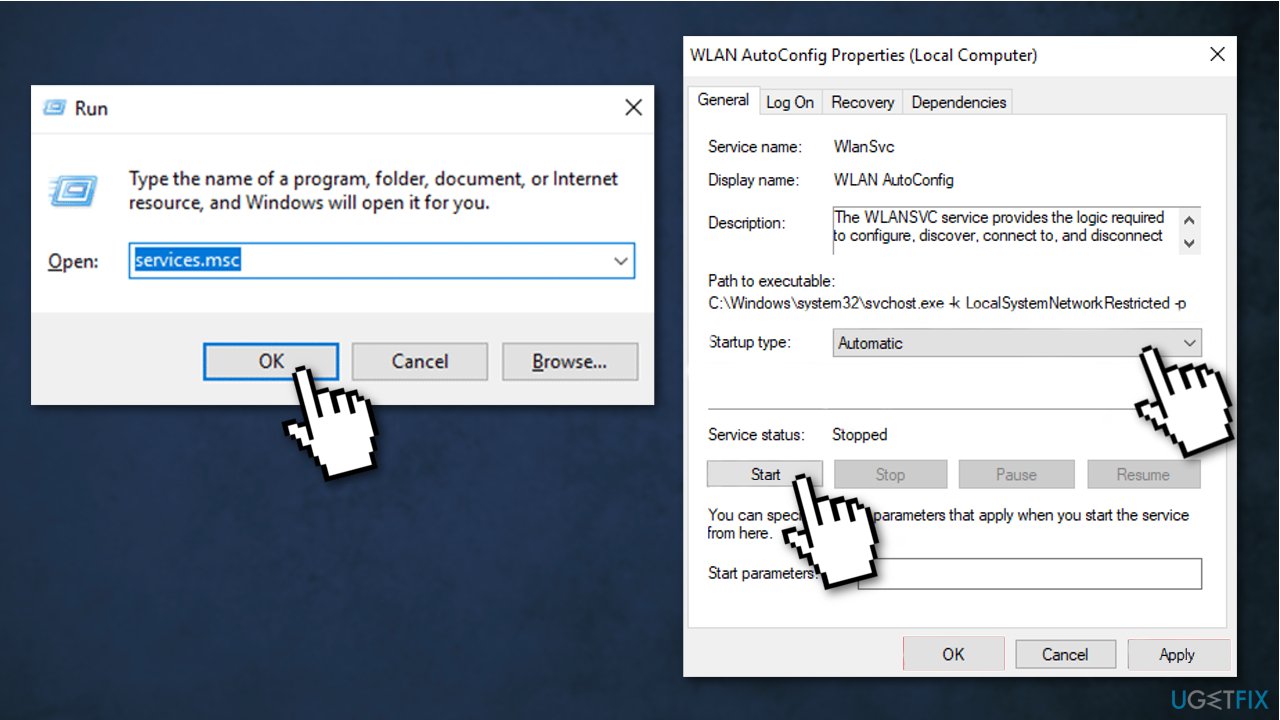
- Click on the Start button
- Click OK and Apply to save the changes
- Restart
Solution 4. Disable the ANOD Network Security Filter Drivers
Some users reported that the error could be caused because the network driver is not compatible with your current Windows version:
- Press Windows + R to open the Run box
- Type devmgmt.msc and hit Enter.
- In the Device Manager window, expand the Network Adapter category
- Right-click on the ANOD Network Security Filter Driver
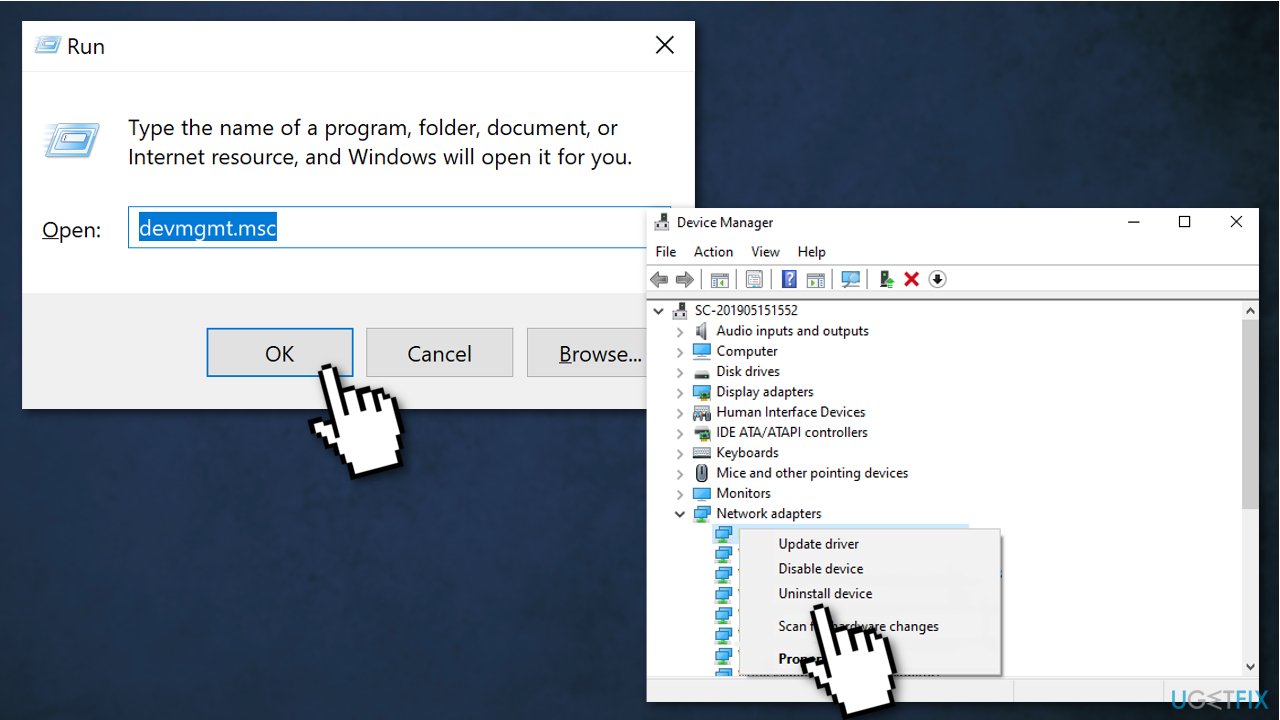
- Select Uninstall device
- Click on Uninstall to confirm and follow the on-screen prompts to complete this uninstallation
- Restart
Solution 5. Update your network adapter
An outdated network adapter driver could be the cause of the error. In this case, you can fix it automatically by using [rev id="DriverFix"], which will scan your PC for missing and out-of-date device drivers. Or you can update your network driver to the latest version manually:
- Press Windows + R keys to open the Run box
- Type devmgmt.msc and hit Enter to open the Device Manager
- Expand the Network Adapter category
- Right-click the network adapter driver and select Update driver
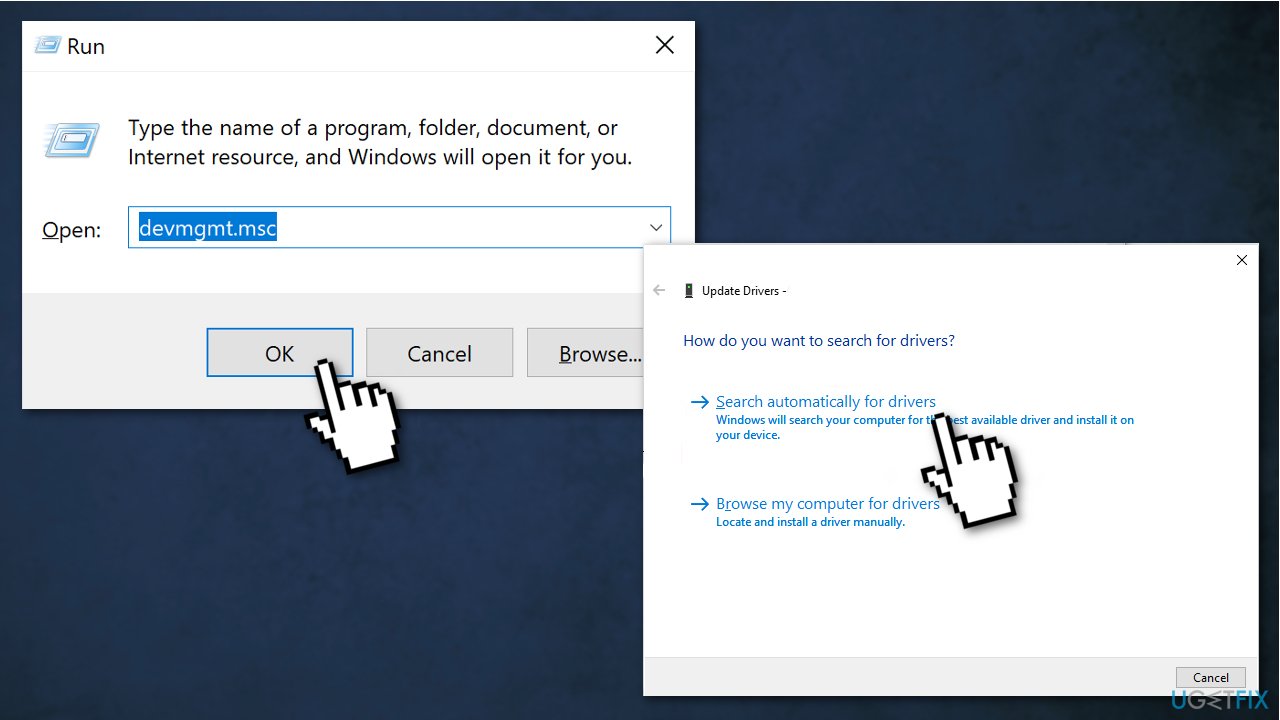
- Select the Search automatically for updated driver software option and follow the on-screen instructions
Solution 6. Remove CISCO VPN registry keys
As per various user reports, older versions of the Cisco VPN are often responsible for causing this particular error. There’s a lot of user speculation that this happens because older Cisco VPN builds are not designed to run with the latest Windows 10 updates. The Cisco VPN can leave behind some registry keys even if the program is uninstalled:
- Press Windows key + R to open the Run box
- Type cmd and press Ctrl + Shift + Enter to open Command Prompt window
- Click Yes to grant admin rights
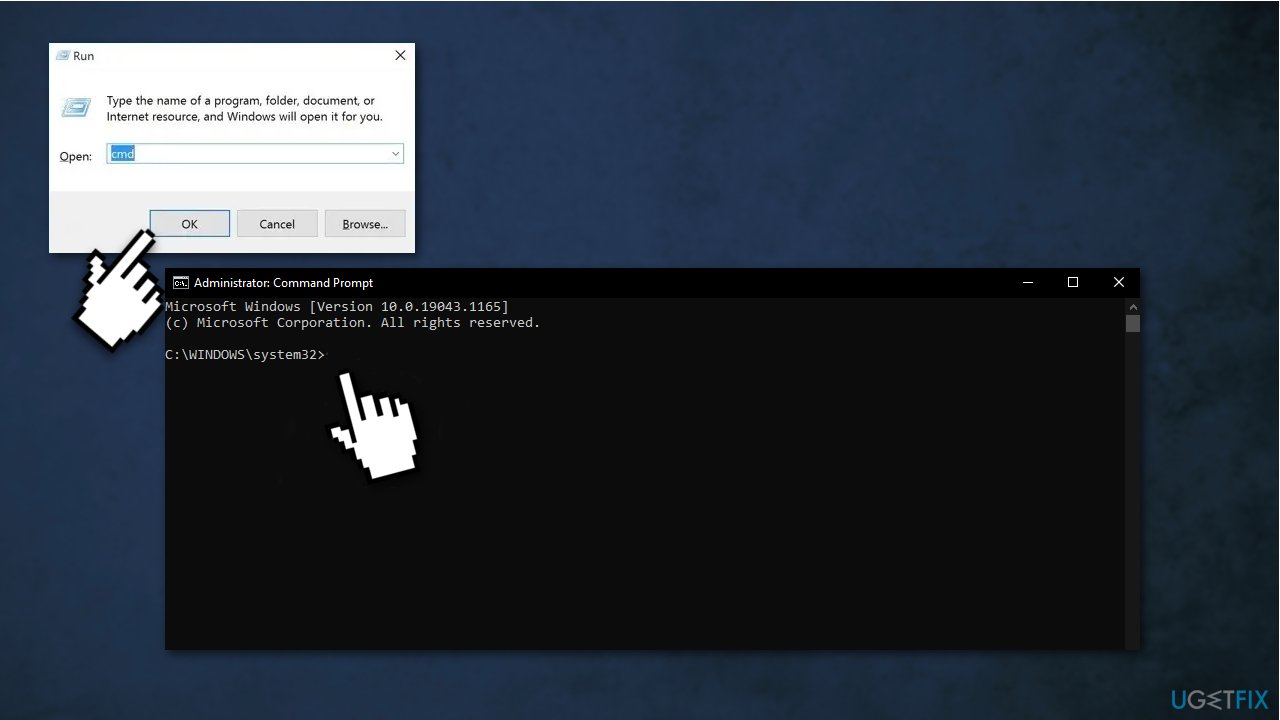
- Copy-paste the command and hit Enter:
reg delete HKCR\\CLSID\\{988248f3-a1ad-49bf-9170-676cbbc36ba3} /f
If the key is not on your system, you will see a “The system was unable to find the specified registry key or value” error
- Insert the following command and press Enter:
netcfg -v -u dni_dne
- Restart
Solution 7. Revert Windows 10 to an earlier state
- Press Windows + R to open the Run box
- Type cmd and press Ctrl + Shift + Enter keys to open the elevated Command Prompt
- Click Yes to grant admin rights
- Type rstrui.exe command and hit Enter
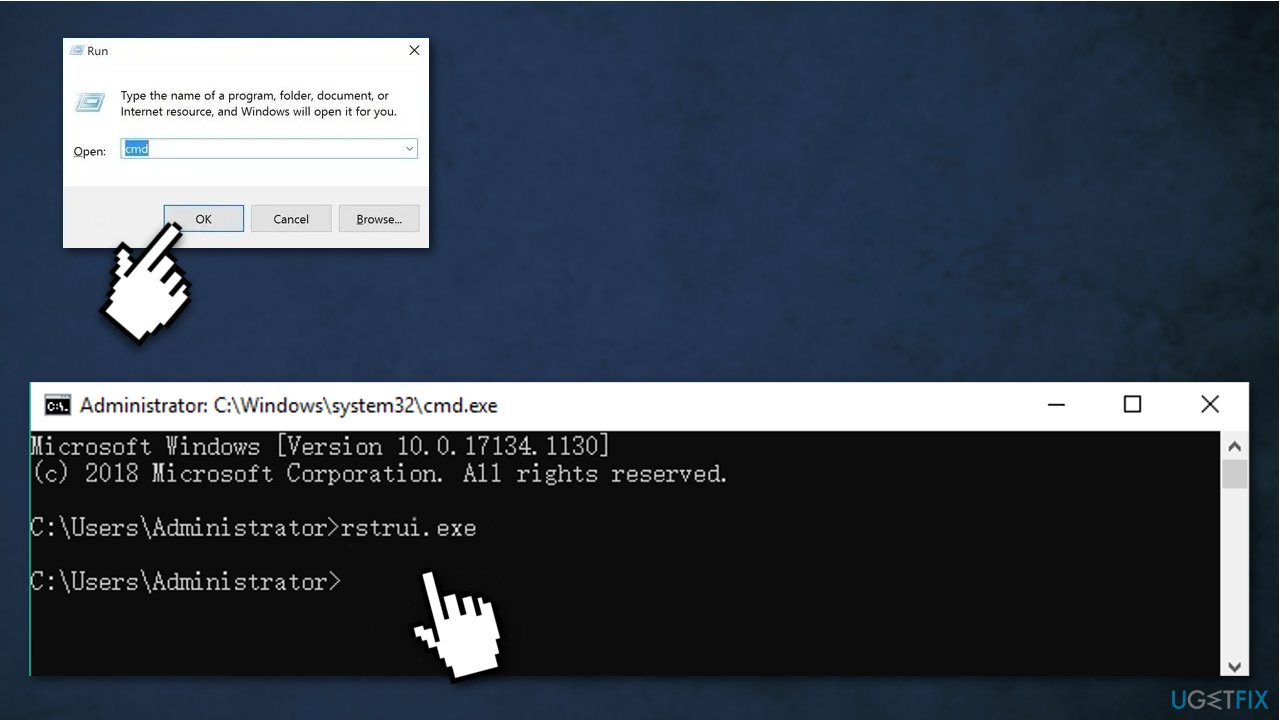
- Click Next on the System Restores window
- In the list of all system restore points, select the Restore point that you prefer to and click the Next button
- Click the Finish button
You might also be interested in these topics:
Bottom line
This guide provides manual methods to resolve the 'Windows couldn’t automatically bind the IP protocol stack to the network adapter' error, including disabling or uninstalling VPN software and using a repair tool to fix system issues. If these solutions do not work, further investigation into the network adapter settings may be necessary.
Frequently asked questions
You can try resetting the TCP/IP stack by running the command 'netsh int ip reset' in the Command Prompt as an administrator. After executing the command, restart your computer to see if the issue is resolved.
Open Device Manager, locate your network adapter, and check for any warning signs or errors. If there are issues, right-click the adapter and select 'Update driver' to ensure you have the latest drivers.
Yes, you can often resolve the issue by running network troubleshooting tools or resetting your network settings in Windows 10 or Windows 11 through the Settings app.




Report an issue
What's wrong with this guide? We review every report and update or remove content.
Report received — thank you. We'll review and fix it.
You need a free account to submit a report.
Be the first to comment