How to fix
“Word could not create the work file” error
on Windows
Resolve the "Word could not create the work file" error in Windows 10 or 11 effortlessly. Follow our expert-tested tips for a quick fix!
What causes How to fix “Word could not create the work file” error in Windows?
- Corrupted files
- Disk problems
- Issues with environment variables
- Failing hard drive
- Improperly configured environment variables
Repairs Windows system files, removes malware, and restores a clean OS state — without reinstalling.
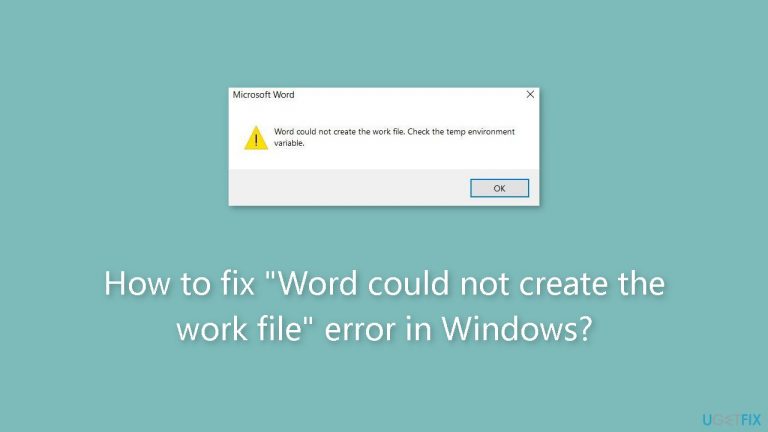
Hello. When I try to open Word documents, I get the error "Word could not create the work file. Check the temp environment variable." How can I fix this?
The "Word could not create the work file" error is a common issue encountered by users of Microsoft Word on Windows PCs. This issue can be particularly annoying because it prohibits users from previewing, opening, or saving documents and is frequently accompanied by the phrase "Check the temp environment variable." Corrupted files, disk problems, or issues with environment variables within the Windows operating system are just a few of the potential root causes of this error message.
Users may be significantly impacted by this problem, particularly those who use Microsoft Word frequently for work or school. When they are unable to access their documents or complete necessary duties, it might interfere with productivity and lead to frustration. This issue may cause delays, lost work, and even possible data loss for professionals, students, and anyone else who uses Word to create, edit, and manage documents.
One of the main issues with this error is that it can be very unclear, which makes it difficult for users to pinpoint the underlying reason. Corrupted files, which are a common trigger for this error, can lead to data loss if not addressed promptly. Disk issues, such as a failing hard drive, may result in more extensive problems, potentially affecting other applications and system stability. Additionally, problems with environment variables can cause issues not only with Microsoft Word but with various other applications as well.
While correcting this issue can be challenging and frequently necessitates a specialized troubleshooting procedure, some potential fixes include repairing or reinstalling Microsoft Word, checking for and fixing disk issues, or configuring environment variables to ensure they are set up properly.
In this guide, you will find 9 steps that should help you fix "Word could not create the work file" error in Windows. You can also run a maintenance tool like [d1] that can fix most system errors, BSODs, corrupted files, and registry issues. Otherwise, follow the step-by-step instructions below.

Solution 1. Fix Corrupted System Files
Use Command Prompt commands to repair system file corruption:
- Open Command Prompt as administrator
- Use the following command and press Enter:
sfc /scannow

- Reboot your system
- If SFC returned an error, then use the following command lines, pressing Enter after each:
DISM /Online /Cleanup-Image /CheckHealth
DISM /Online /Cleanup-Image /ScanHealth
DISM /Online /Cleanup-Image /RestoreHealth
Solution 2. Check Disk
- Open Command Prompt as administrator
- Use the following command and press Enter:
chkdsk c: /r /scan /perf

- Restart your PC.
Solution 3. Turn off the Preview Pane
If you are only getting the "Word could not create the work file" error while previewing documents in File Explorer, you can turn off the preview pane temporarily.
- Press the Windows key + E keyboard shortcut to open File Explorer.
- Click the View menu,
- Go to Show, and disable the Preview pane option.

Solution 4. Add an Environment Variable
- Press the Windows key + I keyboard shortcut to open the Settings app.
- In the System tab, scroll down to select About.
- Click on Advanced system settings.

- Click the Environment Variables button.
- Then, under User variables, click the New button.
- In the Variable name field, enter %userprofile%.
- In the Variable value field, enter the following command and click OK:
C:\Users[YourUsername]
- Replace [YourUsername] in the above command with your actual username.
- Restart your PC.
Solution 5. Create a Temporary Internet Files Folder
- Press the Windows key + R keyboard shortcut to open the Run dialog box.
- Paste the following path in the text box and press Enter:
C:\Users[YourUsername]\AppData\Local\Microsoft\Windows\INetCache
- Replace [YourUsername] in the above command with your actual username.
- In the File Explorer window, press Control + Shift + N keyboard shortcut to create a new folder.
- Name it Content.Word and press Enter.
- After creating the above folder, restart your PC.

Solution 6. Check the Default Location for Temporary Internet Files
- Press the Windows key + R keyboard shortcut to open the Run dialog box.
- Type inetcpl.cpl in the box and press Enter.
- In the Internet Properties window, click on Settings.
- Then, click the Move Folder button.
- In the Browse for Folder window, navigate to the following folder:
C:\Users[YourUsername]\AppData\Local\Microsoft\Windows
- Within the Windows folder, select INetCache and click OK.

Solution 7. Check OneDrive Location
- In Microsoft Word, press F12 to bring up the Save as dialog.
- Navigate to a different location in the OneDrive directory and click Save.

Solution 8. Open Word in Safe Mode
- Hold down the Control key and double-click on the Word shortcut.
- Select Yes to confirm.
After Word opens in safe mode, try opening or saving your documents and see if you get any errors. If you don't, it means one of the add-ins you disabled was causing the problem.
- Open Microsoft Word and click the File menu at the top-left corner.
- Select Options from the left sidebar.

- In the Add-ins tab, select COM Add-ins from the Manage drop-down menu and click the Go button next to it.
- Clear all the checkboxes to disable your add-ins and hit OK.
- Restart Word and enable your add-ins one by one until the error pops up again.
- After you find the problematic add-in, consider removing it.
Solution 9. Re-register Word Files
- Press the Windows key + R keyboard shortcut to access the Run dialog.
- Type winword.exe /r and press Enter.
- Wait for the command to run, and try using Microsoft Word again.

Bottom line
To fix the 'Word could not create the work file' error, you can try repairing or reinstalling Microsoft Word, checking for and fixing disk issues, or configuring environment variables properly. If these steps do not resolve the issue, consider running a maintenance tool that can fix system errors, BSODs, corrupted files, and registry issues.
Frequently asked questions
This error often occurs due to permission issues with the Temp folder or when the folder is missing. Ensuring that the Temp folder exists and is accessible can resolve the issue.
In Windows 11, you can fix this error by changing the location of the Temp folder or clearing its contents. Make sure to restart Word after making these changes.
Yes, modifying the registry to point to a valid Temp folder location can help resolve this error. However, be cautious when editing the registry, as incorrect changes can affect system stability.


Report an issue
What's wrong with this guide? We review every report and update or remove content.
Report received — thank you. We'll review and fix it.
You need a free account to submit a report.
Be the first to comment