Question
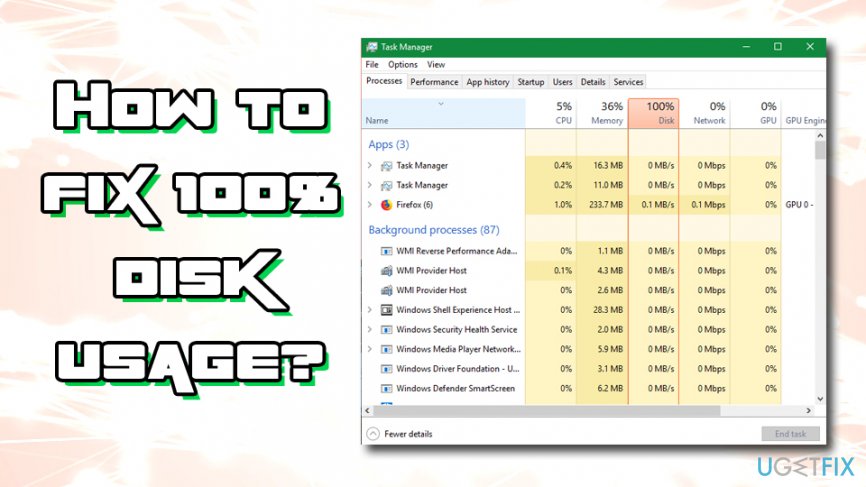
Issue: How to fix 100% disk usage on Windows 10?
Hello. I’m having an on-going issue with disk usage. My laptop is running Windows 10. I did a clean install with the bootable media after I noticed this issue and then disk usage went back to normal. However, when I reinstalled needed apps, the disk usage shot back to 100% constantly. I went through various forums online and the only thing I’ve found out that there are hundreds of people who are struggling with obscure 100% disk usage on Windows 10. Do you have any ideas why this may be happening and what should I do to fix this?
Solved Answer
100% disk[1] usage on Windows 10 can be attributed to many factors, including inappropriately installed software, driver malfunction, system file corruption, malware infection or even hardware failure.
However, according to specialists, this issue is typically triggered by a common software combination of Google Chrome and Skype. These two programs are known for sucking up memory individually, meaning that launching them at the same time might have devastating consequences, such as 100% disk usage on Windows 10, as well as serious slowdowns, freezes, and crashes.[2]
If you are not running Skype and Google Chrome simultaneously, it might be that Google Chrome alone is taking up your disk usage alone if a PC is infected by virus or malware.[3] According to Chrome engineers, advanced settings on Google Chrome contain an option called “Protect you and your device from dangerous sites”.
If you have this option enabled and the malware inside the system, this may root cause a high disk activity. As a matter of fact, various programs might be influencing system slowdowns and 100% disk usage, including Norton anti-virus, OneDrive, or Background Intelligent Transfer Service. Therefore, it’s very important to troubleshoot the issue and corresponding optimization methods.
How to fix 100% disk usage on Windows 10?
If you are using Google Chrome and Skype simultaneously, our recommendation would be to close one of them. Don’t forget that clicking on X button on Skype doesn’t close the application completely as it keeps running in the background. You can find out how to turn off Skype completely in this post.
Furthermore, if your Google Chrome is set to “Protect you and your device from dangerous sites”, try to disable this option and run a scan with a professional anti-virus, for instance, FortectMac Washing Machine X9. Virus, malware, worms, and similar threats are, needless to say, sucking up PC’s resources and generally influencing its performance in a negative way.
It’s worth mentioning that many people have managed to fix 100% disk usage on Windows 10 by unregistering one of OneDrive services. Although this solution is not officially proved, there are a number of people who claim this method to stand out its purpose. If these simple steps did not help to optimize 100% disk usage in Win 10, try the following fixes:
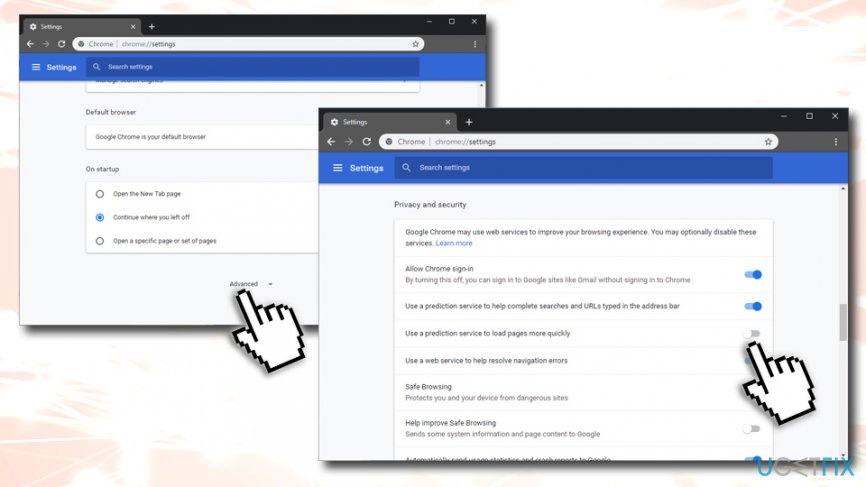
Fix 1. Change Google Chrome settings
- Launch Google Chrome and open Settings by clicking on three vertical dots at the top right corner of the screen.
- Scroll down and click on Show Advanced Settings.
- Select Privacy and security and untick an option Use a prediction service to load pages more quickly.

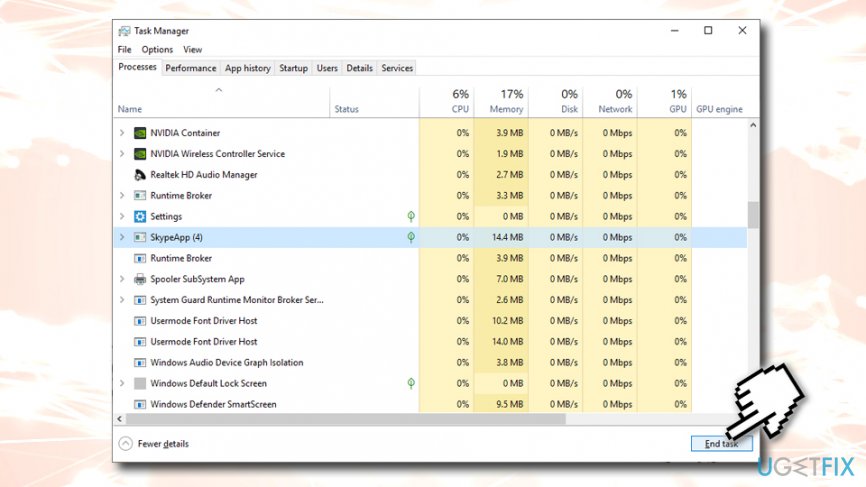
Fix 2. Change Skype settings
- Press Ctrl + Shift + Esc simultaneously.
- In the Task Manager, locate SkypeApp and shut it down by clicking on it once and then End task.

- Once done, open Windows Explorer and navigate to C:\\Program Files (x86)\\Skype\\Phone\\.
- Right-click on Skype.exe and select Properties.
- Click on Security tab, select Edit, and highlight ALL APPLICATION PACKAGES.
- Place a check mark in the Write box.
- Click Apply and OK to save the changes.
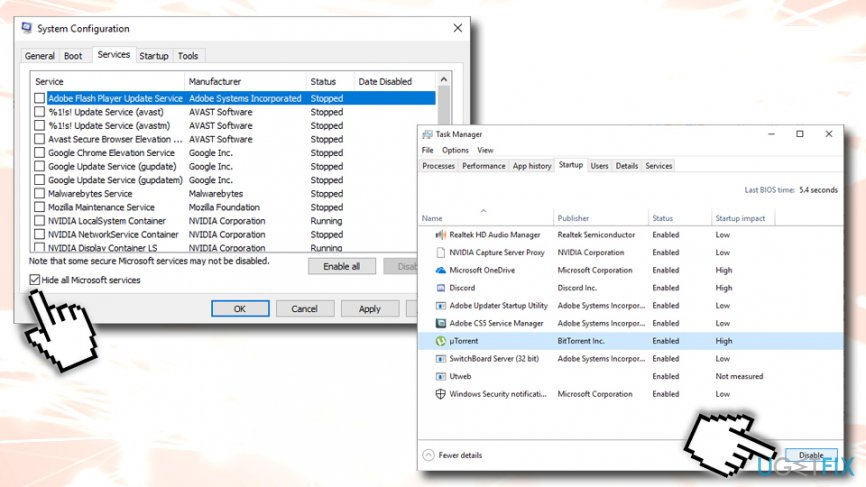
Fix 3. Try a Clean Boot to fix 100% disk usage on Windows 10
- Open search, type System Configuration, and press Enter.
- Go to the Services, select Hide all Microsoft services and then Disable all.
- Open Startup tab and select Task Manager.
- Mark all non-Microsoft applications and click Disable.

- Once done, exit Task Manager.
- On the System Configuration dialogue box, click OK.
- Restart the system.
Check if the memory usage went back to normal. If it did, then you should enable applications one by one to find out which one of them is problematic.
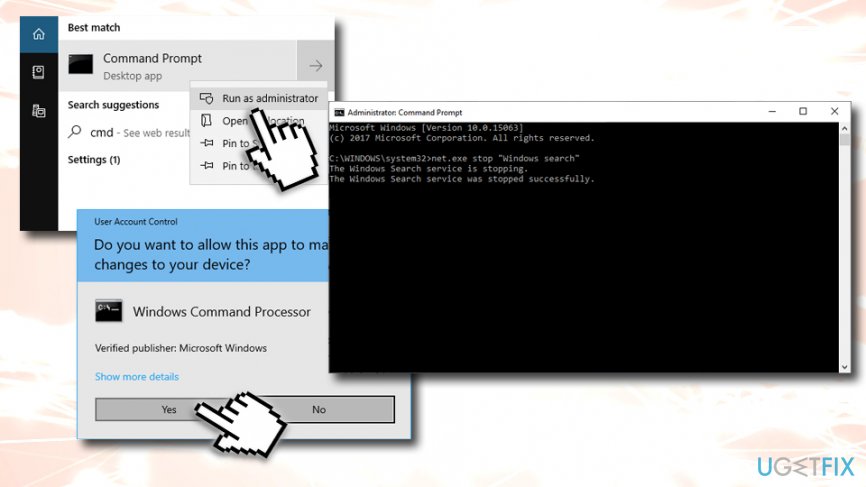
Fix 4. Disable Windows 10 search
- Type in cmd into the search bar
- Right click on Command Prompt search results and select Run as administrator
- On the UAC window, click OK.
- Type in the following and hit Enter:
net.exe stop “Windows search”
- After that, check if your Windows 10 disk usage decreased to the normal level.

Dix 5. Disable Adobe Flash in Google Chrome browser
Adobe Flash Player is one of the most vulnerable software ever created. It has multiple flaws which were abused by many cybercriminals over the years. For that reason, Adobe plans to shut down the plugin in 2020. Users reported that it can also cause 100% disk usage. You should disable the tool, as modern browsers do not really require it anymore:
- Go to menu and click on Settings
- Select Show advanced settings
- Next, go to Privacy > Content settings
- Find Flash and select Block sites from running Flash
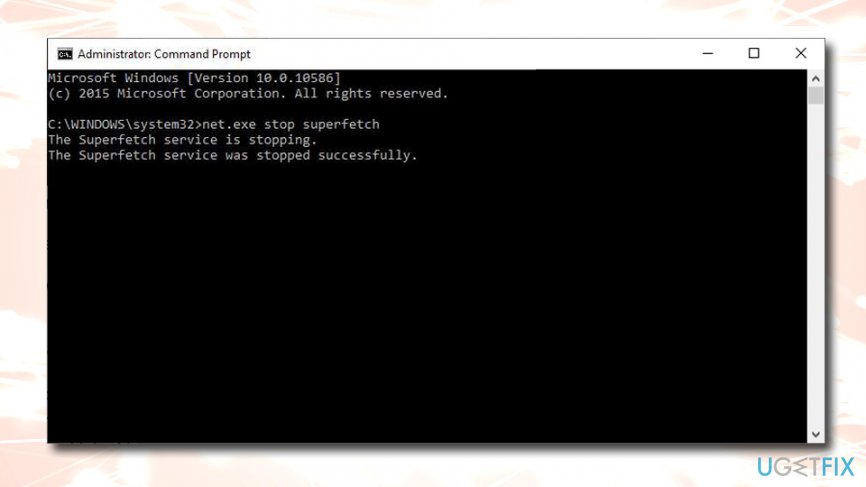
Fix 6. Disable Superfetch Service
This service has been suspected as a potential cause of disk usage issues on earlier Windows versions, so disabling it is worth trying in Windows 10 system, which is encountering a 100% disk usage issue. For that, you should:
- Go to Command Prompt (Admin) again
- Click OK on the UAC window.
- Type net.exe stop superfetch command in the log and press Enter.

Fix 7. Run disk check
Disk check command can be run via Command Prompt in order to make sure your HDD is not affected by bad sectors which can result in 100% disk usage on Windows 10.
- Go to Command Prompt (Admin)
- In the new window, type in
chkdsk C: /f /r /x
Note: replace the letter C with the drive your operating system is installed into
- You should restart the computer to run the check
Hopefully, you have adjusted some of the above-listed tips and managed to fix 100% disk usage on Windows 10. In general, the disk usage should rarely reach 100%, and, in case you tried all the methods mentioned above and nothing worked, it is likely that your hardware components are failing.
Repair your Errors automatically
ugetfix.com team is trying to do its best to help users find the best solutions for eliminating their errors. If you don't want to struggle with manual repair techniques, please use the automatic software. All recommended products have been tested and approved by our professionals. Tools that you can use to fix your error are listed bellow:
Access geo-restricted video content with a VPN
Private Internet Access is a VPN that can prevent your Internet Service Provider, the government, and third-parties from tracking your online and allow you to stay completely anonymous. The software provides dedicated servers for torrenting and streaming, ensuring optimal performance and not slowing you down. You can also bypass geo-restrictions and view such services as Netflix, BBC, Disney+, and other popular streaming services without limitations, regardless of where you are.
Don’t pay ransomware authors – use alternative data recovery options
Malware attacks, particularly ransomware, are by far the biggest danger to your pictures, videos, work, or school files. Since cybercriminals use a robust encryption algorithm to lock data, it can no longer be used until a ransom in bitcoin is paid. Instead of paying hackers, you should first try to use alternative recovery methods that could help you to retrieve at least some portion of the lost data. Otherwise, you could also lose your money, along with the files. One of the best tools that could restore at least some of the encrypted files – Data Recovery Pro.
- ^ Disk Usage (DU). Techopedia. Where Information Technology and Business Meet.
- ^ Crash (computing). Wikipedia. The Free Encyclopedia.
- ^ Darren Allan. McAfee warns that 2019 could be the year of ‘everywhere malware’. Techradar. The source for tech buying advice.
