Question
Issue: How to fix exFAT drive not showing up in Windows?
Hello. When I plug in my exFAT drive in Windows it is not showing up. Why would that be? Any tips would be appreciated.
Solved Answer
For users who depend on the exFAT file system for its compatibility and support for big storage sizes, it can be a fairly disappointing experience when an exFAT drive fails to appear on a Windows machine. These external drives are a popular option for people who use both operating systems because they can often be used to transfer files easily between Windows and macOS. However, the connection between the drive and the computer is frequently to blame when this problem arises.
One of the most frequent causes of an exFAT drive not being recognized by a Windows machine is a bad or loose connection. A broken USB cable, a broken USB port, or a loose connection between the disk and the port are just a few causes of this. The problem could occasionally potentially be caused by issues or conflicts with the driver.
Users may experience considerable effects, particularly if the afflicted drive houses important files or data. Important papers, media files, or backup data may not be accessible to users, which could result in data loss or disrupted workflow. Additionally, it can be a headache to be unable to use a drive that is advertised to be flexible and compatible with several platforms.
Users might think about a few potential fixes to fix the exFAT drive not showing up in Windows issue. These consist of verifying the drive is correctly attached, checking and replacing the USB cable, attempting a new USB port, and upgrading or reinstalling the USB drivers. Users might also need to examine the drive physically for any damage and, if necessary, think about data recovery methods.
Method 1. Check Disk
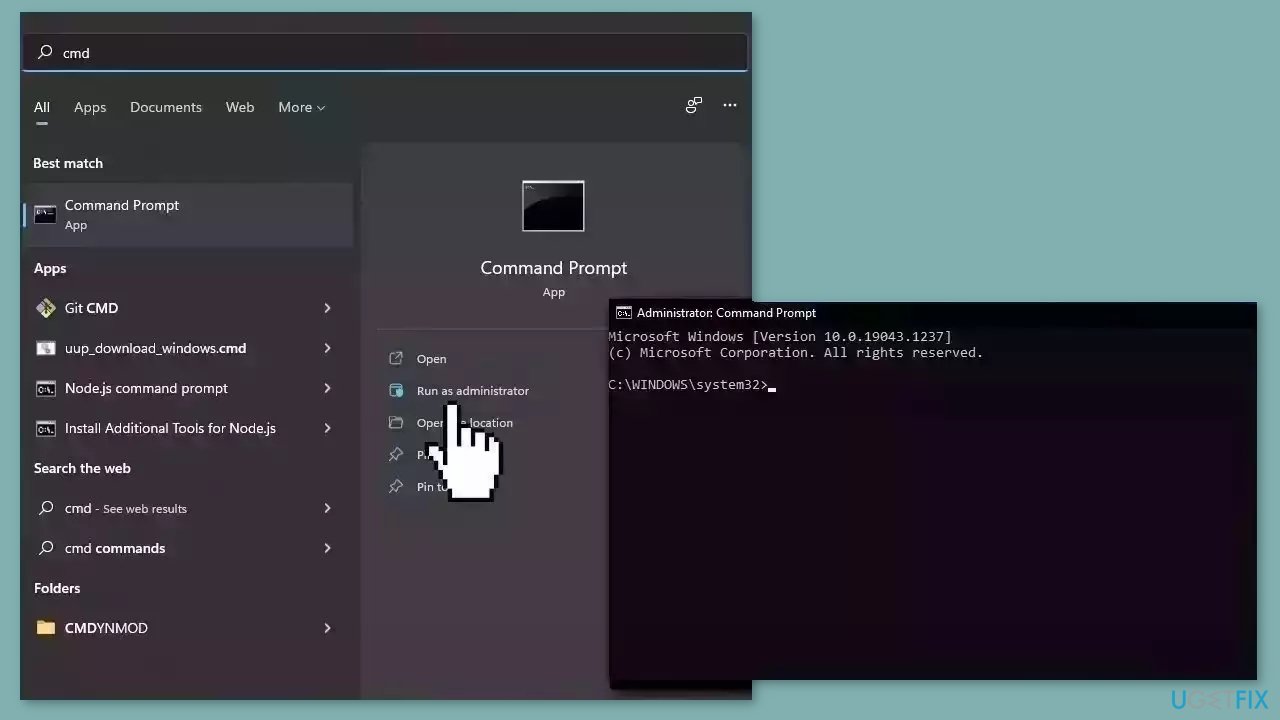
- Press the Windows key + S to initiate the Search function.
- Type Command Prompt in the search field.
- Right-click on the relevant Command Prompt result.
- Select Run as administrator.
- Confirm the action by clicking Yes in the prompt that appears.
- In the elevated Command Prompt window, paste the following command and press Enter:
chkdsk /r
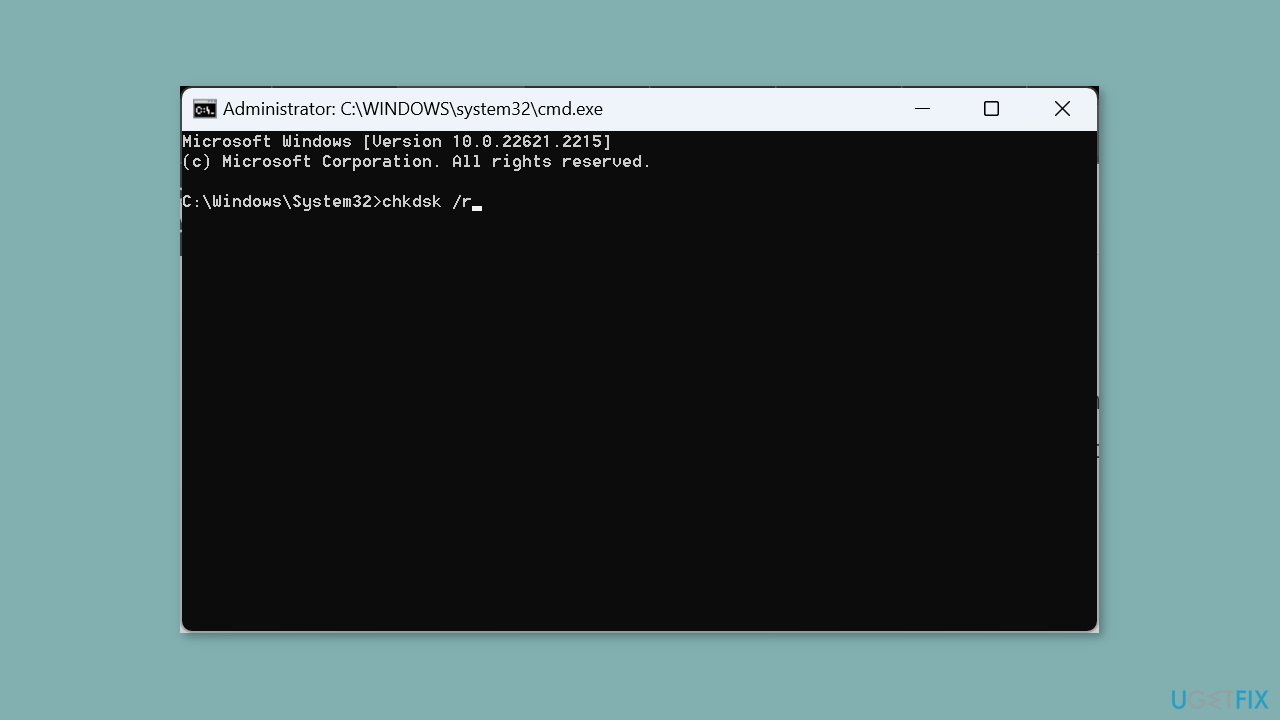
- If prompted to schedule a scan for the next PC restart, press Y and then hit Enter.
- Now, proceed to reboot the computer.
Method 2. Fix Corrupted System Files
Use Command Prompt commands to repair system file corruption:
- Open Command Prompt as administrator
- Use the following command and press Enter:
sfc /scannow
- Reboot your system
- If SFC returned an error, then use the following command lines, pressing Enter after each:
DISM /Online /Cleanup-Image /CheckHealth
DISM /Online /Cleanup-Image /ScanHealth
DISM /Online /Cleanup-Image /RestoreHealth
Method 3. Mark the Drive as Active and Assign a Drive Letter
- Press the Windows key + S to open the Search bar.
- Type Create and format hard disk partitions in the search field and click on the relevant result.
- Locate the exFAT formatted external drive in the Disk Management window.
- Right-click on the external drive.
- Select Mark Partition as Active from the context menu.
- Respond appropriately if a confirmation prompt appears.
- Right-click on the external storage device again.
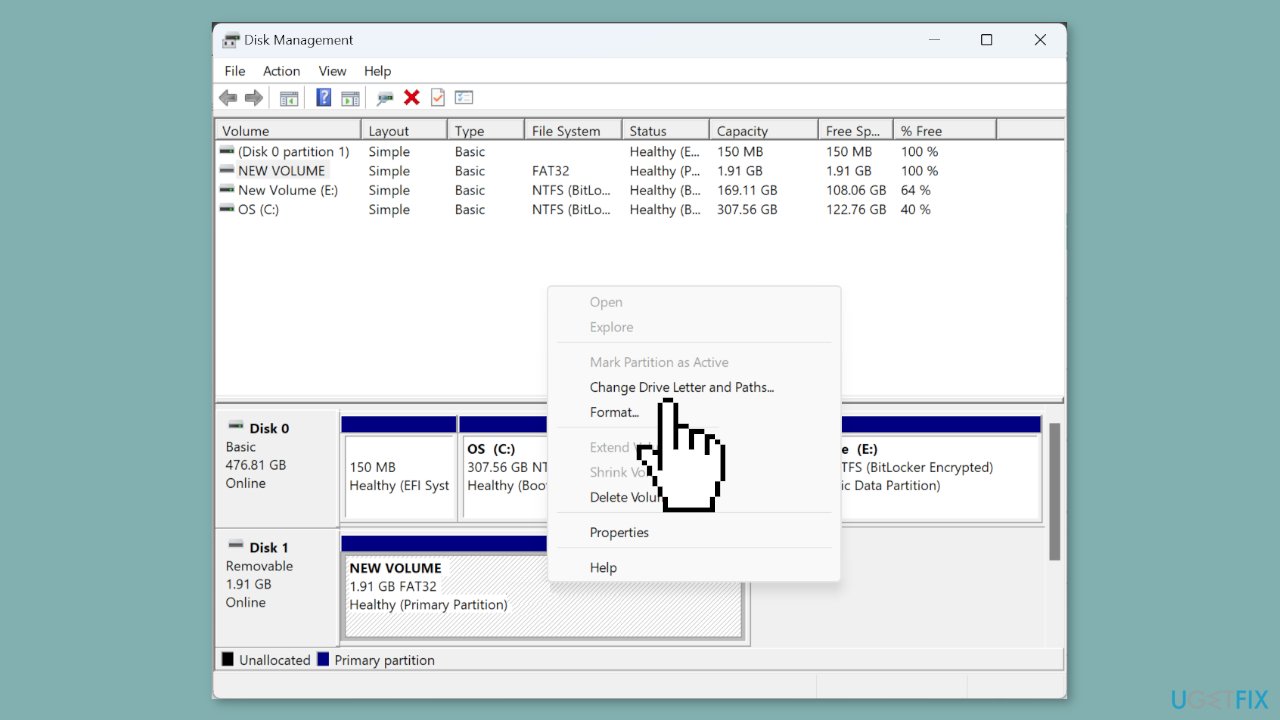
- Choose Change Drive Letter and Paths.
- Click the Add button.
- Select Assign the following drive letter.
- Choose a drive letter from the default menu or stick with the default choice.
- Click OK to confirm your selection.
Method 4. Reformat the Drive
Windows Disk Management:
- Press the Windows key + R to open the Run dialog.
- Type diskmgmt.msc into the text field and press Enter.
- In the Disk Management window, locate the problematic external drive.
- Right-click on the external drive.
- Select Format from the context menu.
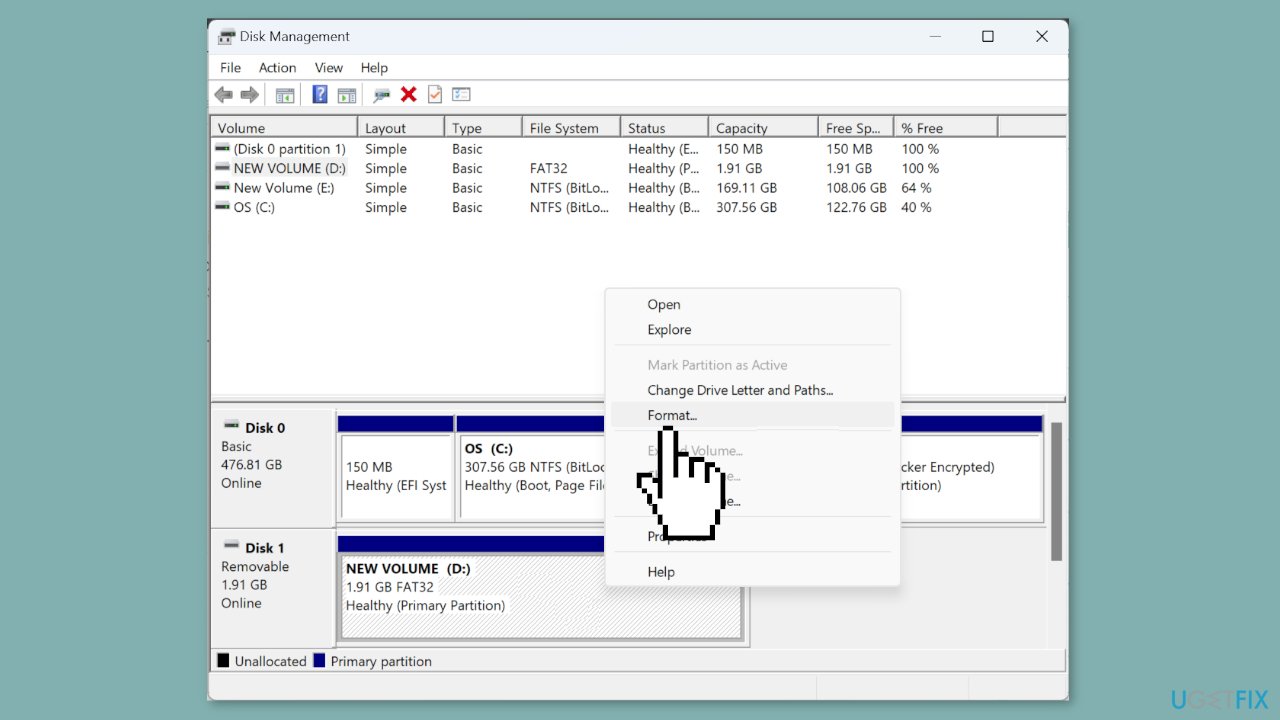
- Enter a Volume label in the provided text field.
- Choose exFAT from the File system dropdown menu.
- Select 128K as the Allocation unit size.
- Untick the checkbox for Perform a quick format.
- Click the OK button to start the formatting process.
- After the drive has been formatted, check if it is now readable on Windows.
Diskpart:
- Press the Windows key + R to open the Run dialog.
- Type cmd and press Ctrl + Shift + Enter.
- Click Yes in the UAC prompt to grant administrative access.
- Paste the following command into the Command Prompt and press Enter:
diskpart
- To view the available disks, run this command:
list disk
- Identify the ID assigned to the external drive.
- Execute the following command, replacing “X” with the assigned number:
select disk X
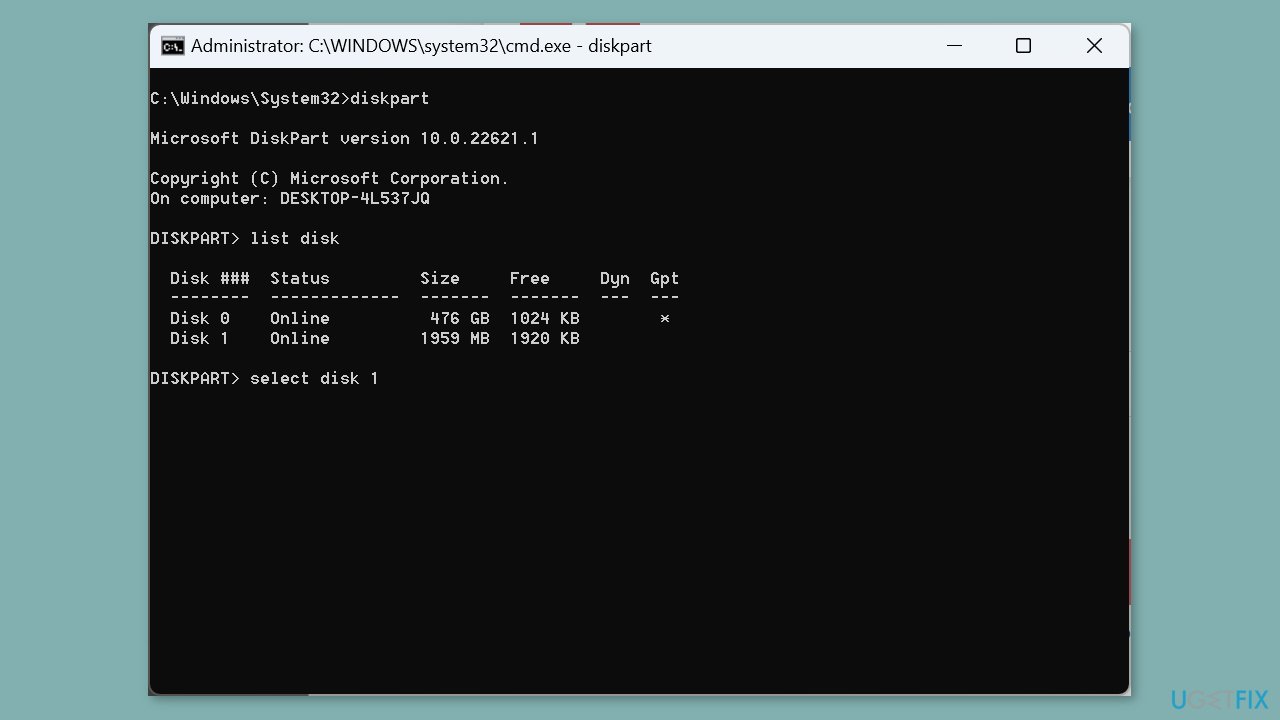
- To clear the disk and delete any files, run this command:
clean
- Create a partition using this command:
create partition primary
- Set the file system to exFAT with this command:
format fs=exFAT
- Assign a drive letter using this command:
assign
Method 5. Update the Driver
- Press the Windows key + X to access the Power User menu.
- From the list of options, select Device Manager.
- Within Device Manager, expand the Disk drives entry.
- Right-click on the USB drive that's experiencing issues.
- Choose Update driver from the context menu.
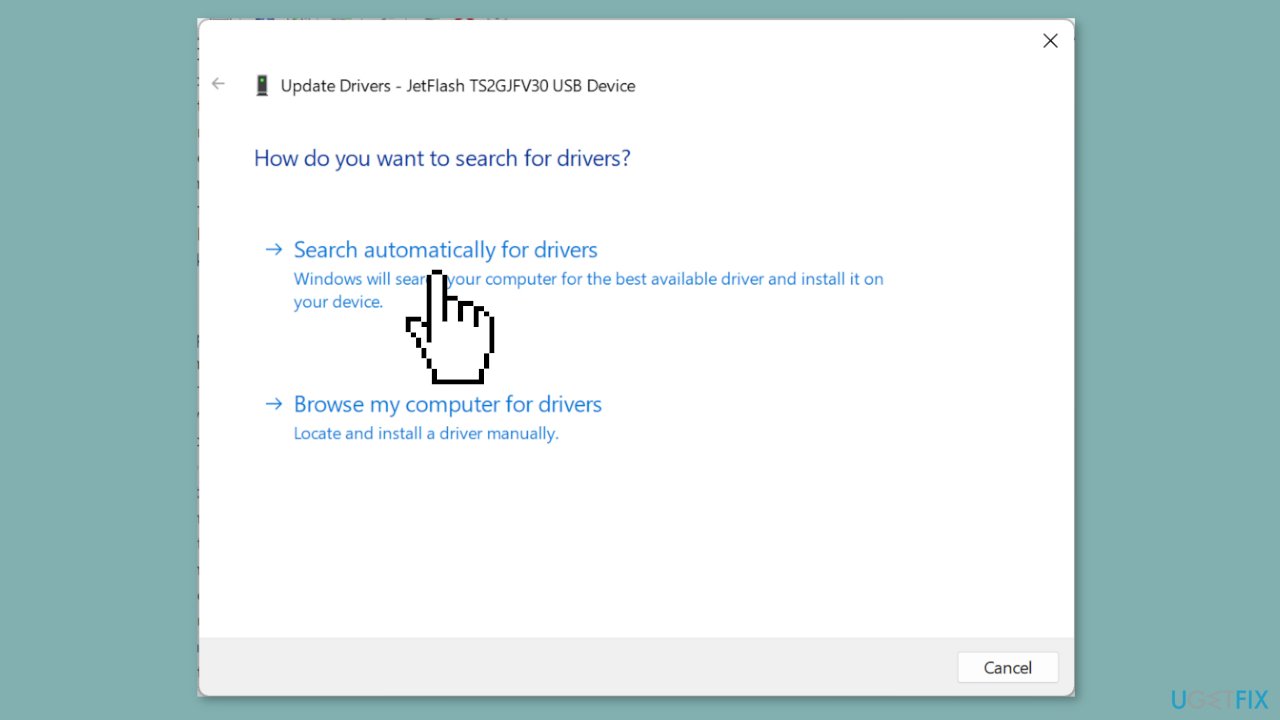
- Opt for Search automatically for drivers.
- Wait while Windows searches and installs the best available driver stored locally.
Repair your Errors automatically
ugetfix.com team is trying to do its best to help users find the best solutions for eliminating their errors. If you don't want to struggle with manual repair techniques, please use the automatic software. All recommended products have been tested and approved by our professionals. Tools that you can use to fix your error are listed bellow:
Protect your online privacy with a VPN client
A VPN is crucial when it comes to user privacy. Online trackers such as cookies can not only be used by social media platforms and other websites but also your Internet Service Provider and the government. Even if you apply the most secure settings via your web browser, you can still be tracked via apps that are connected to the internet. Besides, privacy-focused browsers like Tor is are not an optimal choice due to diminished connection speeds. The best solution for your ultimate privacy is Private Internet Access – be anonymous and secure online.
Data recovery tools can prevent permanent file loss
Data recovery software is one of the options that could help you recover your files. Once you delete a file, it does not vanish into thin air – it remains on your system as long as no new data is written on top of it. Data Recovery Pro is recovery software that searchers for working copies of deleted files within your hard drive. By using the tool, you can prevent loss of valuable documents, school work, personal pictures, and other crucial files.


