Question
Issue: How to fix HDMI audio not working in Windows?
Hello. The HDMI connection does not seem to be transferring audio data to my Windows PC. Is there a way to fix this? The HDMI cable is not the problem.
Solved Answer
Users may find it challenging when HDMI audio malfunctions in Windows because it affects their ability to hear audio from multimedia files, video streams, and other applications that depend on audio output. The main cause of this problem is Windows' inability to recognize or properly set up the audio output via the HDMI connection. It can occur on various versions of Windows, including Windows 10 and Windows 11.
The effects of this issue may be very serious for users. For instance, people who use their laptops to enjoy themselves by watching movies or playing games will discover that their experience is greatly hampered. The immersive and engaging elements of these activities are lost without audio. Additionally, if the HDMI audio is not working correctly, professionals who depend on their Windows PCs for presentations or video conferencing may experience substantial disruptions. Miscommunication, decreased productivity, and frustration may result from this.
Additionally, customers may experience problems in a variety of situations, such as when they utilize HDMI to link their laptops or desktops to bigger screens or better audio quality on external monitors, projectors, or televisions. When this happens, the connection's intended use may be compromised since it is difficult to exchange films, present information, or listen to high-quality audio in home entertainment systems.
In order to resolve the problem, troubleshooting procedures are typically taken. These steps could include checking audio settings, upgrading or reinstalling audio drivers, making sure the HDMI cable and device are in good working order, and making sure the HDMI audio output is configured as the default playback device.
In this guide, you will find 5 steps that should help you fix HDMI audio not working in Windows. You can also run a repair tool like FortectMac Washing Machine X9 that can fix most system errors, BSODs, corrupted files, registry issues, or clear cookies and cache. Otherwise, follow the step-by-step instructions below.
Method 1. Run the Sound Troubleshooter
- Press the Windows key + I to open the Settings app.
- In the Settings app, locate and select the Troubleshoot option.
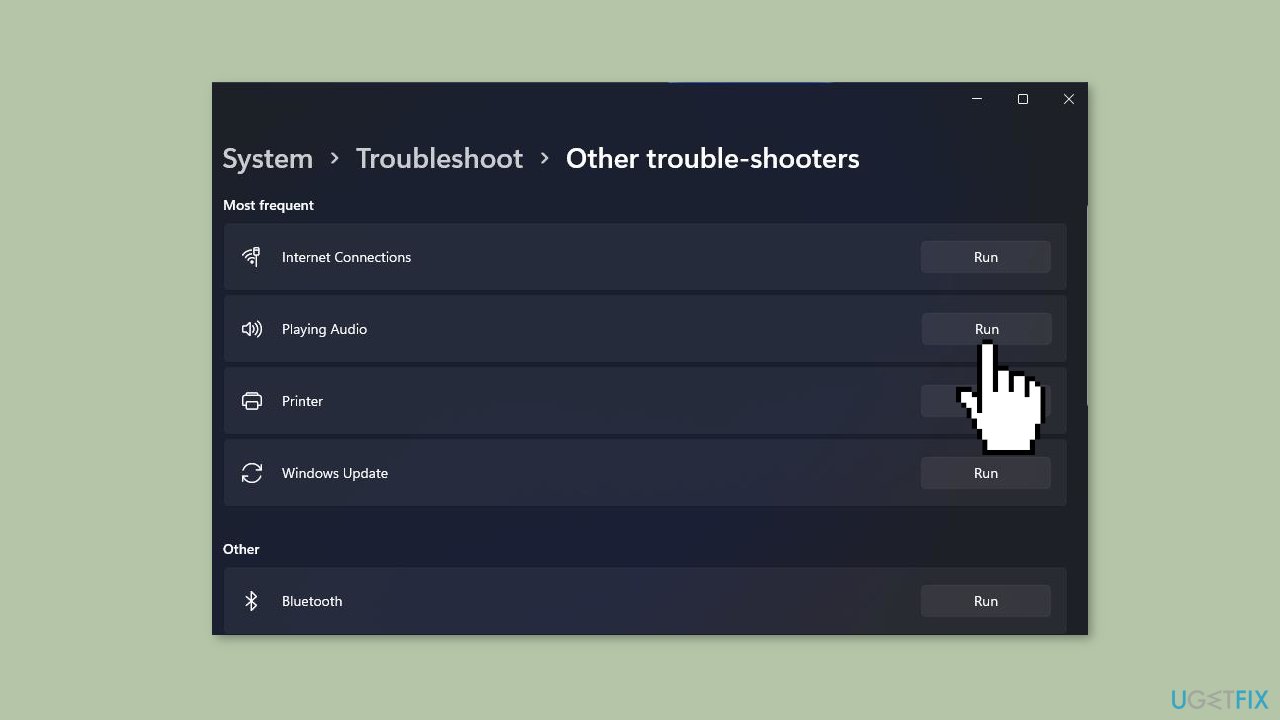
- Inside the Troubleshoot section, click on Other troubleshooters to access a list of Windows troubleshooters.
- Find the Playing Audio troubleshooter in the list and click on its Run button to initiate the troubleshooting process.
- Follow the on-screen instructions and implement any solutions recommended by the troubleshooter to resolve the audio issue.
Method 2. Set HDMI as the Default Playback Device
- Press the Windows key + R on your keyboard simultaneously.
- Input the following command to open sound settings: control mmsys.cpl sounds
- Click OK to open the Sound window.
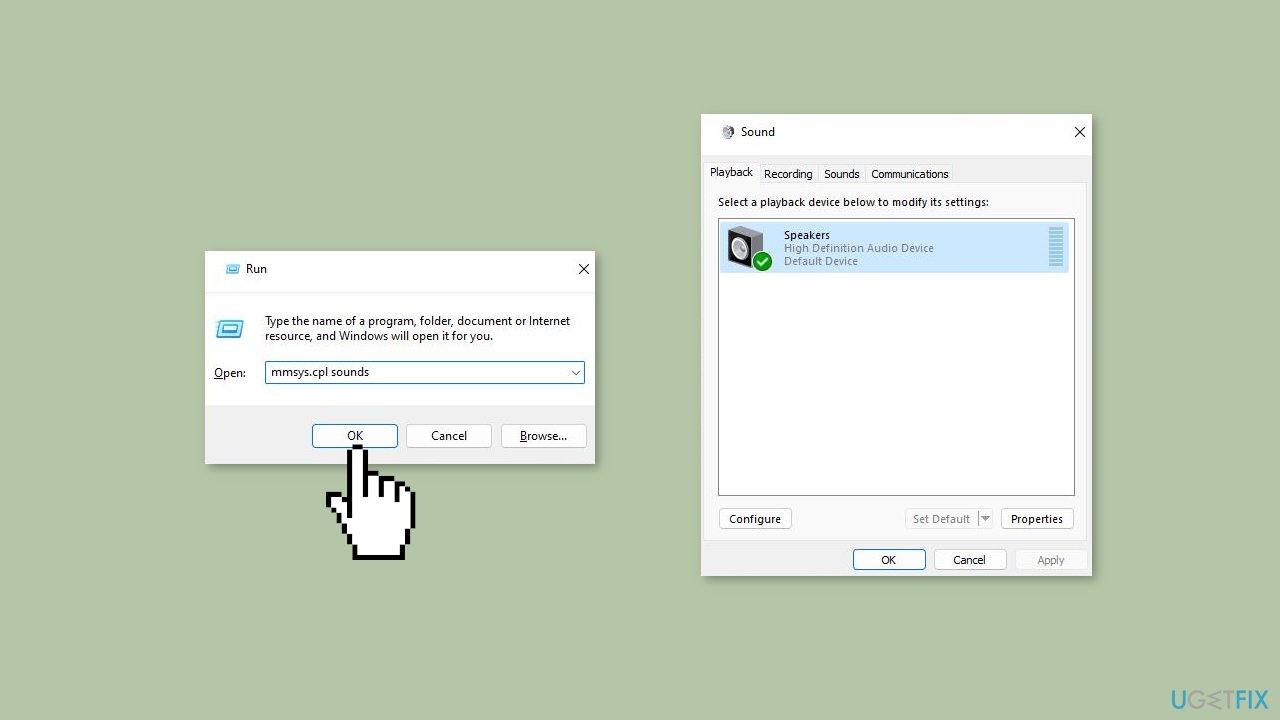
- On the Playback tab, right-click an HDMI output device to select Enable.
- Select the HDMI output device, and press the Set Default button.
- Click Apply and OK to save the new sound settings.
Method 3. Update or Reinstall Sound Drivers
- Press the Windows key + X to open the Power User menu and select Device Manager.
- In Device Manager, double-click the category labeled Sound, video, and audio controllers.
- Right-click the High Definition Audio category and choose Update driver from the context menu.
- In the Update Drivers window, select the option to Browse my computer for drivers.
- Click on Let me pick.
- Choose High Definition Audio Device and then click the Next button.
- Confirm the update by clicking Yes on the Update Driver Warning window.
If updating the driver did not work, try reinstalling it:
- Open the Sound, video, and audio controllers category in Device Manager.
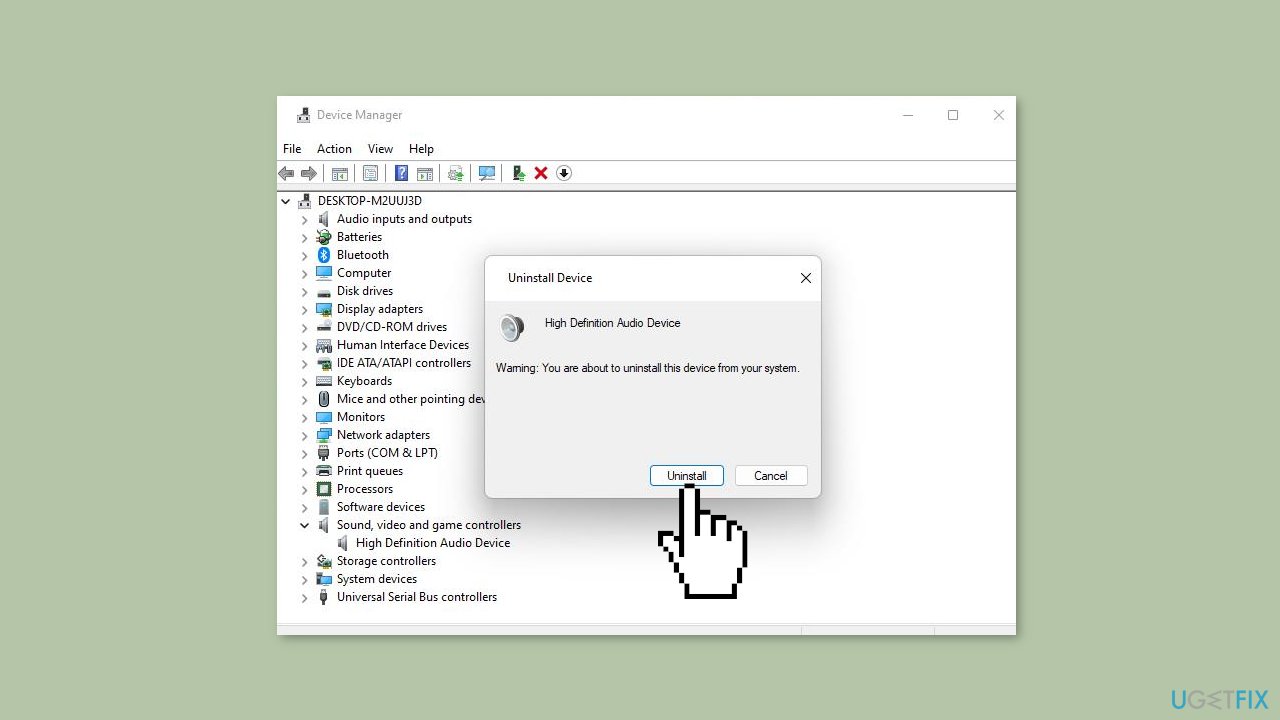
- Right-click on High Definition Audio Device to select Uninstall device.
- Choose the Uninstall option.
- Press Alt + F4 to select Restart.
Method 4. Restart the Audio Service
- Bring up Run by pressing the Windows key + X and selecting it from the menu.
- Type in the following Run command: services.msc
- Click OK to launch the Services tool.
- Double-click the Windows Audio service.
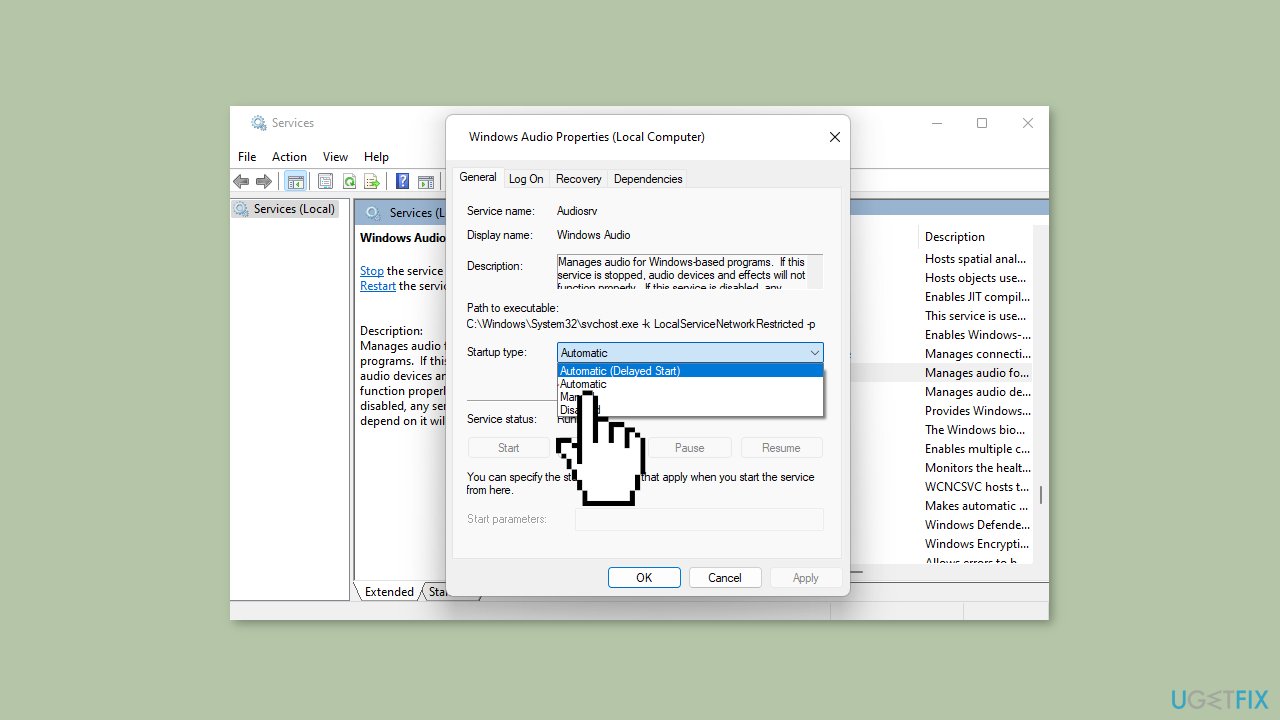
- From the drop-down menu for the Windows Audio service, select Automatic if the service is disabled. Then, click the service's Start button.
- If the Windows Audio service is already enabled, right-click on Windows Audio and choose a Restart option for it.
- Repeat the above steps for the Windows Audio Endpoint Builder service.
Method 5. Enable All Audio Controllers
- Open Device Manager.
- Click the View menu, and select its Show hidden devices option.
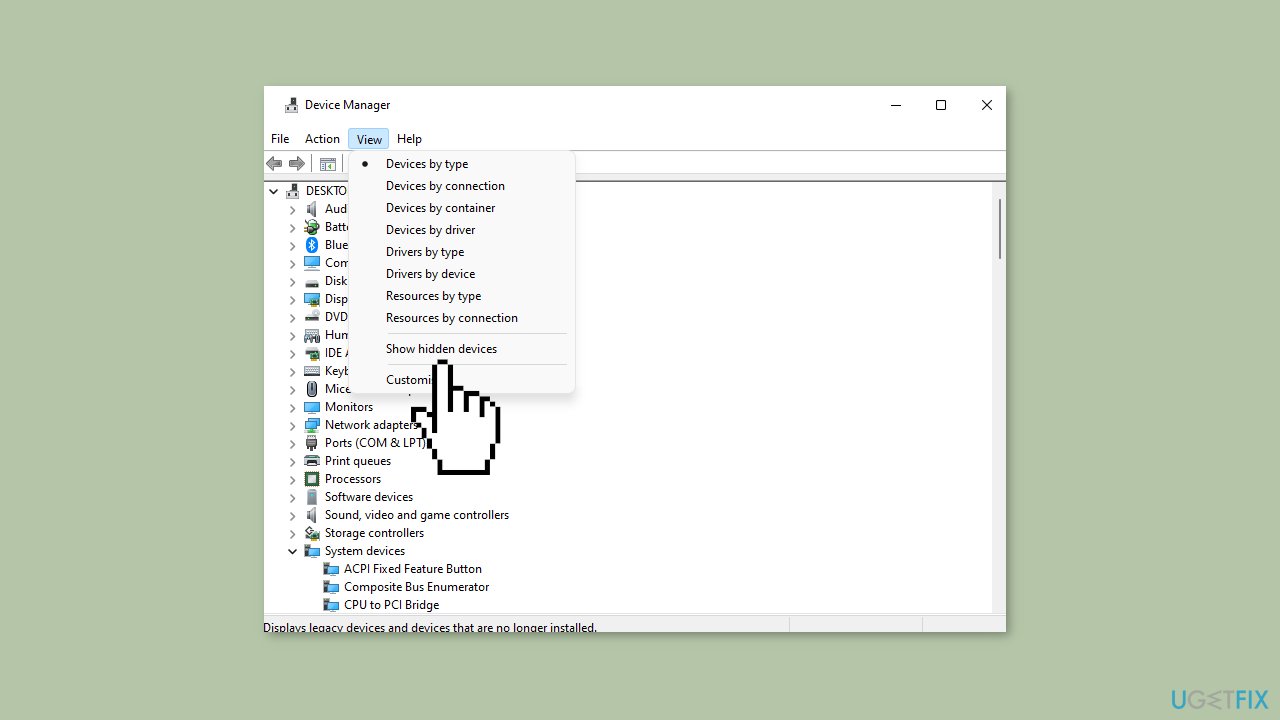
- Double-click System devices to extend that category.
- Right-click High Definition Audio Controller and select Properties.
- In the Properties window, select the Driver tab.
- Click Enable if that option is available on the tab.
- Repeat those steps for any other audio devices listed within that category.
Repair your Errors automatically
ugetfix.com team is trying to do its best to help users find the best solutions for eliminating their errors. If you don't want to struggle with manual repair techniques, please use the automatic software. All recommended products have been tested and approved by our professionals. Tools that you can use to fix your error are listed bellow:
Prevent websites, ISP, and other parties from tracking you
To stay completely anonymous and prevent the ISP and the government from spying on you, you should employ Private Internet Access VPN. It will allow you to connect to the internet while being completely anonymous by encrypting all information, prevent trackers, ads, as well as malicious content. Most importantly, you will stop the illegal surveillance activities that NSA and other governmental institutions are performing behind your back.
Recover your lost files quickly
Unforeseen circumstances can happen at any time while using the computer: it can turn off due to a power cut, a Blue Screen of Death (BSoD) can occur, or random Windows updates can the machine when you went away for a few minutes. As a result, your schoolwork, important documents, and other data might be lost. To recover lost files, you can use Data Recovery Pro – it searches through copies of files that are still available on your hard drive and retrieves them quickly.


