Question
Issue: How to fix Hyper-V Audio not working in Windows 11?
Hello. When I use Hyper-V on Windows 11 the audio is not working. Is there any way to fix this issue?
Solved Answer
Microsoft's Hyper-V virtualization[1] technology allows users to create virtual machines on their Windows computers. It's a popular choice for developers, IT pros, and others who need to run multiple operating systems on a single device. Hyper-V offers several advantages, such as the ability to test new software, isolate different environments, and consolidate hardware.
Users can save files to a specific location with a unique name using the “Save As” window in Microsoft Office and Microsoft 365 applications such as Word or Excel. This window may appear unexpectedly, causing users to be frustrated and interfering with their workflow. The “Save As” window appearing repeatedly can have a significant impact on user productivity and frustration, resulting in time and productivity loss.
In some cases, users may experience issues with Hyper-V Audio not working in Windows 11. A number of factors can contribute to this problem, including driver conflicts, outdated drivers, or incorrect audio settings in the virtual machine.
The impact of this issue varies depending on the use case. For example, if a user is running a multimedia application in a virtual machine, the lack of audio functionality may render the application unusable. In other cases, the lack of audio may not be a critical issue, but it can still limit the virtual environment's functionality.
There are several possible solutions for the Hyper-V Audio issue in Windows 11. These include updating audio drivers, checking audio settings in the virtual machine, and disabling audio enhancements. However, the specific solution will depend on the underlying cause of the issue.
In this guide, you will find 4 steps that should help you fix Hyper-V Audio not working in Windows 11. Keep in mind that the manual troubleshooting process may be lengthy. If you want to avoid it, use a maintenance tool like FortectMac Washing Machine X9. It can fix most system errors, BSODs,[2] corrupted files, and registry[3] issues. Otherwise, follow the step-by-step instructions below.
Enable Hyper-V
If you have not enabled Hyper-V on you machine yet, here is a way to do it:
- Open Notepad on your Windows device
- Create a new file
- Copy and paste the following script into the file:
pushd “%~dp0”
dir /b %SystemRoot%\servicing\Packages\*Hyper-V*.mum >hyper-v.txt
for /f %%i in ('findstr /i . hyper-v.txt 2^>nul') do dism /online /norestart /add-package:”%SystemRoot%\servicing\Packages\%%i”
del hyper-v.txt
Dism /online /enable-feature /featurename:Microsoft-Hyper-V -All /LimitAccess /ALL
pause
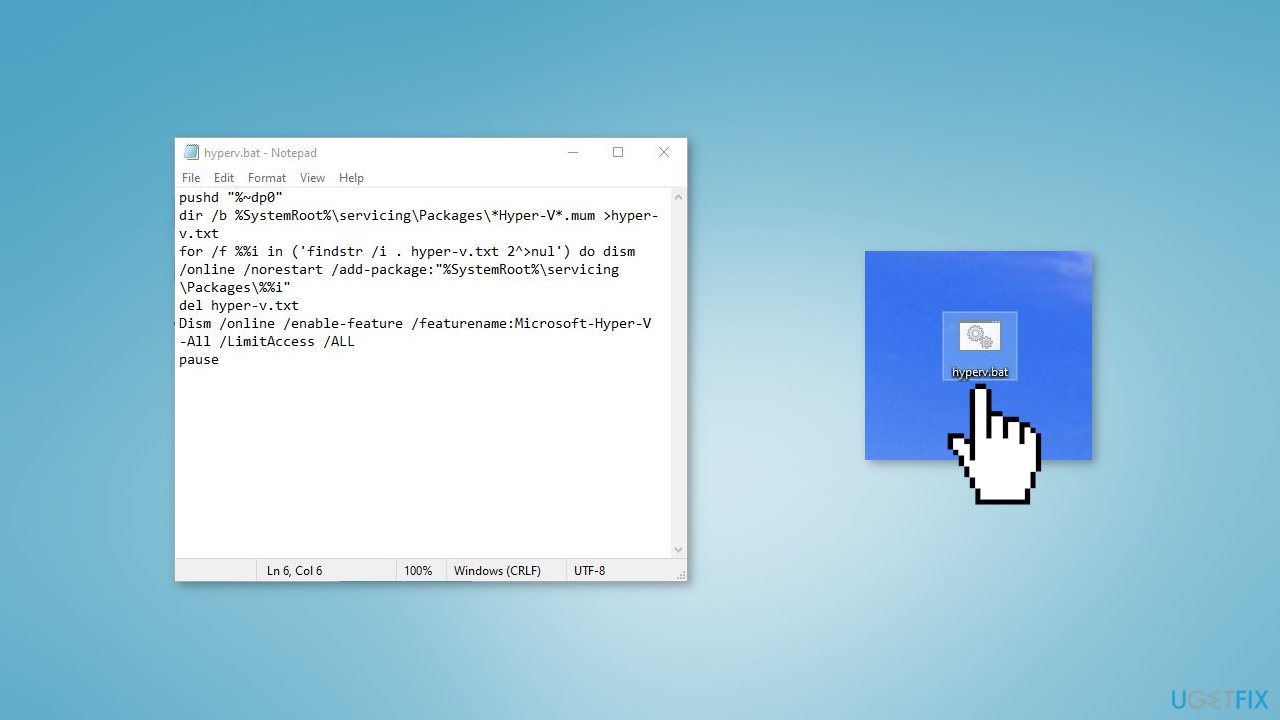
- Click on File > Save as, type hyperv.bat in the name field, and click on Save
- Navigate to the location where the file was saved
- Right-click on the file and select Run as administrator
- The Command Prompt will now open and start installing Hyper-V on your device
- Wait for the procedure to complete
- When the installation completes, the Command Prompt will ask you to restart your system
- Type Y and press Enter to proceed with the restart
- After your device restarts, Hyper-V will be enabled on your device
Solution 1. Run Playing Audio Troubleshooter
- Press the Windows key + I on your keyboard to open the Settings app
- Scroll down and select Troubleshoot from the list of options
- Click on Other troubleshooters
- Scroll down to the Find and fix other problems section and click on Playing Audio
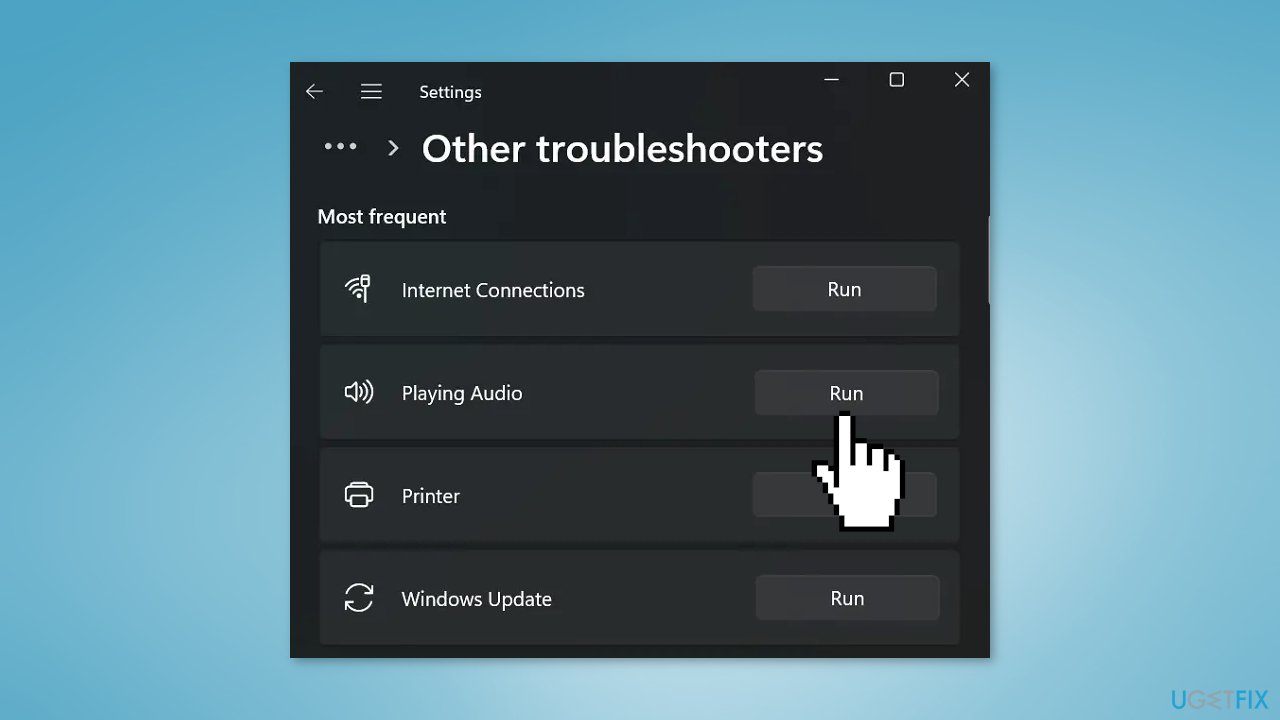
- Click on the Run troubleshooter button
- Wait for the troubleshooter to run and complete the process
- Once the process is complete, the troubleshooter will display a message with the results of the troubleshooting.
- If the troubleshooter was able to fix the issue, restart your device to apply the changes and verify if the problem is resolved.
Solution 2. Update Audio Drivers
Outdated drivers could be the cause of this issue. In this case, you can fix it automatically by using DriverFix, which will scan your PC for missing and out-of-date device drivers. Or you can update them manually:
- Open Settings
- Click on Update & Security
- Click on Windows Update
- Click the Check for updates button
- Click the View optional updates option
- Click the Driver updates tab
- Select the driver you want to update
- Click the Download and install button
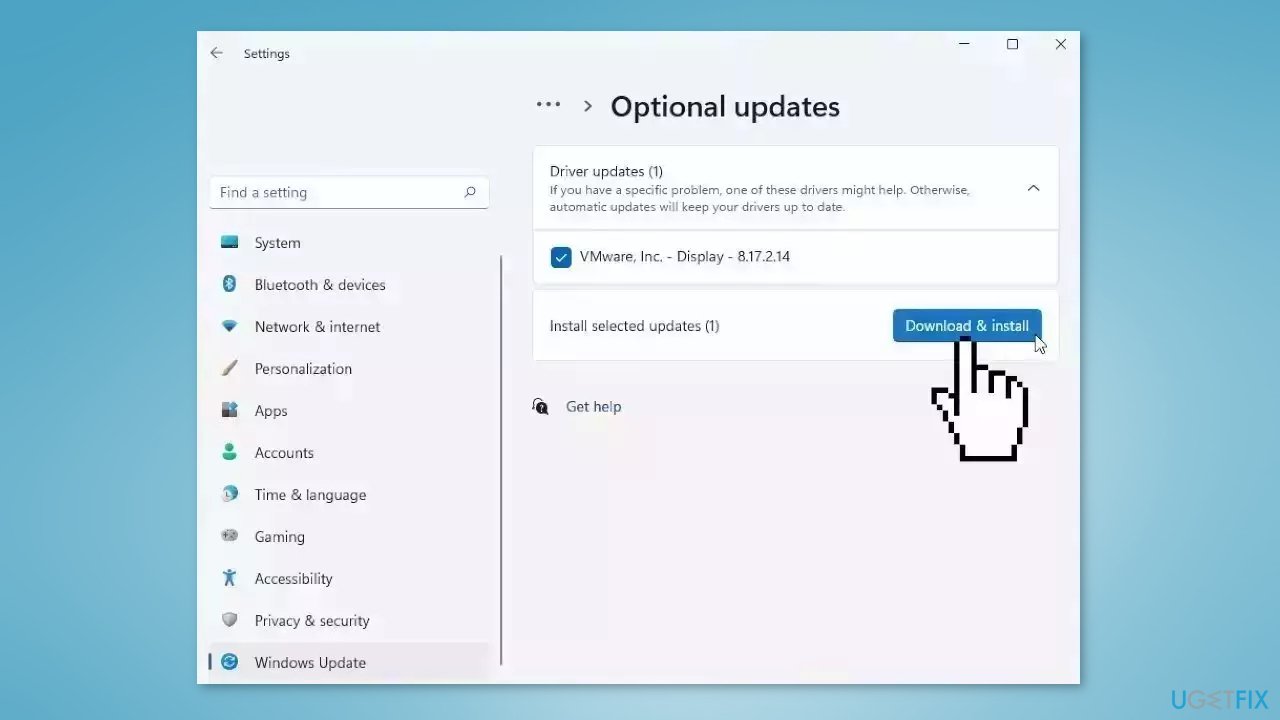
If the View optional updates link is not available after checking for updates, then Windows Update does not have any new drivers or any updates for other products at that particular time.
Solution 3. Restart Windows Audio Service
- Press the Windows key on your keyboard
- Type Services in the search box
- Click on the Services app to open it
- Scroll through the list of services to locate the Windows Audio service
- Right-click on the service
- Click on Restart from the options menu that appears
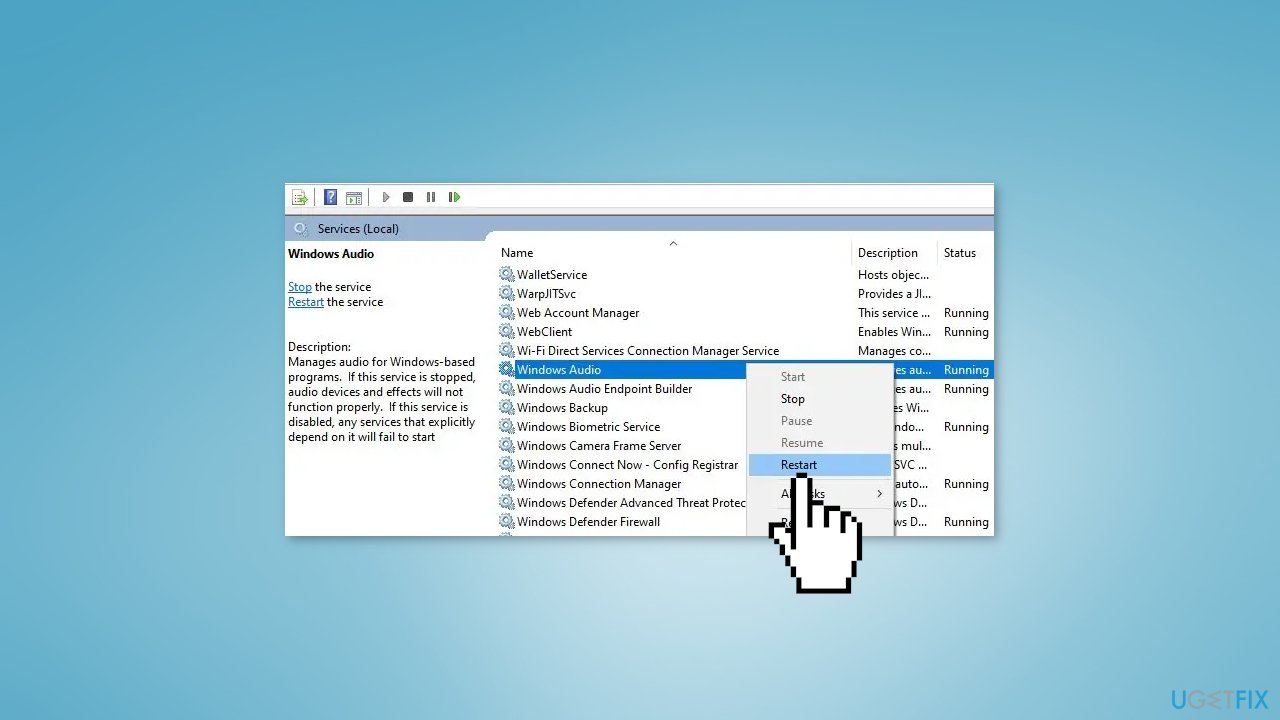
- Wait for the service to restart
- Once the service has restarted, close the Services app
- Check if the audio issue has been resolved
Solution 4. Configure Remote Desktop Settings
- Press the Windows key on your keyboard
- In the search box, type Remote Desktop Connection and click on it to open
- Click on Show Options located at the bottom of the window
- Click on the Local Resources tab
- Scroll down to the Remote Audio section
- Click on the Settings button
- Select Play on this computer under the Remote audio playback section
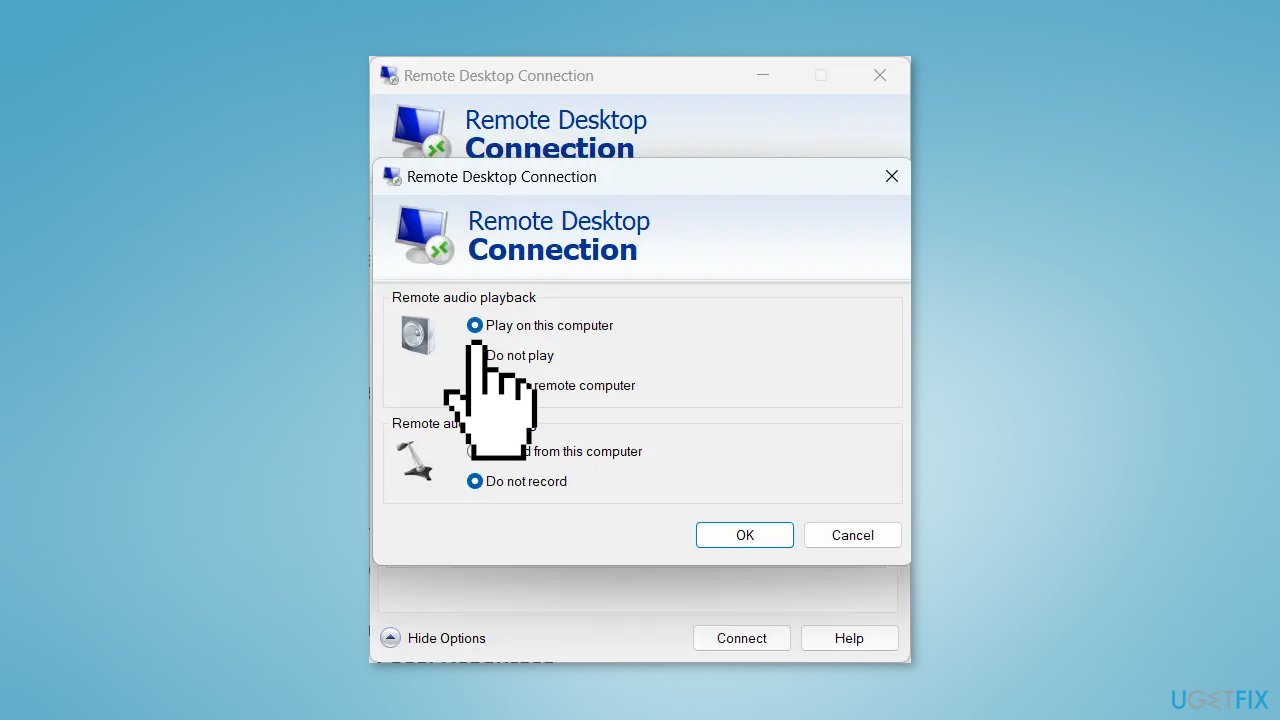
- Click on OK to save the changes
- You can now connect to the remote desktop session and the audio should be played on your local computer
Repair your Errors automatically
ugetfix.com team is trying to do its best to help users find the best solutions for eliminating their errors. If you don't want to struggle with manual repair techniques, please use the automatic software. All recommended products have been tested and approved by our professionals. Tools that you can use to fix your error are listed bellow:
Protect your online privacy with a VPN client
A VPN is crucial when it comes to user privacy. Online trackers such as cookies can not only be used by social media platforms and other websites but also your Internet Service Provider and the government. Even if you apply the most secure settings via your web browser, you can still be tracked via apps that are connected to the internet. Besides, privacy-focused browsers like Tor is are not an optimal choice due to diminished connection speeds. The best solution for your ultimate privacy is Private Internet Access – be anonymous and secure online.
Data recovery tools can prevent permanent file loss
Data recovery software is one of the options that could help you recover your files. Once you delete a file, it does not vanish into thin air – it remains on your system as long as no new data is written on top of it. Data Recovery Pro is recovery software that searchers for working copies of deleted files within your hard drive. By using the tool, you can prevent loss of valuable documents, school work, personal pictures, and other crucial files.
- ^ Virtualization. Wikipedia, the free encyclopedia.
- ^ Tim Fisher. What Is the Windows Registry?. Lifewire. Software and Apps.
- ^ Chris Hoffman. Everything You Need To Know About the Blue Screen of Death. Howtogeek. Technology Magazine.


