Question
Issue: How to fix HyperX Cloud Stinger mic is not detected or not recognized?
Hello. I just bought the HyperX Cloud Stinger gaming headset but when I try to use the built-in microphone, it is not detected. What should I do?
Solved Answer
The HyperX Cloud Stinger headset is popular among gamers and other users who require high-quality audio for their activities. It has an in-built microphone that allows users to communicate with others while playing multiplayer games, video conferencing, or using voice chat. However, some users may encounter problems with their HyperX Cloud Stinger microphone not being detected or recognized by their device, which can be inconvenient and negatively impact their overall user experience.
This problem can occur for a number of reasons, including faulty hardware, outdated drivers,[1] or incorrect audio settings. When the microphone is not detected or recognized, users may be unable to effectively communicate, causing disruptions during gameplay, meetings, or other activities. This can be especially troublesome for gamers who rely on clear communication to coordinate with their team, as well as remote workers who need to communicate with their colleagues during virtual meetings.
There are several potential solutions to this problem, including checking the device's audio settings, updating the drivers, or testing the headset on another device to see if the problem is with the hardware. Checking for firmware updates for the headset or checking for compatibility issues between the device and the headset are two other possible solutions.
In this guide, you will find 4 steps that should help you fix HyperX Cloud Stinger mic not detected or not recognized. If you experience this issue with Windows, you can try using a maintenance tool like FortectMac Washing Machine X9 that can fix most system errors, BSODs,[2] corrupted files, and registry[3] issues. Otherwise, follow the step-by-step instructions below carefully.

Method 1. Check the Connectivity
- Check your audio settings manually, specifically for audio mute settings.
- Verify that your headphone is connected properly to your device, especially if it's not working or accidentally muted.
- Use the proper extension cable (splitter) with separate headphone and microphone jacks to connect your HyperX Cloud Stinger to your PC headphone output and input ports (or on other gaming devices).
- Check whether all your connections are properly plugged in, including the extension cable connections.
- For the microphone, make sure it's plugged in all the way and not hanging loosely.
- Check the volume knob on the right ear to ensure the microphone isn't muted or the volume isn't too low.
Method 2. Check for Damage
Physical damage can sometimes lead to multiple audio-related problems. If you're unsure whether your headset is physically intact, it's important to check for any damage.
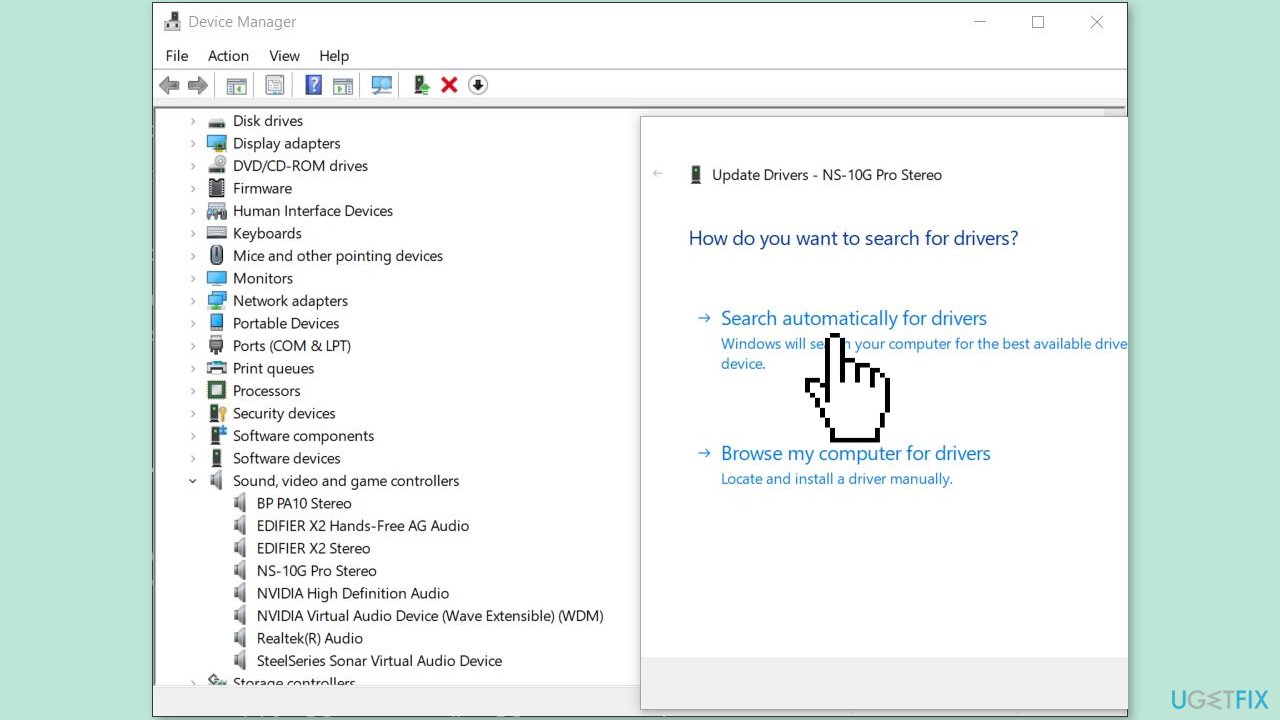
Method 3. Update Audio Drivers
- Press the Windows key + X to open the Quick Link Menu.
- Click on Device Manager to open it.
- Double-click on Sound, video, and game controllers.
- Right-click on the active or problematic audio device.
- Select Update driver.
- Click on Search automatically for drivers.

- If there is an update available, the system will automatically check for it and install the update.
- Once the update is complete, make sure to reboot the system to apply changes.
You can also use a dedicated utility like DriverFix that can find the best drivers for your machine and install them automatically.
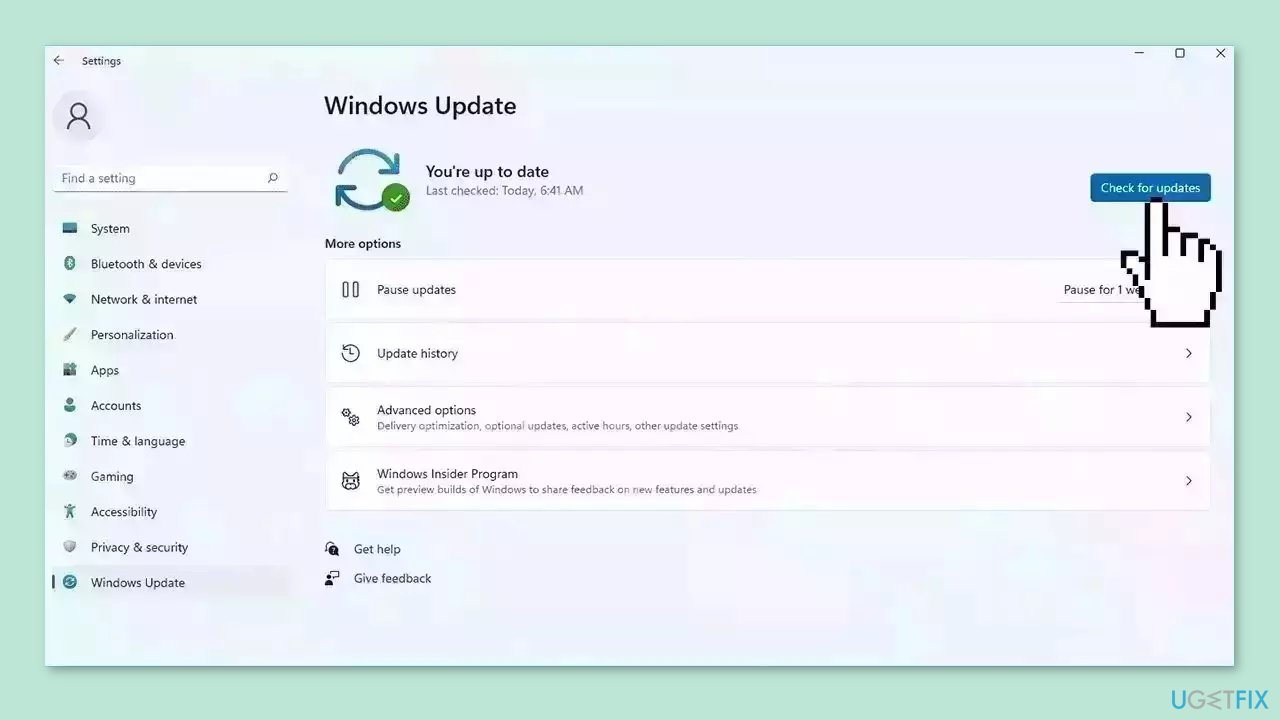
Method 4. Install System Updates
Windows:
- Press the Windows key + I to open up the Windows Settings menu.
- Click on Update & Security.
- Select Check for updates under the Windows Update section.

- If there is a feature update available, select Download and install.
- Wait for the update to complete.
- Once done, restart your computer to install the update.
Xbox:
- Press the Home button on the Xbox console to open the Dashboard menu.
- Select Settings from the bottom of the menu.
- Select All Settings.
- Choose to System.
- Select Updates.
- Select Update Console (if available).
- Follow the on-screen prompts to complete the update process.
- Once done, restart the console to apply changes.
PlayStation:
- Go to the Settings menu on the PlayStation console.
- Select System Software Update.
- Check for available updates and follow the on-screen instructions to complete the update process.
- Once done, reboot the system to apply changes.
Nintendo Switch:
- Select the System Settings on the HOME menu.
- Scroll down the menu and select System.
- Select System Update to start the process.
- The system will check if a new system update is available.
- If there is an update available, the download process will begin automatically.
- Wait for the update to complete.
Repair your Errors automatically
ugetfix.com team is trying to do its best to help users find the best solutions for eliminating their errors. If you don't want to struggle with manual repair techniques, please use the automatic software. All recommended products have been tested and approved by our professionals. Tools that you can use to fix your error are listed bellow:
Protect your online privacy with a VPN client
A VPN is crucial when it comes to user privacy. Online trackers such as cookies can not only be used by social media platforms and other websites but also your Internet Service Provider and the government. Even if you apply the most secure settings via your web browser, you can still be tracked via apps that are connected to the internet. Besides, privacy-focused browsers like Tor is are not an optimal choice due to diminished connection speeds. The best solution for your ultimate privacy is Private Internet Access – be anonymous and secure online.
Data recovery tools can prevent permanent file loss
Data recovery software is one of the options that could help you recover your files. Once you delete a file, it does not vanish into thin air – it remains on your system as long as no new data is written on top of it. Data Recovery Pro is recovery software that searchers for working copies of deleted files within your hard drive. By using the tool, you can prevent loss of valuable documents, school work, personal pictures, and other crucial files.
- ^ Device driver. Wikipedia, the free encyclopedia.
- ^ Chris Hoffman. Everything You Need To Know About the Blue Screen of Death. Howtogeek. Tech Insight Magazine.
- ^ Tim Fisher. What Is the Windows Registry?. Lifewire. Software and Apps.


