Question
Issue: How to fix "Microsoft PowerPoint failed to load hlink.dll" error?
Hello. When I try to open PowerPoint on my Windows PC I receive the “Microsoft PowerPoint failed to load hlink.dll” error message. Why am I seeing it?
Solved Answer
Microsoft PowerPoint is a presentation software program. It is part of the Microsoft Office software suite and is used to create visual presentations for both business and personal use. Users can use PowerPoint to create slideshows that include text, images, videos, and other multimedia elements.
The “Microsoft PowerPoint failed to load hlink.dll” error is an issue that can occur when trying to open PowerPoint on a Windows computer. This error message indicates that the hlink.dll file, which is a dynamic link library file used by PowerPoint, is either missing or corrupted.
DLL files[1] are a type of file that contains code, data, and resources that can be used concurrently by multiple programs. DLL files are an important part of the Windows operating system because they help individual programs use less memory and disk space.
This problem can be resolved by repairing the Office installation, reinstalling PowerPoint, or manually registering the hlink.dll file. However, depending on the exact cause of the error, these solutions may differ and should be implemented with caution to avoid causing further problems with the system.
In this guide, you will find 6 steps that should help you fix “Microsoft PowerPoint failed to load hlink.dll” error in Windows. However, the manual troubleshooting process may be lengthy. You can try using a maintenance tool like FortectMac Washing Machine X9 that can fix most system errors, BSODs,[2] corrupted files, and registry[3] issues. Otherwise, follow the step-by-step instructions below.

Solution 1. Fix Corrupted System Files
Use Command Prompt commands to repair system file corruption:
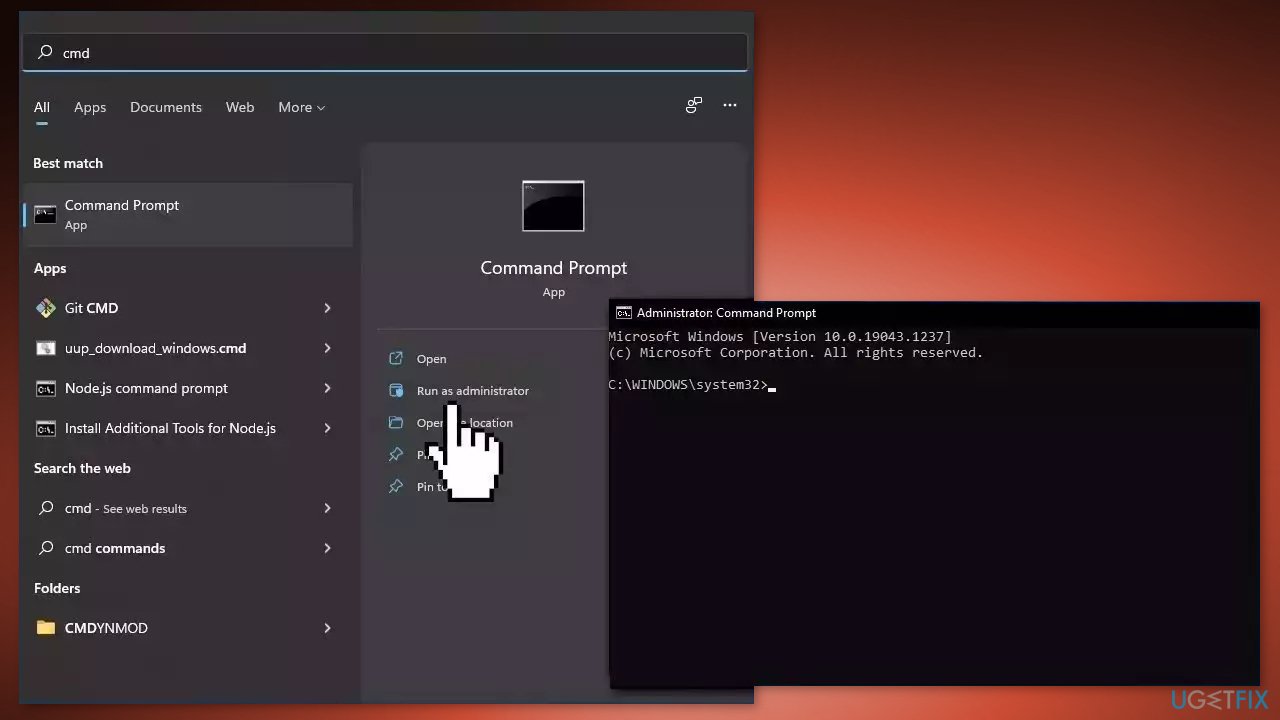
- Open Command Prompt as administrator
- Use the following command and press Enter:
sfc /scannow
- Reboot your system
- If SFC returned an error, then use the following command lines, pressing Enter after each:
DISM /Online /Cleanup-Image /CheckHealth
DISM /Online /Cleanup-Image /ScanHealth
DISM /Online /Cleanup-Image /RestoreHealth
Solution 2. Re-register the DLL File
- Click on the Windows key and type Command Prompt in the search box
- Right-click on the result and select Run as Administrator from the context menu
- If a User Account Control dialog box appears, click Yes to allow the Command Prompt to make changes to your computer.
- Type regsvr32 Hlink.dll in the Command Prompt and press Enter
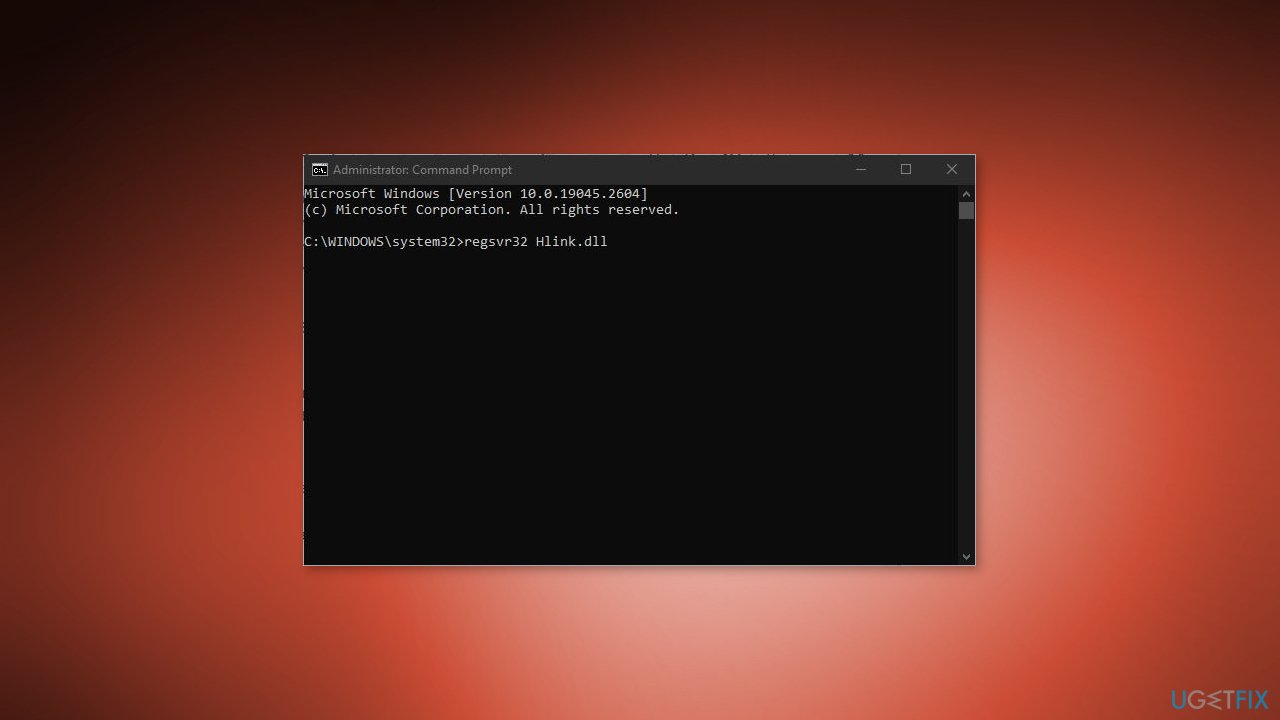
- Wait for a message to appear that says DllRegisterServer in Hlink.dll succeeded
- Restart your PC
- Check if the Hlink.dll file has been registered properly
Solution 3. Launch PowerPoint in Clean Boot
- Click on the Start button and type System Configuration in the search box
- Click on the result, and if a User Account Control dialog box appears, click Yes to allow the System Configuration to make changes to your computer
- Navigate to the General tab and check the Selective Startup option
- Check the Load System Services option
- Navigate to the Services tab in the System Configuration window
- Check the Hide all Microsoft services option
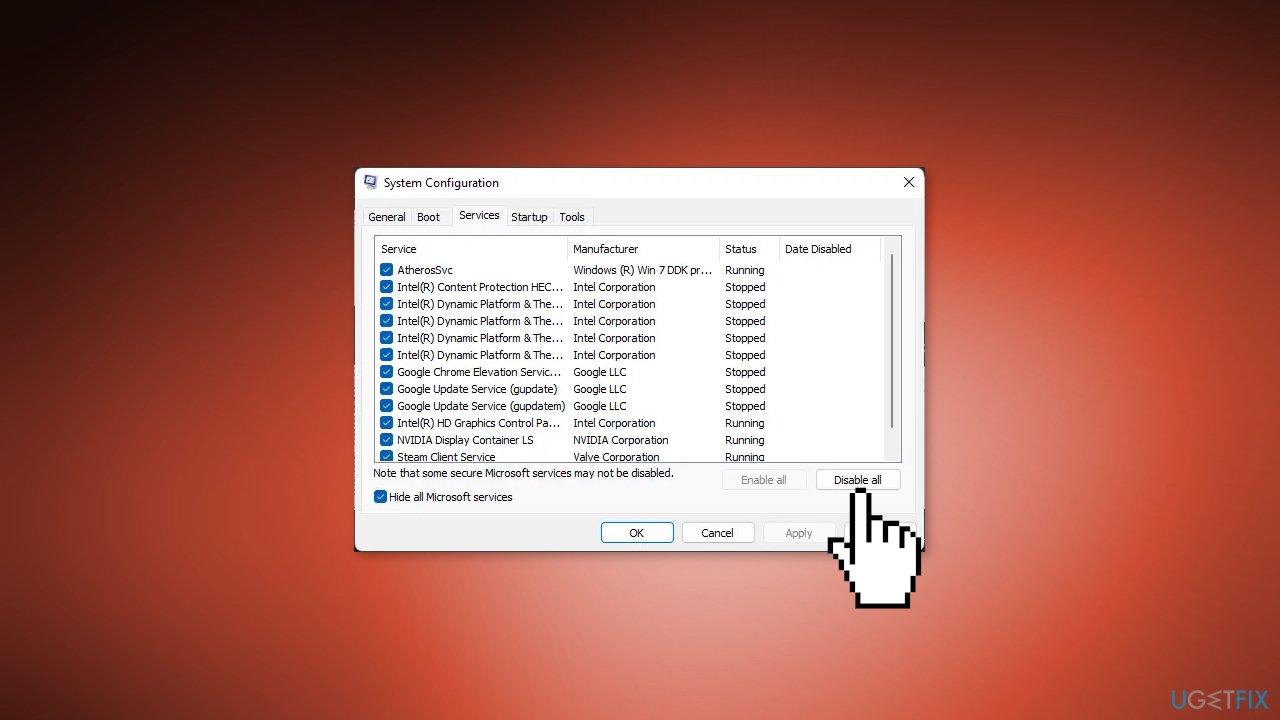
- Click on Disable all at the bottom right corner
- Click Apply and OK to save the changes
- Restart your PC
- Check if the error still appears in the clean boot state
- If the error doesn't appear in the clean boot state, manually enable one process after another to see which process is causing the error.
- Once you've identified the culprit, disable or uninstall the software that's causing the error
Solution 4. Repair Office
- Press the Windows key + I to open the Settings app
- Click on Apps in the Settings window
- Click on Apps & Features in the menu
- Scroll down the list of apps and click on the Office product you want to repair
- Click on Modify button
- Select Online Repair option
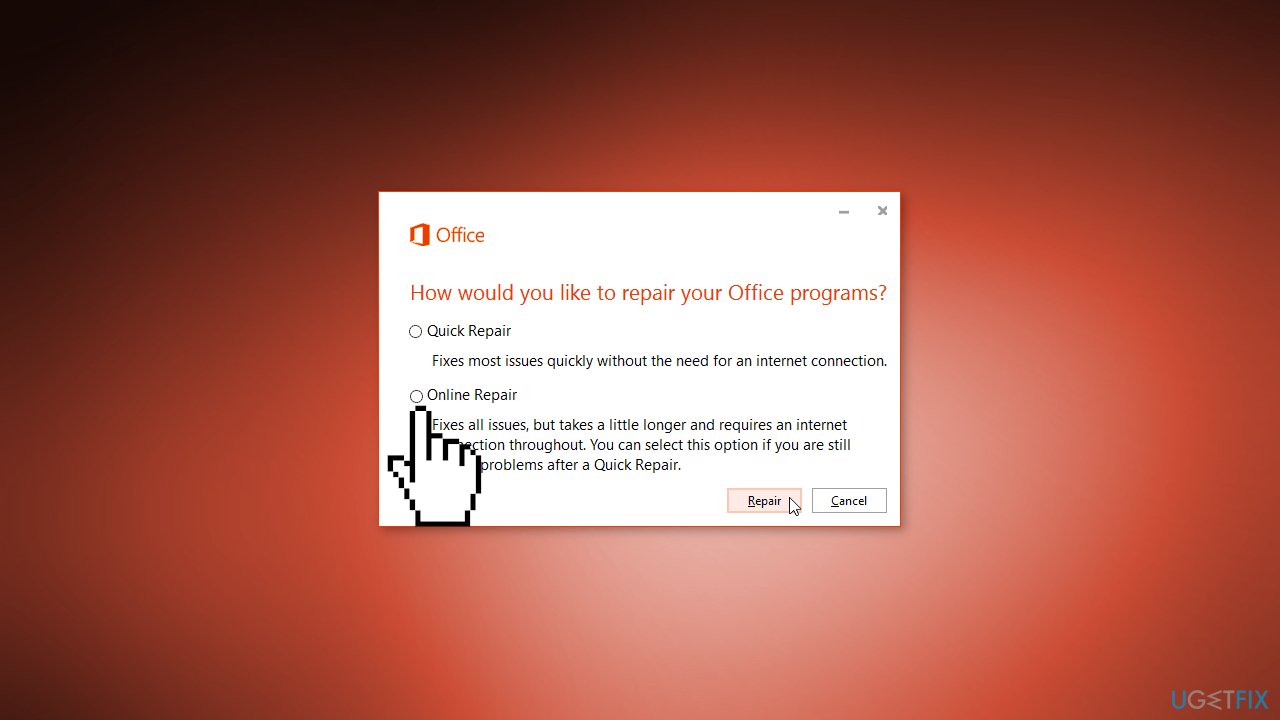
- Follow the instructions that appear on-screen to complete the online repair process
Solution 5. Use System Restore
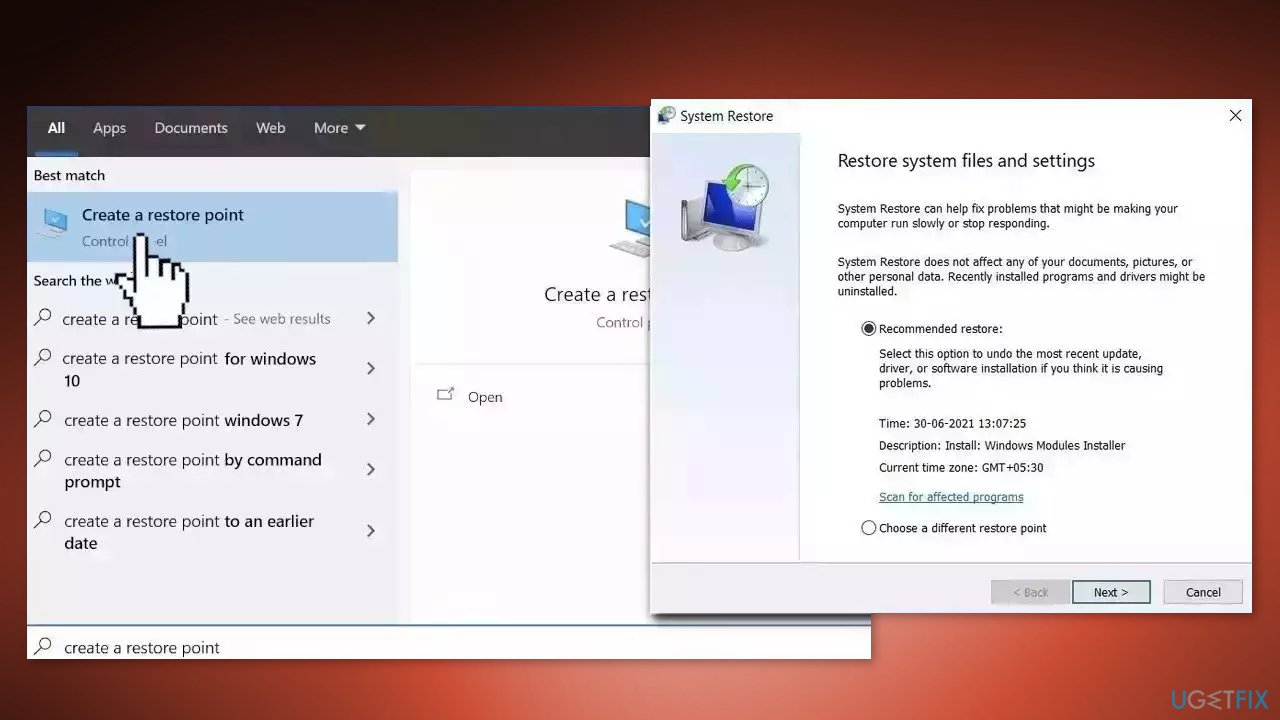
System Restore is a feature in Microsoft Windows that allows users to revert their computer's state to a previous point in time. This can be helpful if you have made changes to your system that are causing problems.
- Go to the Start menu, type restore, and click on Create a restore point
- Click System Restore, then follow the prompts until you can select a restore point
- Select the one you want (ideally before the issue started occurring) and go ahead with the process
Solution 6. Repair Install Windows
- Visit the official Microsoft website to download Windows 11 or Windows 10 Installation Media
- Run the Media Creation Tool and select Create Installation Media for another PC
- Select your USB drive
- Let the Process complete of writing the Installation files to the USB drive
- Click Finish
- On the PC you wish to upgrade, Press Windows + E to open the File Explorer
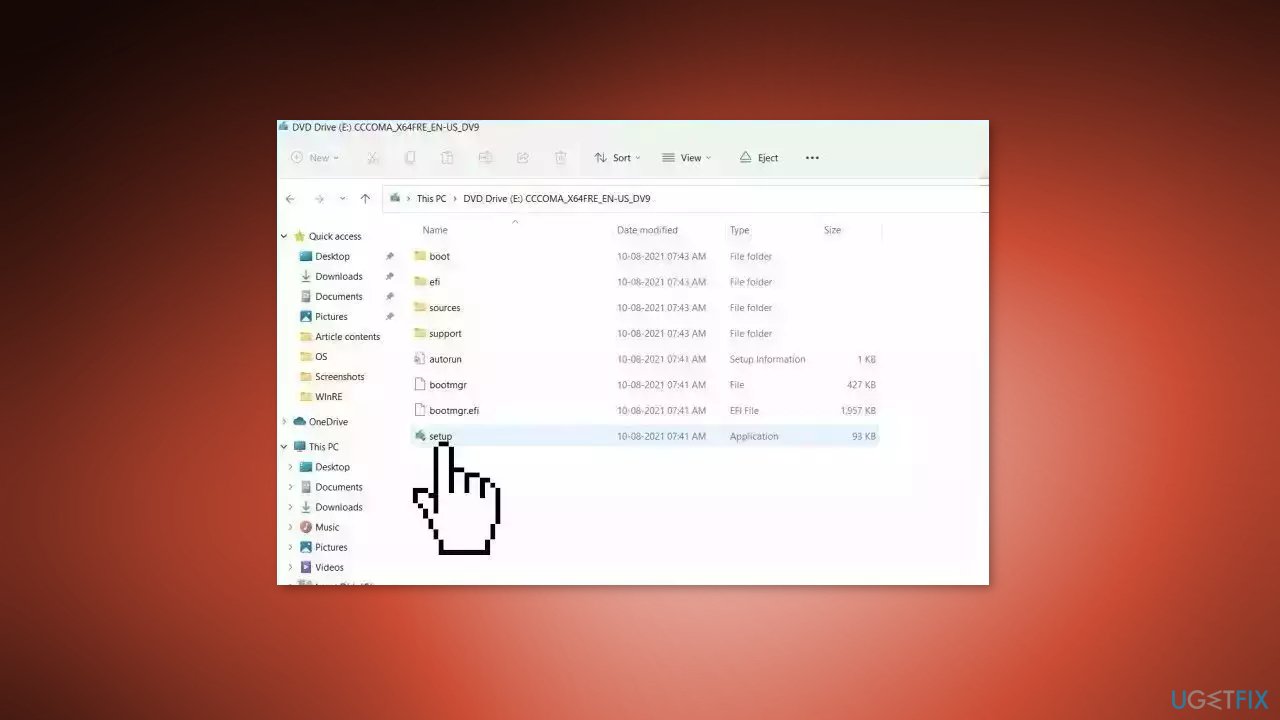
- Open the Removable drive and click Setup.exe
- Accept the license terms on the next screen
- Confirm the Upgrade options – Files, apps and Settings are kept
- Click Install, and the upgrade should start
Repair your Errors automatically
ugetfix.com team is trying to do its best to help users find the best solutions for eliminating their errors. If you don't want to struggle with manual repair techniques, please use the automatic software. All recommended products have been tested and approved by our professionals. Tools that you can use to fix your error are listed bellow:
Protect your online privacy with a VPN client
A VPN is crucial when it comes to user privacy. Online trackers such as cookies can not only be used by social media platforms and other websites but also your Internet Service Provider and the government. Even if you apply the most secure settings via your web browser, you can still be tracked via apps that are connected to the internet. Besides, privacy-focused browsers like Tor is are not an optimal choice due to diminished connection speeds. The best solution for your ultimate privacy is Private Internet Access – be anonymous and secure online.
Data recovery tools can prevent permanent file loss
Data recovery software is one of the options that could help you recover your files. Once you delete a file, it does not vanish into thin air – it remains on your system as long as no new data is written on top of it. Data Recovery Pro is recovery software that searchers for working copies of deleted files within your hard drive. By using the tool, you can prevent loss of valuable documents, school work, personal pictures, and other crucial files.
- ^ Dynamic-link library. Wikipedia, the free encyclopedia.
- ^ Chris Hoffman. Everything You Need To Know About the Blue Screen of Death. Howtogeek. Tech Insight Magazine.
- ^ Tim Fisher. What Is the Windows Registry?. Lifewire. Software and Apps.


