Question
Issue: How to fix OBS Studio not recording audio in Windows?
Hello. I tried to make a recording with OBS Studio but it is not recording audio. I am using it on my Windows PC. Any suggestions about solutions to this issue would be appreciated.
Solved Answer
OBS Studio (Open Broadcasting Software) is a free and open-source video recording and live-streaming application. Its features, such as customizable and versatile sources, advanced audio/video mixing, and efficient encoding capabilities, make it popular among gamers, content creators, and streamers.
The problem of OBS Studio not recording audio in Windows is a common one. This can be a frustrating issue because audio is an important aspect of recording and streaming. The recording or stream becomes incomplete and of poor quality without audio.
This problem can be caused by a number of factors, including incorrect audio device settings, out-of-date audio drivers,[1] microphone access permissions, and others. Updating audio drivers, granting microphone access permissions, adjusting audio settings in OBS Studio, and reinstalling OBS Studio are all possible solutions to this problem.
OBS Studio is a must-have application for content creators and streamers. However, the issue of OBS Studio not recording audio can have a significant impact on work and the audience's experience. It is recommended that you try out the possible solutions to this problem in order to ensure a smooth recording and streaming experience.
In this guide, you will find 9 steps that should help you fix OBS Studio not recording audio in Windows. However, if you suspect you may have underlying Windows operating system malfunctions that could be causing this, you can use a repair tool like FortectMac Washing Machine X9 that can fix most system errors, BSODs,[2] corrupted files, and registry[3] issues. Otherwise, follow the step-by-step instructions below.
Solution 1. Restart the app
Try restarting OBS Studio before proceeding to advanced troubleshooting. To do this, use Task Manager to close all OBS Studio processes, then restart the program and check if the audio recording works. If it still doesn't, move on to further fixes.
Solution 2. Launch OBS Studio as an Administrator
- Right-click the OBS Studio icon
- Choose Properties from the context menu
- In the Properties window, go to the Compatibility tab
- Check Run this program as an administrator option
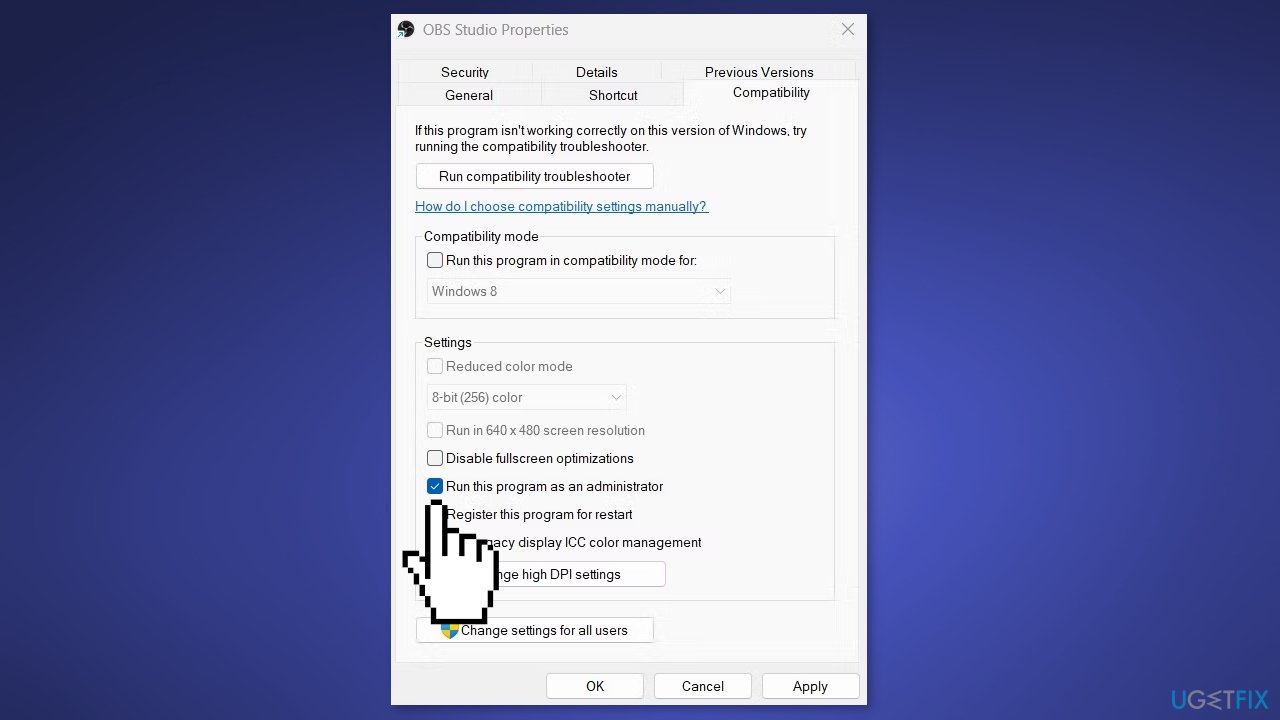
- Click Apply
- Click OK to save the changes
Solution 3. Adjust Volume in Windows Settings
- Open the Settings app
- Choose System from the left sidebar
- Select Sound from the right pane
- Under the Advanced section, choose the Volume Mixer option
- Under the Apps section, unmute OBS Studio if muted
- Adjust the slider
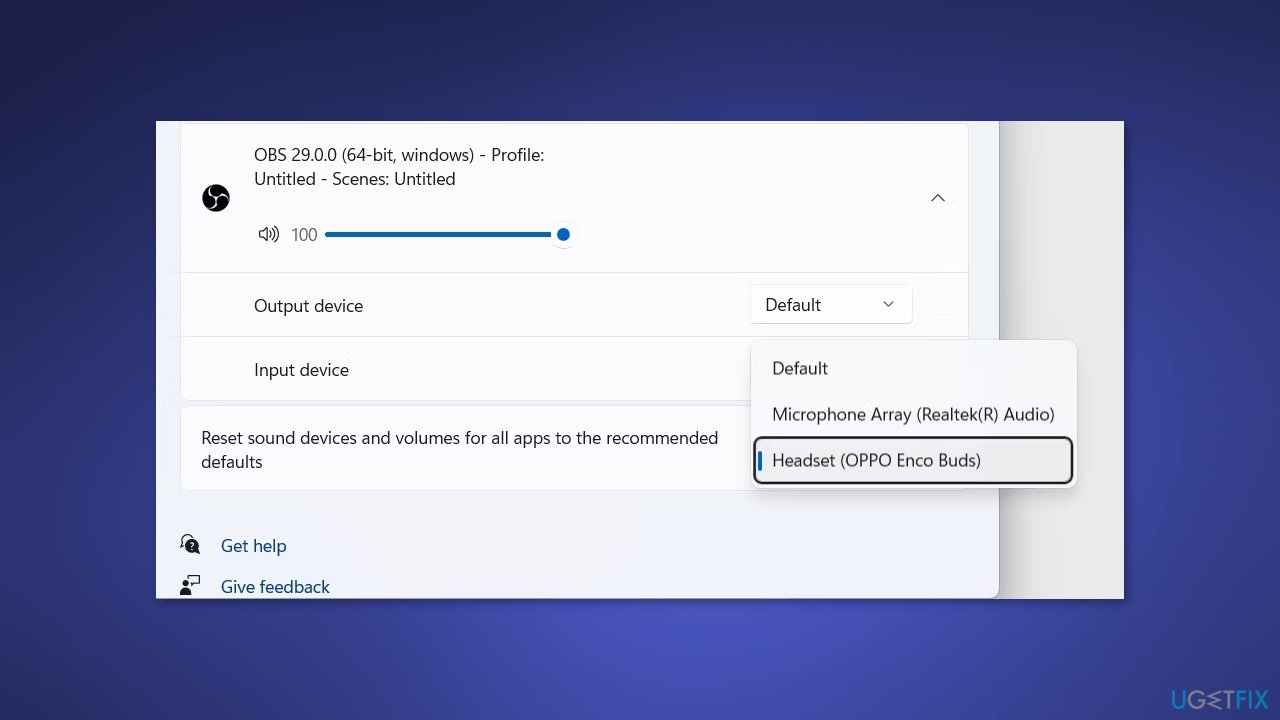
- Click the drop-down icon next to OBS Studio
- Choose the correct input device
- Restart OBS Studio
- Check if the problem persists
Solution 4. Choose the Right Recording Device
- Open the Settings app
- Go to System > Sound
- Under Advanced section, choose More sound settings
- Switch to the Recording tab
- Right-click on the correct recording device
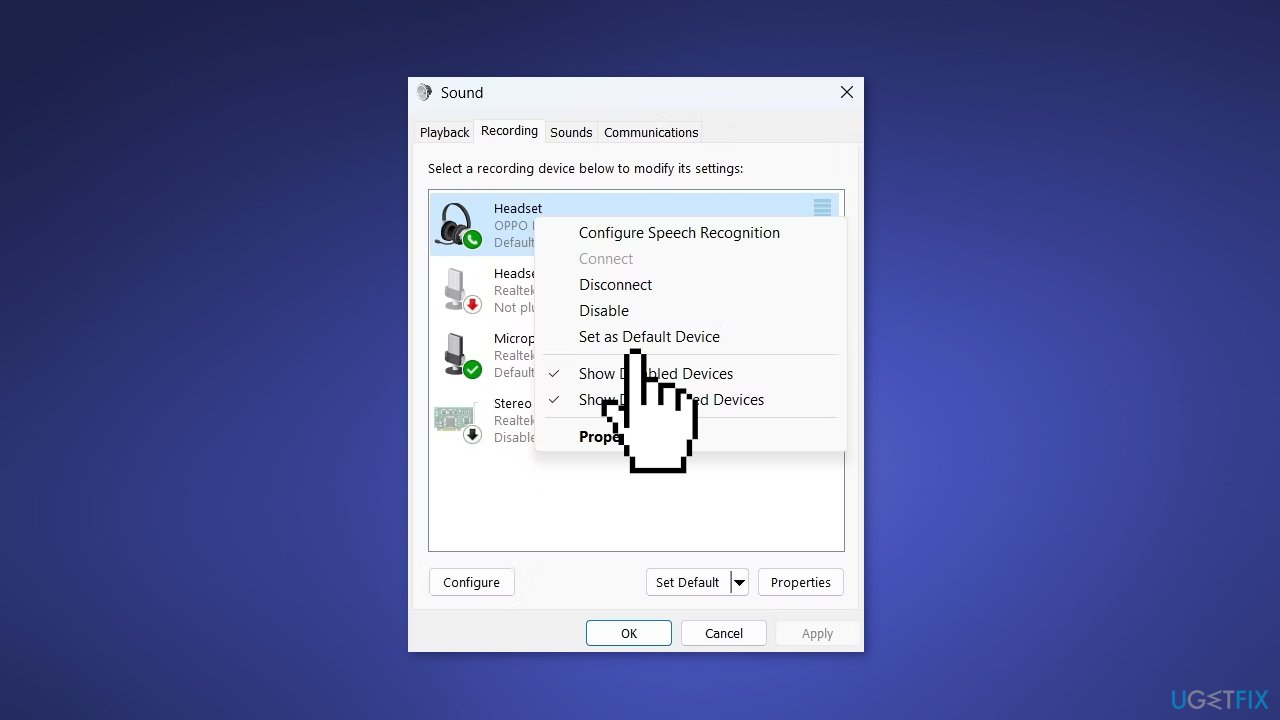
- Choose Set as Default Device from context menu
- Click Apply
- Click OK
Solution 5. Allow OBS Studio to Access your Microphone
- Open the Settings app
- Choose Privacy & Security from the left sidebar
- Under the App Permission section, select Microphone
- Enable the toggle next to the Microphone access option
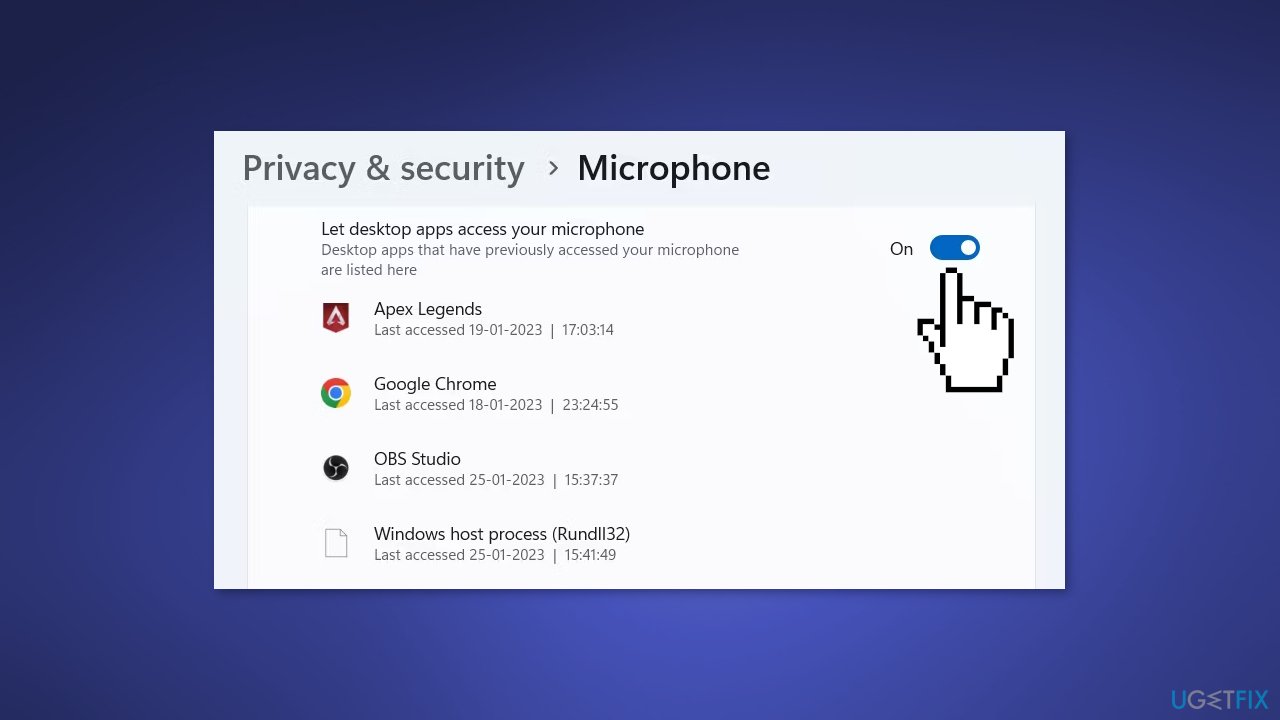
- Enable the toggle next to Let desktop apps access your microphone
Solution 6. Update Audio Driver
- Press the Windows key + X and choose Device Manager from the list
- Double-click Sound, video, and game controllers section to expand it
- Right-click on the default recording device
- Select Update Driver from context menu
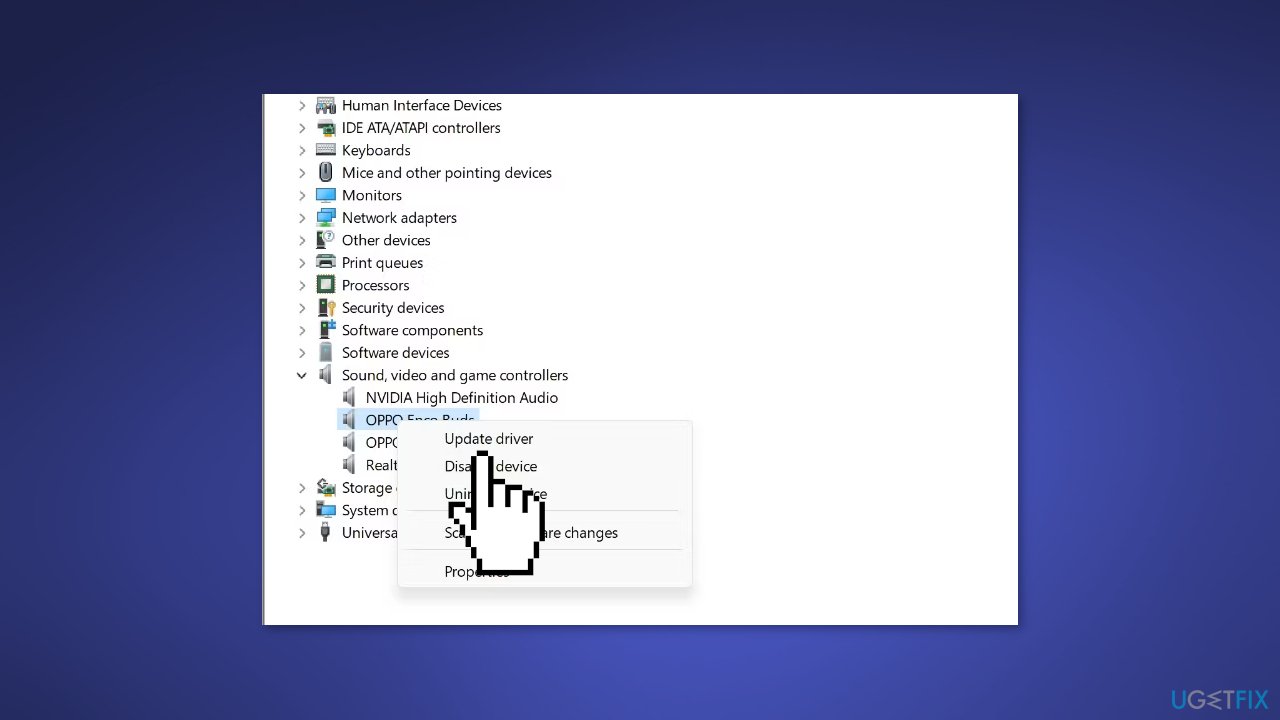
- Choose Search automatically for drivers option in the window that appears
Solution 7. Change OBS Studio Settings
- Launch OBS Studio
- Choose File from the top-left corner
- Choose Settings from the context menu
- In the Settings window, select Audio from the left sidebar
- Under the Global Audio Devices section click the drop-down icon next to Desktop Audio and Desktop Audio 2
- Choose Default in both options
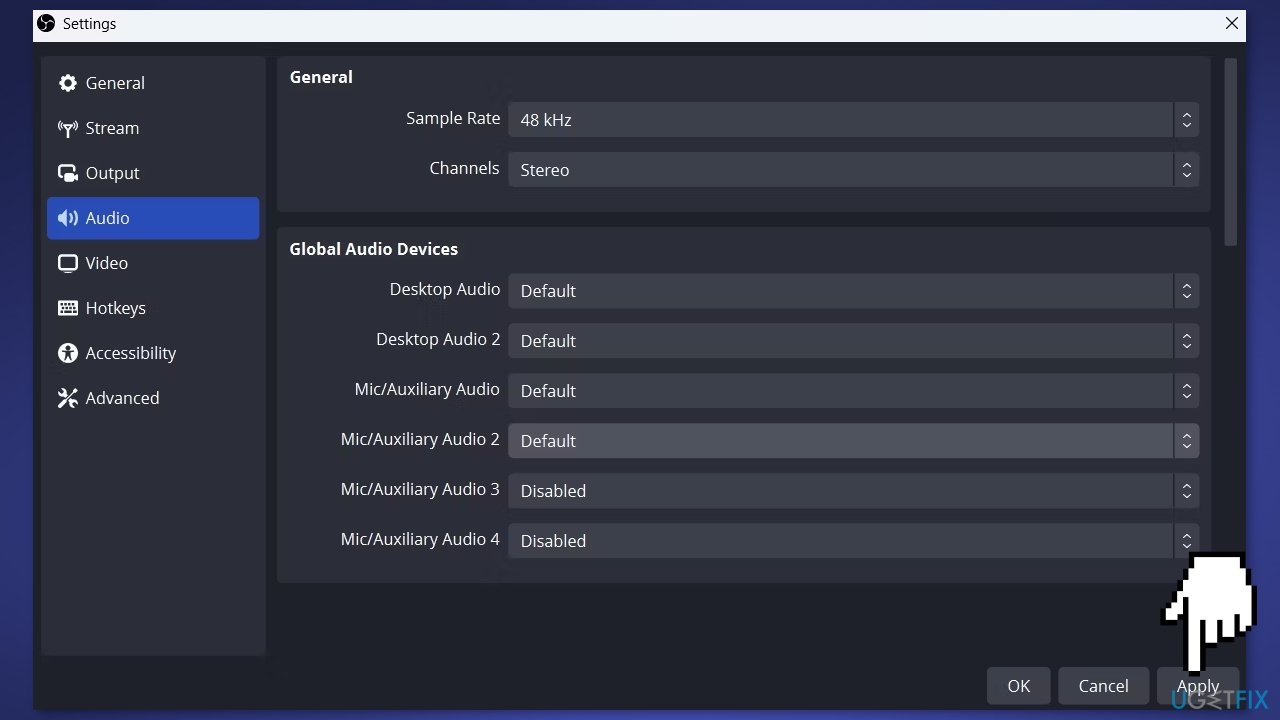
- Click the drop-down icon next to Mic/Auxiliary Audio and Mic/Auxiliary Audio 2
- Choose Default in both options
- Choose Apply
- Choose OK to save changes
Solution 8. Modify Audio Mixer Settings
- Open OBS Studio
- Under the Audio Mixer section adjust the Mic/Aux slider to -2.1dB
- Click the three dots next to Mic/Aux
- Choose Properties
- Click the drop-down icon next to Device
- Select your default recording device
- Click OK
- Click the three dots next to Mic/Aux again
- Choose Advanced Audio Properties
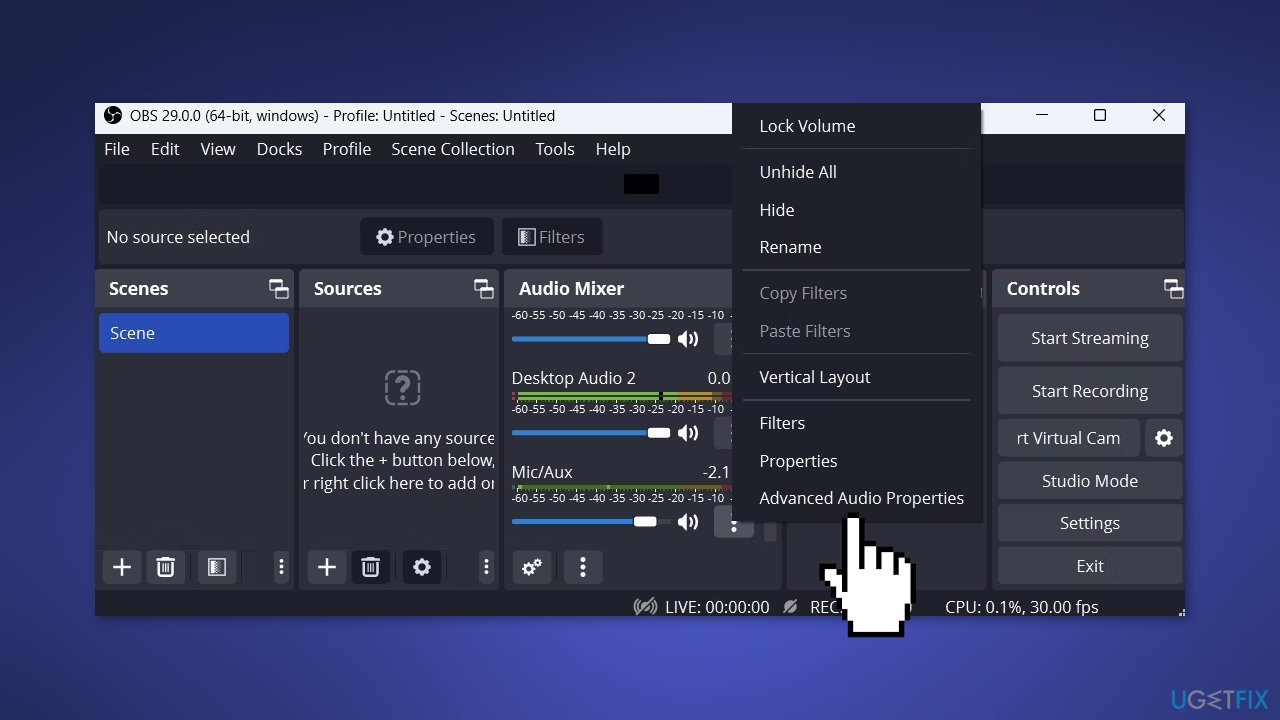
- Under the Audio Monitoring tab choose Monitor and Output for Desktop Audio
- Choose Monitor Only (mute output) for Mic/Aux
Solution 9. Reinstall the app
If you are still facing the issue, the OBS Studio installation file may be causing the problem. At this point, the only thing left to try is reinstalling the OBS Studio application.
- Go to Control Panel > Programs > Programs and Features, select OBS Studio, and choose Uninstall
- Download the latest version of OBS Studio from the official website
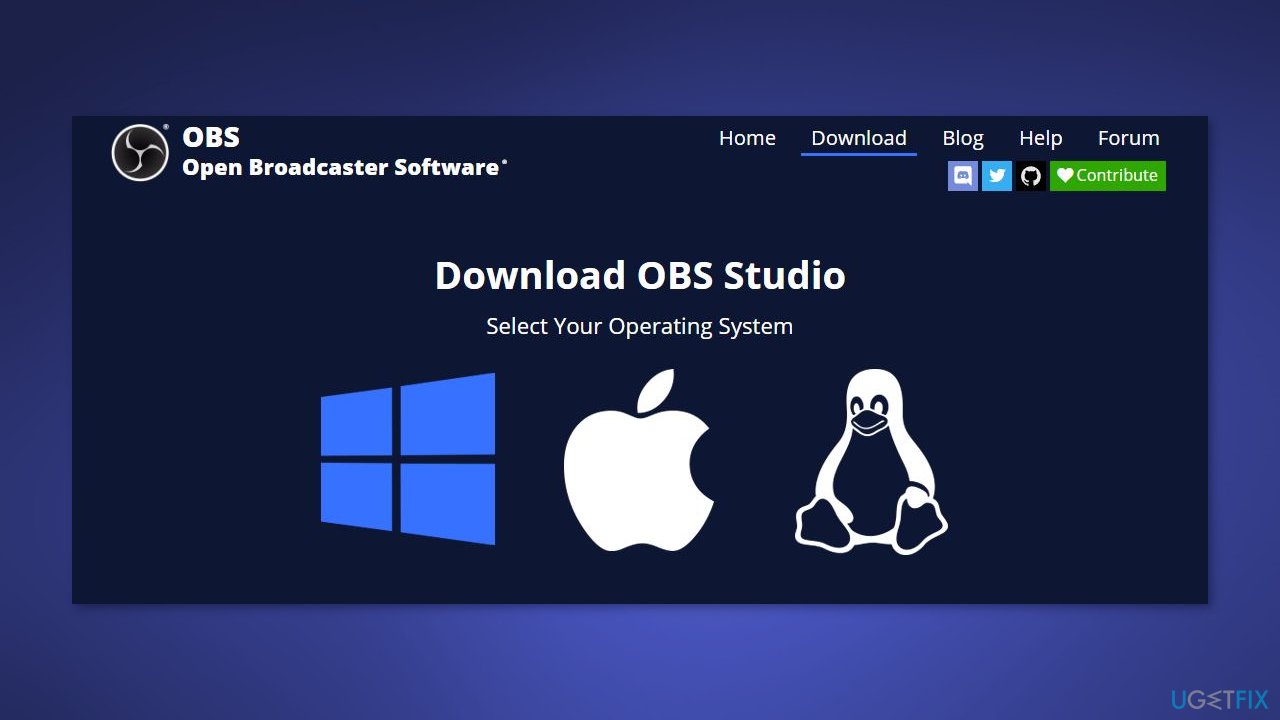
- Double-click the downloaded installation file, follow the prompts and complete the installation process
- Launch OBS Studio and check if the issue has been resolved
Repair your Errors automatically
ugetfix.com team is trying to do its best to help users find the best solutions for eliminating their errors. If you don't want to struggle with manual repair techniques, please use the automatic software. All recommended products have been tested and approved by our professionals. Tools that you can use to fix your error are listed bellow:
Protect your online privacy with a VPN client
A VPN is crucial when it comes to user privacy. Online trackers such as cookies can not only be used by social media platforms and other websites but also your Internet Service Provider and the government. Even if you apply the most secure settings via your web browser, you can still be tracked via apps that are connected to the internet. Besides, privacy-focused browsers like Tor is are not an optimal choice due to diminished connection speeds. The best solution for your ultimate privacy is Private Internet Access – be anonymous and secure online.
Data recovery tools can prevent permanent file loss
Data recovery software is one of the options that could help you recover your files. Once you delete a file, it does not vanish into thin air – it remains on your system as long as no new data is written on top of it. Data Recovery Pro is recovery software that searchers for working copies of deleted files within your hard drive. By using the tool, you can prevent loss of valuable documents, school work, personal pictures, and other crucial files.
- ^ Device driver. Wikipedia, the free encyclopedia.
- ^ Chris Hoffman. Everything You Need To Know About the Blue Screen of Death. Howtogeek. Tech Insight Magazine.
- ^ Tim Fisher. What Is the Windows Registry?. Lifewire. Software and Apps.


