Question
Issue: How to fix Windows 11 installation error 0xC1900101 - 0x40017?
Hi, I am trying to upgrade to Windows 11 from Windows 10, but I receive the 0xC1900101 – 0x40017 error after hours of waiting, and it happens every time. I really want to upgrade to the latest version of Windows, but I can't because of this. Is there anything I could do to resolve this?
Solved Answer
0xC1900101 – 0x40017 is a Windows error that is usually encountered whenever users are trying to upgrade to the latest version of Windows, for example, from Windows 10 to Windows 11.
With the latest Windows version, the transition to it should be really easy and smooth – users can either upgrade via the Settings menu or use alternative tools, such as ISO file or Media Creation Tool. However, those who encounter upgrade errors such as 0xC1900101 – 0x40017 can get stuck for good.
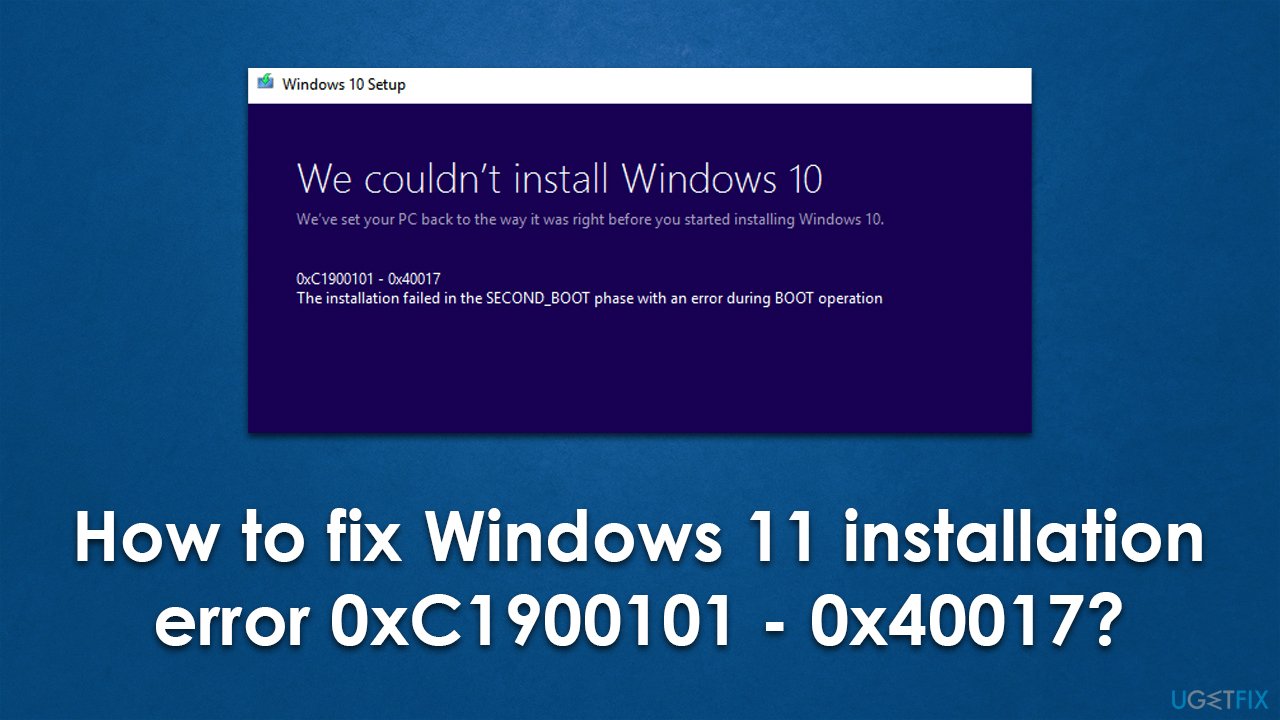
In most cases, people manage to go through several installation steps (which may last for hours for some) before they receive the error, which reads as follows:
0xC1900101 – 0x40017
The installation failed in the SECOND_BOOT phase with an error during BOOT operation
The upgrade process happens in phases, which include “Copying files,” “Installing features and drivers,” and last – “Configuring settings,” during which the error occurs. This can mean several things, for example, that system drivers are corrupt, or that system files are damaged. In some cases, trying again might simply work. In any case, please check the instructions below to fix the 0xC1900101 – 0x40017 error when upgrading Windows.
Simple solutions that might work
First and foremost, we recommend you run a scan with a powerful tool FortectMac Washing Machine X9 – it can automatically locate damaged system components and replace them with working ones. It can also clean the system from junk, clear browser caches for better privacy, and repair damage caused by malware infection.
There are also several general tips that should help you to out simple problems that could be causing the 0xC1900101 – 0x40017 error. Here they are:
- Before initiating the upgrade process, unplug all unnecessary peripherals, such as printers or cameras, and only leave the mouse and keyboard connected.
- Uninstall the third-party antivirus, firewall, or VPN software. Please refer to the following link to download the official removal tool for the security software you are using.
- Ensure time and date settings are correct.
- Make sure you have enough space – you'll need at least 64GB.
- Ensure your computer is connected to the internet. If the upgrade is failing when it is, disconnect from the internet and try again.
- If you haven't done so, try initiating the upgrade process again.
Fix 1. Run SFC and DISM
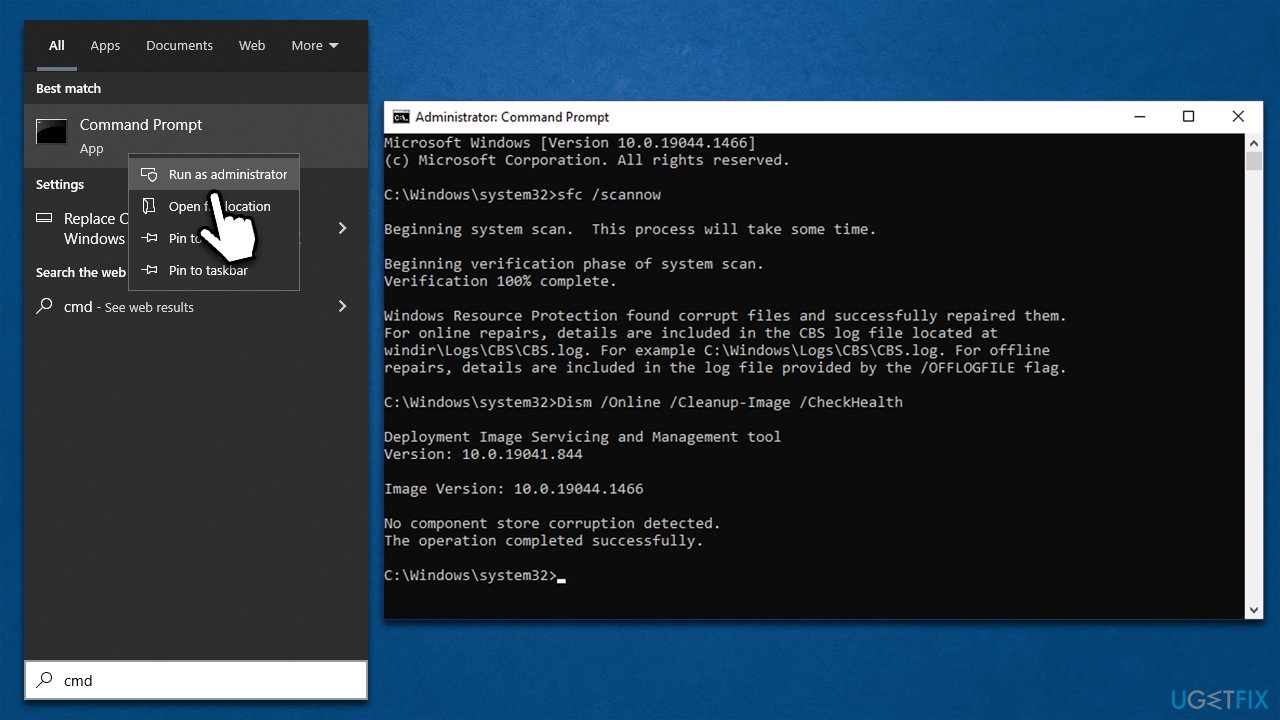
- Search for cmd in Windows.
- Right-click on the Command Prompt result and select Run as administrator.
- The User Account Control (UAC) will prompt you to allow changes to your computer – click Yes.
- Copy and paste the following commands, pressing Enter after each:
sfc /scannow
DISM /Online /Cleanup-Image /CheckHealth
DISM /Online /Cleanup-Image /ScanHealth
DISM /Online /Cleanup-Image /RestoreHealth - Restart your system.
Fix 2. Install all the Windows updates
Windows updates can include a lot of bug fixes, and if you have been neglecting this aspect, it might fix many of the issues, even those related to the upgrade process. So, make sure all the updates are installed as follows:
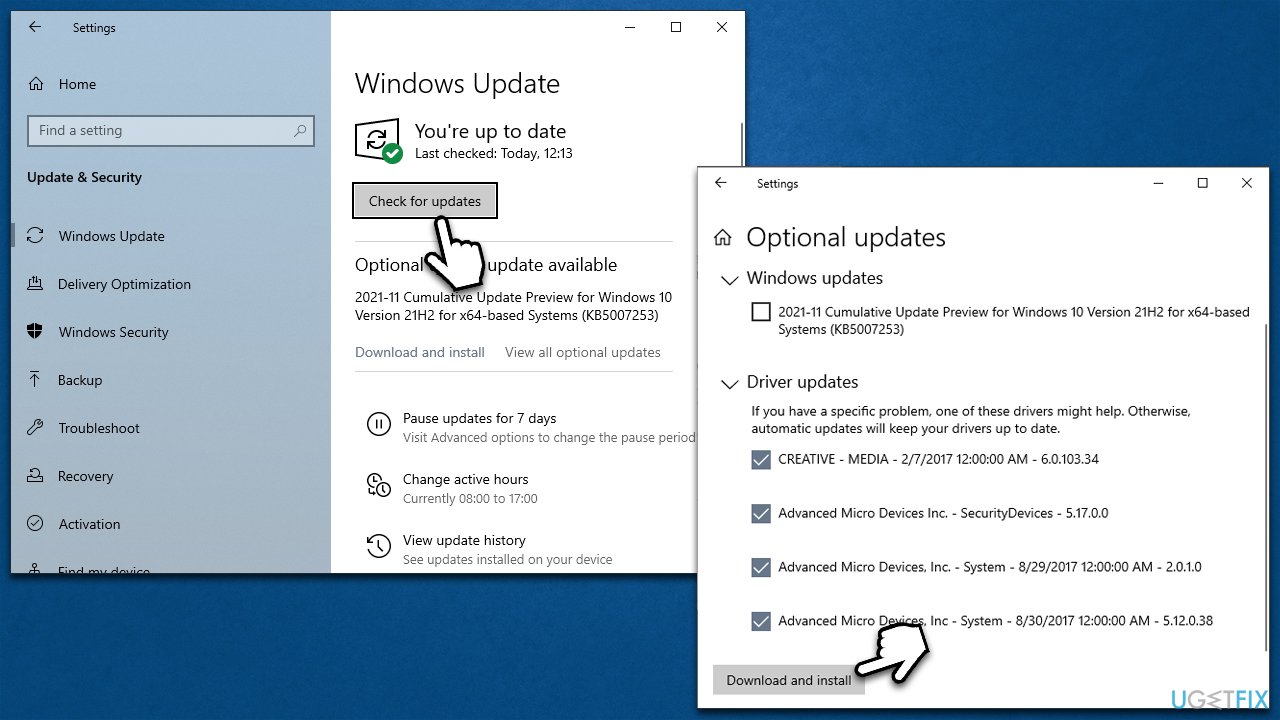
- Type Updates in Windows search and press Enter.
- Select Check for Updates.
- Install any optional updates if available.
- Allow the necessary files to download and install.
- Reboot your device.
Fix 3. Update drivers
As mentioned, the likely cause of the 0xC1900101 – 0x40017 upgrade error is drivers. This is especially true for network adapters for wireless or ethernet.
Usually, this process can be done by installing all the optional Windows updates, as we explained above, although this method is not reliable. Windows might fail to download the latest version of the driver for your particular setup. You have two other solutions available for you:
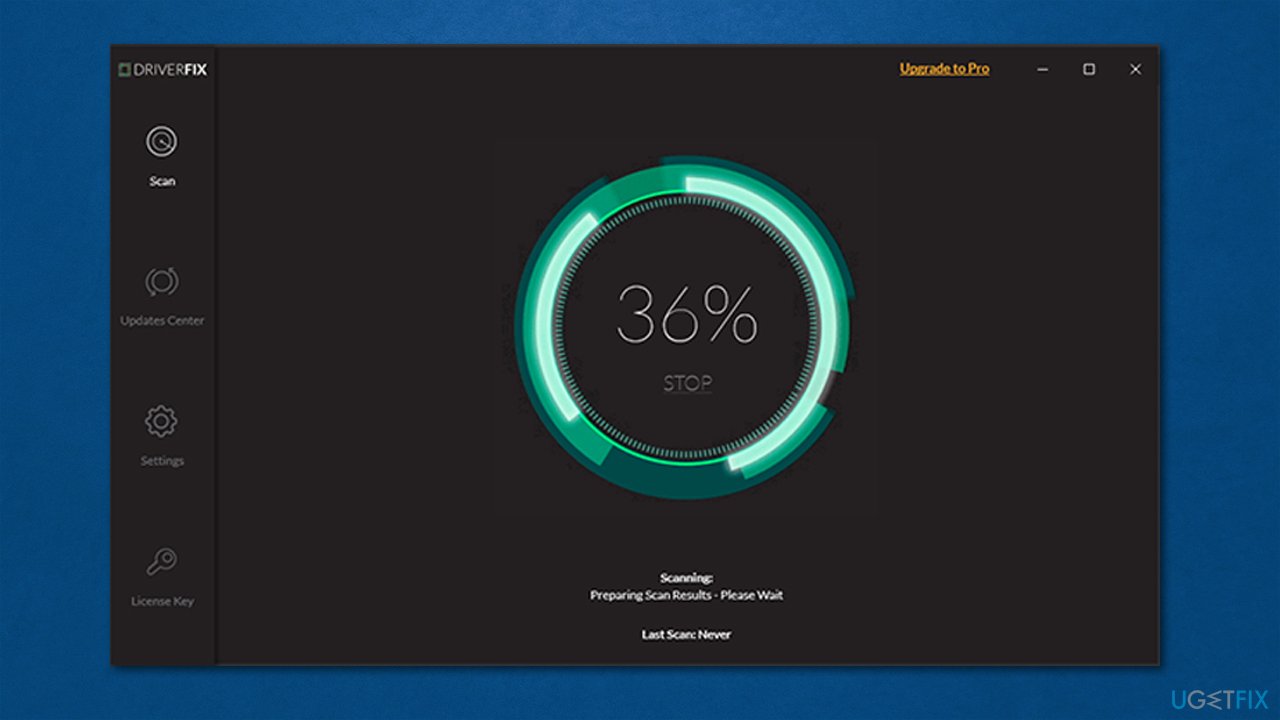
- Use an automatic driver updater such as DriverFix, which can scan your system and automatically install the latest versions of all the drivers.
- Visit each of the device manufacturer's websites and download the drivers from there, although keep in mind this process might take a while.
Fix 4. Reinstall drivers
In some cases, you might see a yellow exclamation mark in the Device Manager next to drivers that are malfunctioning. We recommend reinstalling drivers seen this way.
- Right-click on Start and pick Device Manager.
- Expand each of the sections and check for yellow exclamation marks.
- Once identified, right-click on the driver and select Uninstall device.
- When prompted, mark the Delete driver software for this device checkbox.
- Follow the instructions and restart your system.
- You can then redownload drivers using one of the methods described above.
Fix 5. Use Bootable Media [Windows 11 only]
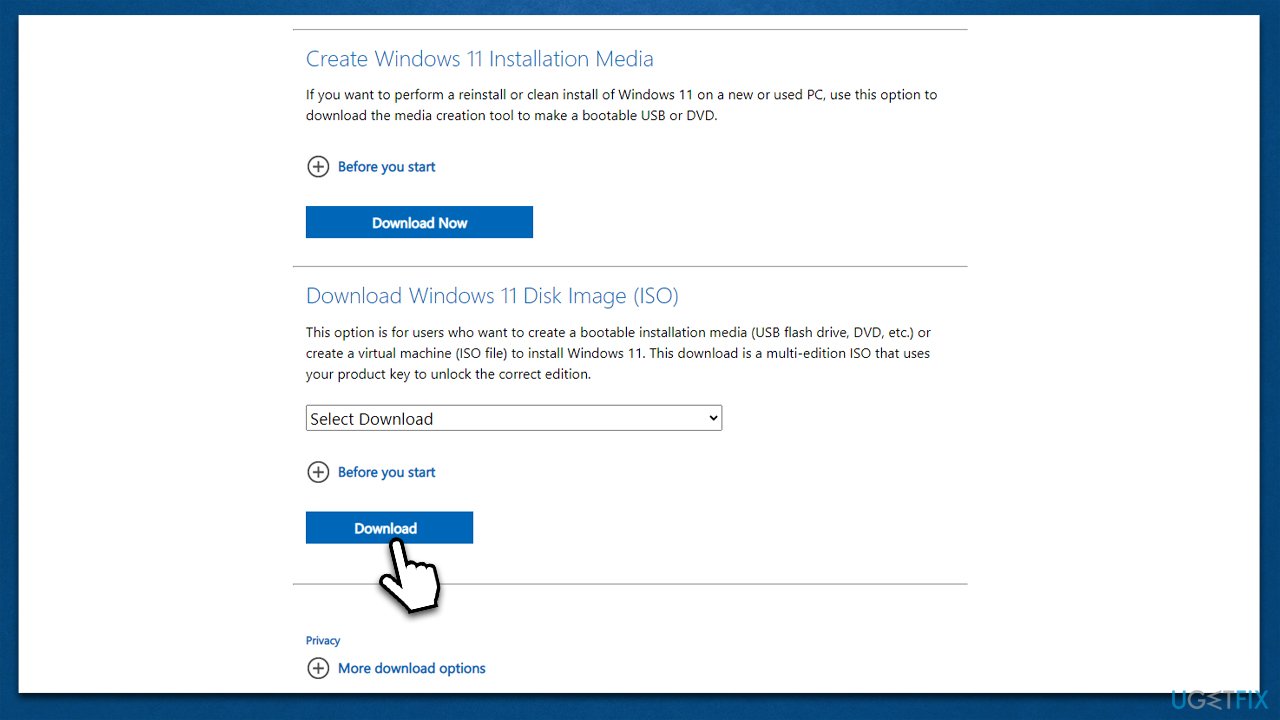
Windows 11 can be installed using ISO files instead – this will make sure that all the files are genuine.
- Visit the official Microsoft page to download Windows Disk Image.
- Open the folder with the downloaded ISO file.
- Right-click the ISO file and select Properties.
- On the General tab, click Change under Opens with and select Windows Explorer.
- Click Apply.
- Right-click the ISO file again and select Mount
- A virtual bootable disc will be created. Double-click on it to view the contents
- Double-click setup.exe to begin the setup process for Windows 11.
Fix 6. Reset Windows
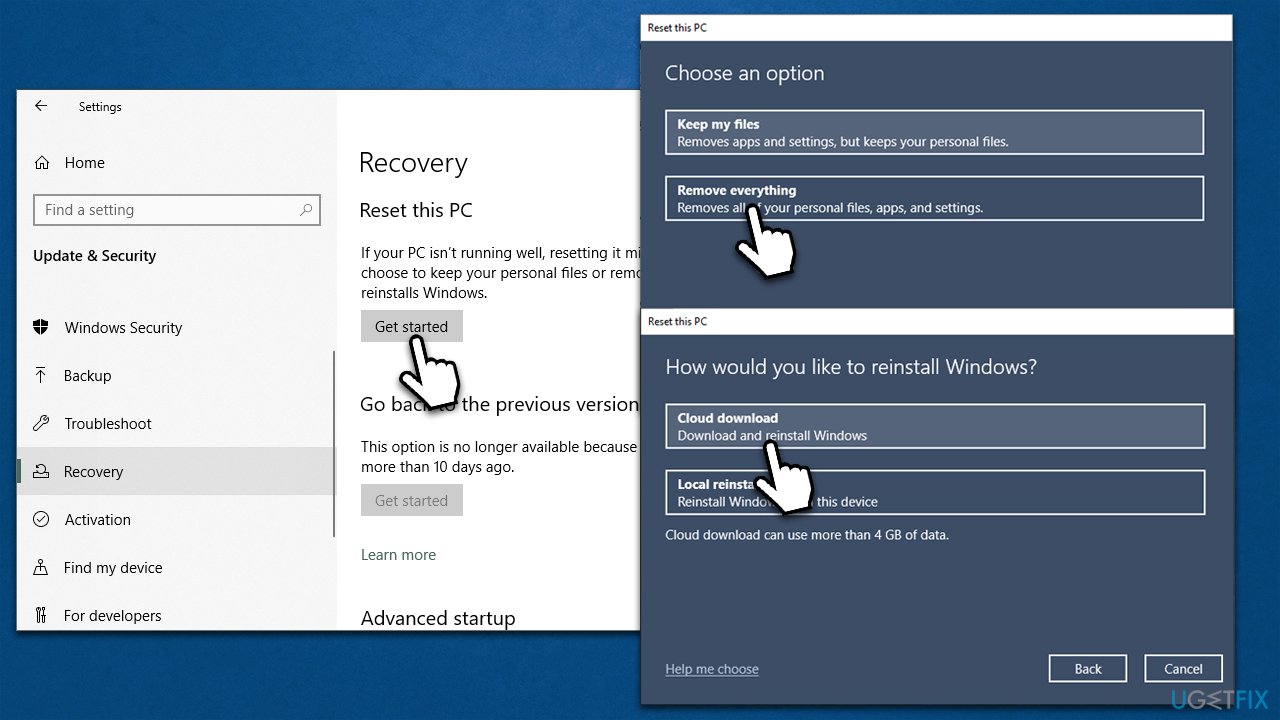
Before upgrading, try resetting Windows. It is also recommended to remove all files and programs during this process – so make personal data copies in this case.
- Right-click on Start and select Settings.
- Go to Update & Security and pick Recovery.
- Find Reset this PC section and click Get Started.
- Select Remove everything > Cloud download.
- Proceed with the on-screen instructions (your system may restart several times).
Repair your Errors automatically
ugetfix.com team is trying to do its best to help users find the best solutions for eliminating their errors. If you don't want to struggle with manual repair techniques, please use the automatic software. All recommended products have been tested and approved by our professionals. Tools that you can use to fix your error are listed bellow:
Access geo-restricted video content with a VPN
Private Internet Access is a VPN that can prevent your Internet Service Provider, the government, and third-parties from tracking your online and allow you to stay completely anonymous. The software provides dedicated servers for torrenting and streaming, ensuring optimal performance and not slowing you down. You can also bypass geo-restrictions and view such services as Netflix, BBC, Disney+, and other popular streaming services without limitations, regardless of where you are.
Don’t pay ransomware authors – use alternative data recovery options
Malware attacks, particularly ransomware, are by far the biggest danger to your pictures, videos, work, or school files. Since cybercriminals use a robust encryption algorithm to lock data, it can no longer be used until a ransom in bitcoin is paid. Instead of paying hackers, you should first try to use alternative recovery methods that could help you to retrieve at least some portion of the lost data. Otherwise, you could also lose your money, along with the files. One of the best tools that could restore at least some of the encrypted files – Data Recovery Pro.


