Question
Issue: [Fix] Standard hardware security not supported in Windows
Hello. When I go to the Windows Security app, I see the “Standard hardware security not supported” message. What does it mean? Should I be worried?
Solved Answer
“Standard hardware security not supported” is an error message that can occur in Windows operating systems. The message indicates that the device or system is incompatible with Windows hardware security features like Windows Hello or device encryption.[1]
This error message can appear for a variety of reasons, including outdated drivers, incompatible hardware, or unsupported firmware. When this message appears, the user may be unable to access certain security features or may encounter other problems.
Users may be at risk of unauthorized access to sensitive data if a device is not compatible with Windows hardware security. Windows hardware security features, such as Windows Hello and device encryption, add an extra layer of security to help protect user data. Without these features, users may be vulnerable to potential security breaches and data theft.
There are a few options for dealing with the “Standard hardware security not supported” error message. Users can try updating their drivers, making sure their firmware is up to date and determining whether their hardware is compatible with Windows hardware security features. They can also seek assistance from the device's manufacturer or Microsoft support.
In this guide, you will find 6 steps that should help you fix Standard hardware security not supported in Windows. Keep in mind that the manual troubleshooting process can be lengthy. You can use a repair tool like FortectMac Washing Machine X9 that can fix most system errors, BSODs,[2] corrupted files, and registry[3] issues. Otherwise, follow the step-by-step instructions below.

Method 1. Modify BIOS Settings
- Press the correct key (depending on your motherboard) to enter BIOS settings while the computer is booting. Common keys include F1, F2, F10, etc.
- Once you are in the BIOS settings, go to the Security tab.
- Set TPM to Enabled.
- Navigate to the Boot tab.
- Enable the Secure Boot option.
- Move to the Advanced tab.
- Tap on CPU configuration.
- Enable SVM Mode (for AMD CPU) or Intel Virtualization Technology (for Intel CPU).
- Once you have enabled all the necessary configurations, save the settings.
- Exit the BIOS settings to restart your PC.
Method 2. Enable Data Execution Prevention
- Press the Windows key + R to open the Run dialog box.
- Type sysdm.cpl and press Enter to launch System Properties.
- Move to the Advanced tab inside the System Properties window.
- Click on Settings under the Performance section.
- Navigate to the Data Execution Prevention tab.
- Select the Turn on DEP option that suits your requirement.
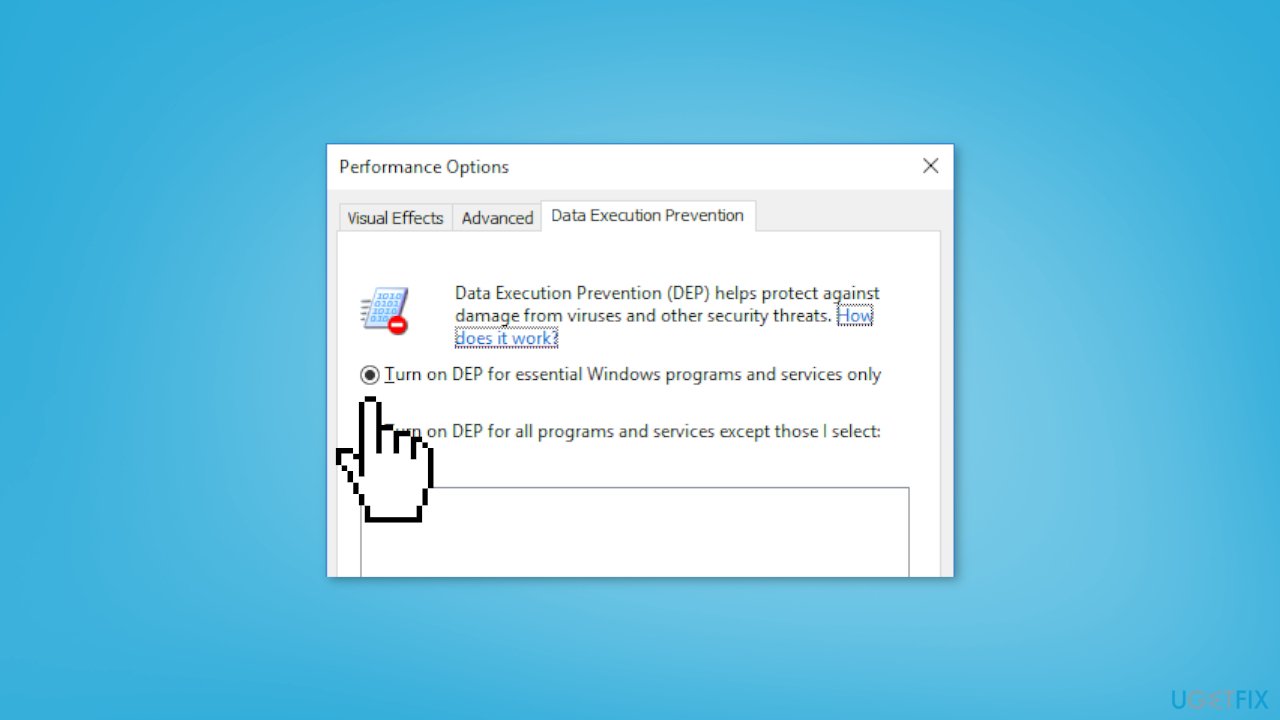
- Click on the Apply button.
- Click on the OK button to save changes.
Method 3. Turn on Memory Integrity
- Press the Windows key + I to open the Windows Settings app.
- Navigate to the Privacy & security tab.
- Click on the Windows Security option from the right-side pane.
- Select the Device security option.
- Click on the Core isolation details option under Core isolation.
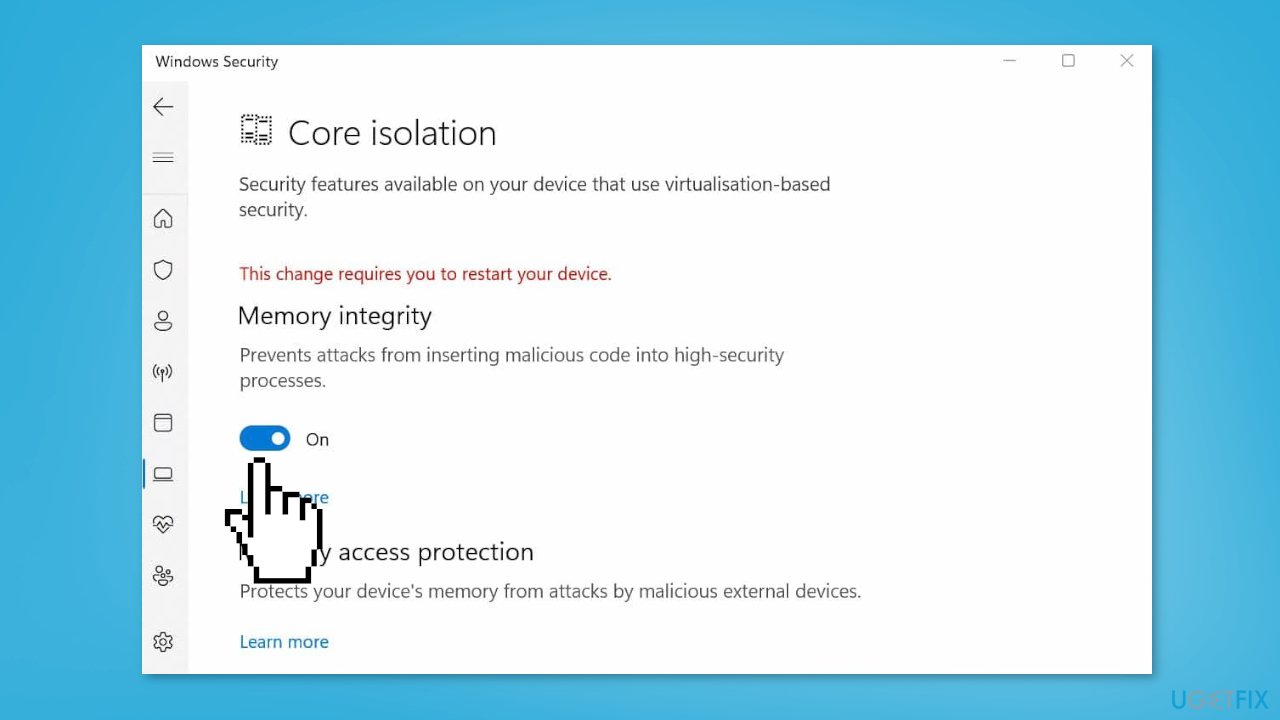
- Turn on the toggle associated with the Memory integrity.
- Exit the Settings window.
- Open Windows Security to check if the error message is gone.
Method 4. Reset Windows Security
- Press the Windows key + I to open the Settings app.
- Navigate to the Apps tab.
- Click on the Installed apps option.
- Locate the Windows Security app.
- Press the three-dot menu button present next to Windows Security.
- Click on Advanced options.
- Scroll down to the Reset section.
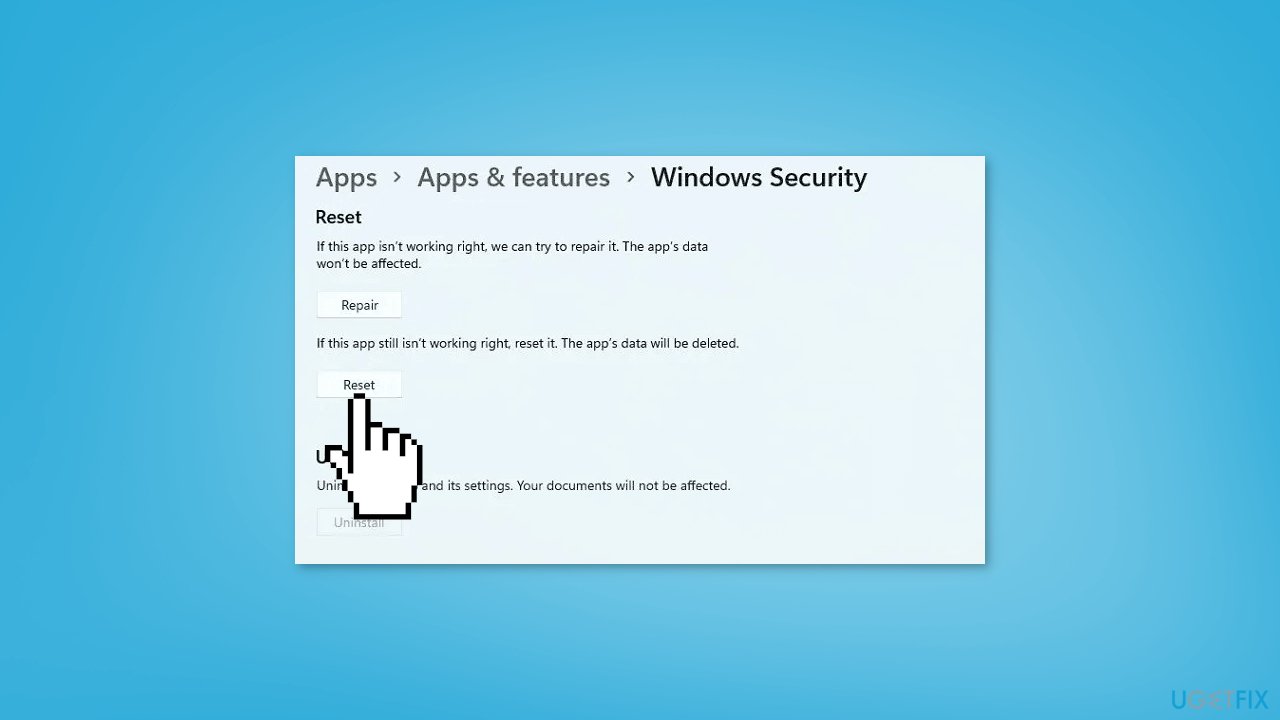
- Press the Reset button.
- Confirm the process to reset the app.
- Once done, restart your computer.
- Check if the error is gone.
Method 5. Re-register the Windows Security app
- Open Windows search.
- Search for PowerShell.
- Right-click on Windows PowerShell and select Run as administrator.
- Type the following command in the PowerShell window:
PowerShell -ExecutionPolicy Unrestricted -Command “& {$manifest = (Get-AppxPackage Microsoft.Windows.SecHealthUI).InstallLocation + '\AppxManifest.xml' ; Add-AppxPackage -DisableDevelopmentMode -Register $manifest}”
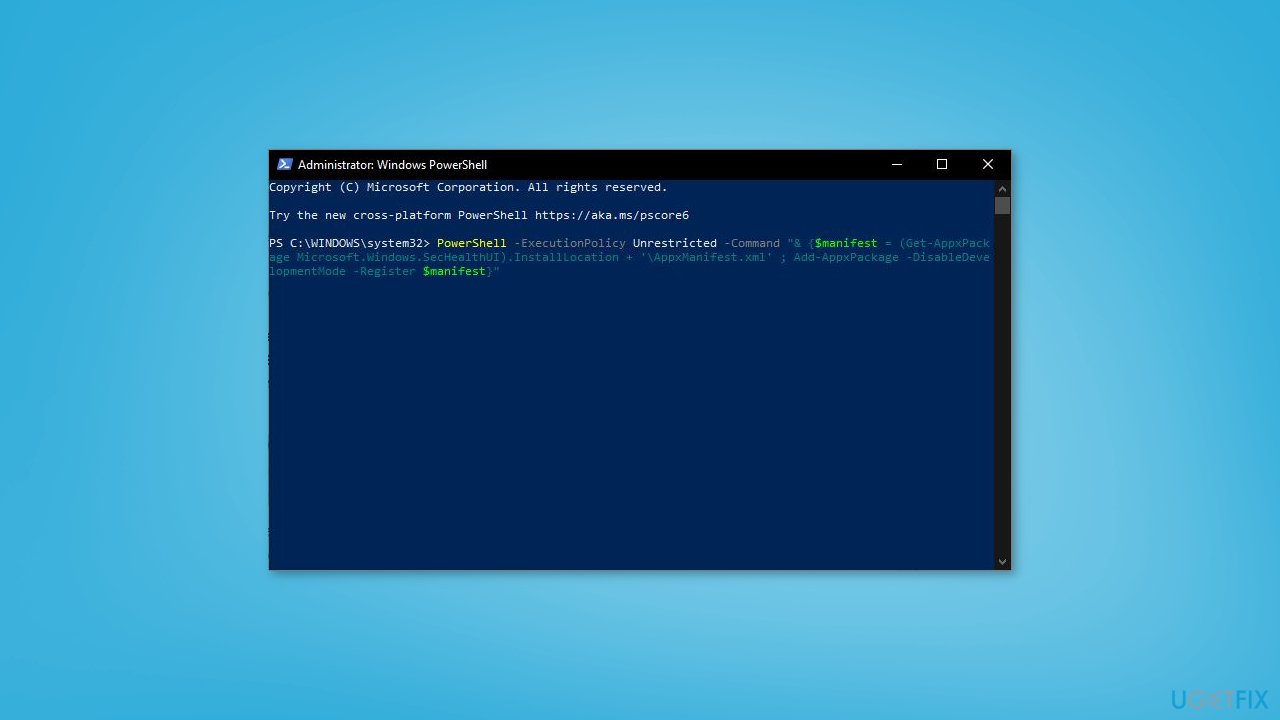
- Press Enter to execute the command.
- Once the command is executed, reboot your computer.
- Check if the error message has disappeared or not.
Method 6. Take Ownership of the SecurityHealth Folder
- Open File Explorer using the Windows key + E.
- Navigate to the following location: C:\Windows\System32\SecurityHealth.
- Right-click on the SecurityHealth folder.
- Select the Properties option.
- Go to the Security tab and click on the Advanced button.
- Press the Change button present next to Owner.
- Tap on Advanced.
- Click on the Find Now button.
- From the Search Results section, select Administrators and press OK.
- Click Check Names and press OK.
- Tick the Replace owner on sub containers and objects checkbox.
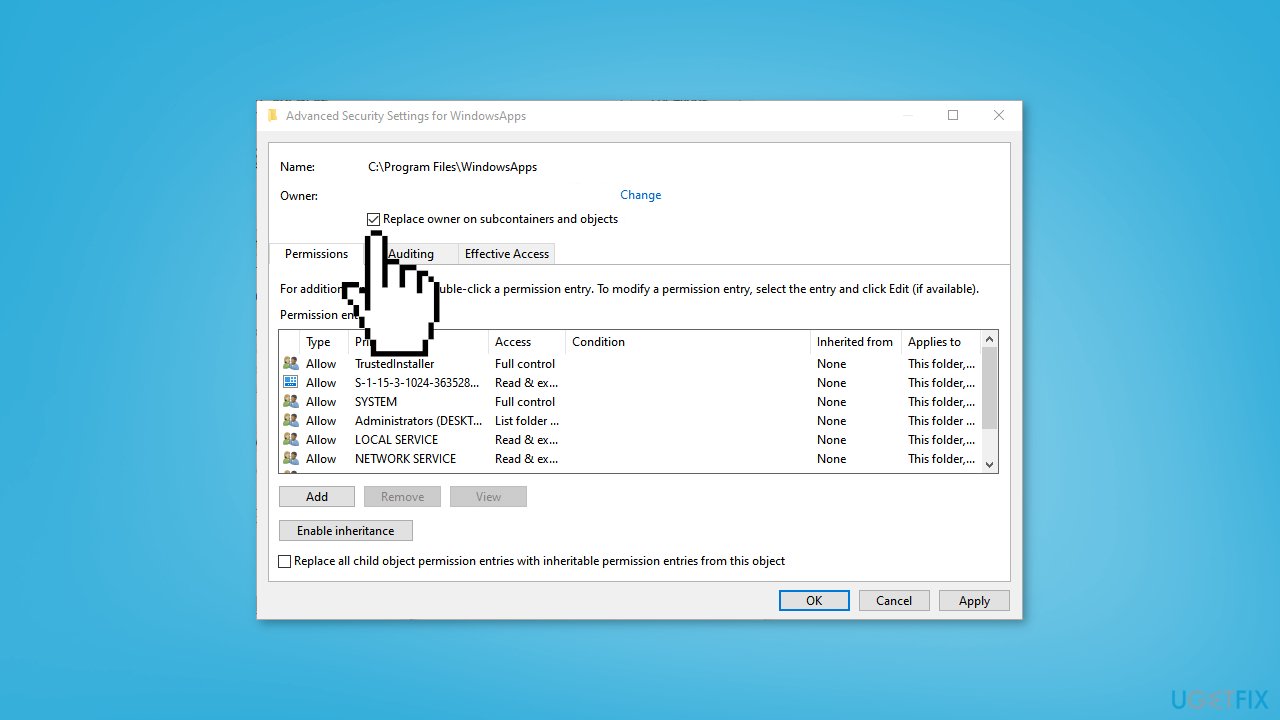
- Click Apply > OK.
- Once you return to the Properties window, choose Administrators.
- Press the Edit option and select Administrators.
- Tick the Allow checkbox associated with the Full Control option.
- Open the SecurityHealth folder.
- Create a backup of all the consisting folders on your desktop.
- Navigate to the 1.0.2109.27002-0 folder.
- Run the Microsoft.SecHealthUI_8wekyb3d8bbwe.appx file.
- Restart your computer in safe mode.
- Go to the SecurityHealth folder.
- Delete the 1.0.2207.20002-0 folder.
- Rename the 1.0.2109.27002-0 folder to 1.0.2207.20002-0.
- Once done, restart your PC.
- Check if the message is gone.
- You can always go back to the created restore point to revert the changes.
Repair your Errors automatically
ugetfix.com team is trying to do its best to help users find the best solutions for eliminating their errors. If you don't want to struggle with manual repair techniques, please use the automatic software. All recommended products have been tested and approved by our professionals. Tools that you can use to fix your error are listed bellow:
Prevent websites, ISP, and other parties from tracking you
To stay completely anonymous and prevent the ISP and the government from spying on you, you should employ Private Internet Access VPN. It will allow you to connect to the internet while being completely anonymous by encrypting all information, prevent trackers, ads, as well as malicious content. Most importantly, you will stop the illegal surveillance activities that NSA and other governmental institutions are performing behind your back.
Recover your lost files quickly
Unforeseen circumstances can happen at any time while using the computer: it can turn off due to a power cut, a Blue Screen of Death (BSoD) can occur, or random Windows updates can the machine when you went away for a few minutes. As a result, your schoolwork, important documents, and other data might be lost. To recover lost files, you can use Data Recovery Pro – it searches through copies of files that are still available on your hard drive and retrieves them quickly.
- ^ Device encryption in Windows. Microsoft. Windows Support.
- ^ Chris Hoffman. Everything You Need To Know About the Blue Screen of Death. Howtogeek. Tech Insight Magazine.
- ^ Tim Fisher. What Is the Windows Registry?. Lifewire. Software and Apps.


