Question
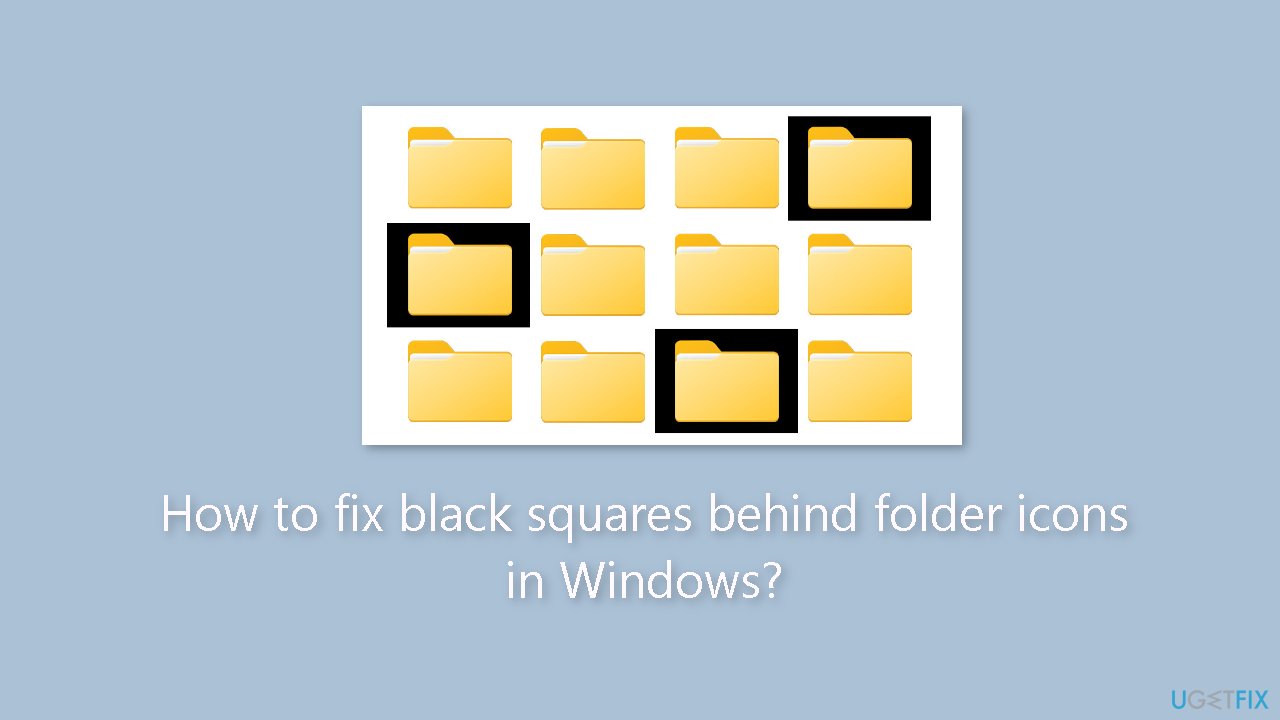
Issue: How to fix black squares behind folder icons in Windows?
Hello. Black squares have appeared behind every folder on my Windows PC. How do I fix this?
Solved Answer
The appearance of black squares behind folder icons in Windows can be a significant issue for users, particularly those who frequently use their computer for work or productivity-related tasks. When users change the style of their file and folder icons, black squares appear behind the folder icons, obscuring them and making them difficult to identify quickly. This can have a variety of effects on users, such as decreasing productivity, causing frustration, and affecting the overall aesthetics of the operating system.
The problem can be especially aggravating for users who rely on visual cues to quickly locate specific folders. For example, if a user frequently needs to access a specific folder, the black square behind the folder icon can make it difficult to find it quickly, reducing their productivity. Furthermore, the black square can make the operating system appear unappealing and cluttered, which can negatively impact the overall user experience.
However, there are several possible solutions to this problem that users can try to resolve it. Clearing the icon cache is a common solution that usually fixes the problem. When Windows displays icons, an icon cache is used to speed up the process. If this cache becomes corrupted or damaged, it can cause icon problems, such as the black square issue.
Another solution is to reset Windows' default icon settings. This is accomplished by navigating to “Folder Options” in File Explorer and clicking the “Restore Defaults” button. This frequently resolves the problem with black squares behind folder icons.
Users can also experiment with changing their Windows visual effects settings or updating their graphics card drivers.[1] In some cases, the problem may be caused by a third-party app or software, in which case users can try uninstalling or disabling such programs to see if the problem is resolved.
In this guide, you will find 7 steps that should help you fix black squares behind folder icons in Windows. You can also try using a system repair tool like FortectMac Washing Machine X9 that can fix most system errors, BSODs,[2] corrupted files, and registry[3] issues. Otherwise, follow the step-by-step instructions below.
Method 1. Fix Corrupted System Files
Use Command Prompt commands to repair system file corruption:
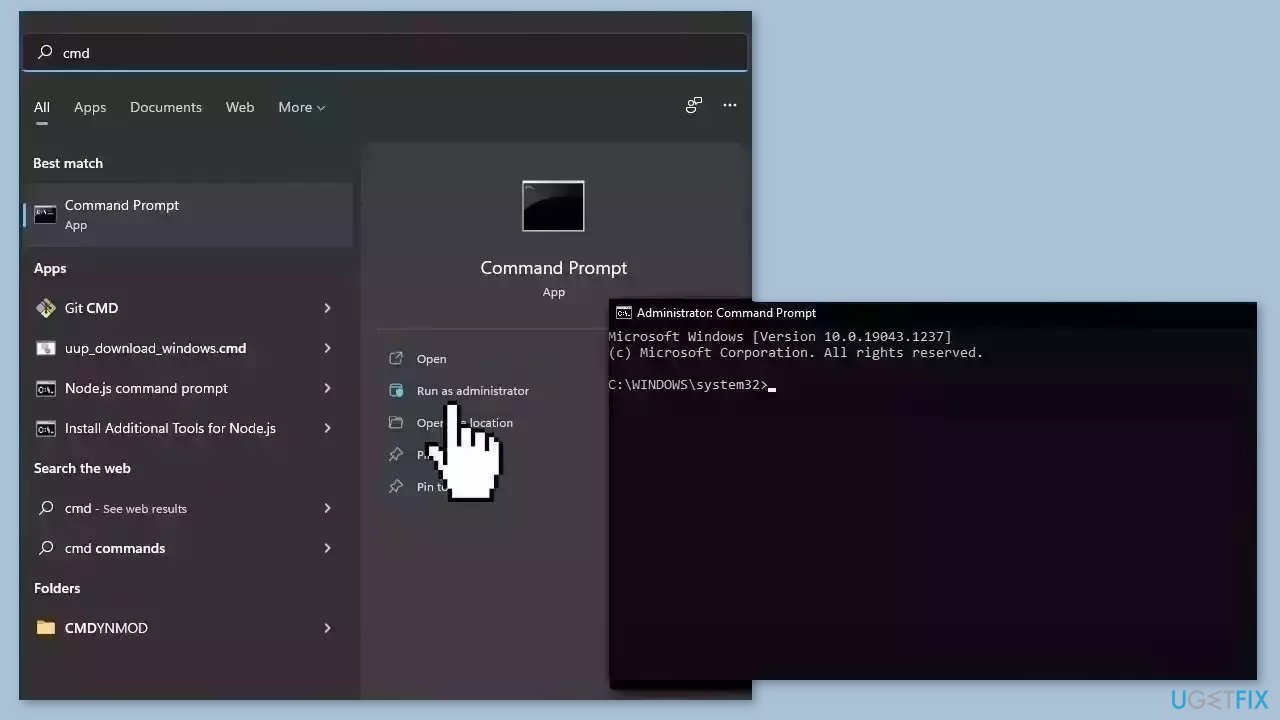
- Open Command Prompt as administrator
- Use the following command and press Enter:
sfc /scannow
- Reboot your system
- If SFC returned an error, then use the following command lines, pressing Enter after each:
DISM /Online /Cleanup-Image /CheckHealth
DISM /Online /Cleanup-Image /ScanHealth
DISM /Online /Cleanup-Image /RestoreHealth
Method 2. Install Windows Updates
- Click Start and select Settings.
- Go to the Windows Update section.
- Click Check for updates and wait.
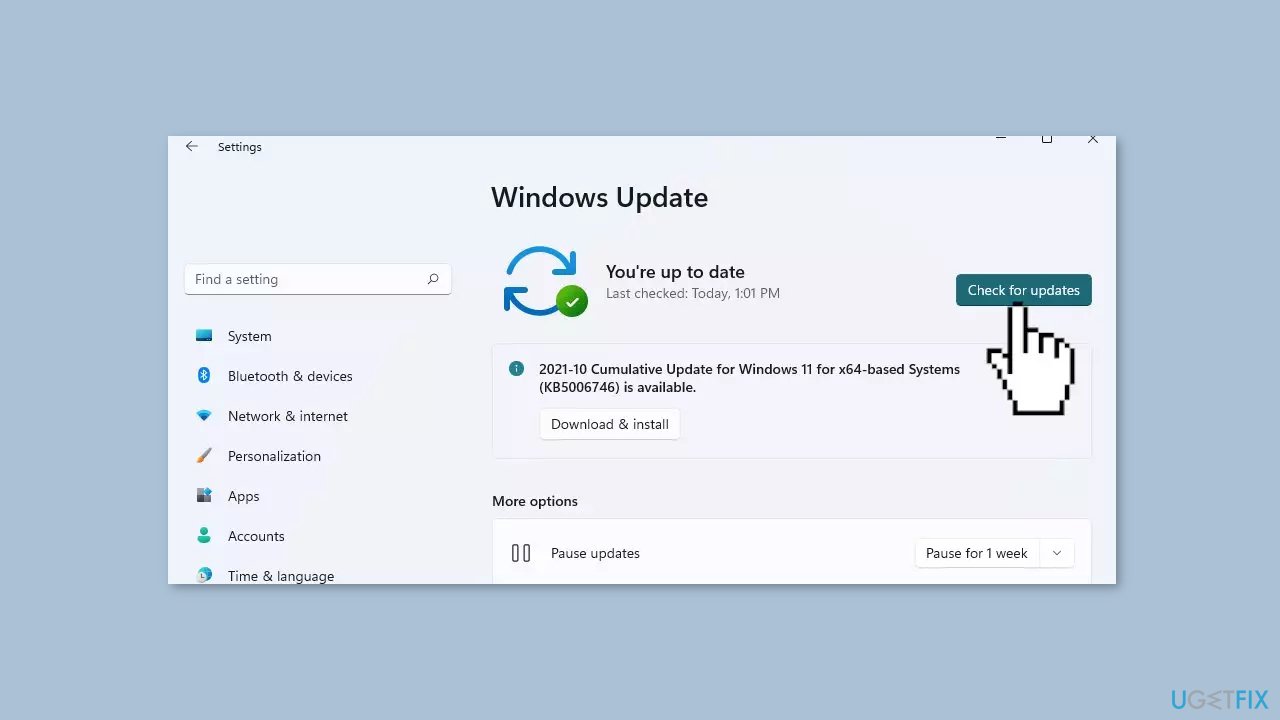
- Go to the Advanced options and install optional updates.
- Reboot your system.
Method 3. Use Disk Cleanup
- Open the Search bar.
- Type Disk Cleanup.
- Select the C: drive from the drop-down menu.
- Click OK to start scanning.
- Wait for the scanning to complete.
- Select the files you want to delete.
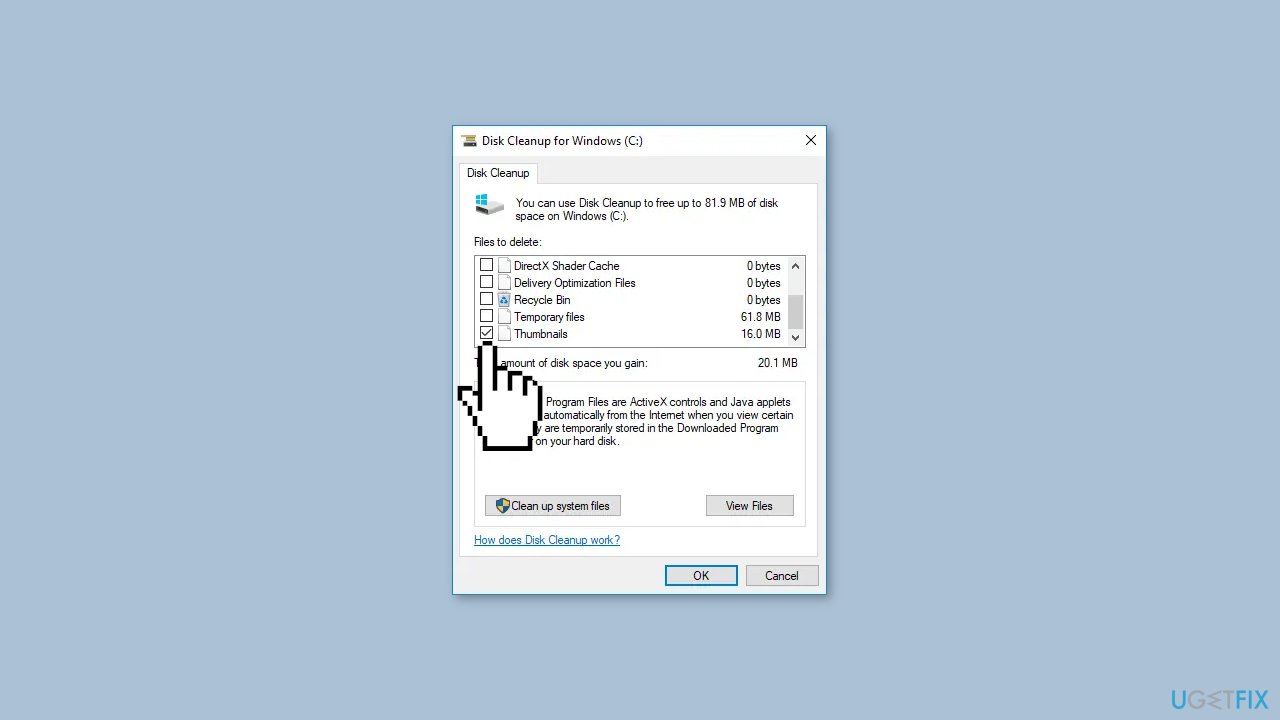
- Make sure the Thumbnails option is selected under the Files to Delete section.
- Click OK.
- In the confirmation box, click Delete files to permanently delete the selected files.
- Restart the system.
Method 4. Reset Thumbnail Cache
- Open File Explorer.
- Navigate to the View tab.
- Select the option to show hidden items to display all the hidden files and folders.
- Go to the path C:\Users<username>\AppData\Local
Note: you should replace “<username>” with your actual username.
- Search and locate the file IconCache.db.
- Right-click on the file and select Delete.
- Go to the path C:\Users<username>\AppData\Local\Microsoft\Windows\Explorer.
- Select all the files in this folder and delete them.
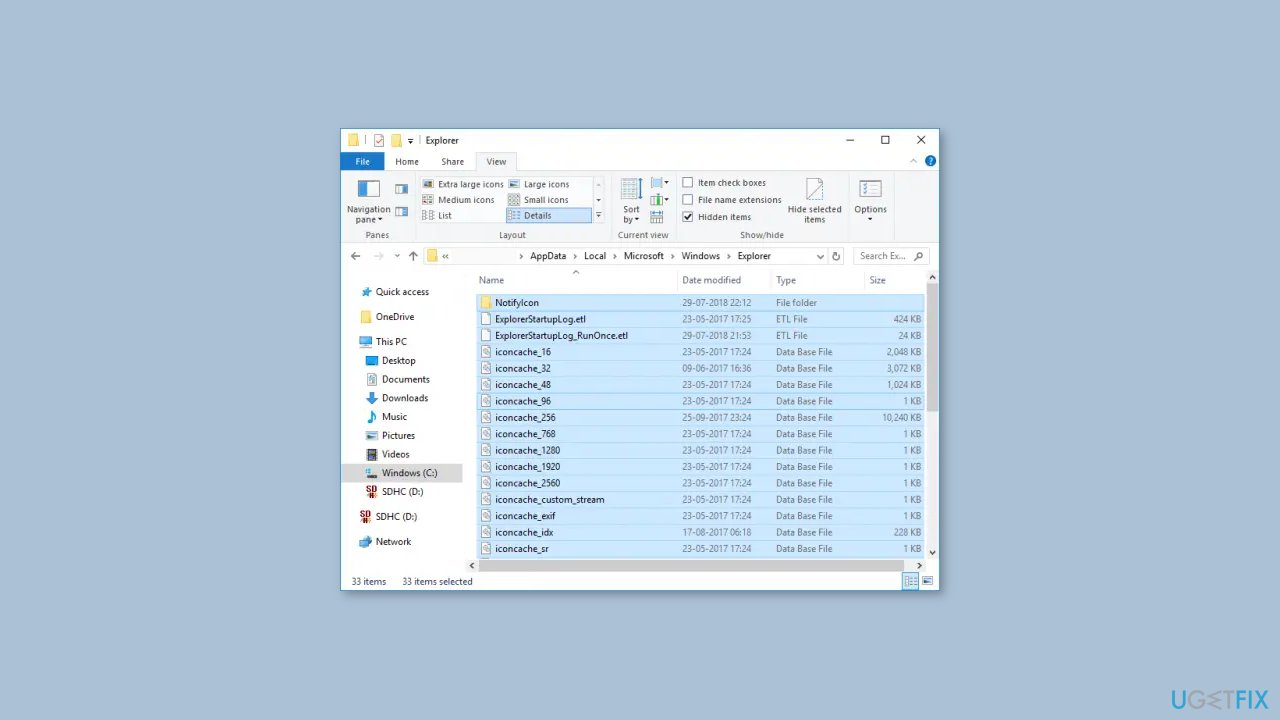
- If you see a prompt saying that The files are in use and cannot be deleted, select the option to do this for all current items and click Try Again.
- If you receive an error message, click Cancel to close the window.
- Restart your system.
Method 5. Update Graphics Driver
- Right-click on the Start Menu to open up the Quick Access Menu.
- Click on Device Manager from the list.
- Double-click on the Display adapters category to expand the list.
- Right-click on the dedicated graphics card name.
- Select Update driver.
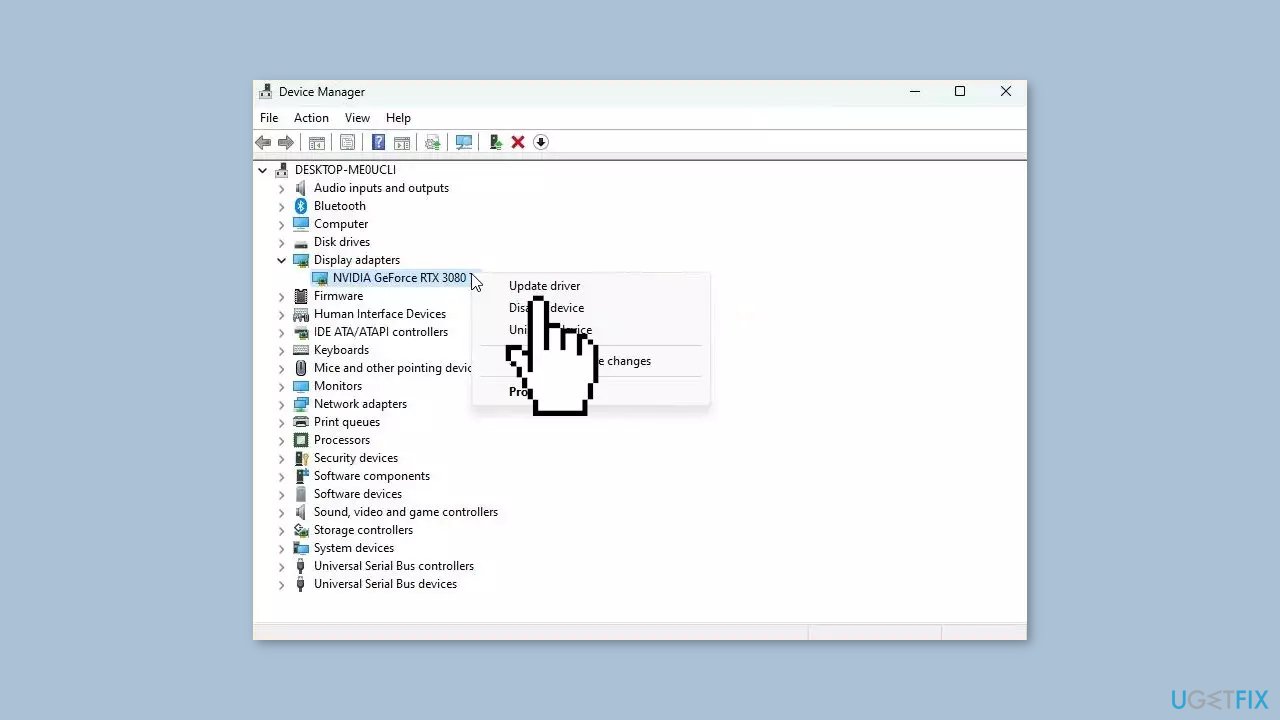
- Choose Search automatically for drivers.
- If an update is available, it will automatically download and install the latest version.
- Once done, make sure to reboot your computer to apply the changes.
You can also use a dedicated utility like DriverFix that can find the best drivers for your machine and install them automatically.
Method 6. Use System Restore
System Restore is a feature in Microsoft Windows that allows users to revert their computer's state to a previous point in time. This can be helpful if you have made changes to your system that are causing problems.
- Press the Windows key + R on your keyboard to open the Run box.
- Type SystemPropertiesProtection and press Enter.
- Go to the System Protection tab.
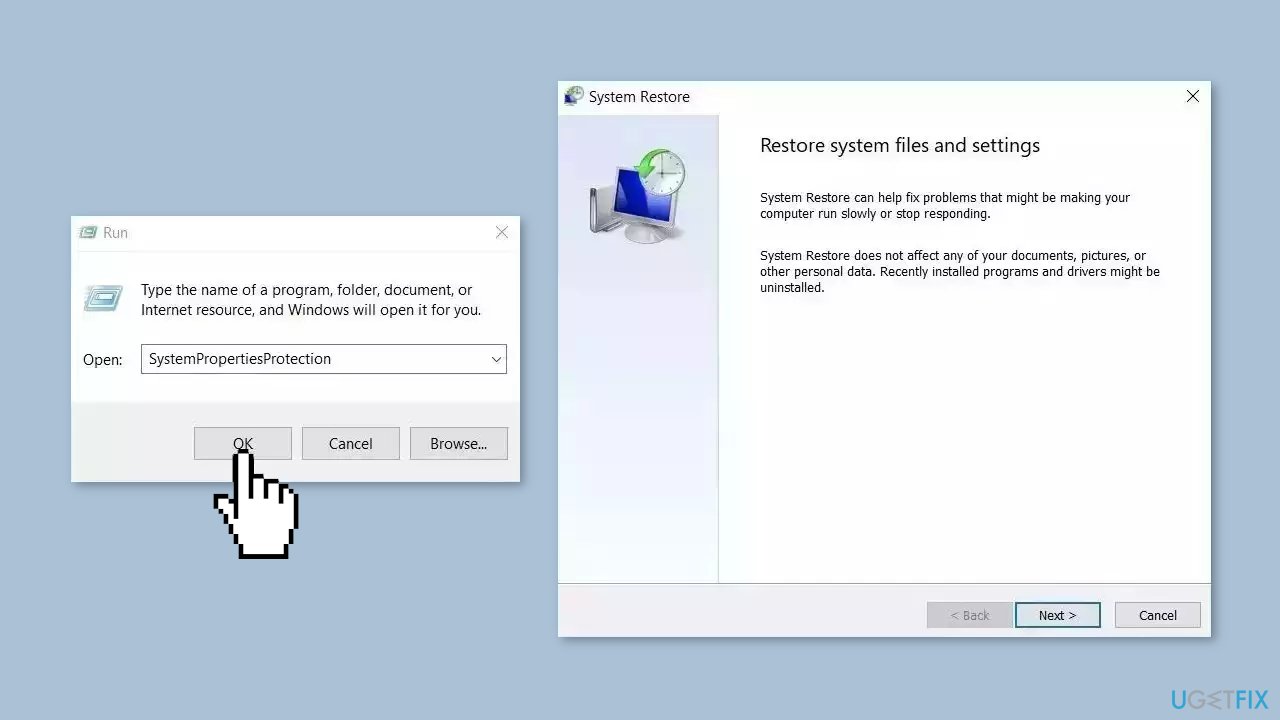
- You will see the System Restore… button. Click it to run System Restore.
- Follow the prompts until you can select a restore point.
- Select the one you want (ideally before the issue started occurring) and go ahead with the process.
Method 7. Reset Windows
If none of the previous solutions resolve the issue, consider resetting Windows. Keep in mind that this is a time-consuming process, as the Windows reset will remove all your apps and require reinstallation.
- Press the Windows key + I to open Windows Settings.
- Press on Update & security.
- Click on Recovery in the left pane.
- In the right pane, click on Reset PC next to Reset this PC.
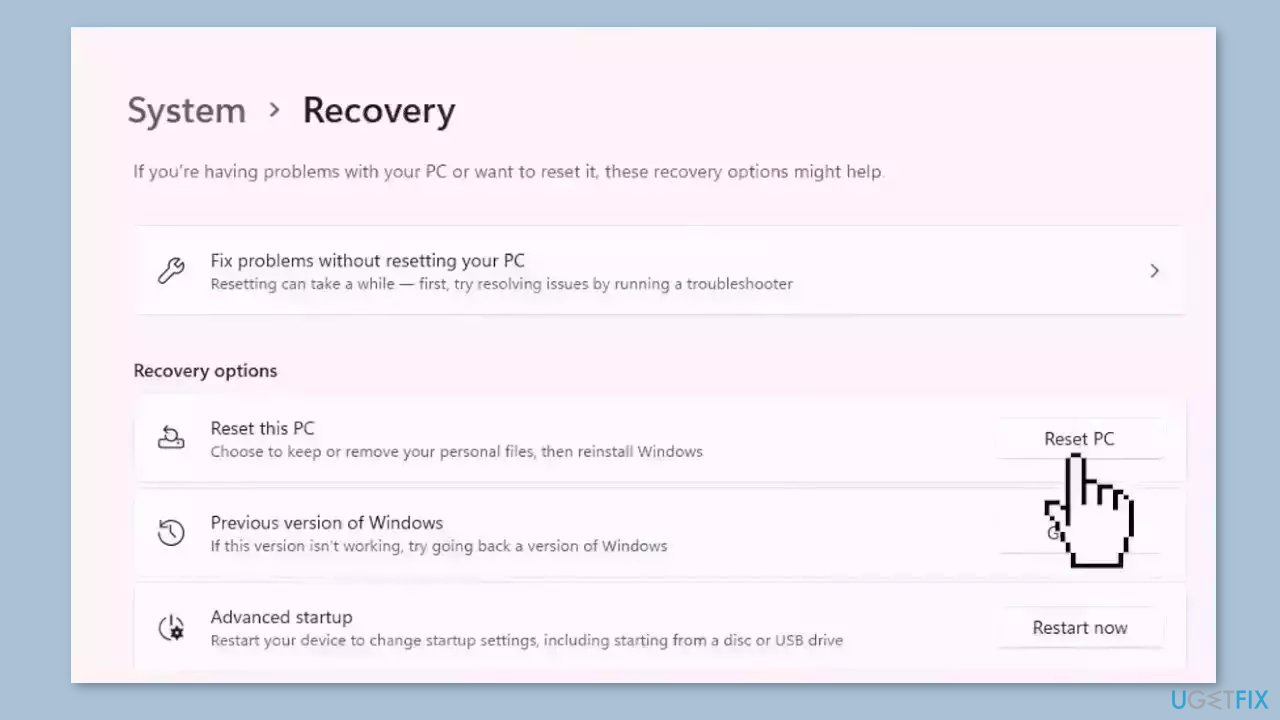
- Click on either Keep my files (if you want the computer to be reset without losing any of the user data stored on it) or Remove everything (if you want the computer to be reset and any and all user data stored on it to be deleted.
- If presented with a warning, simply click on Next.
- When prompted to do so, click on Reset.
Repair your Errors automatically
ugetfix.com team is trying to do its best to help users find the best solutions for eliminating their errors. If you don't want to struggle with manual repair techniques, please use the automatic software. All recommended products have been tested and approved by our professionals. Tools that you can use to fix your error are listed bellow:
Access geo-restricted video content with a VPN
Private Internet Access is a VPN that can prevent your Internet Service Provider, the government, and third-parties from tracking your online and allow you to stay completely anonymous. The software provides dedicated servers for torrenting and streaming, ensuring optimal performance and not slowing you down. You can also bypass geo-restrictions and view such services as Netflix, BBC, Disney+, and other popular streaming services without limitations, regardless of where you are.
Don’t pay ransomware authors – use alternative data recovery options
Malware attacks, particularly ransomware, are by far the biggest danger to your pictures, videos, work, or school files. Since cybercriminals use a robust encryption algorithm to lock data, it can no longer be used until a ransom in bitcoin is paid. Instead of paying hackers, you should first try to use alternative recovery methods that could help you to retrieve at least some portion of the lost data. Otherwise, you could also lose your money, along with the files. One of the best tools that could restore at least some of the encrypted files – Data Recovery Pro.
- ^ Device driver. Wikipedia, the free encyclopedia.
- ^ Chris Hoffman. Everything You Need To Know About the Blue Screen of Death. Howtogeek. Tech Insight Magazine.
- ^ Tim Fisher. What Is the Windows Registry?. Lifewire. Software and Apps.


