Question
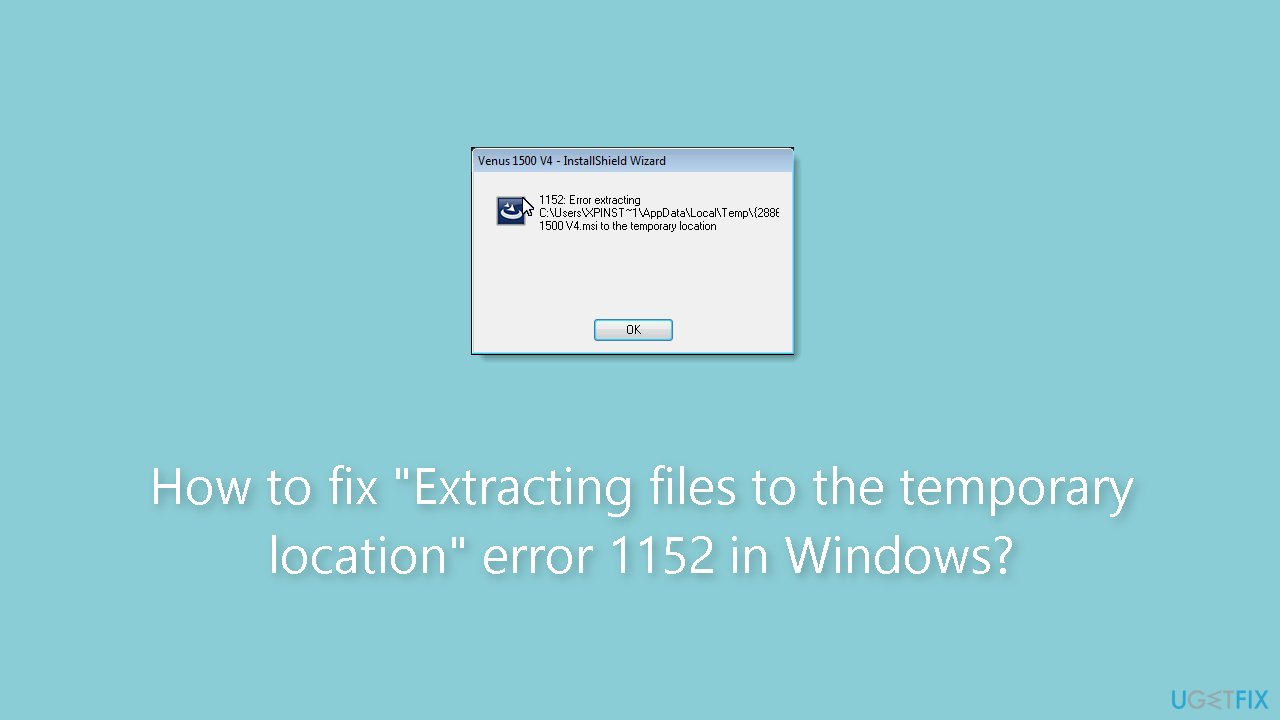
Issue: How to fix "Extracting files to the temporary location" error 1152 in Windows?
Hello. When I try to install a particular program in Windows I get the “Extracting files to the temporary location” message with an 1152 error. How do I fix it?
Solved Answer
Error 1152 is a bothersome problem that some Windows users run into when attempting to install particular software packages. It is frequently accompanied by the statement “Error extracting files to the temporary location.” Users are effectively unable to continue with the installation of their desired program due to this problem, which is caused by the InstallShield software.
Error 1152 may have big effects on users. The user experience is first and foremost disrupted, resulting in irritation and lost time as people are unable to install or use the software they require. If the program in question is essential for performing work or personal-related duties, this can be very problematic, resulting in delays and problems with productivity.
Error 1152 can also be perplexing and frightening for less tech-savvy individuals who might not comprehend the technical implications of the error message. Users may feel helpless and anxious because they are unsure of how to start fixing the problem.
Error 1152 may have potential fixes, but they frequently require technical steps that some users may find difficult to follow. These fixes often demand that users explore system settings, change the locations of temporary files, or even change rights. The irritation customers feel when they run into this issue can be made worse by its intricacy.
In this guide, you will find 4 steps that should help you fix “Extracting files to the temporary location” error 1152 in Windows. You can also use a maintenance tool like FortectMac Washing Machine X9 that can fix most system errors, BSODs,[1] corrupted files, and registry[2] issues. Otherwise, follow the step-by-step instructions below.

Method 1. Download the affected Installation File
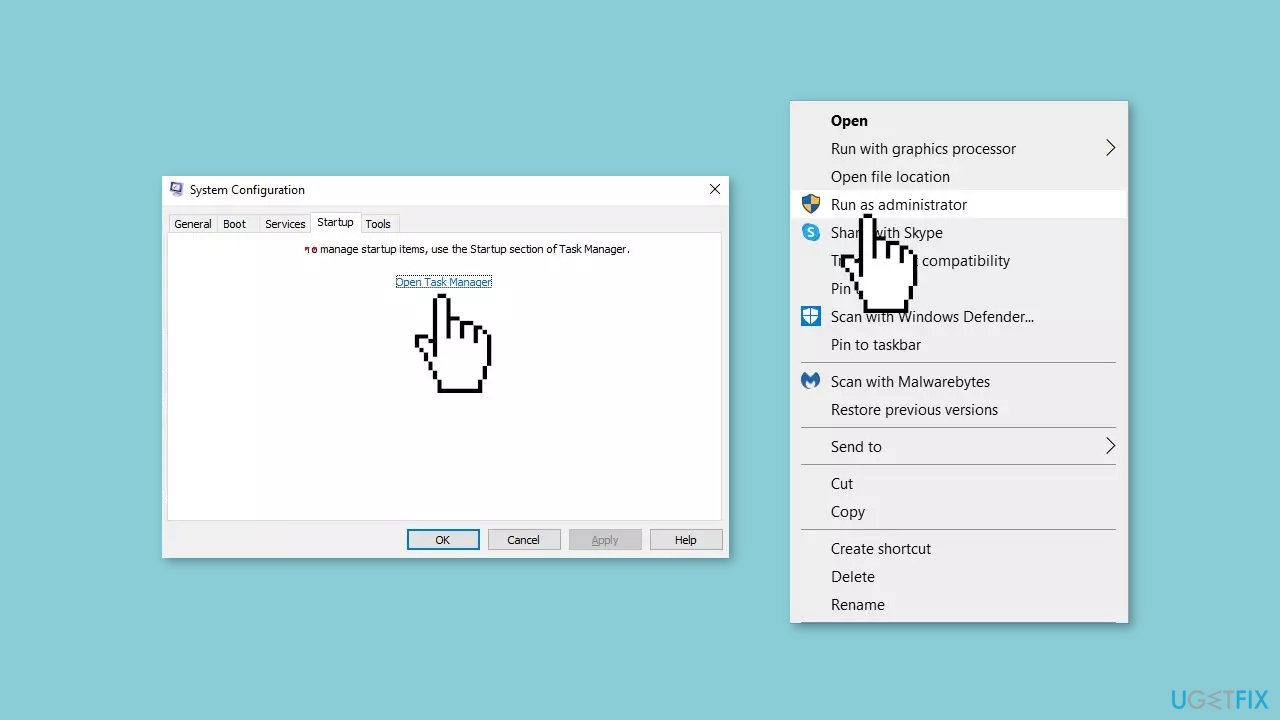
This error may occur due to a problem with the downloaded installer file. Errors during the download process can lead to file corruption. To resolve this, consider re-downloading the setup file, ideally from an alternative website source if possible. After obtaining the new installer file, right-click on it and choose to run it with administrative privileges.
Method 2. Set Full Control Permissions for the Temp Folder
- Open File Explorer and navigate to C:\Windows. Right-click on the Temp directory within the Windows folder.
- Select Properties from the context menu.
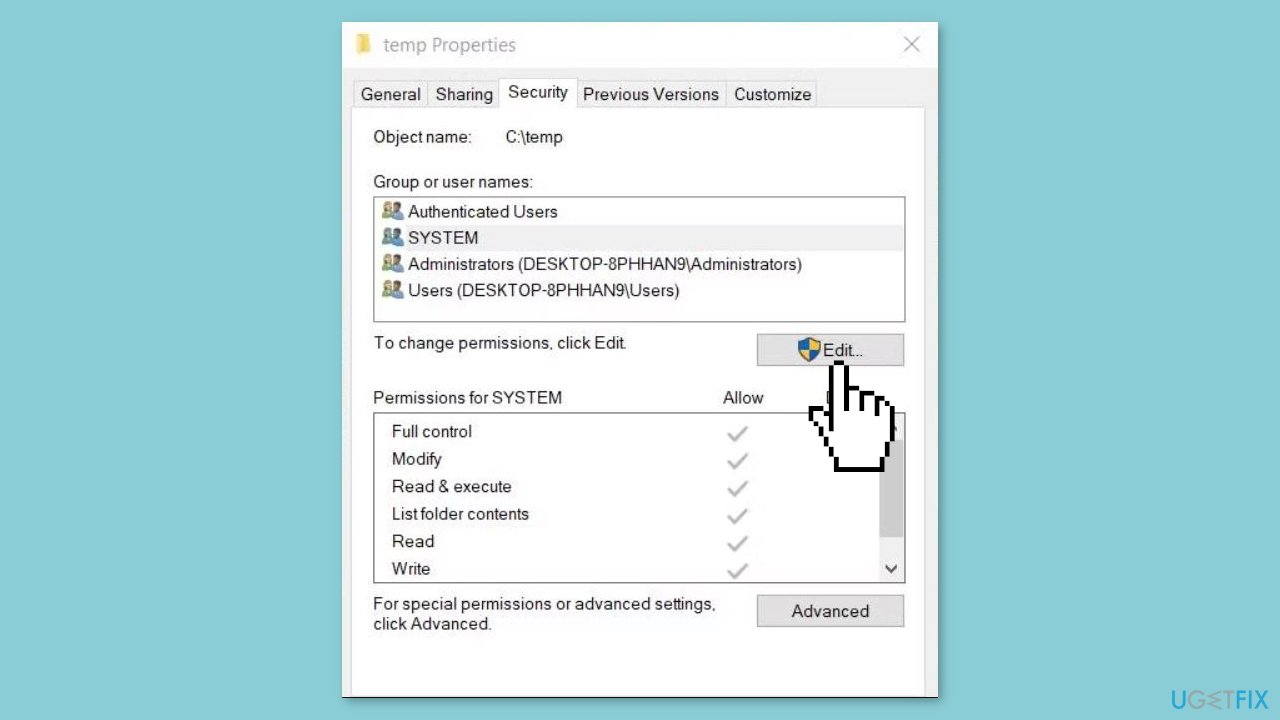
- In the Properties window, click on the Security tab.

- Click on the Edit button to open the Permissions window. Click Add to bring up the object name selection window.
- In the object name box, type everyone and then click Check Names.
- Select OK to add the Everyone group.
- Click on Everyone within the Permission for Temp window.
- Check the Full control permission checkbox. Click Apply and then OK to save the changes and close all windows.
- If the Security tab indicates you need read permissions, click Advanced and then Change.
- Input Everyone in the Enter the object name to select box, as instructed above.
- Select System in the Advanced Security Settings window.
- Press the Add button. This will open another Select User or Group window; here, input Everyone again.
- Finally, select the Full control checkbox from the permissions list. Click OK on all open windows to save the changes.
Method 3. Clear the Temporary Files Folder
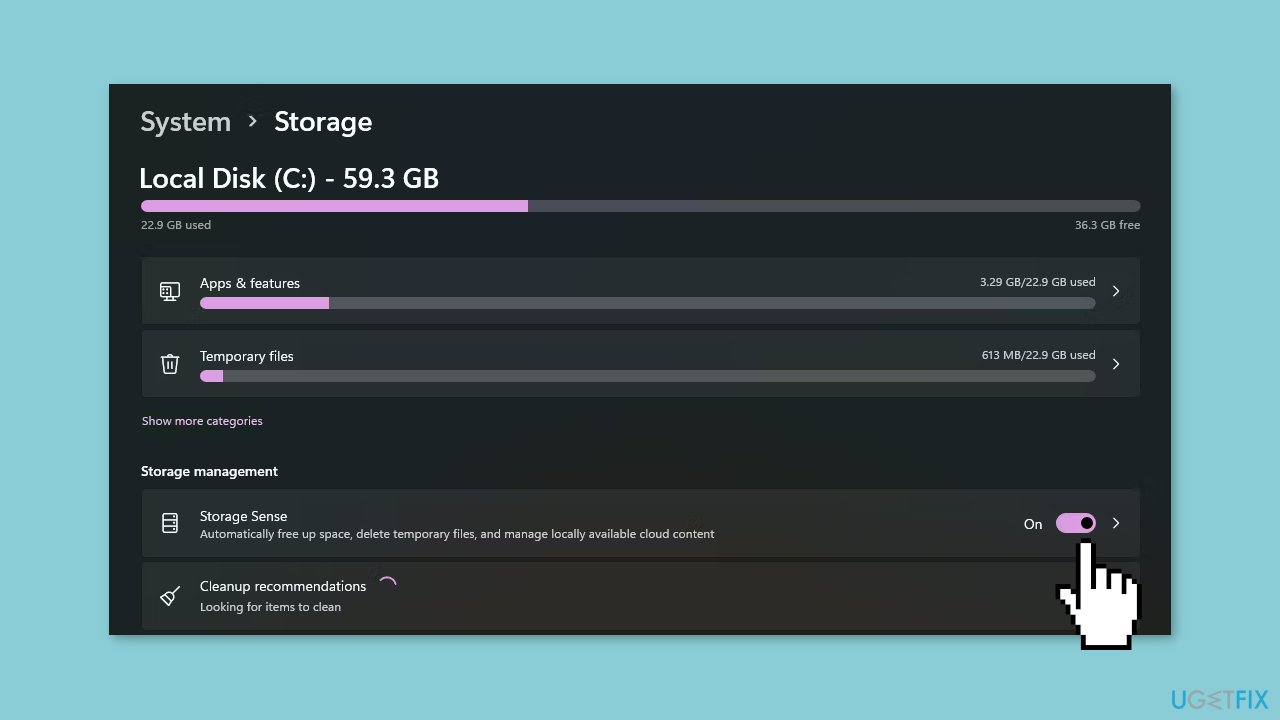
- Click on the magnifying glass icon on the taskbar to open Windows 11's search tool. In the search box, type Storage Sense as the keyword.
- From the search results, select Turn on Storage Sense.
- Click the toggle switch to turn on Storage Sense.

- Click the > arrow located next to the Storage Sense option to access the settings below.
- Select the Keep Windows running smoothly by automatically clearing up temporary system and app files checkbox.
- Enable the Automatic User Cleanup content option.
- Click the Run Storage Sense drop-down menu to choose an automatic cleanup schedule for deleting temporary files.
- Select the Every day option for the most frequent scheduling.
- To manually delete temporary files using Storage Sense, press the Run Storage Sense now button.
Method 4. Try Clean Boot
- Open the Search menu, type in system configuration, and press Enter.
- Under the Services tab, tick the Hide all Microsoft services box.
- Click on Disable all button.
- Head over to the Startup tab and click on Open Task Manager.

- Select a third-party program and click on Disable at the top.
- Repeat this step to disable all third-party apps and programs.
- Restart your PC to enter the clean boot state and see if the issue persists.
- If the issue disappeared in the clean boot state, then you can be certain that a third-party app is causing it.
- Go through all recently installed apps or programs and remove them one by one.
Repair your Errors automatically
ugetfix.com team is trying to do its best to help users find the best solutions for eliminating their errors. If you don't want to struggle with manual repair techniques, please use the automatic software. All recommended products have been tested and approved by our professionals. Tools that you can use to fix your error are listed bellow:
Prevent websites, ISP, and other parties from tracking you
To stay completely anonymous and prevent the ISP and the government from spying on you, you should employ Private Internet Access VPN. It will allow you to connect to the internet while being completely anonymous by encrypting all information, prevent trackers, ads, as well as malicious content. Most importantly, you will stop the illegal surveillance activities that NSA and other governmental institutions are performing behind your back.
Recover your lost files quickly
Unforeseen circumstances can happen at any time while using the computer: it can turn off due to a power cut, a Blue Screen of Death (BSoD) can occur, or random Windows updates can the machine when you went away for a few minutes. As a result, your schoolwork, important documents, and other data might be lost. To recover lost files, you can use Data Recovery Pro – it searches through copies of files that are still available on your hard drive and retrieves them quickly.
- ^ Chris Hoffman. Everything You Need To Know About the Blue Screen of Death. Howtogeek. Technology Magazine.
- ^ Tim Fisher. What Is the Windows Registry?. Lifewire. Software and Apps.


