Question
Issue: How to fix Windows backup error code 0x8078002A?
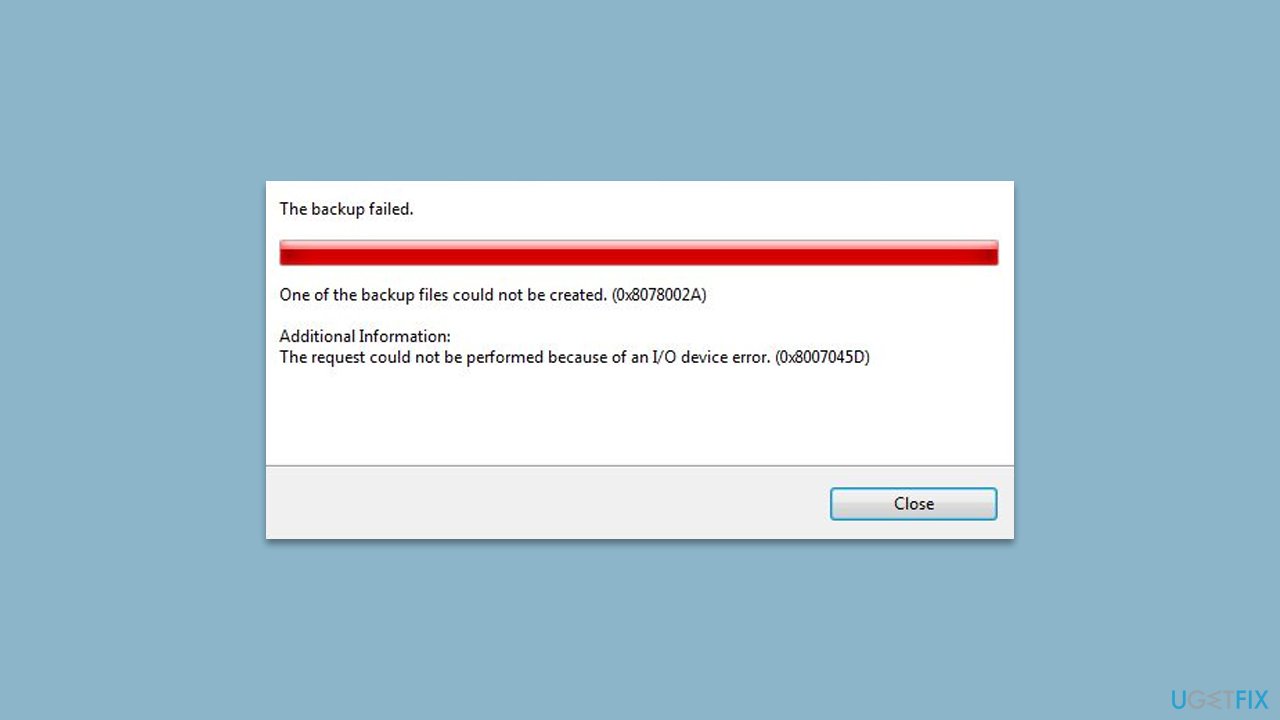
Hi, when attempting to perform a Windows backup, I receive an error 0x8078002A, with the message “The request could not be performed because of an I/O device error.” Any ideas on how to tackle this? Tips appreciated.
Solved Answer
Backing up your files is an essential step to safeguard your data from unexpected Windows errors. However, you may come across errors such as the 0x8078002A when attempting to create a backup. This error indicates that one of the backup files could not be created, and it's due to an I/O device error. This article will guide you through the necessary steps to fix the 0x8078002A Windows backup error code.
Here's what the message says when users see the pop-up during the creation of a backup:
One of the backup files could not be created. Details : The request could not be performed because of an I/O device error.
There are several reasons why you might be experiencing this error code:
- If you're attempting to back up your files to an external drive using a 4K logical disk sector size drive, it could trigger the 0x8078002A backup error code.
- A corrupt Windows installation from a corrupt media stick or the external disc can make it hard to back up your system.
- A forced system shutdown due to a system crash can trigger the 0x8078002A error.
- Corrupt system files due to various reasons (for example, malware infection) can also cause backup errors.
Before proceeding with the manual solutions below, we recommend you try employing a PC repair and maintenance utility FortectMac Washing Machine X9, which can quickly and easily find system file corruption and repair those files automatically. The app is great when dealing with various Windows issues, including BSODs, DLL errors, registry corruption, and more.
In conclusion, encountering errors while backing up your files can be frustrating, but with the solutions provided below, you can fix the 0x8078002A error code and ensure that your data remains safe and secure.
Solution 1. Check that the relevant services are running
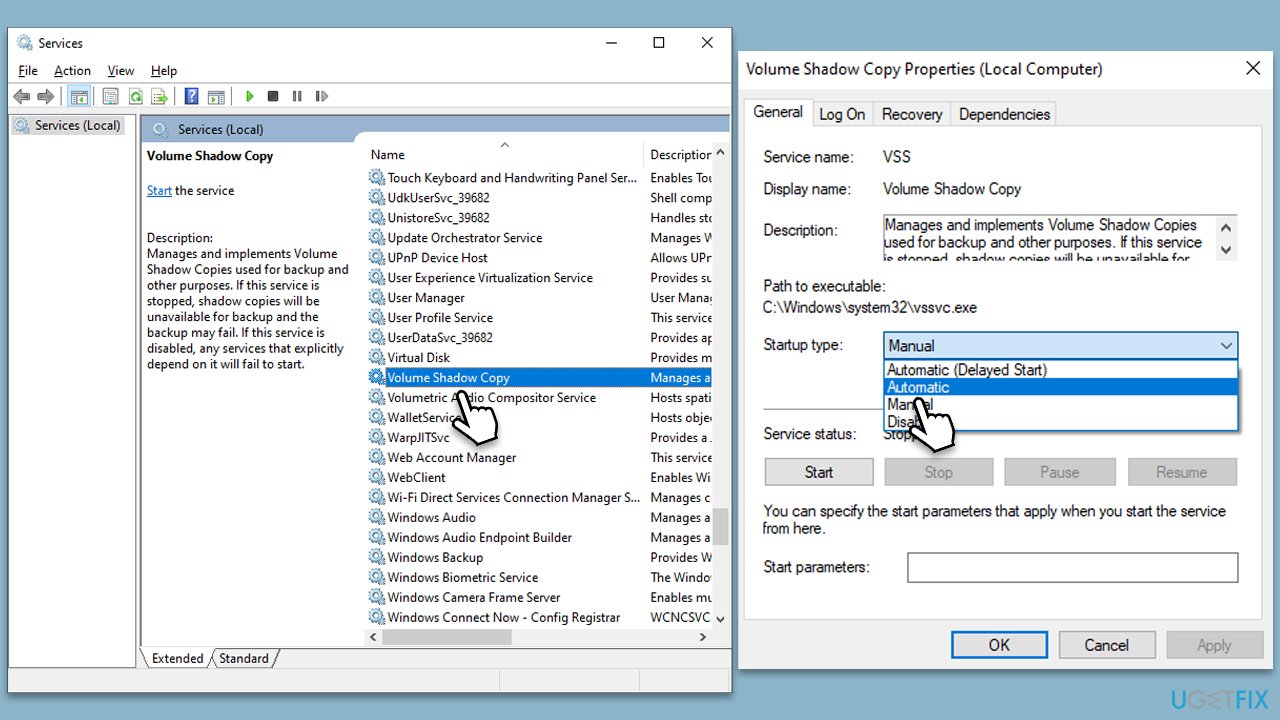
First, you need to ensure that Windows Backup and Volume Shadow Copy services are running:
- Type Services in Windows search and press Enter.
- In the new window, scroll down to locate the Volume Shadow Copy service.
- Double-click the service to open Properties.
- Under Startup type, select Automatic from the drop-down menu.
- Click Start, Apply, and OK.
- Repeat the process with the Windows Backup service.
Solution 2. Check your disk for errors
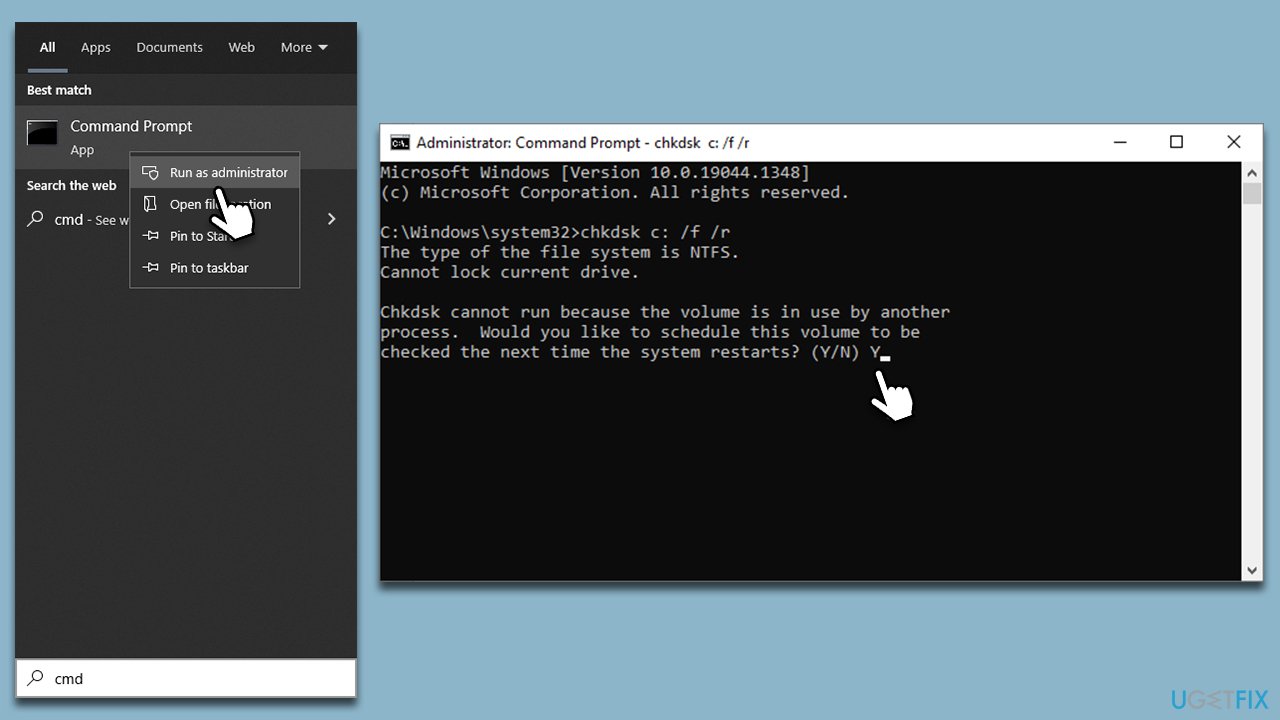
- Type cmd in Windows search.
- Right-click on the Command Prompt result and select Run as administrator.
- When UAC shows up, click Yes.
- If you are using a hard drive (HDD) for storing your operating system files, use the following command and press Enter:
chkdsk c: /f - If you are using a Sold State Driver (SSD) for Windows, use the following command instead:
chkdsk c: /f /r /x - If you are asked whether you want to proceed with the check after a reboot, type in Y and hit Enter.
- Restart the system to begin the check – you can check the results in the Event Viewer once your system boots back up (Open Event Viewer > Windows Logs > Application Log > right-click > Find > type wininit >Find Next).
Solution 3. Run SFC and DISM
Corrupted system files can be fixed by running SFC and DISM scans. Here's how:
- Open Command Prompt as administrator, as explained above.
- As the new window shows up, paste the following command:
sfc /scannow - Once completed, run the following commands, pressing Enter every time:
DISM /Online /Cleanup-Image /CheckHealth
DISM /Online /Cleanup-Image /ScanHealth
DISM /Online /Cleanup-Image /RestoreHealth - Restart the PC.
Solution 4. Change Windows registry
This solution is applicable to Windows 11 users only. Note: you might have to use the administrator's account for these steps to work.
- Type regedit in Windows search and press Enter.
- When UAC shows up, click Yes.
- Click File > Export and save the registry as a backup at a convenient location.
- Go to the following location:
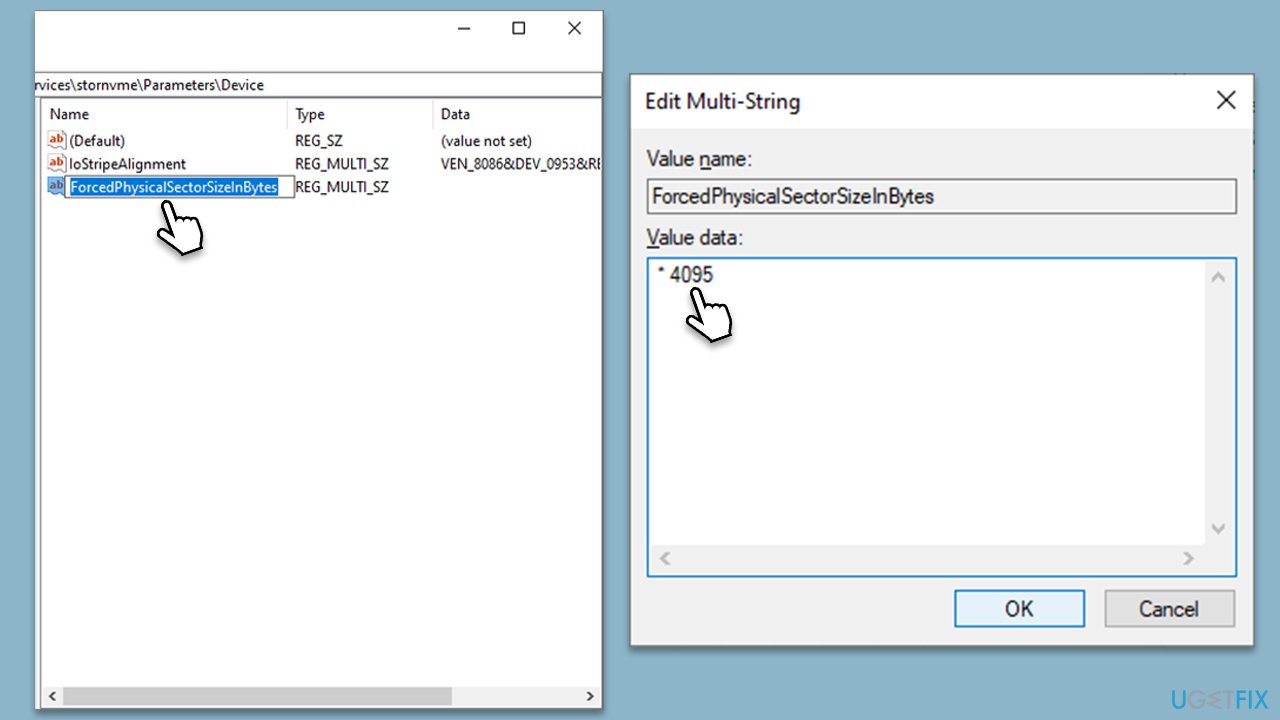
Computer\HKEY_LOCAL_MACHINE\SYSTEM\CurrentControlSet\Services\stornvme\Parameters\Device - On the right-side of the window, right-click on empty space and select New > Multi-String Value.
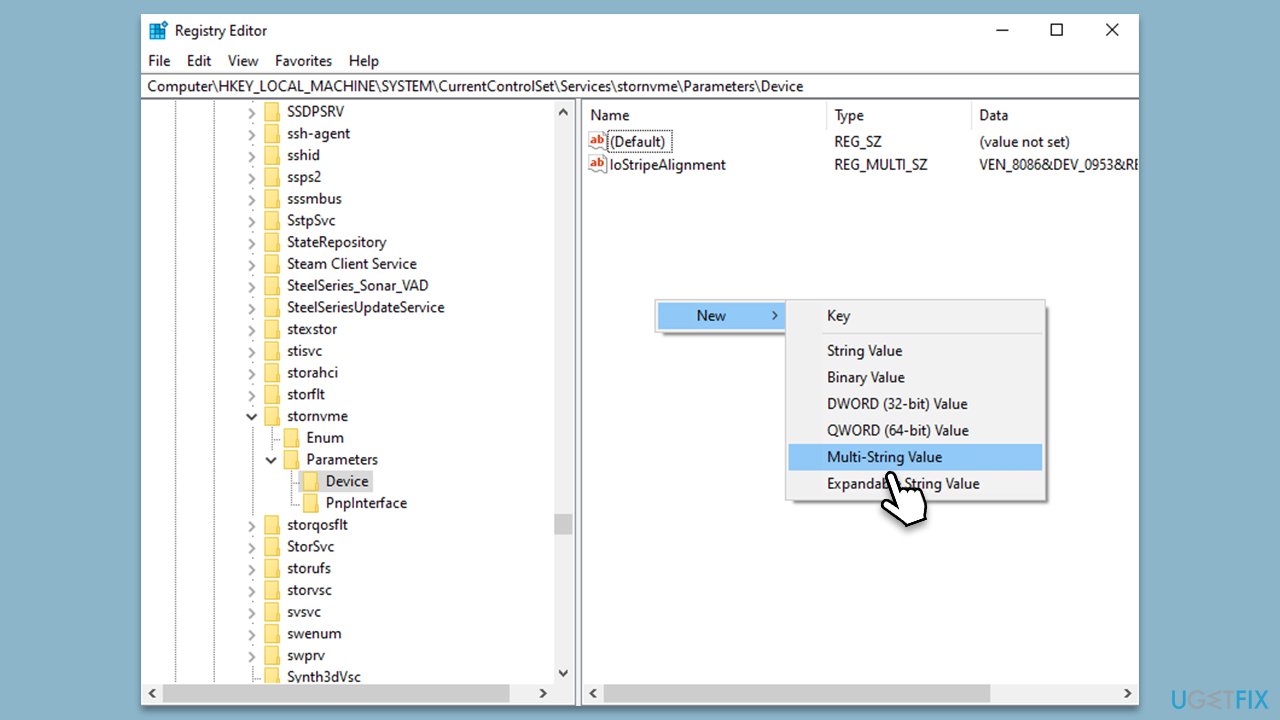
- Name it ForcedPhysicalSectorSizeInBytes.
- Double-click the string and type the following in the Value data field:
* 4095 - Click OK and close down Registry Editor.
- Restart your computer for the changes to take effect.
Repair your Errors automatically
ugetfix.com team is trying to do its best to help users find the best solutions for eliminating their errors. If you don't want to struggle with manual repair techniques, please use the automatic software. All recommended products have been tested and approved by our professionals. Tools that you can use to fix your error are listed bellow:
Prevent websites, ISP, and other parties from tracking you
To stay completely anonymous and prevent the ISP and the government from spying on you, you should employ Private Internet Access VPN. It will allow you to connect to the internet while being completely anonymous by encrypting all information, prevent trackers, ads, as well as malicious content. Most importantly, you will stop the illegal surveillance activities that NSA and other governmental institutions are performing behind your back.
Recover your lost files quickly
Unforeseen circumstances can happen at any time while using the computer: it can turn off due to a power cut, a Blue Screen of Death (BSoD) can occur, or random Windows updates can the machine when you went away for a few minutes. As a result, your schoolwork, important documents, and other data might be lost. To recover lost files, you can use Data Recovery Pro – it searches through copies of files that are still available on your hard drive and retrieves them quickly.


