Question
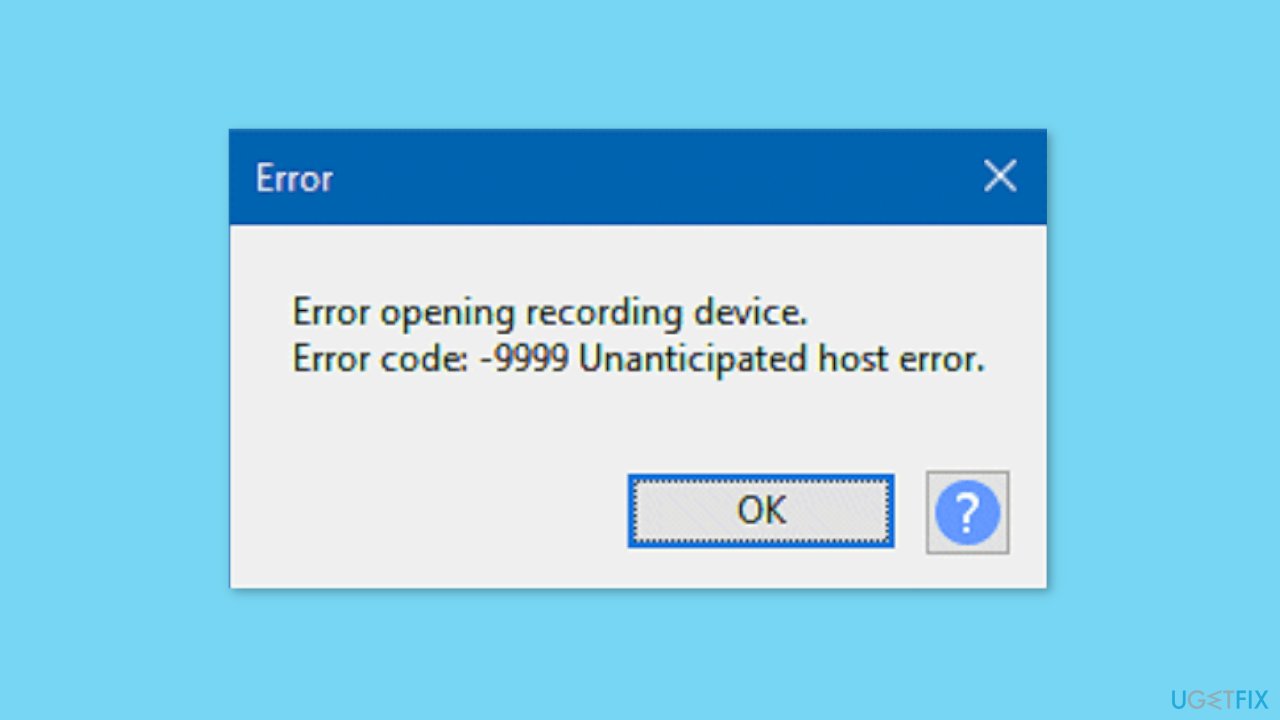
Issue: How to fix Audacity error code 9999 in Windows?
Hello. I tried to make a recording using Audacity on my Windows PC but I received the 9999 error code. How can I solve this?
Solved Answer
Audacity is a popular free and open-source digital audio editor and recording application used by podcasters, musicians, and sound engineers. It enables users to edit and manipulate audio files using a variety of tools, such as cutting, copying, and pasting sections of audio and applying effects and filters to improve sound quality. Audacity is compatible with a variety of operating systems, including Windows.
Some Windows users, however, have reported receiving an error code 9999 when attempting to record audio with Audacity. This error can prevent the user from recording any audio, rendering the application useless. The error code 9999 in Audacity appears to be caused by other applications using the microphone at the same time, such as messaging and video conferencing software.
This problem may affect users who rely on Audacity for their work, such as podcasters or musicians because it prevents them from recording audio and finishing their projects on time. It can also be annoying for casual users who use Audacity for personal projects or hobbies.
There are several solutions to this problem, including disabling other applications that may be using the microphone, making sure the microphone is selected as the input device in Audacity, and uninstalling and reinstalling Audacity. The exact solution, however, will depend on the user's specific system and setup, and may require some troubleshooting to resolve the issue.
In this guide, you will find 7 steps that should help you fix Audacity error code 9999 in Windows. However, you can also use a repair tool like FortectMac Washing Machine X9 that can fix most system errors, BSODs,[1] corrupted files, registry[2] issues, or clear cookies and cache[3] automatically. Otherwise, follow the step-by-step instructions below.
Method 1. Run the Recording Audio Troubleshooter
- Press the Windows key + R to open the Run box.
- Type Control Panel and click OK.
- In the Control Panel window, click on the View by drop-down menu and select Large icons.
- Click on Troubleshooting
- Click on View all to see the full list of troubleshooting tools.
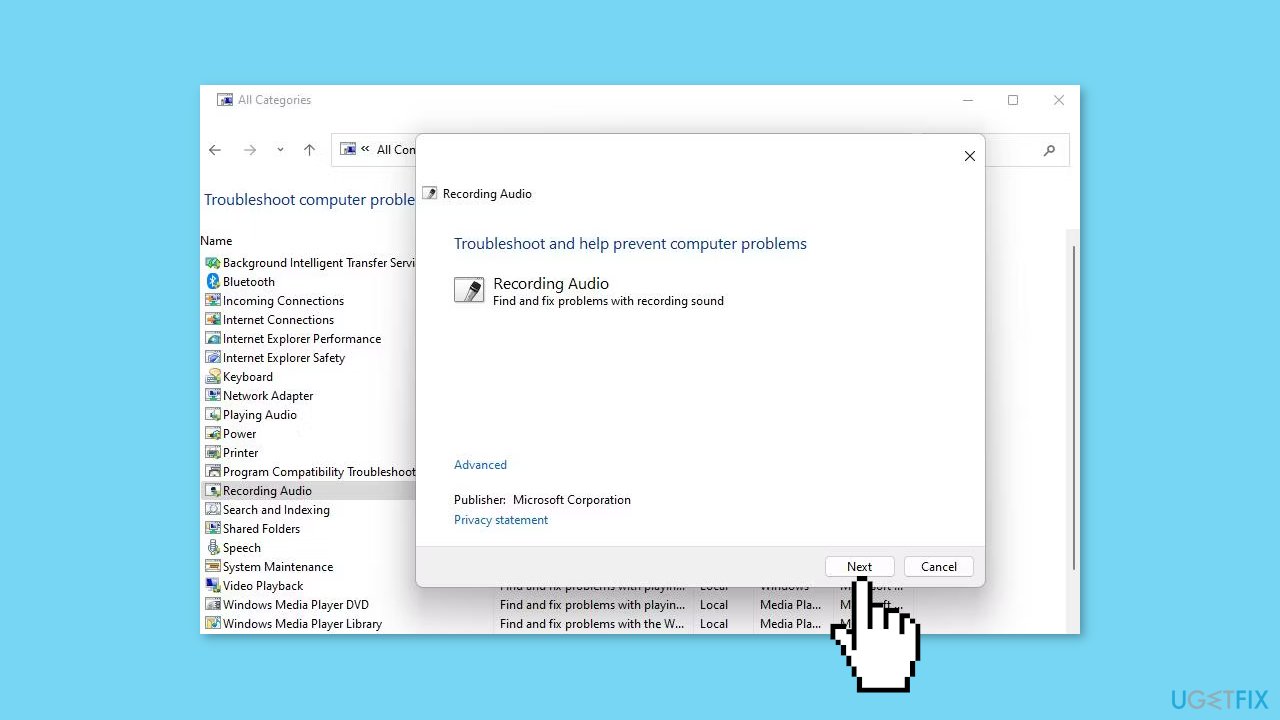
- Select Recording Audio from the list of tools.
- Click on Next to start the Recording Audio troubleshooting process.
Method 2. Close Communication Apps
When using Audacity, you may encounter Error 9999 due to other messaging and video conference apps like Skype, Teams, Google Meet, and Zoom using the microphone concurrently. These apps can operate in the background even while Audacity is open on the taskbar.
- Press Ctrl + Shift + Esc on your keyboard to access the Task Manager.
- If needed, click on the Processes tab to switch to that section.
- Look for any messaging software listed under the Apps section and click on it.
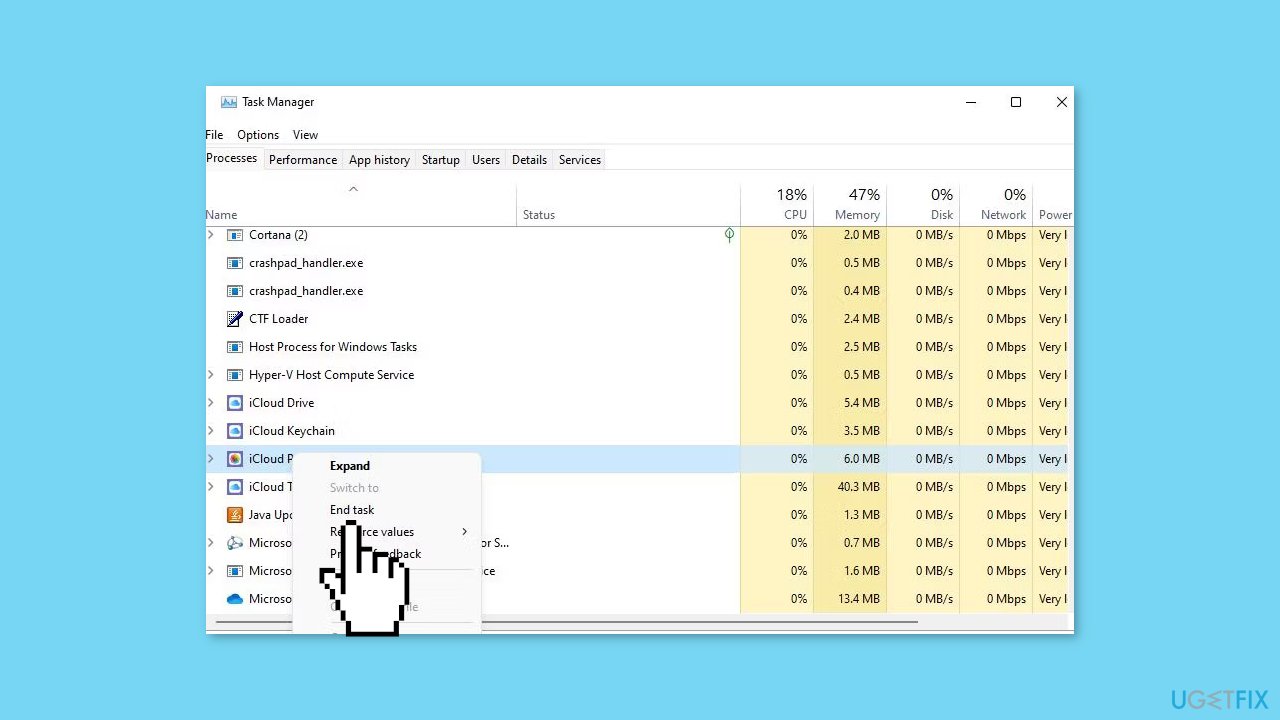
- Click on End task to close the messaging software.
- Check the Background processes section for any other messaging apps that may be running.
- Right-click on any messaging app processes found and select End task.
- Look in your system tray to see if there is an icon for a messaging app, such as Skype or Zoom.
- Right-click on the messaging app icon in the system tray and select an option to close the software.
- Open Audacity and attempt to record once more.
Method 3. Disable Third-Party Antivirus
If you have third-party antivirus software installed on your Windows 11/10 computer, it may potentially conflict with Audacity. To avoid this, try disabling the antivirus software's shield before running Audacity. You can typically do this by right-clicking on the antivirus tool's system tray icon and selecting an option from the context menu to turn off the shield.
However, some antivirus software may have special features that monitor microphones, which could block microphone access for certain apps. For instance, Bitdefender has a Microphone monitor setting. Disabling the antivirus software's shield may not necessarily turn off this microphone security feature. Therefore, you should check your security software's tabs for any feature settings that could impact microphone access and disable them if necessary.
Method 4. Enable Microphone Access
- Open the Start menu and select the Settings app.
- Click on the Privacy tab or category in the Settings window.
- Select Microphone to access the microphone app permission settings.
- Toggle on the Microphone access option if it's currently disabled.
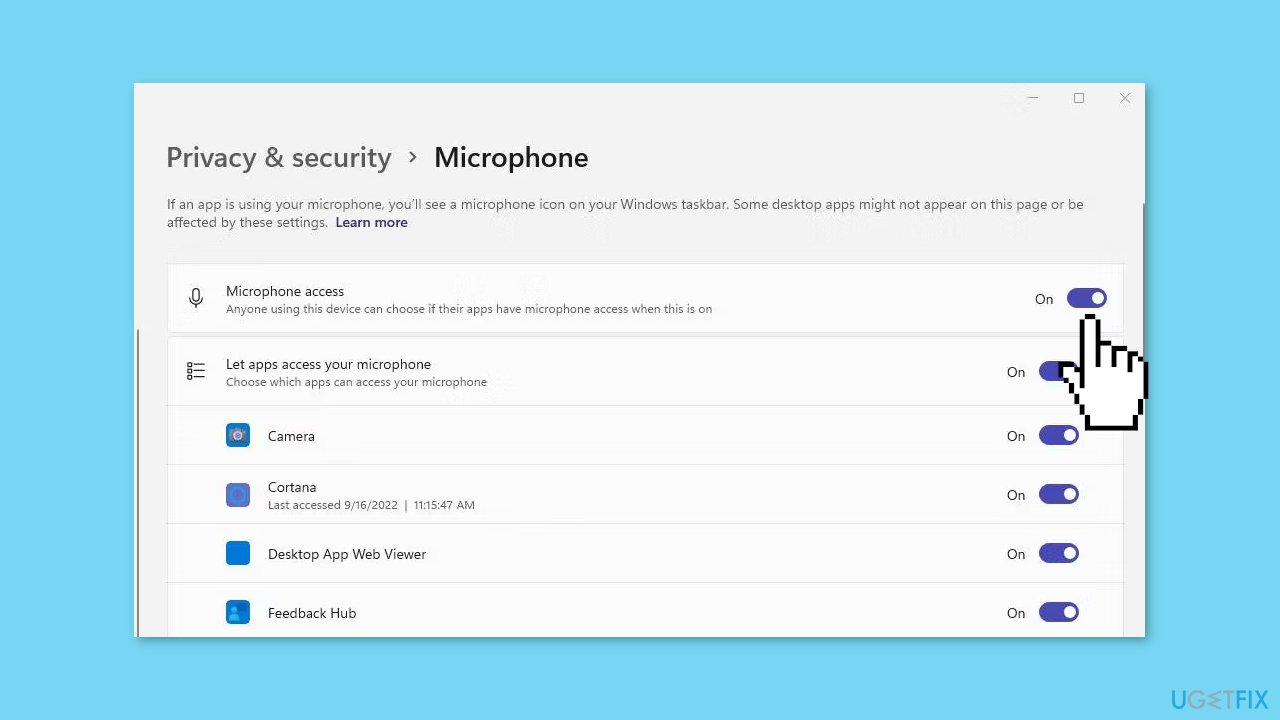
- For Windows 10, turn on the Allow apps to access your microphone setting.
- Scroll through the list of apps below that setting and locate Audacity.
- Click on Audacity's toggle button to enable microphone access.
Method 5. Reinstall the Microphone Driver
- Right-click on the Start menu and select the Device Manager from the Power User menu.
- Double-click on the Audio inputs and outputs category to view the sound devices.
- Right-click on your microphone and select Uninstall device.
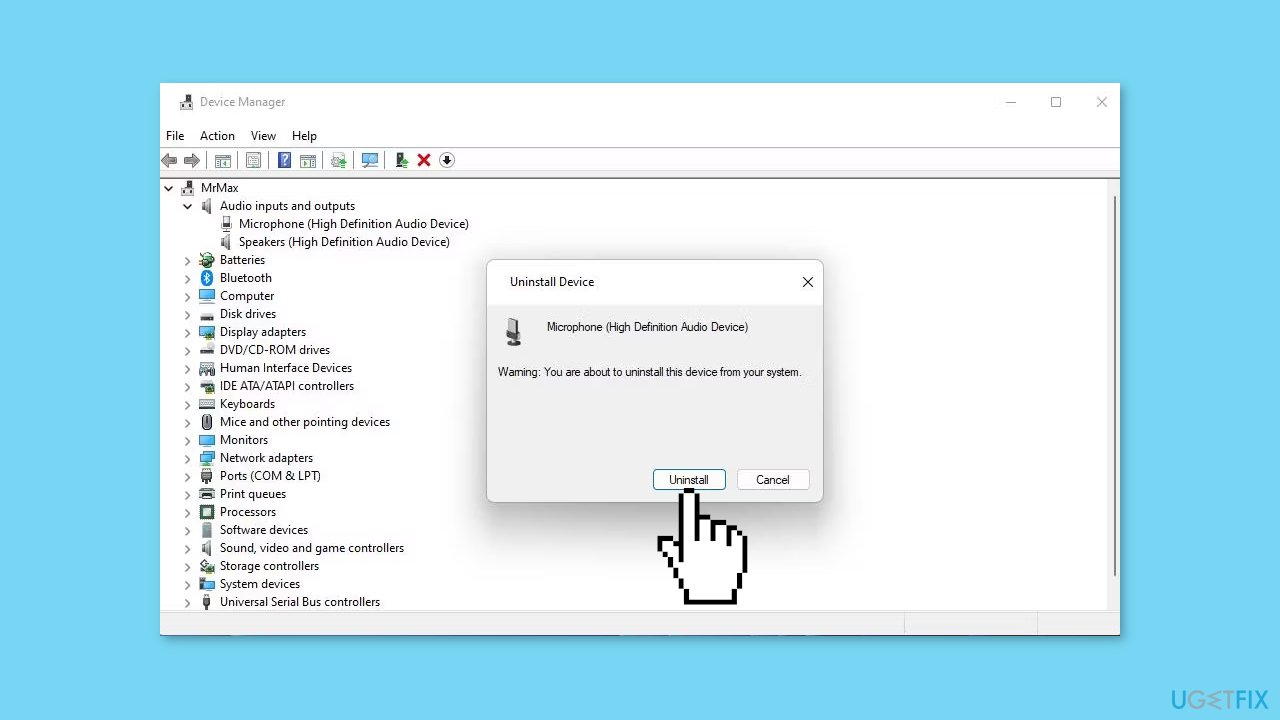
- Click on the confirmation dialog's Uninstall option to proceed with uninstalling the microphone driver.
- Select Action and click on Scan for hardware changes to reinstall the microphone driver.
Method 6. Try Clean Boot
- Open the Search menu, type in system configuration, and press Enter
- Under the Services tab, tick the Hide all Microsoft services box
- Click on Disable all button
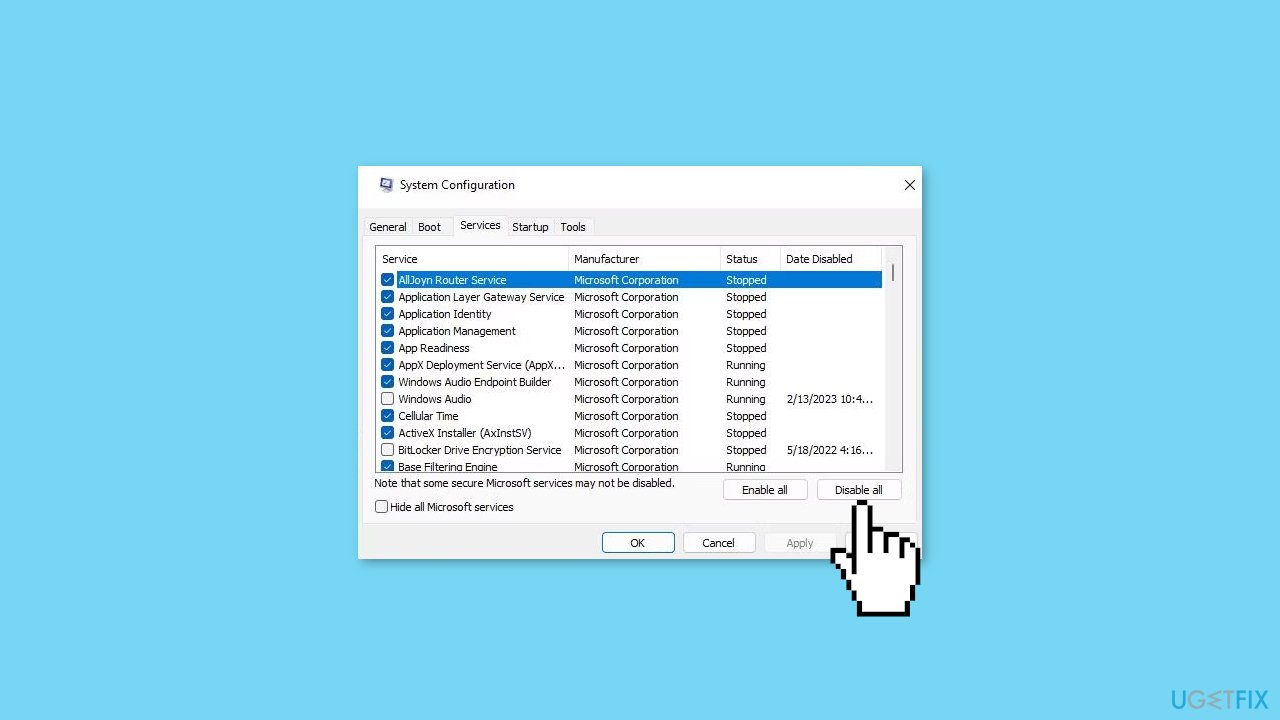
- Head over to the Startup tab and click on Open Task Manager
- Select a third-party program and click on Disable at the top
- Repeat this step to disable all third-party apps and programs
- Restart your PC to enter the clean boot state and see if the issue persists
- If the issue disappeared in the clean boot state, then you can be certain that a third-party app is causing it
- Go through all recently installed apps or programs and remove them one by one
Method 7. Reinstall Audacity
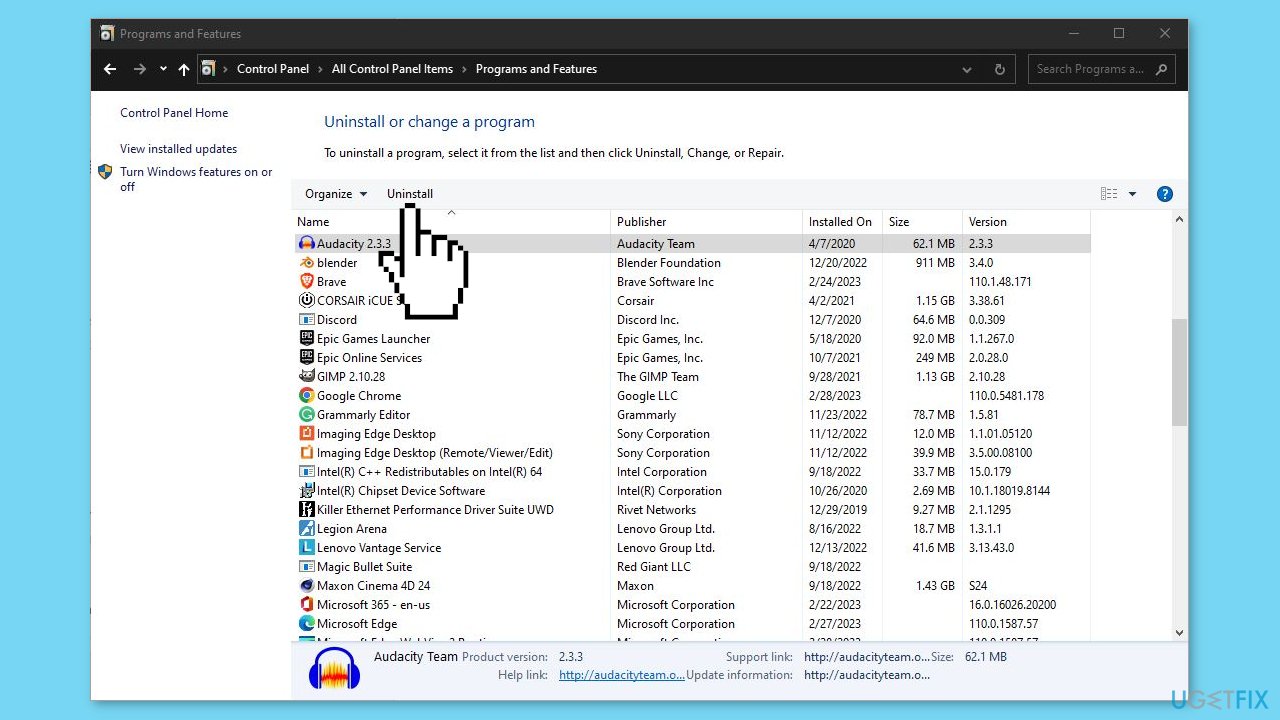
- Open the Start menu and go to Control Panel.
- Locate Audacity in the list of installed programs and select it.
- Click on the Uninstall button and follow the prompts to uninstall Audacity from your computer.
- Go to the Audacity website and download the latest version of the software for your operating system.
- Once the download is complete, locate the downloaded installation file.
- Double-click on the installation file to launch the installation wizard.
- Follow the prompts on the installation wizard to install Audacity on your computer.
Repair your Errors automatically
ugetfix.com team is trying to do its best to help users find the best solutions for eliminating their errors. If you don't want to struggle with manual repair techniques, please use the automatic software. All recommended products have been tested and approved by our professionals. Tools that you can use to fix your error are listed bellow:
Access geo-restricted video content with a VPN
Private Internet Access is a VPN that can prevent your Internet Service Provider, the government, and third-parties from tracking your online and allow you to stay completely anonymous. The software provides dedicated servers for torrenting and streaming, ensuring optimal performance and not slowing you down. You can also bypass geo-restrictions and view such services as Netflix, BBC, Disney+, and other popular streaming services without limitations, regardless of where you are.
Don’t pay ransomware authors – use alternative data recovery options
Malware attacks, particularly ransomware, are by far the biggest danger to your pictures, videos, work, or school files. Since cybercriminals use a robust encryption algorithm to lock data, it can no longer be used until a ransom in bitcoin is paid. Instead of paying hackers, you should first try to use alternative recovery methods that could help you to retrieve at least some portion of the lost data. Otherwise, you could also lose your money, along with the files. One of the best tools that could restore at least some of the encrypted files – Data Recovery Pro.
- ^ Chris Hoffman. Everything You Need To Know About the Blue Screen of Death. Howtogeek. Technology Magazine.
- ^ Windows Registry. Wikipedia, the free encyclopedia.
- ^ Difference between Cache and Cookies. Geeksforgeeks. IT Education.


