Question
Issue: How to fix memory integrity is off because of incompatible drivers in Windows?
Hi, I am facing an issue with memory integrity. It remains switched off, and when I checked the settings, it said memory integrity is off because of incompatible drivers. The message says that I need to resolve the issues with these drivers (it points to wdcsam64.sys), but I have no clue what it is or how to fix this.
Solved Answer
Memory integrity is a security feature in Windows that helps to protect against certain types of malicious attacks. It uses hardware virtualization technology to create a separate, isolated area of memory that is protected from unauthorized access or modification. This can help to prevent attackers from injecting malicious code into the system and gaining control of it.
Memory integrity can be enabled or disabled in the Windows Security settings. It is enabled by default on systems that support it, but it can be turned off if necessary. Most users tend to keep the feature on because it improves the security of their devices. Unfortunately, some users noticed that memory integrity is off because Windows found incompatible drivers.
This could be particularly problematic, as users can't use the feature that's meant to protect them, and they are more vulnerable to dangerous attacks of ransomware or other malware. Thus, it is important to fix memory integrity not running due to incompatible drivers.
There could be numerous drivers associated with this issue, including STTub30.sys, wdcsam64.sys, AVerFx2HD.sys, ftdibus.sys, and many others. Naturally, Windows points at the driver that's seemingly incompatible, although users struggle to understand what has caused this. Some people also report that some other issues may be present, such as Firewall not working.
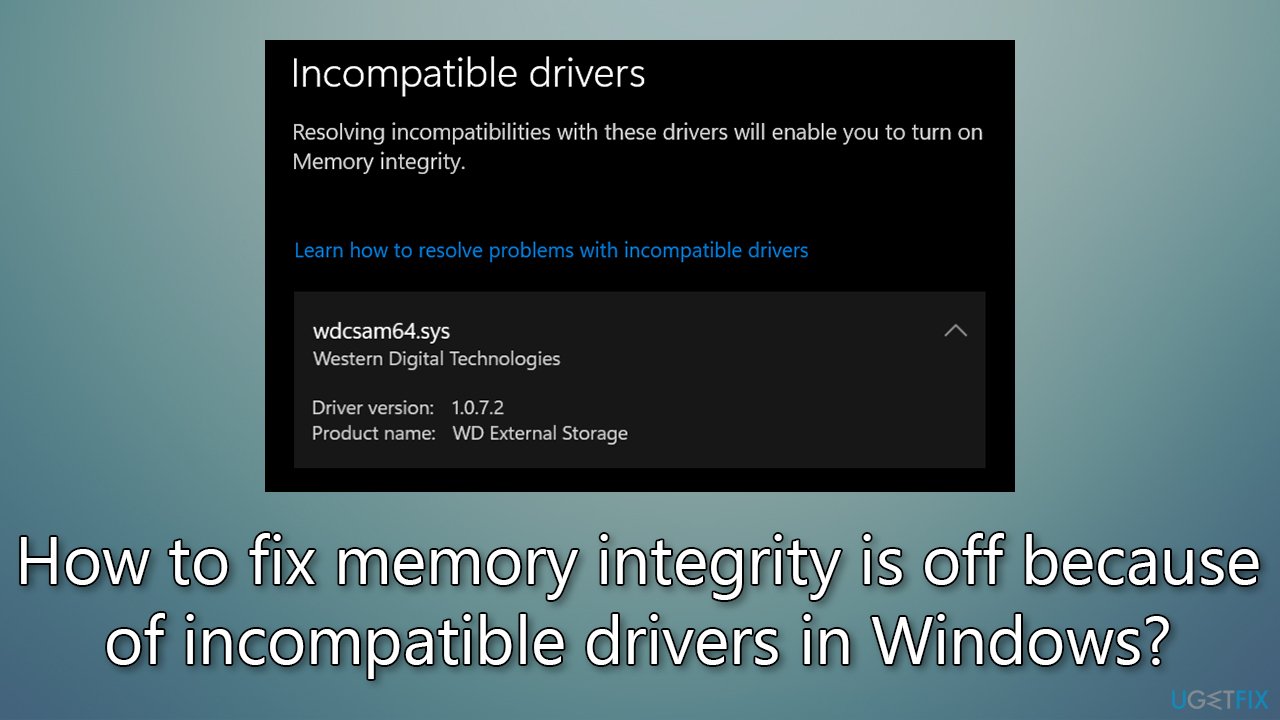
As it is claimed by the message, users need to resolve the driver incompatibility problems to turn memory integrity back on. This can be done via Command Prompt, Autoruns, or other methods we explain below.
Before proceeding, we'd recommend running a scan with FortectMac Washing Machine X9 PC repair tool to ensure there are no underlying issues that may have caused memory integrity not to work in the first place.
1. Update your drivers
Your first step is to ensure that all drivers on Windows are up to date. You can try doing this via the Windows Update feature:
- Type Update in Windows search and hit Enter
- Click Check for updates
- Click View optional updates
- Find the Driver Updates section, tick the checkboxes, and click Download and Install
- Restart the PC once all the drivers are installed.
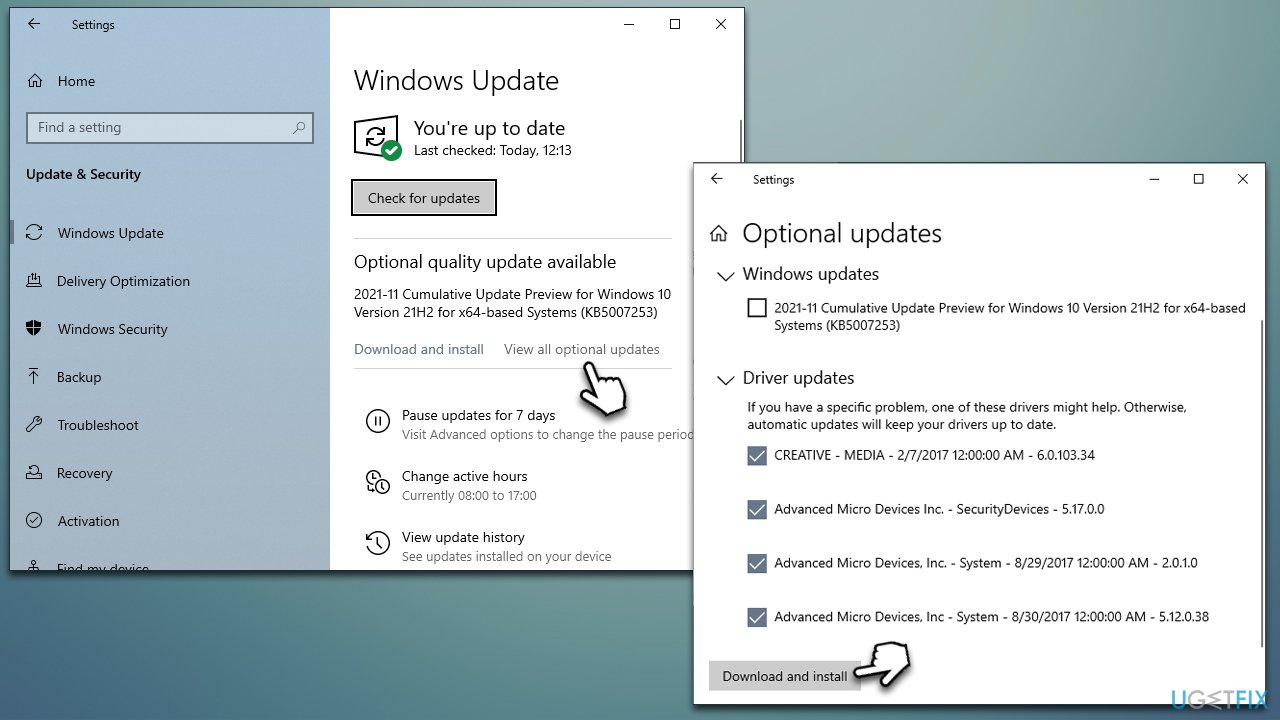
Using Windows Update is by far the least optional solution, as Windows can fail to find the driver you require. Instead, we recommend either running an automatic driver updater DriverFix or installing the driver from the device manufacturer's website.
2. Run the command via Command Prompt
You can attempt to remove the associated driver via an elevated Command Prompt.
- Type in cmd in Windows search
- Right-click on Command Prompt and select Run as administrator
- In the User Account Control window, click Yes
- Next, copy and paste the following command, pressing Enter after:
dism /online /get-drivers /format:table
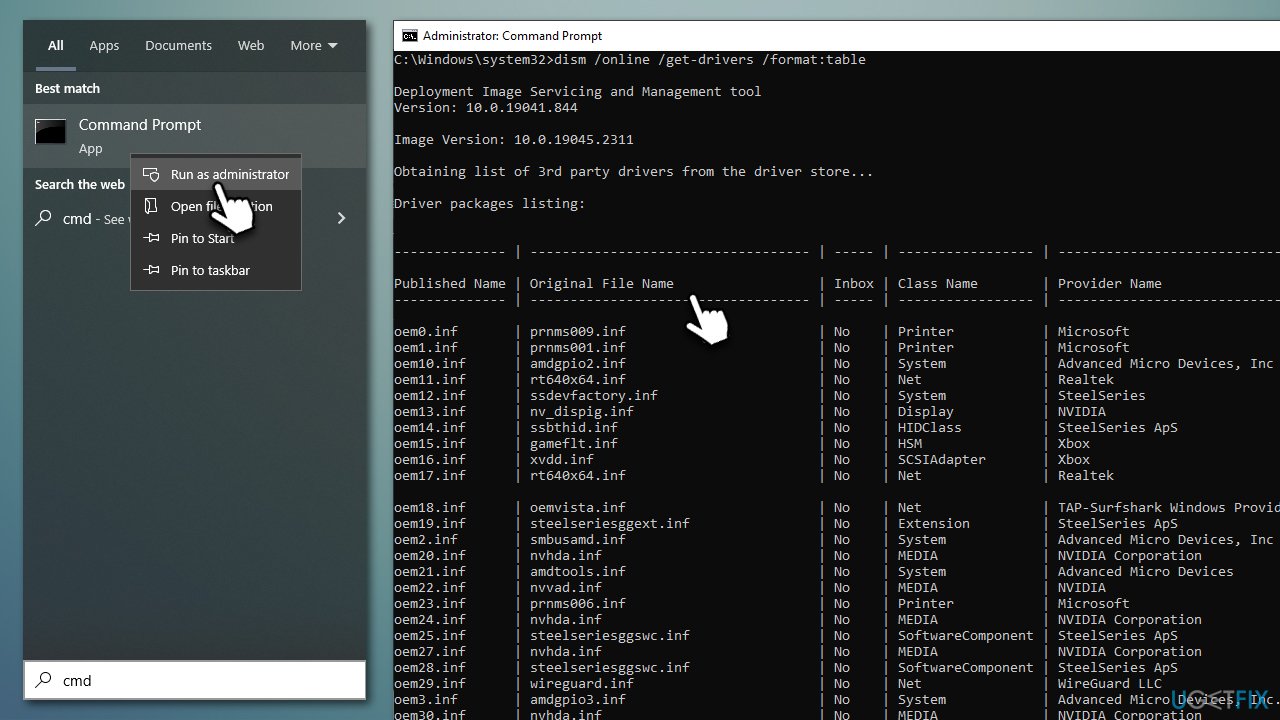
- Your task is to find the driver that's causing the problem under the Original File Name section. Note the Published name next to it, you'll need it in the next step
- Type in the following command, replacing “Published name” with the driver name, for example:
pnputil /delete-driver oem33.inf /uninstall /force - Press Enter and restart your PC.
3. Use Autoruns
Another solution here is using Autoruns.
- Download Autoruns for Windows from the official website
- Go to the Downloads folder or anywhere else your files are directed to be placed
- Right-click on the ZIP file and select Extract to Autoruns and enter the folder once done
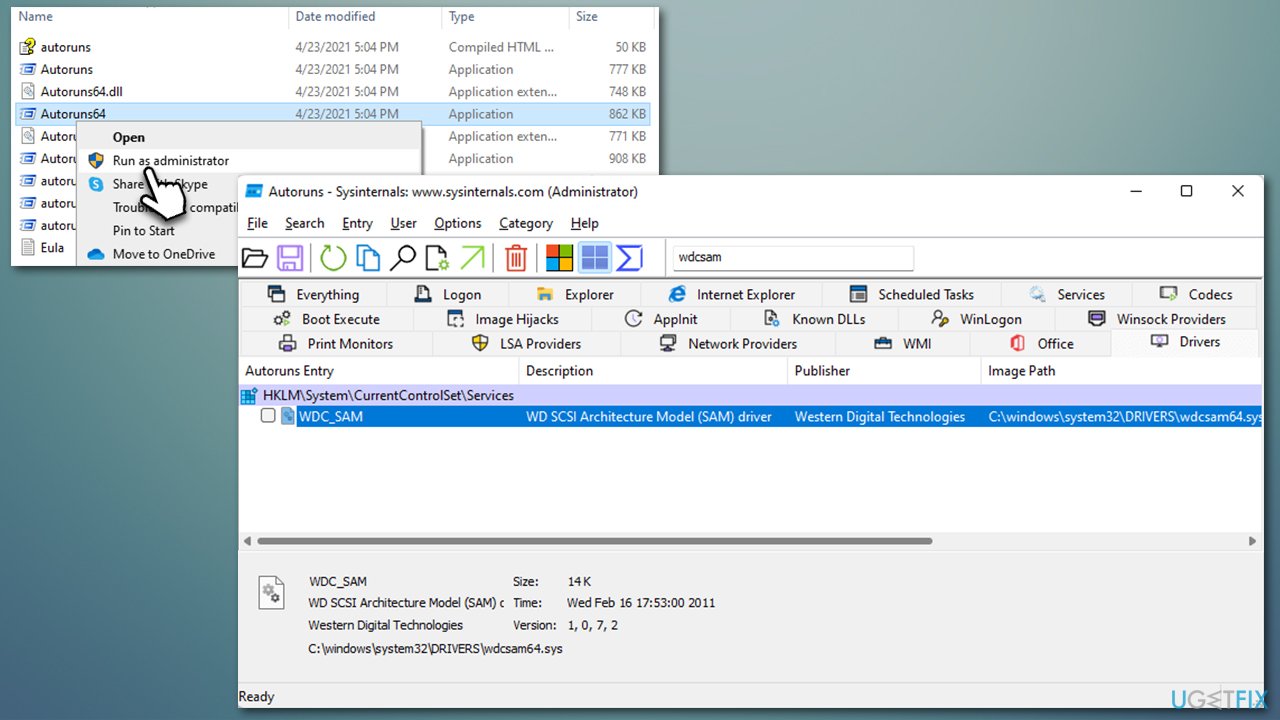
- Select the right version: Autoruns.exe if you are using 32-bit Windows or go for Autoruns64.exe if you are using 64-bit Windows
- Right-click on the correct EXE file and select Run as administrator
- In the UAC window, click Yes
- In the search box at the top, type the name of the driver that's causing problems, for example, wdcsam64
- If any entries show up relating to the driver, right-click and select Delete
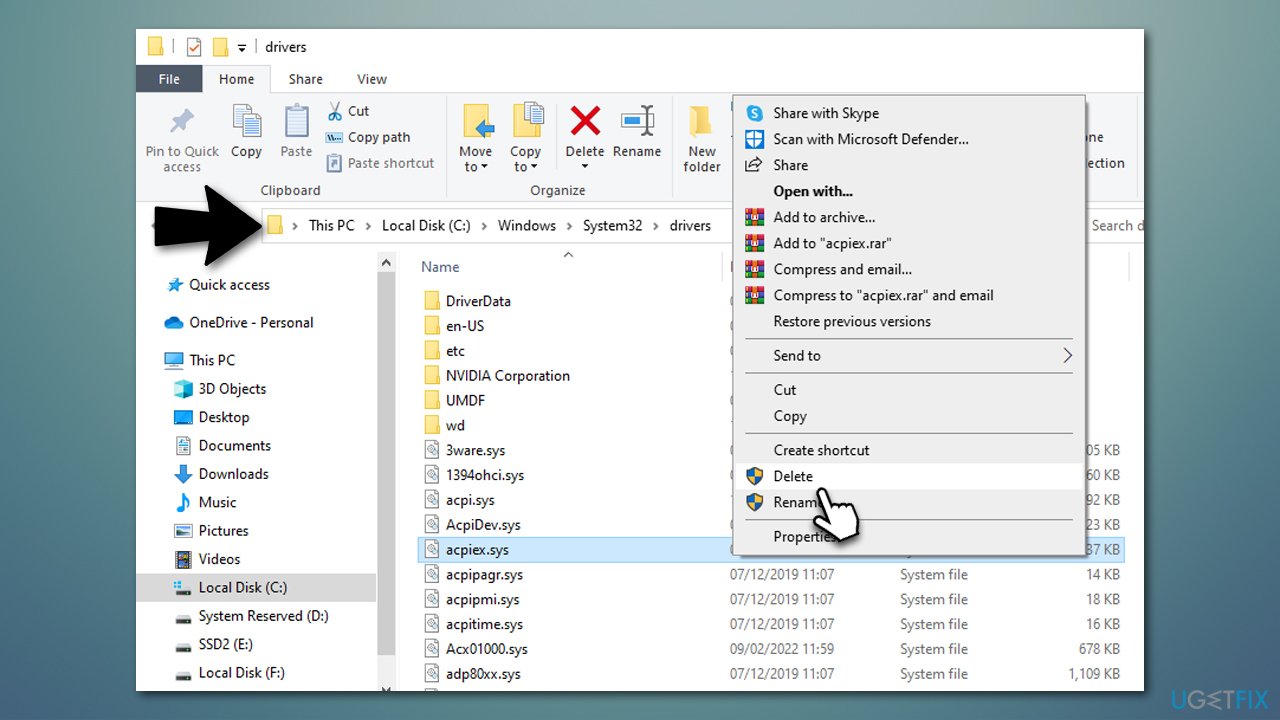
- Finally, go to the following location via File Explorer (make sure hidden files are visible):
C:\Windows\System32\Drivers\ - Locate the driver associated with the problem and delete it by pressing Shift + Del.
Repair your Errors automatically
ugetfix.com team is trying to do its best to help users find the best solutions for eliminating their errors. If you don't want to struggle with manual repair techniques, please use the automatic software. All recommended products have been tested and approved by our professionals. Tools that you can use to fix your error are listed bellow:
Prevent websites, ISP, and other parties from tracking you
To stay completely anonymous and prevent the ISP and the government from spying on you, you should employ Private Internet Access VPN. It will allow you to connect to the internet while being completely anonymous by encrypting all information, prevent trackers, ads, as well as malicious content. Most importantly, you will stop the illegal surveillance activities that NSA and other governmental institutions are performing behind your back.
Recover your lost files quickly
Unforeseen circumstances can happen at any time while using the computer: it can turn off due to a power cut, a Blue Screen of Death (BSoD) can occur, or random Windows updates can the machine when you went away for a few minutes. As a result, your schoolwork, important documents, and other data might be lost. To recover lost files, you can use Data Recovery Pro – it searches through copies of files that are still available on your hard drive and retrieves them quickly.


