Question
Issue: How to fix PowerShell high CPU usage in Windows?
Hello. I noticed my Windows computer was getting slower and the fans were constantly spinning. I found that the PowerShell is using high amounts of CPU. Is there a way to fix this?
Solved Answer
Microsoft PowerShell is a command-line interface and scripting language for Windows. It was first released in 2006 as a replacement for the traditional command prompt, allowing users to manage Windows systems with a more powerful and flexible tool.
PowerShell is widely used for system administration tasks such as file, process, and Windows service management. It gives users access to the .NET framework,[1] allowing them to write and run scripts that automate complex tasks. PowerShell also includes advanced features like remoting, which allows users to manage remote systems from their local machine, and scripting support for a variety of programming languages.
The CPU (Central Processing Unit) is the main component of a computer that handles the majority of processing tasks. When a computer performs tasks, the CPU is used to execute commands and operations. High CPU usage can be caused by a variety of factors, including the use of multiple applications, the use of resource-intensive applications, or malware infections.
High CPU usage in PowerShell can occur when a script or command consumes a large amount of CPU resources. This problem can degrade computer performance and cause other applications to run slower. Users may also notice that their computer is becoming hotter and that the fans are spinning faster.
In this guide, you will find 6 steps that should help you fix PowerShell high CPU usage in Windows. You can also try using a system repair tool like FortectMac Washing Machine X9 that can fix most system errors, BSODs,[2] corrupted files, and registry[3] issues. Otherwise, follow the step-by-step instructions below.
Method 1. Install Windows Updates
- Press the Windows key + R to open the Run box
- Type ms-settings:windowsupdate in the text box and press Enter
- Click the Check for updates button
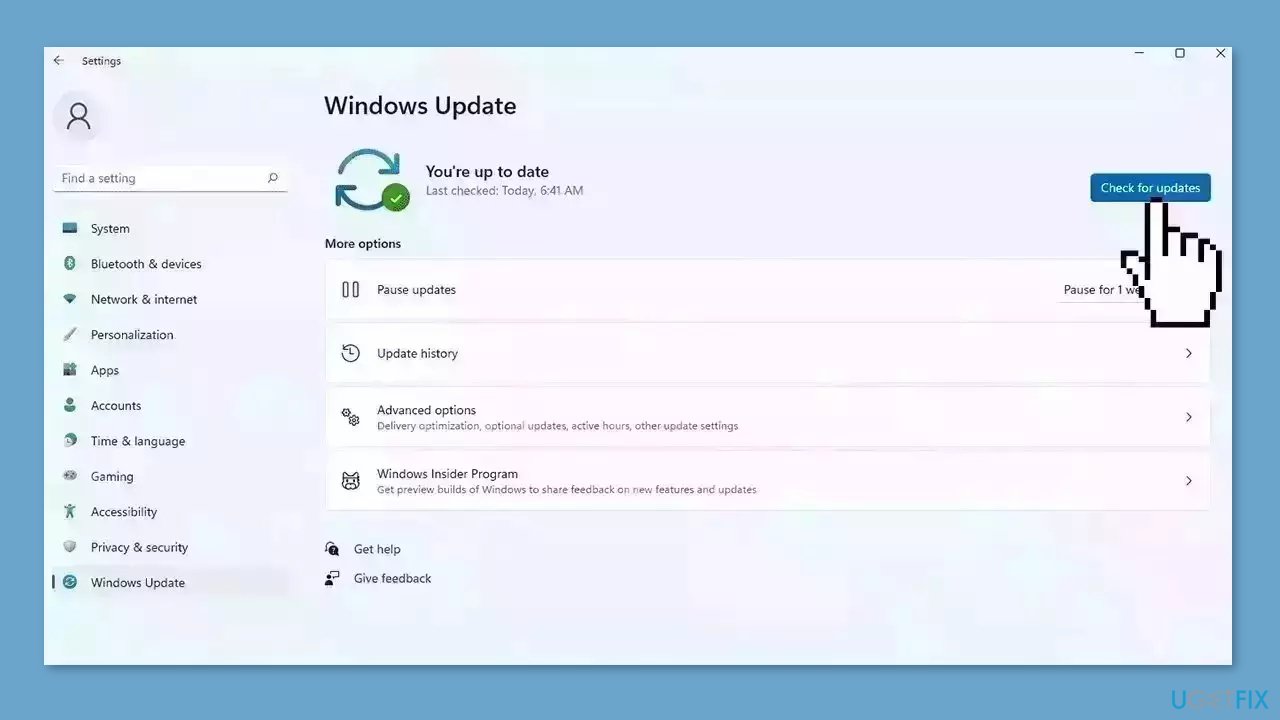
- If a new update is available, click the Download & Install all button.
- Restart your computer after the process is finished and check to see if the problem is fixed
Method 2. Fix Corrupted System Files
Use Command Prompt commands to repair system file corruption:
- Open Command Prompt as administrator
- Use the following command and press Enter:
sfc /scannow
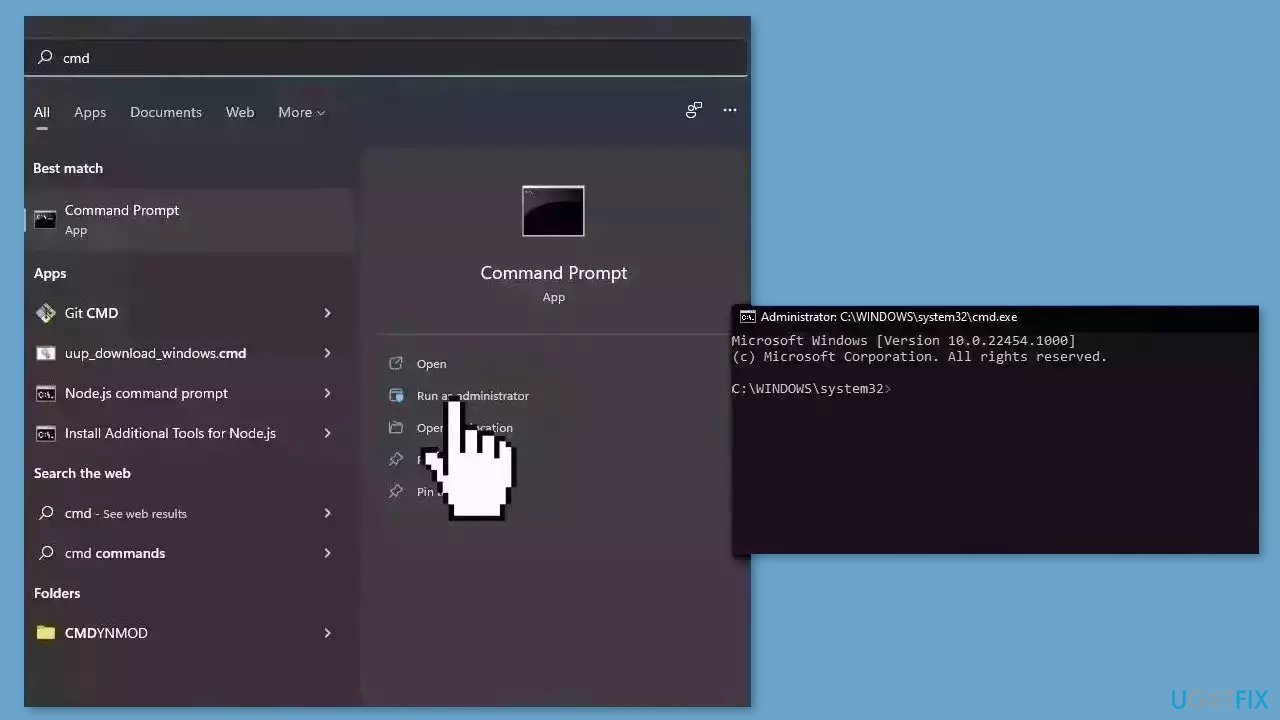
- Reboot your system
- If SFC returned an error, then use the following command lines, pressing Enter after each:
DISM /Online /Cleanup-Image /CheckHealth
DISM /Online /Cleanup-Image /ScanHealth
DISM /Online /Cleanup-Image /RestoreHealth
Method 3. Try Clean Boot
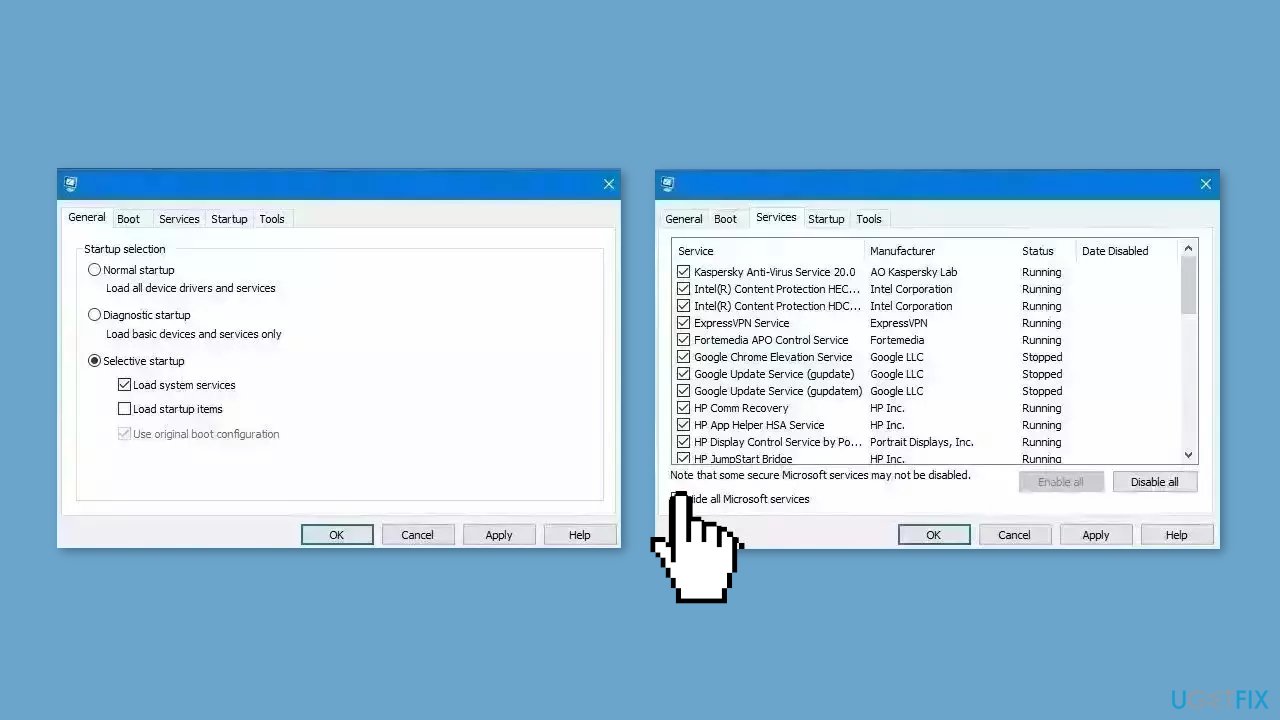
- Open the Search menu, type in system configuration, and press Enter
- Under the Services tab, tick the Hide all Microsoft services box
- Click on Disable all button
- Head over to the Startup tab and click on Open Task Manager
- Select a third-party program and click on Disable at the top
- Repeat this step to disable all third-party apps and programs
- Restart your PC to enter the clean boot state and see if the issue persists
- If the issue disappeared in the clean boot state, then you can be certain that a third-party app is causing it
- Go through all recently installed apps or programs and remove them one by one
Method 4. Run a Malware Scan
It is possible that a malware infection may be the cause of the SDL2.dll missing or not found error in Windows. It is important to run a comprehensive security scan to rule out this possibility and ensure that the computer is not infected. This can help to prevent further issues with the Windows operating system and ensure that it is functioning properly.
If you have access to a security scanner, or if your organization pays for one, you can use it to scan your entire system to check for a virus infection. Otherwise, you can use Windows Defender to scan your system:
- Click on the Windows Start menu or press the Windows key on your keyboard
- Type Microsoft Defender in the search bar and click on Microsoft Defender Antivirus to open the application
- Click on the Virus & threat protection option in the left-hand menu
- Click on the Quick scan or Full scan option, depending on your preference
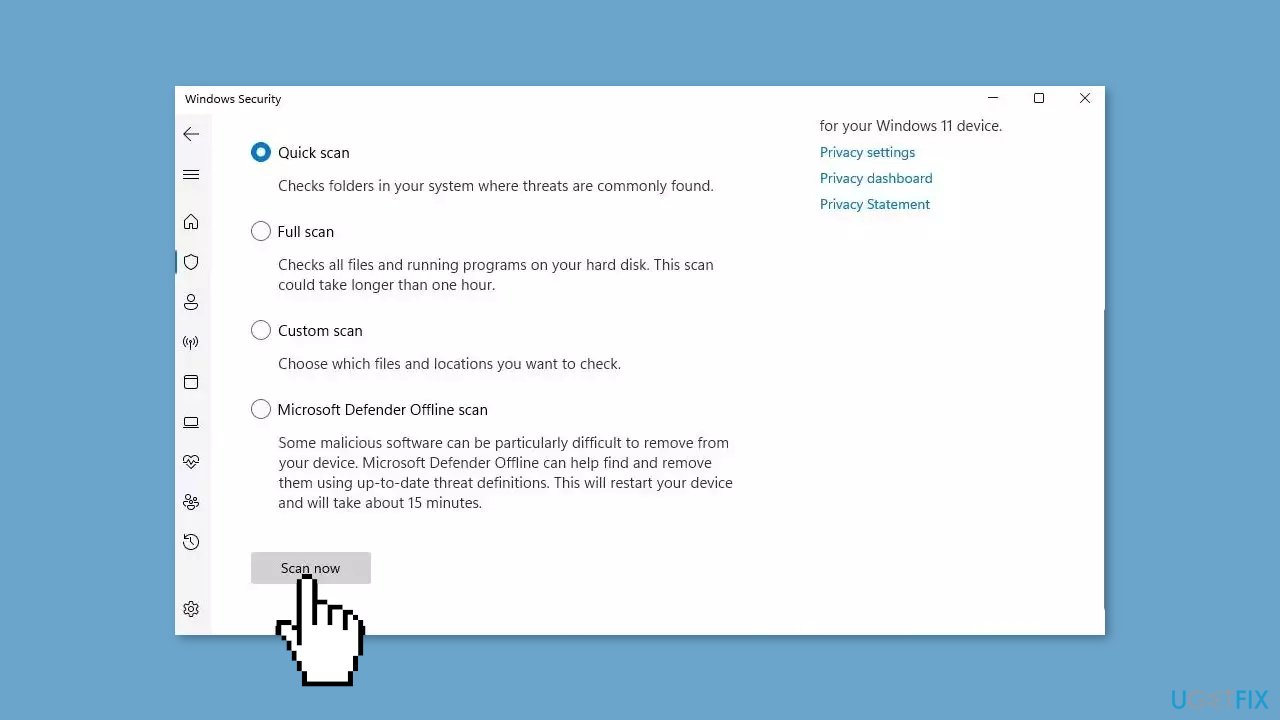
- If you choose Quick scan, Microsoft Defender Antivirus will scan the most vulnerable and commonly infected areas of your computer
- If you choose Full scan, Microsoft Defender Antivirus will scan your entire computer, including all files, folders, and programs
- Click on the Scan now button to start the selected scan type and wait for the scan to complete
- The time it takes will depend on the size of your hard drive and the number of files being scanned
- Once the scan is complete, you will be informed of any detected threats, and you can choose to quarantine or remove them
- If no threats are found, Microsoft Defender Antivirus will inform you that your device is secure
Method 5. Use System Restore
System Restore is a feature in Microsoft Windows that allows users to revert their computer's state to a previous point in time. This can be helpful if you have made changes to your system that are causing problems.
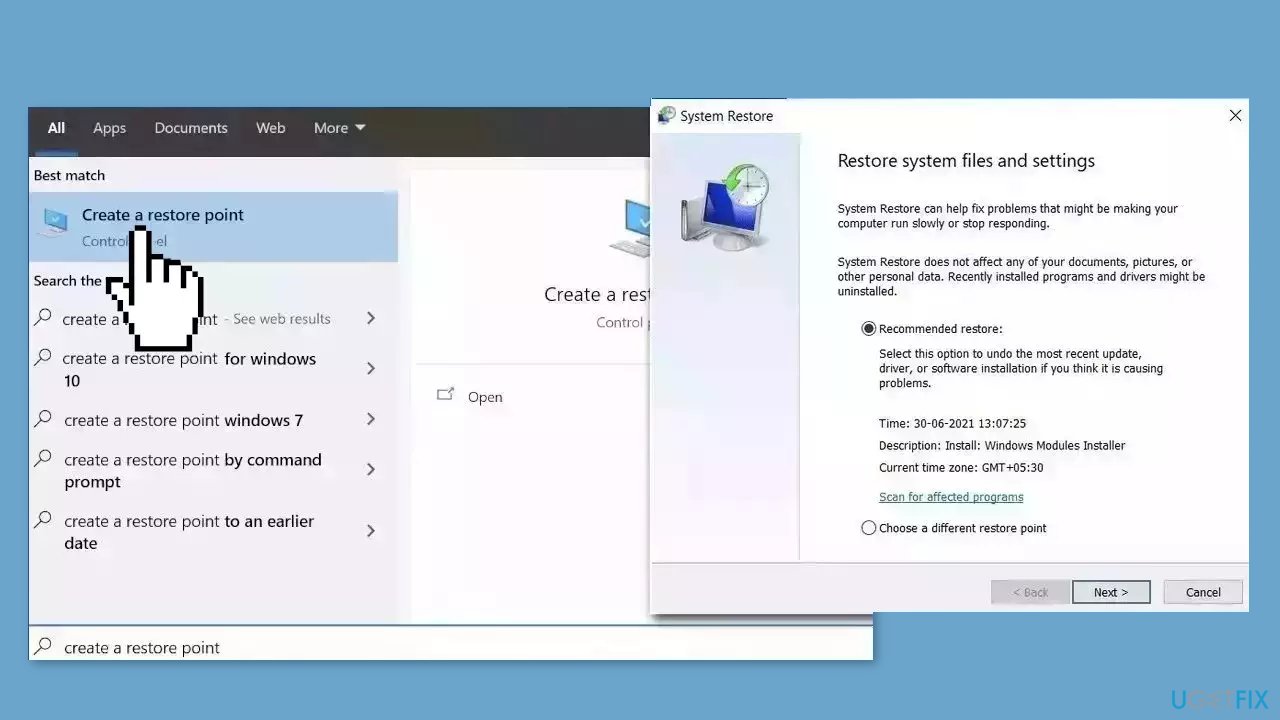
- Go to the Start menu, type restore, and click on Create a restore point
- Click System Restore, then follow the prompts until you can select a restore point
- Select the one you want (ideally before the issue started occurring) and go ahead with the process
Method 6. Repair Install Windows
- Visit the official Microsoft website to download Windows 11 or Windows 10 Installation Media
- Run the Media Creation Tool and select Create Installation Media for another PC.
- Select your USB drive.
- Let the Process complete of writing the Installation files to the USB drive.
- Click Finish.
- On the PC you wish to upgrade, Press Windows + E to open the File Explorer.
- Open the Removable drive and click Setup.exe.
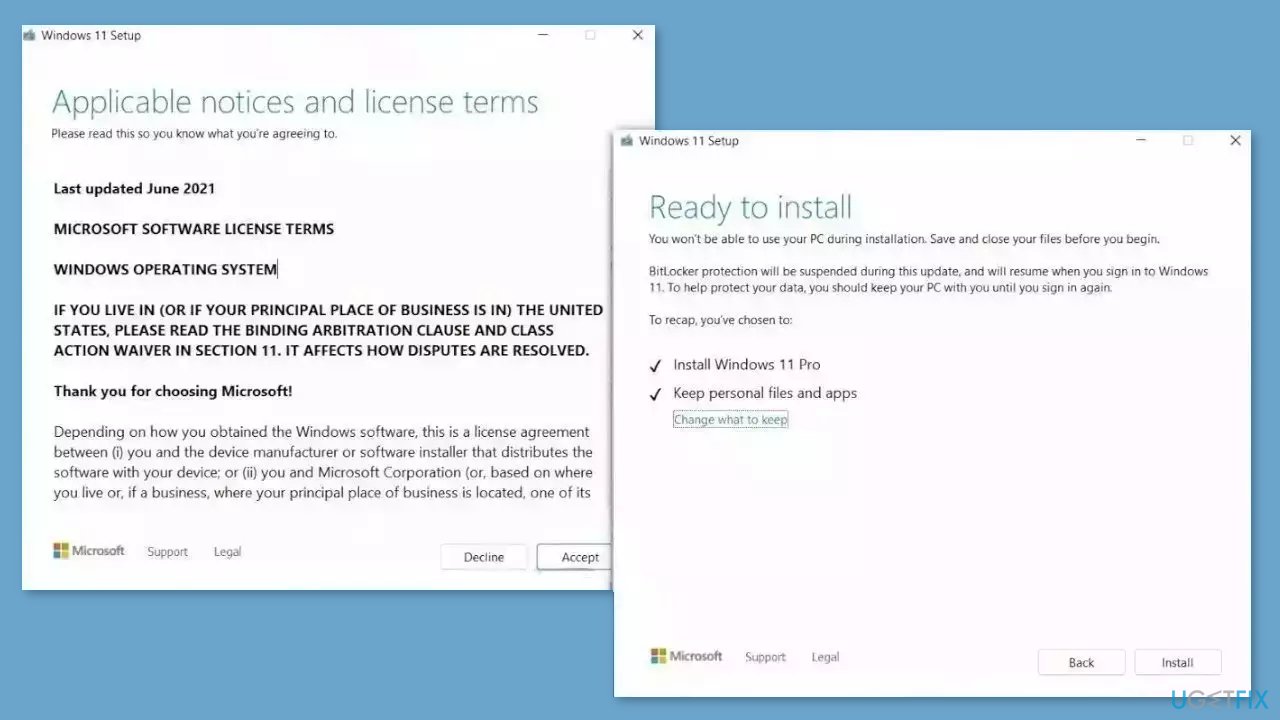
- Accept the license terms on the next screen.
- Confirm the Upgrade options – Files, apps and Settings are kept.
- Click Install, and the upgrade should start.
Repair your Errors automatically
ugetfix.com team is trying to do its best to help users find the best solutions for eliminating their errors. If you don't want to struggle with manual repair techniques, please use the automatic software. All recommended products have been tested and approved by our professionals. Tools that you can use to fix your error are listed bellow:
Access geo-restricted video content with a VPN
Private Internet Access is a VPN that can prevent your Internet Service Provider, the government, and third-parties from tracking your online and allow you to stay completely anonymous. The software provides dedicated servers for torrenting and streaming, ensuring optimal performance and not slowing you down. You can also bypass geo-restrictions and view such services as Netflix, BBC, Disney+, and other popular streaming services without limitations, regardless of where you are.
Don’t pay ransomware authors – use alternative data recovery options
Malware attacks, particularly ransomware, are by far the biggest danger to your pictures, videos, work, or school files. Since cybercriminals use a robust encryption algorithm to lock data, it can no longer be used until a ransom in bitcoin is paid. Instead of paying hackers, you should first try to use alternative recovery methods that could help you to retrieve at least some portion of the lost data. Otherwise, you could also lose your money, along with the files. One of the best tools that could restore at least some of the encrypted files – Data Recovery Pro.
- ^ .NET Framework. Wikipedia, the free encyclopedia.
- ^ Chris Hoffman. Everything You Need To Know About the Blue Screen of Death. Howtogeek. Tech Insight Magazine.
- ^ Tim Fisher. What Is the Windows Registry?. Lifewire. Software and Apps.


