Question
Issue: How to fix Sennheiser EPOS headphones not working after 22H2 update?
Hello. I recently updated to the 22H2 version on Windows 11 but my Sennheiser EPOS headphones stopped working. What do I do to fix this?
Solved Answer
Sennheiser EPOS headphones are high-end headphones that provide exceptional audio quality, noise-canceling features, and long-term comfort. They are a popular choice among professionals who use headphones for both work and personal reasons.
However, many Sennheiser EPOS headphone users have reported that after updating their Windows 11 operating system to version 22H2, their headphones stopped working. Sennheiser EPOS headphones not working after Windows 11 22H2 update can have a significant impact on users, especially those who rely on their headphones for work or to complete important tasks. Users may experience frustration and inconvenience while attempting to resolve the issue or find a suitable workaround.
Users have several options for resolving the issue with Sennheiser EPOS headphones not working after the Windows 11 22H2 update. These may include updating drivers,[1] reverting to a previous version of the update, or resetting the headphones. However, the specific solution may vary depending on the circumstances of the individual user and the cause of the problem.
In this guide, you will find 5 steps that should help you fix Sennheiser EPOS headphones not working after 22H2 update. But you can also use an automatic maintenance tool like FortectMac Washing Machine X9 that can fix most system errors, BSODs,[2] corrupted files, and registry[3] issues. Otherwise, follow the step-by-step instructions below.

Method 1. Run the Audio Troubleshooter
- Press the Windows key + I keys together to open the Settings app.
- Choose System from the options.
- Click on Troubleshoot from the left-hand menu.
- Select Other troubleshooters from the list of options.
- Locate the Playing Audio troubleshooter and click on the Run button.
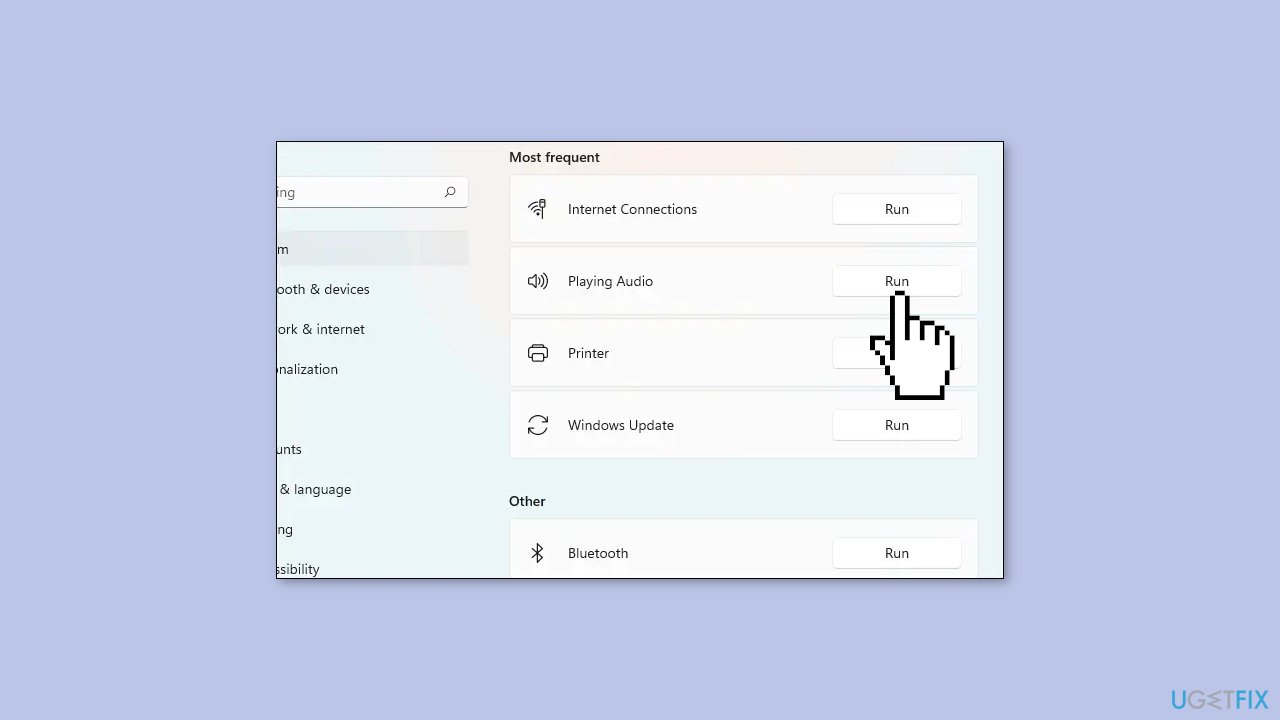
- Wait for the troubleshooter to finish scanning the system for errors.
- If the troubleshooter finds a problem and suggests a fix, click on Apply this fix.
- If no issues are identified, click on Close the troubleshooter option and move to the next solution below.
Method 2. Update or Rollback the Driver
You can try updating the headphone audio driver or rolling it back if you recently updated it.
Update driver:
- Type Device Manager in Windows Search and click Open.
- In the following window, expand the Audio inputs and outputs section.
- Right-click on the problematic driver and choose Update driver from the context menu.
- Click on Search automatically for drivers and then allow the system to pick a driver from the system.
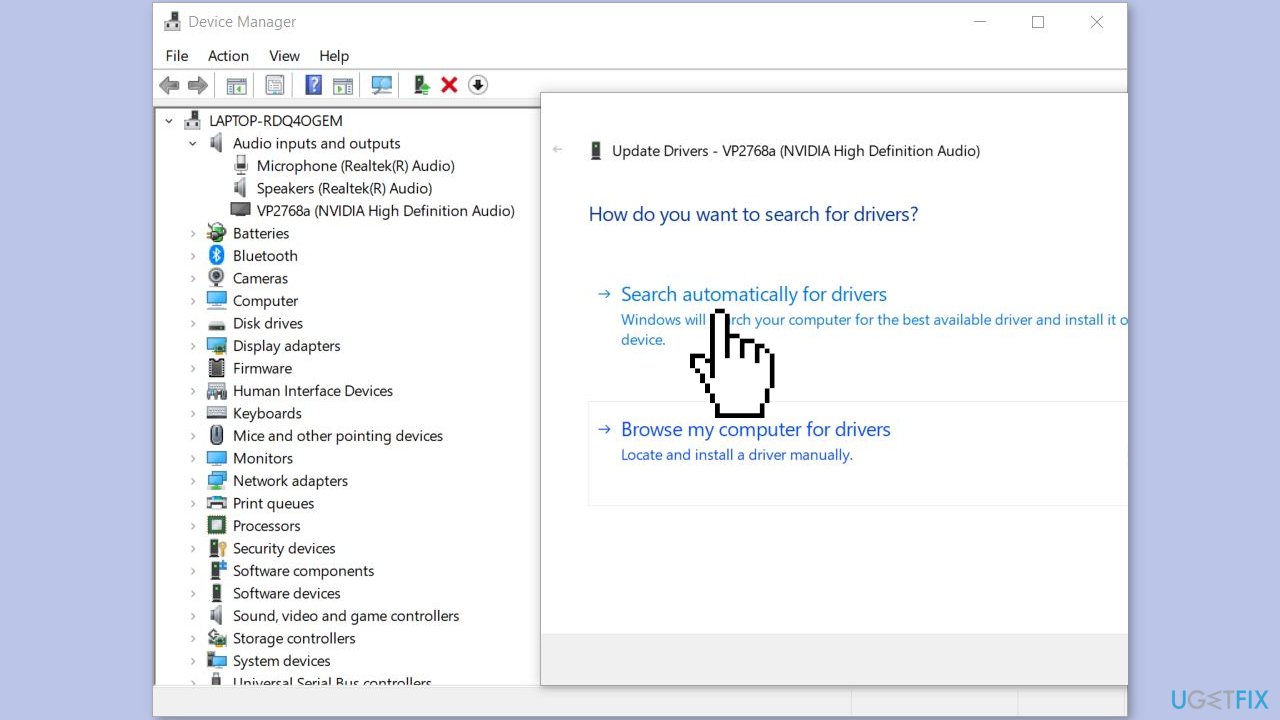
- Follow the on-screen instructions to proceed and then restart your computer.
- If the error persists, repeat steps 1-3.
- This time, choose Let me pick from a list of available drivers on my computer.
- Choose High Definition Audio Device from the list of available drivers and install it.
- Restart your computer and check if the issue is resolved.
Rollback driver:
- Access the Audio inputs and outputs section.
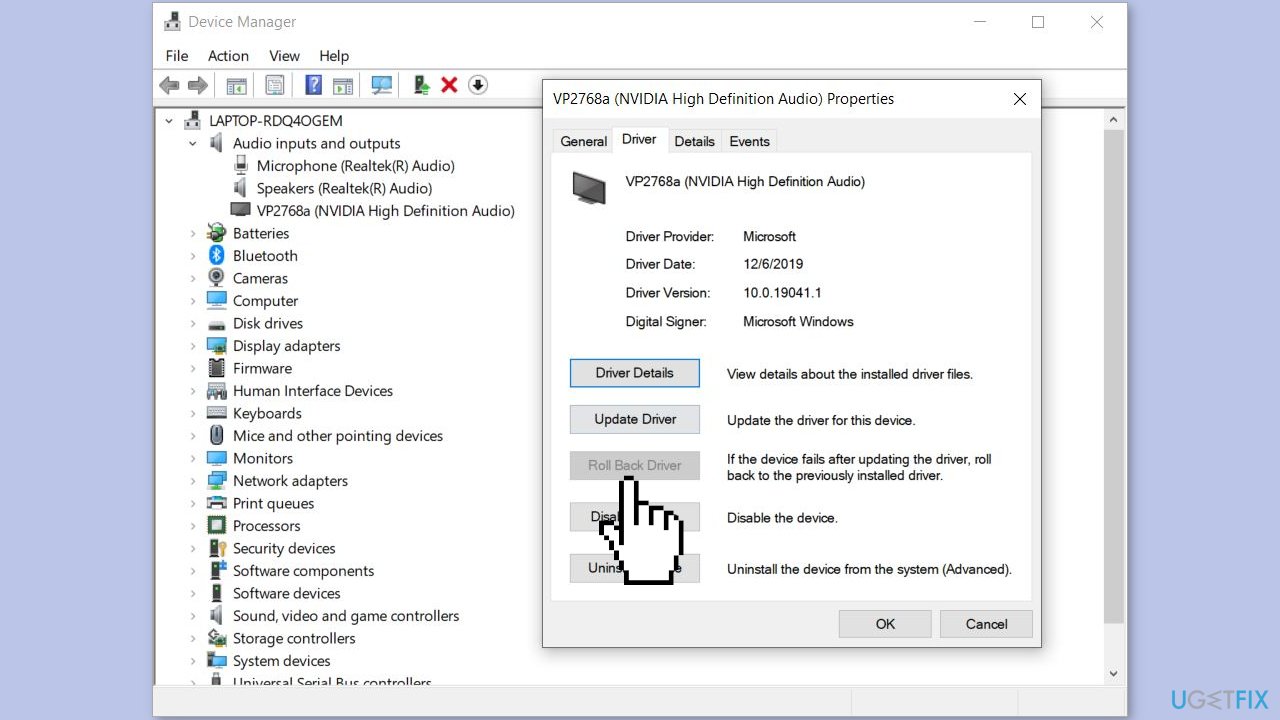
- Right-click on the targeted driver and choose Properties from the context menu.
- In the Properties dialog, head over to the Drivers tab.
- Click on the Roll Back Driver button.
- Follow the on-screen instructions to proceed and then check if the issue is resolved.
Method 3. Reinstall the Driver
If updating or rolling back the update did not fix the issue, you may need to reinstall the headphone driver completely. You can do that by uninstalling the driver in the Device Manager, restarting your PC, and letting Windows install a driver automatically or install a new driver from the official manufacturer's website.
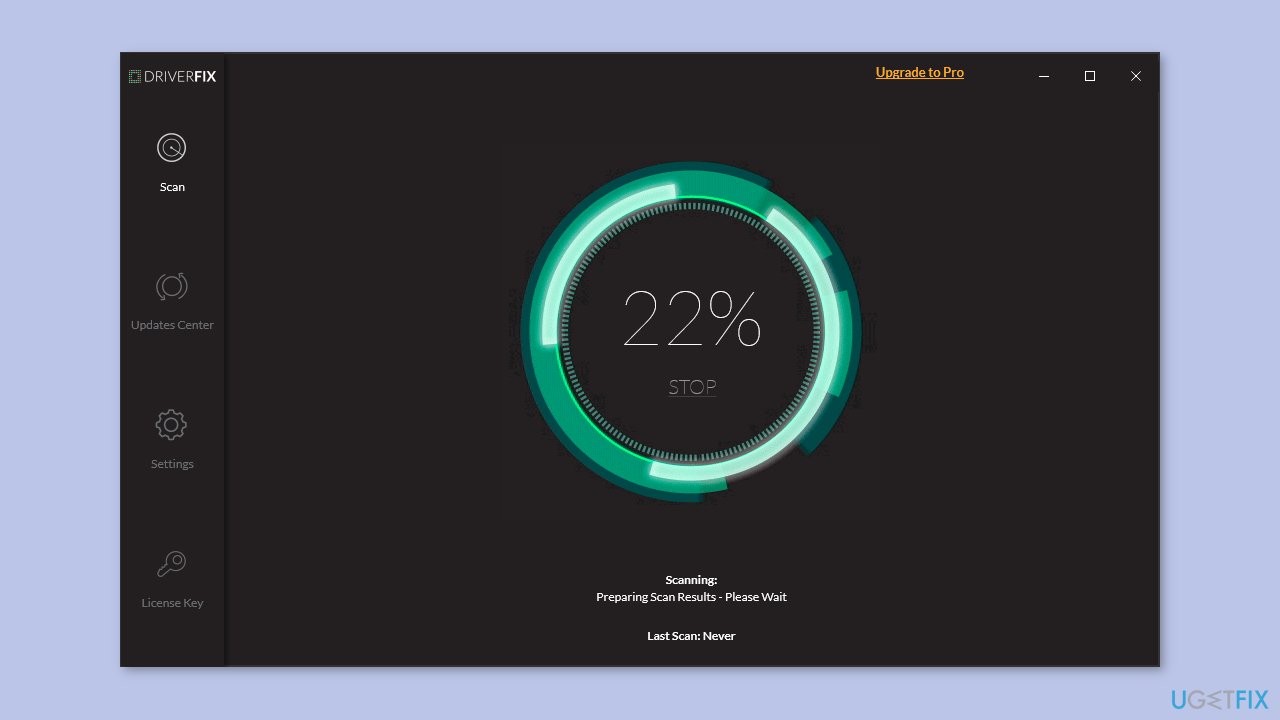
You can also use a dedicated utility like DriverFix that can find the best drivers for your machine and install them automatically.
Method 4. Uninstall KB5017321 and KB5017026
Sometimes, the most recent system updates can be problematic and cause issues within the system. In the case of the audio issues we're discussing, a number of users reported that updates KB5017321 and KB5017026 were the cause of the problem, and they were able to fix it by uninstalling these updates.
- Press the Windows key + R to open Run.
- Type control in the text field of Run and click Enter.
- In the following window, choose Programs from the list of options available.
- Click on View installed updates under Programs and Features.
- You should now see a list of all the installed updates on the computer.
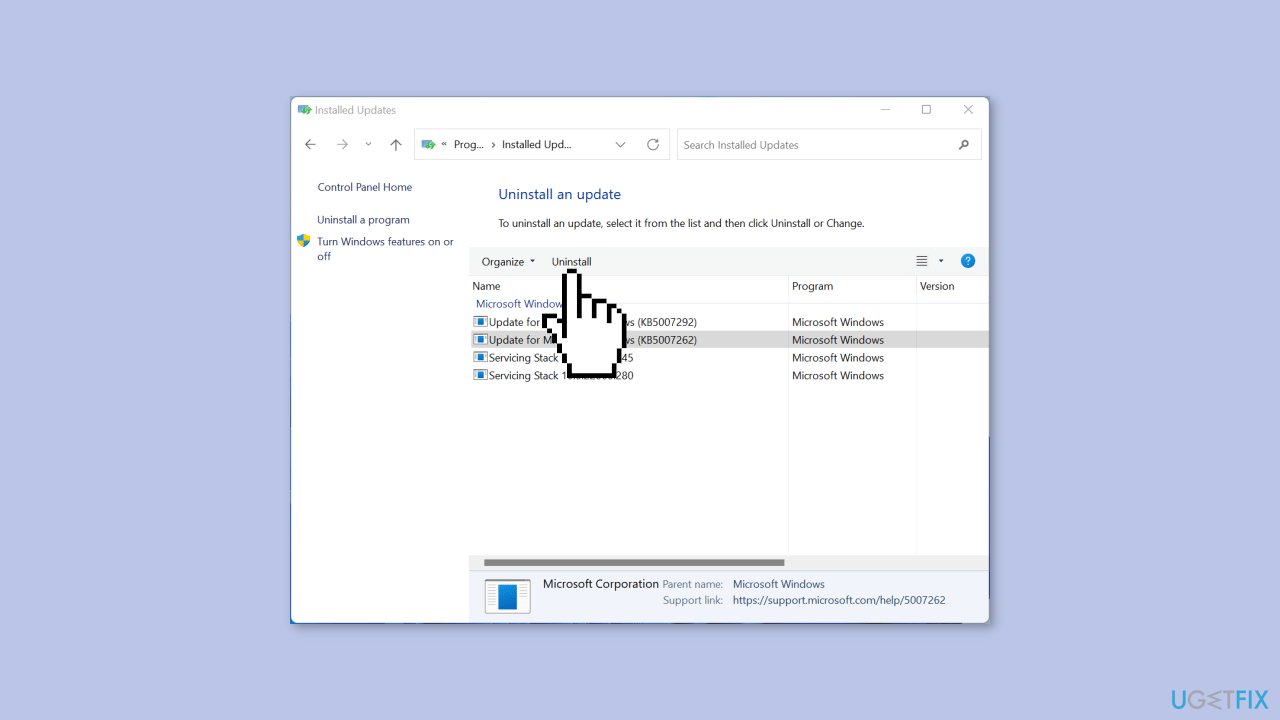
- Locate KB5017321 and KB5017026 updates and right-click on them.
- Choose Uninstall and follow the on-screen instructions to fix the problem.
Method 5. Install the KB5019509 Update
Microsoft has released an update, KB5019509, which appears to have resolved the issue for many users. If your system does not already have this update, you can try installing it to see if it fixes the problem.
- Head over to the Microsoft Update Catalog in your browser.
- Use the search bar at the top right corner to search for the KB5019509 update.
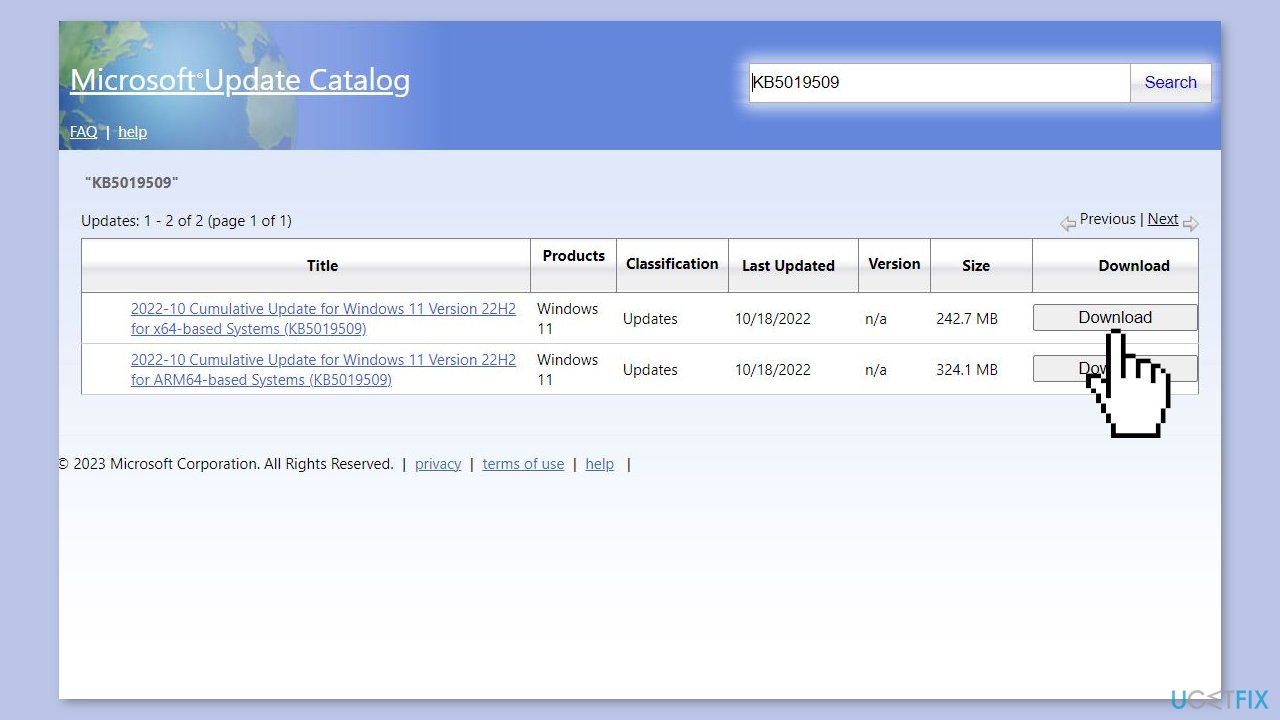
- Once the results are displayed, look for the most appropriate update option according to your device.
- Click on the Download button for the update.
- Once the update file is downloaded, click on it to install the update.
- Check if the problem is resolved after the update is installed.
Repair your Errors automatically
ugetfix.com team is trying to do its best to help users find the best solutions for eliminating their errors. If you don't want to struggle with manual repair techniques, please use the automatic software. All recommended products have been tested and approved by our professionals. Tools that you can use to fix your error are listed bellow:
Prevent websites, ISP, and other parties from tracking you
To stay completely anonymous and prevent the ISP and the government from spying on you, you should employ Private Internet Access VPN. It will allow you to connect to the internet while being completely anonymous by encrypting all information, prevent trackers, ads, as well as malicious content. Most importantly, you will stop the illegal surveillance activities that NSA and other governmental institutions are performing behind your back.
Recover your lost files quickly
Unforeseen circumstances can happen at any time while using the computer: it can turn off due to a power cut, a Blue Screen of Death (BSoD) can occur, or random Windows updates can the machine when you went away for a few minutes. As a result, your schoolwork, important documents, and other data might be lost. To recover lost files, you can use Data Recovery Pro – it searches through copies of files that are still available on your hard drive and retrieves them quickly.
- ^ Device driver. Wikipedia, the free encyclopedia.
- ^ Chris Hoffman. Everything You Need To Know About the Blue Screen of Death. Howtogeek. Tech Insight Magazine.
- ^ Tim Fisher. What Is the Windows Registry?. Lifewire. Software and Apps.


