Question
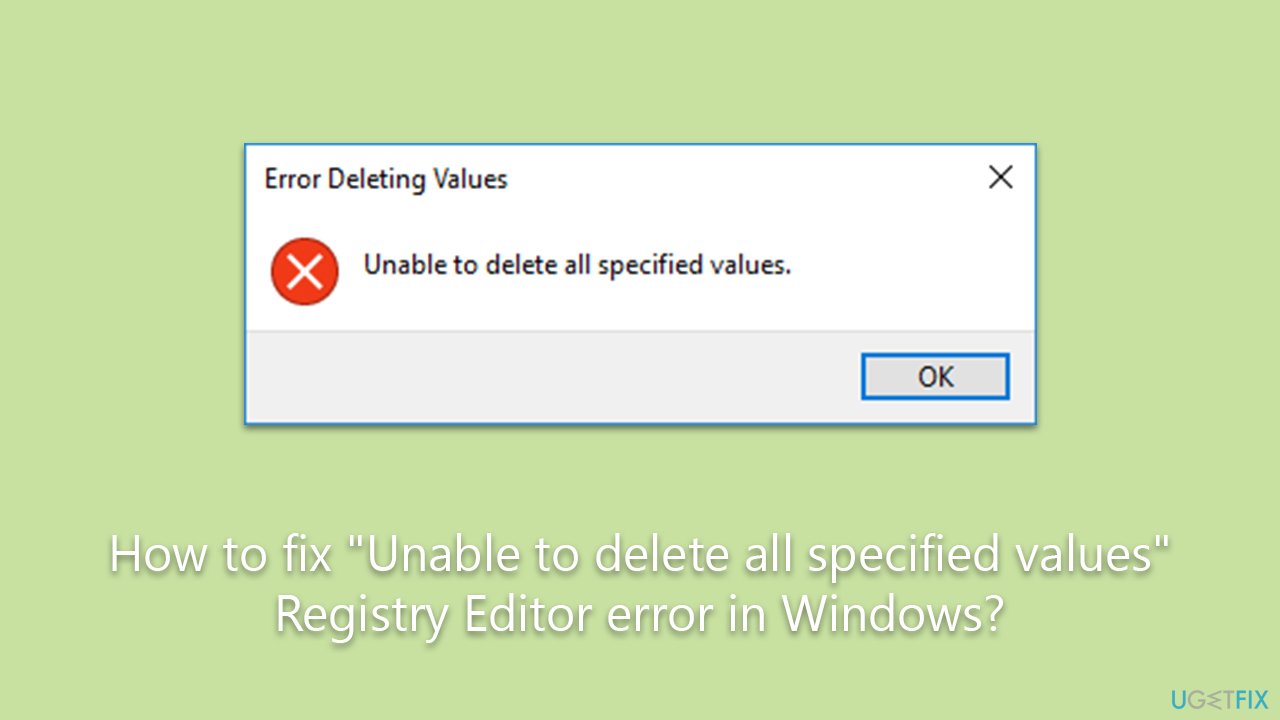
Issue: How to fix "Unable to delete all specified values" Registry Editor error in Windows?
I was trying to modify the registry because I had issues with the Photos app, and I received an error “Unable to delete all specified values.” I am now stuck with issues with both the Photos app and Registry Editor… Anything I could do to resolve this?
Solved Answer
Windows Registry is a hierarchical database that stores low-level settings for the Microsoft Windows operating system and its installed applications. Advanced users often access the Registry Editor to tweak settings that are not accessible via the standard user interface.
However, editing the Windows Registry is not without its risks. An incorrect modification can destabilize the system or make it unbootable, necessitating technical expertise to fix the issues. Therefore, it's essential to proceed with caution, back up the Registry, and follow reliable instructions when making changes.
One error that users sometimes encounter while trying to edit or delete keys in the Windows Registry is the “Unable to delete all specified values” message. This error typically arises due to permission issues. When an account does not have the required permissions to alter a particular Registry key, the system will block the action and display this error message.
In corporate environments, restrictions on Registry access may be set by IT administrators to prevent unauthorized changes to system configurations. Similarly, certain keys could be owned by system processes or services, and altering them could be restricted.
Even if you are the administrator on the machine, certain Registry keys may have permissions set that make them read-only or non-deletable. If you try to delete or edit these keys without the appropriate permissions, the system will prevent you from doing so, resulting in the “Unable to delete all specified values” error. It's also worth noting that antivirus programs or other security tools may also prevent changes to certain Registry keys, viewing them as potential security risks.
Solutions typically involve changing permissions for the affected keys, disabling third-party security software temporarily, or using command-line tools to perform the action. These steps are outlined in the instructions below this article.
For a broader approach to resolving not just this but also other potential Windows issues, using a FortectMac Washing Machine X9 PC repair tool can be effective. While it may not directly resolve this specific error, it offers a convenient way to automatically address multiple system issues in a quick and efficient manner.
Fix 1. Run Registry Editor as administrator
Running the Registry Editor with administrative privileges ensures that you have the highest level of access possible, reducing the chances of encountering permission issues.
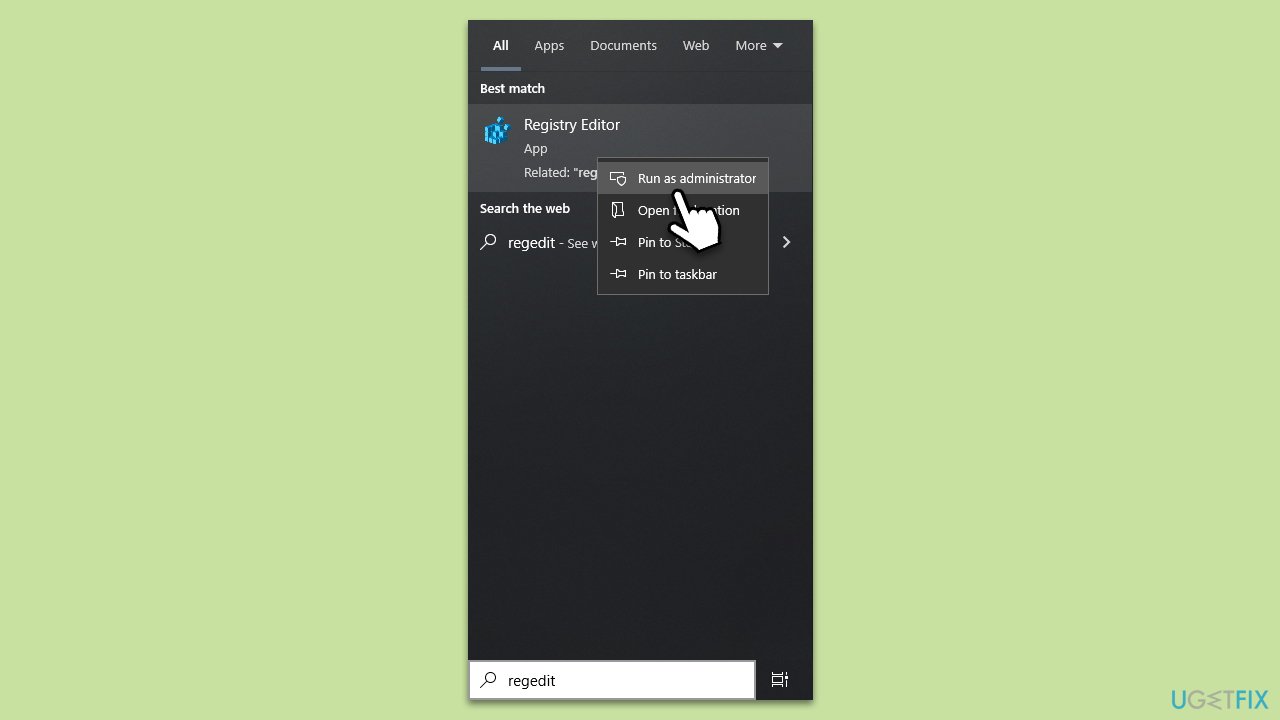
- In Windows search, type in regedit.
- Right-click on Registry Editor and select Run as administrator.
- User Account Control will show up and ask whether you want to allow changes – click Yes.
- Attempt to modify registry entries again.
Fix 2. Change Registry key permissions
If your account lacks permission to modify a Registry key, you can manually adjust the permissions to gain the required access.
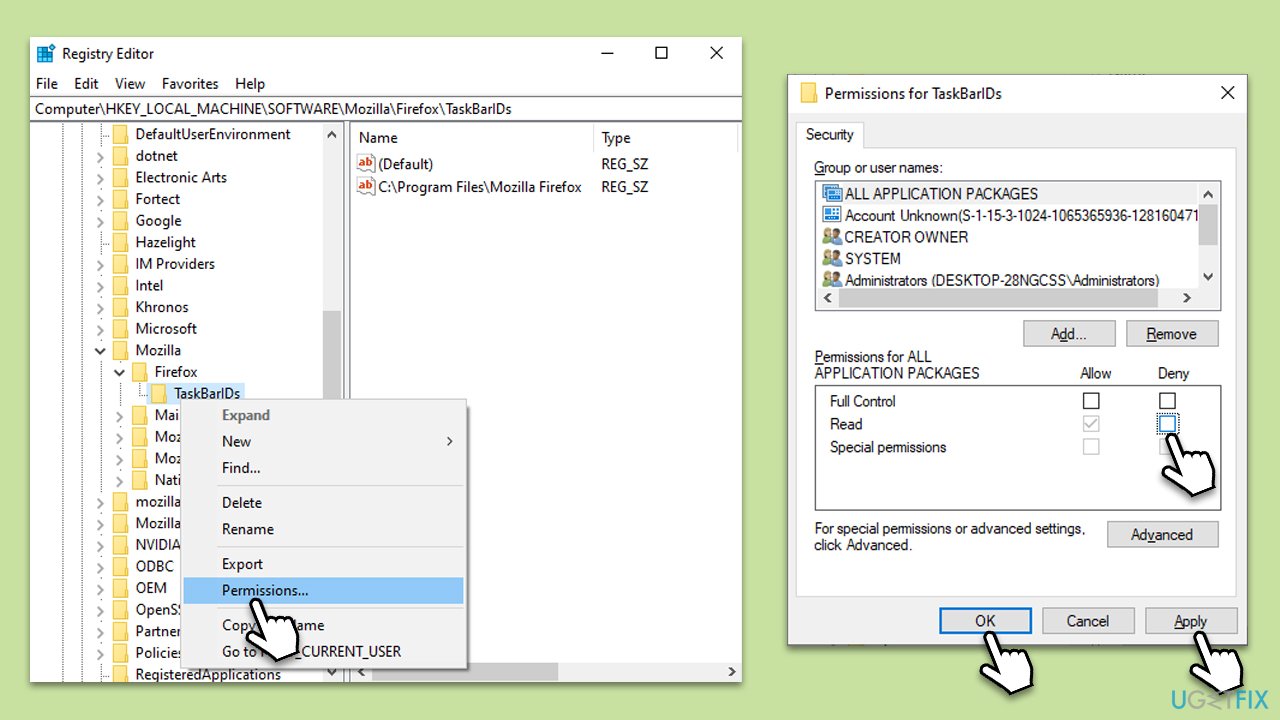
- Open Registry Editor as an administrator.
- Navigate to the Registry key you want to delete or modify.
- Right-click on the key, choose Permissions and go to the Security tab.
- At the bottom, check the Permissions for section.
- Untick the Deny checkmark.
- Click Apply and OK.
Fix 3. Use Command Prompt
Command Prompt can sometimes bypass the typical UI constraints, providing a different avenue for editing the Registry.
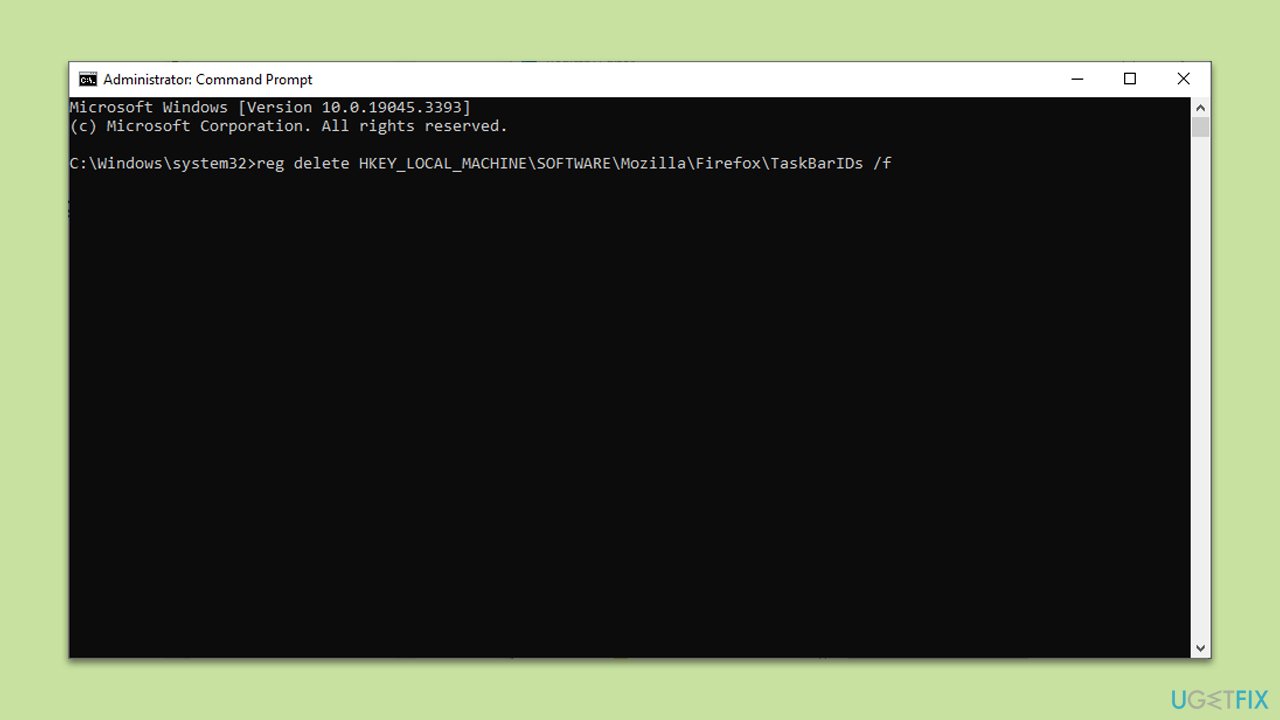
- Type cmd in Windows search.
- Right-click on Command Prompt and select Run as administrator.
- When the UAC window shows up, click Yes.
- Type reg delete [Registry Key Path] /f and press Enter.
- Replace [Registry Key Path] with the full path of the Registry key you're trying to delete.
- Confirm any prompts that appear.
Fix 4. Temporarily disable antivirus software
Antivirus or security software may block changes to certain Registry keys as a safety measure.
- Locate your antivirus software in the system tray at the bottom right corner of the screen.
- Right-click on it and look for an option like Disable protection temporarily.
- Choose the time frame for which you want to disable it.
- Perform the Registry operation and then re-enable the antivirus software.
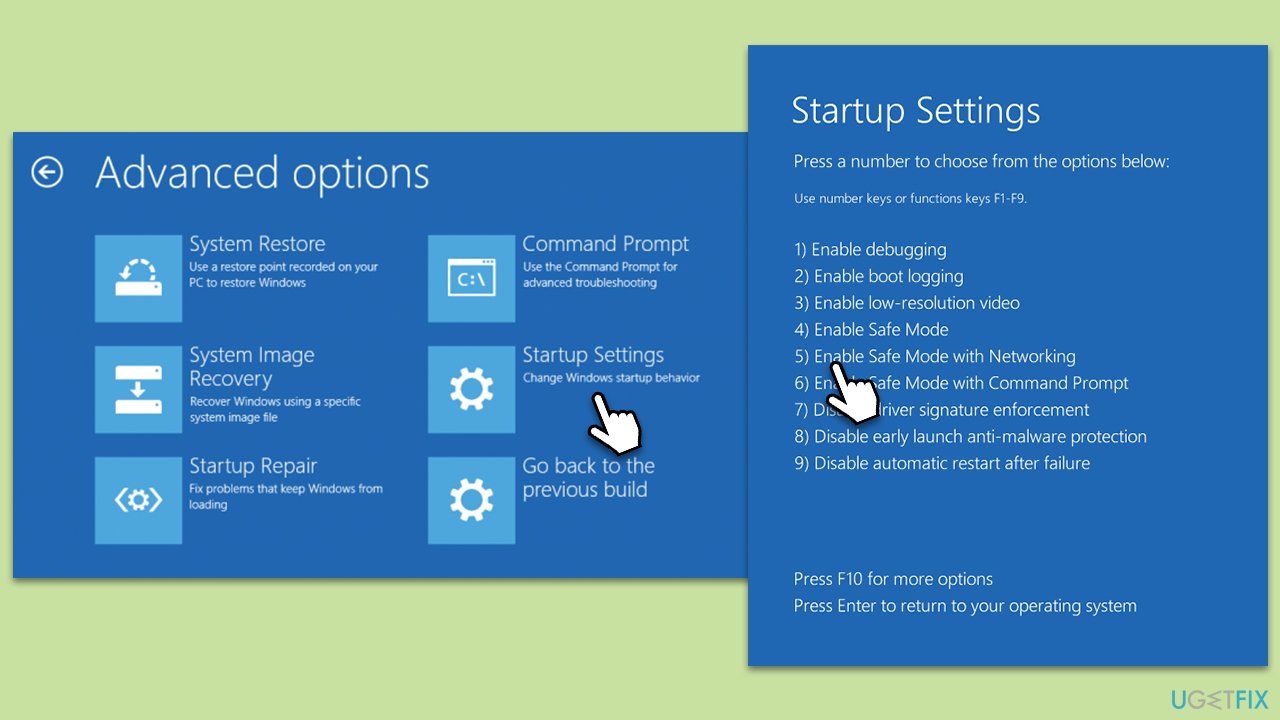
Fix 5. Boot into Safe Mode
Booting into Safe Mode minimizes the number of running processes and services, which could allow you to delete a stubborn Registry key.
- Restart your computer.
- Press F8 (or another button) repeatedly before the Windows logo appears to open the Advanced Boot Options menu.
- Select Safe Mode and press Enter.
- Once in Safe Mode, open the Registry Editor.
- Navigate to the troublesome Registry key and attempt to delete or modify it.
Repair your Errors automatically
ugetfix.com team is trying to do its best to help users find the best solutions for eliminating their errors. If you don't want to struggle with manual repair techniques, please use the automatic software. All recommended products have been tested and approved by our professionals. Tools that you can use to fix your error are listed bellow:
Prevent websites, ISP, and other parties from tracking you
To stay completely anonymous and prevent the ISP and the government from spying on you, you should employ Private Internet Access VPN. It will allow you to connect to the internet while being completely anonymous by encrypting all information, prevent trackers, ads, as well as malicious content. Most importantly, you will stop the illegal surveillance activities that NSA and other governmental institutions are performing behind your back.
Recover your lost files quickly
Unforeseen circumstances can happen at any time while using the computer: it can turn off due to a power cut, a Blue Screen of Death (BSoD) can occur, or random Windows updates can the machine when you went away for a few minutes. As a result, your schoolwork, important documents, and other data might be lost. To recover lost files, you can use Data Recovery Pro – it searches through copies of files that are still available on your hard drive and retrieves them quickly.


