Question
Issue: How to fix Windows Volume Mixer not saving changes?
Hello. When I change the volume using the Windows Volume Mixer and close it, the changes disappear immediately. Is there a way to fix this?
Solved Answer
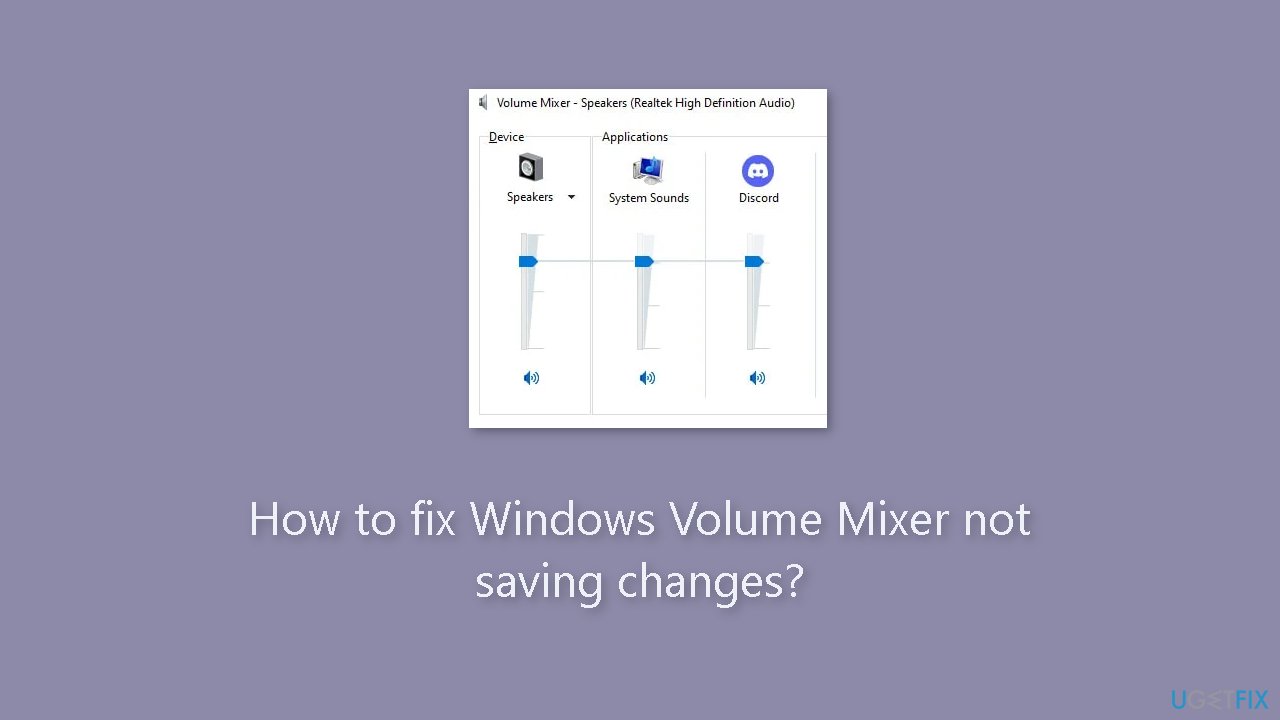
The Windows Volume Mixer is a program that allows users to control the volume of individual applications that are running on their computers. It is a useful feature because it allows users to adjust the volume of individual applications without affecting the overall system volume.
However, some users have reported that the Volume Mixer does not save their changes. This means that when users change the volume settings in the Volume Mixer and then close the Window, the changes are lost or are not saved. This issue can be aggravating for users, especially if they must frequently adjust the volume levels.
The severity of this problem varies depending on the user's situation. For example, if a user is working on a project that requires them to use various applications with varying sound levels, it may be inconvenient for them to have to re-adjust the volume levels every time they open an application. Furthermore, if a user is using headphones, they may discover that the Volume Mixer does not save their changes, which affects their overall listening experience.
Updating the audio drivers, restarting the Windows Audio service, and resetting the Volume Mixer settings are all possible solutions to this problem. However, the precise solution may be dependent on the root cause of the problem. This guide will walk you through 5 steps that should help you fix Windows Volume Mixer not saving changes.
Keep in mind that the manual troubleshooting process can be lengthy. You can try using a system repair tool like FortectMac Washing Machine X9 that can fix most system errors, BSODs,[1] corrupted files, and registry[2] issues, or clear cookies and cache.[3] Otherwise, follow the step-by-step instructions provided below.
Solution 1. Run Windows Audio Troubleshooter
- Press the Windows key + I to open Settings.
- Scroll down and select Troubleshoot > Other Troubleshooters.
- Click on Run beside Playing Audio.
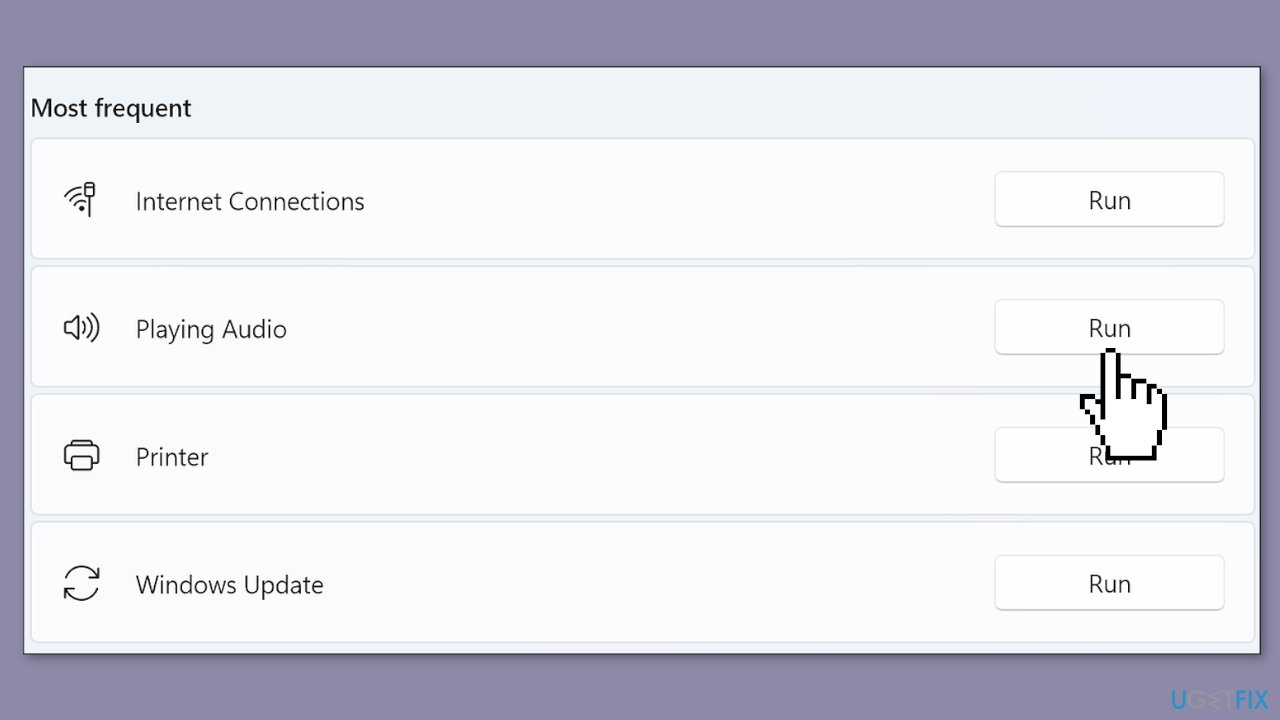
- Wait for the process to complete.
- Restart your device.
- Check to see if the error has been resolved.
Solution 2. Update Audio Drivers
Outdated drivers could be the cause of this issue. In this case, you can fix it automatically by using DriverFix, which will scan your PC for missing and out-of-date device drivers. Or you can update them manually:
- Open Settings.
- Click on Update & Security.
- Click on Windows Update.
- Click the Check for updates button.
- Click the View optional updates option.
- Click the Driver updates tab.
- Select the driver you want to update.
- Click the Download and install button.
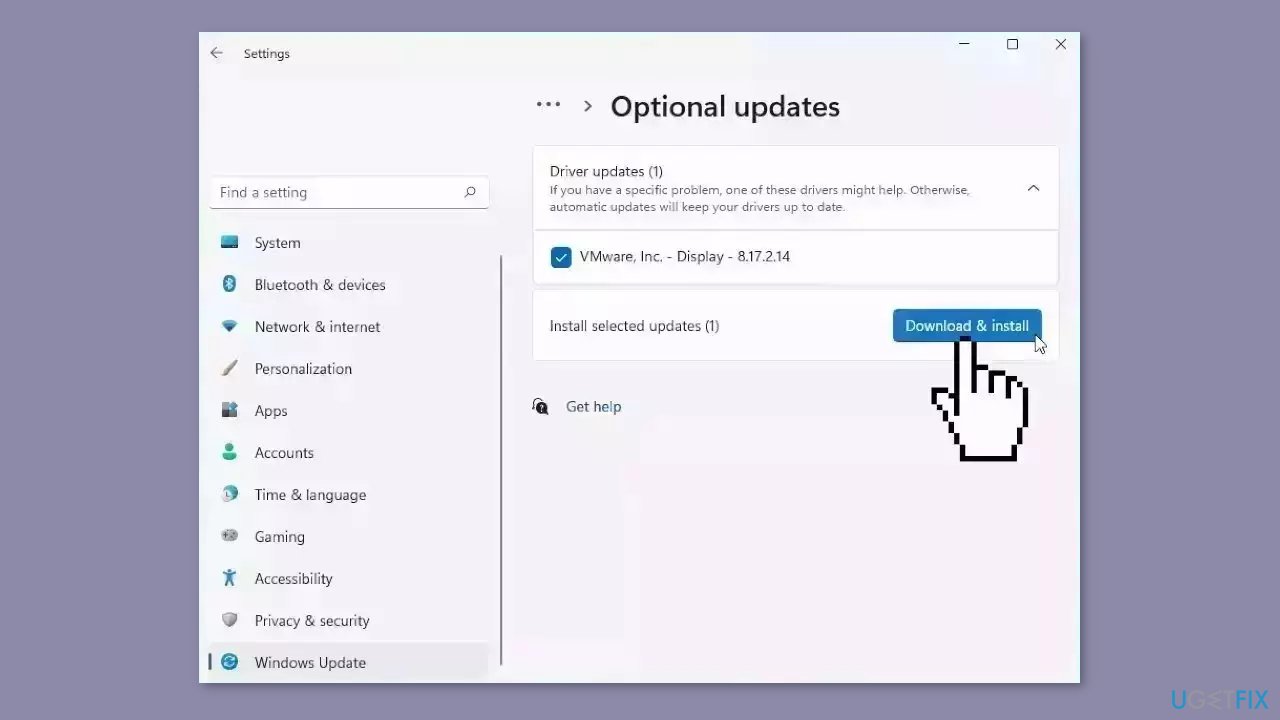
If the View optional updates link is not available after checking for updates, then Windows Update does not have any new drivers or any updates for other products at that particular time.
Solution 3. Enable Exclusive Mode
- Press the Windows key + R to open the Run dialog box.
- Type sndvol and hit Enter.
- Once the Volume Mixer opens, click on the Speaker icon.
- The Speaker Properties dialog will now open; here, navigate to the Advanced tab.
- Under Exclusive mode, check the options Allow applications to take exclusive control of this device and Give exclusive mode application priority.
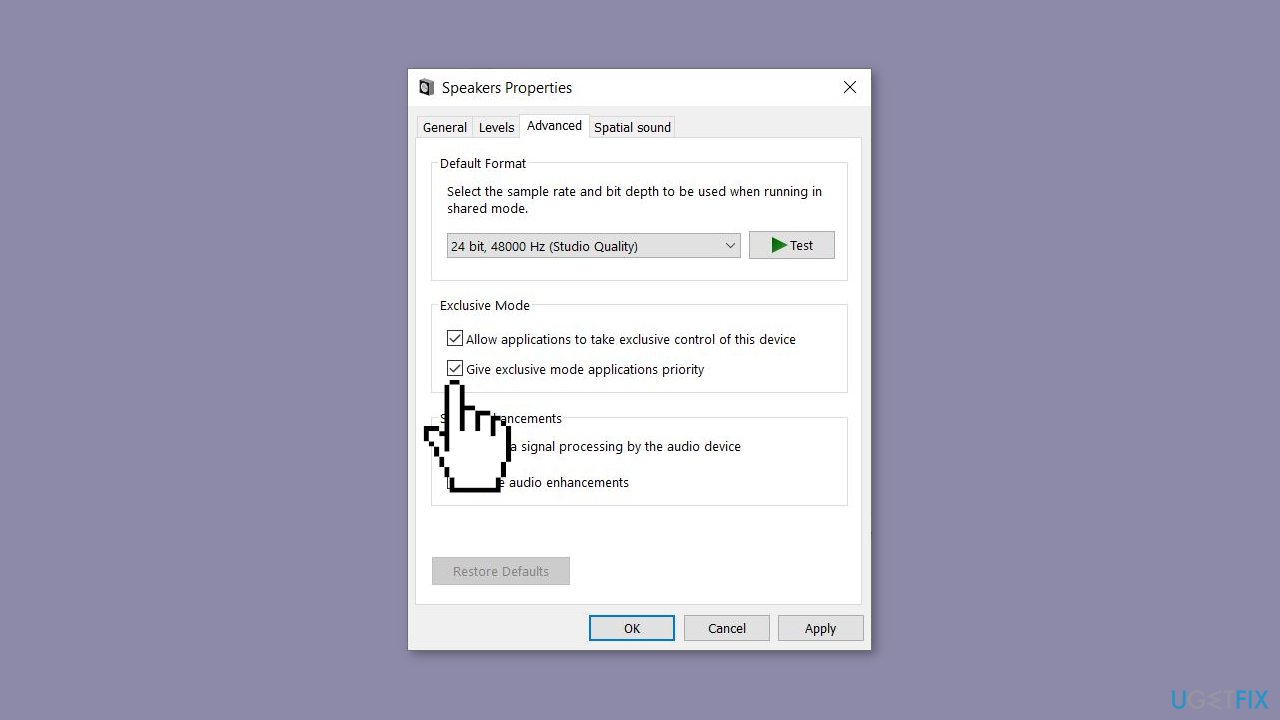
- Click on Apply and then on Ok to save the changes.
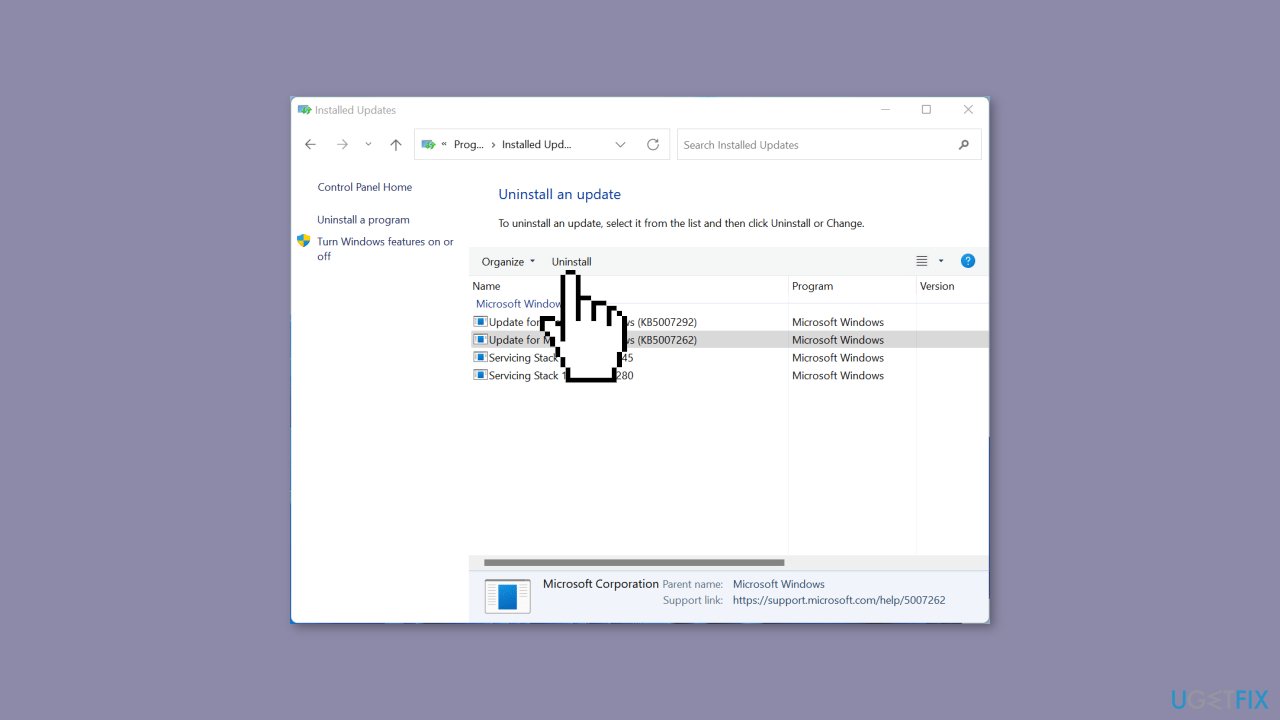
Solution 4. Uninstall the most recent Windows Update
Updates can sometimes cause conflicts with audio drivers or settings, resulting in problems with the Volume Mixer. The user can eliminate the possibility that the most recent Windows update is the source of the problem by uninstalling it.
- Press the Windows key + R to open the Run dialog box.
- Type appwiz.cpl and hit Enter.
- In the Uninstall or view a program page click on View Installed Updates.
- Find the recently installed update.
- Right-click on the recently installed update and select Uninstall.
Solution 5. Try Clean Boot
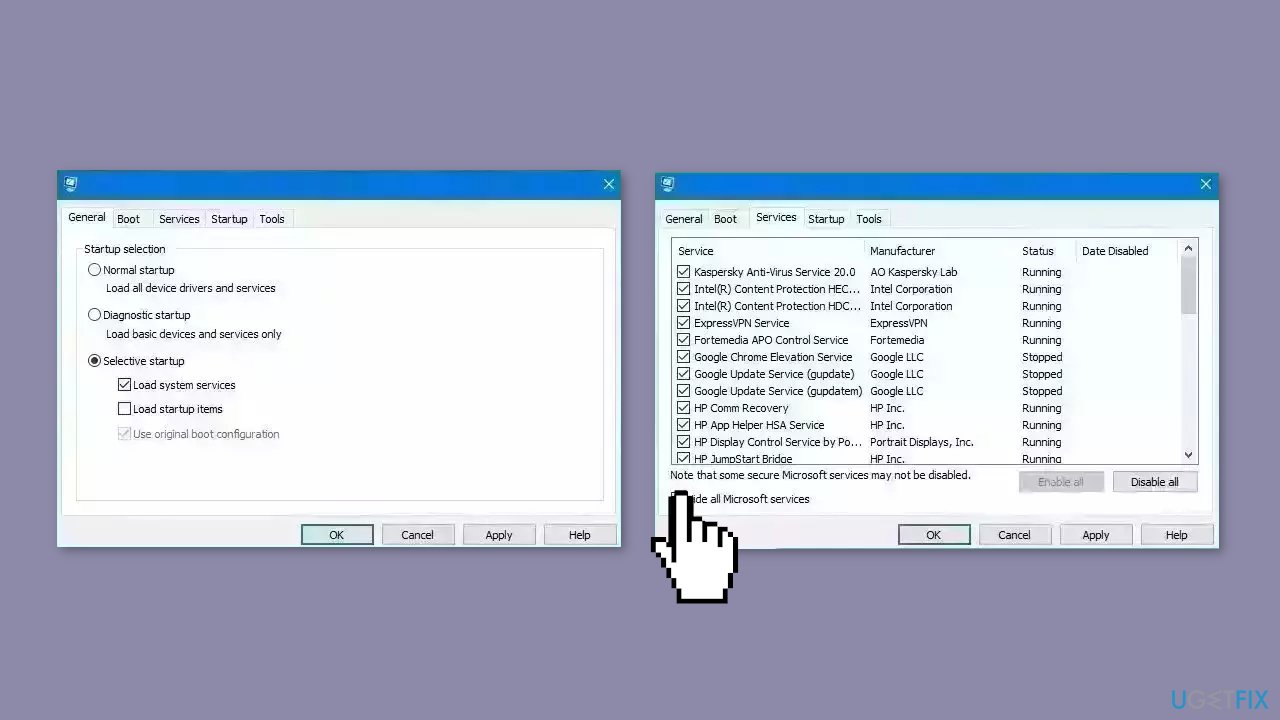
Third-party applications and services can sometimes interfere with the Volume Mixer settings, causing changes to be lost. Users can identify which program or service is causing the problem and take the necessary steps to resolve it by performing a clean boot.
- Open the Search menu, type in system configuration, and press Enter.
- Under the Services tab, tick the Hide all Microsoft services box.
- Click on Disable all button.
- Head over to the Startup tab and click on Open Task Manager.
- Select a third-party program and click on Disable at the top.
- Repeat this step to disable all third-party apps and programs.
- Restart your PC to enter the clean boot state and see if the issue persists.
- If the issue disappeared in the clean boot state, then you can be certain that a third-party app is causing it.
- Go through all recently installed apps or programs and remove them one by one.
Repair your Errors automatically
ugetfix.com team is trying to do its best to help users find the best solutions for eliminating their errors. If you don't want to struggle with manual repair techniques, please use the automatic software. All recommended products have been tested and approved by our professionals. Tools that you can use to fix your error are listed bellow:
Prevent websites, ISP, and other parties from tracking you
To stay completely anonymous and prevent the ISP and the government from spying on you, you should employ Private Internet Access VPN. It will allow you to connect to the internet while being completely anonymous by encrypting all information, prevent trackers, ads, as well as malicious content. Most importantly, you will stop the illegal surveillance activities that NSA and other governmental institutions are performing behind your back.
Recover your lost files quickly
Unforeseen circumstances can happen at any time while using the computer: it can turn off due to a power cut, a Blue Screen of Death (BSoD) can occur, or random Windows updates can the machine when you went away for a few minutes. As a result, your schoolwork, important documents, and other data might be lost. To recover lost files, you can use Data Recovery Pro – it searches through copies of files that are still available on your hard drive and retrieves them quickly.
- ^ Chris Hoffman. Everything You Need To Know About the Blue Screen of Death. Howtogeek. Technology Magazine.
- ^ Tim Fisher. What Is the Windows Registry?. Lifewire. Software and Apps.
- ^ Difference between Cache and Cookies. Geeksforgeeks. IT Education.


