Question
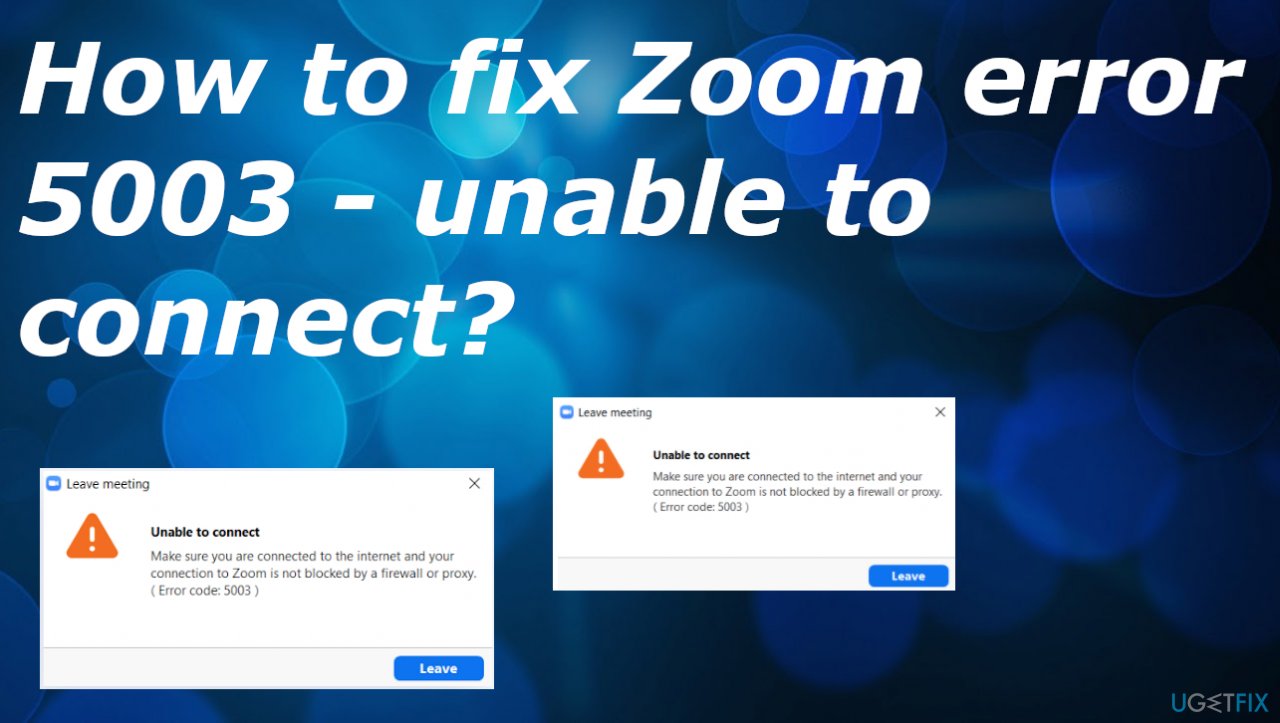
Issue: How to fix Zoom error 5003 – unable to connect?
Hello. I need to use Zoom for my job interviews and other things with family, but I get this annoying Zoom error 5003 – unable to connect message. The pop-up states about internet connection issues and firewalls. I cannot use the program and I really need to do that. Can you help me fix this?
Solved Answer
Zoom error 5003 is the issue that appears on the screen when the connection is failed. The issue keeps users from initiating the video call on the Zoom program, and the service is disabled. This is the Zoom server connectivity issue that can be triggered by firewall or proxy problems.
Also, antivirus software can block the connection to Zoom, so disabling the program could help. However, these instances are common and more unique, so there are various reasons and solutions for the error. This error is on the list[1] for common Zoom errors because users encounter the problem pretty often.
Most cases show that this Zoom error 5003 – unable to connect issue is related to internal server issues when the Zoom web services fail to launch properly or the server status times out. Network settings, VPN proxy connections can also cause the issue. It all depends on the device and instance.
Closing and restarting the program could be the first tip for the issue, but most people have already tried this, and it fails to solve the root cause for this error. Another common suggestion is to restart the device, disable anti-malware and security tools. However, that could be only a temporary fix for the issue. Users of iOS devices, Android phones, Windows computers, and other machines receive the Zoom code 5003 – unable to connect error, so solutions do differ, and not every fix can work on all of the systems.
As for the quick solution and helpful tip, you can run a scan using a tool like FortectMac Washing Machine X9 because this program can find and repair any virus[2] leftovers, recover damaged files and even help with more in-depth system issues or problems with updates[3] of the OS that could interfere with the solutions.
Basic fixes of checking other programs and force closing services, entering the Task Manager to end the Zoom processes, or checking for the suspicious background files could help fix Zoom error 5003 – unable to connect. But the best methods are listed below for various instances of this issue. Follow the guide thoroughly.
1. Restart the application
- Right-click on the Taskbar and select Task Manager.
- Under the Processes tab, go to Windows processes and check if the Zoom app shows still running.
- If it’s still running, right-click on the Zoom Meetings app and select End task.
on Mac
- Click on the Search button at the top right corner of your screen.
- Type Activity Monitor and hit Enter to open it.
- Locate the Zoom app.
- Lastly, click the Zoom app and hit the Stop button on the menu bar.
- You can either select Quit or Force Quit from the options.
2. Check Zoom servers
To verify if all the problems are on your end, visit https://status.zoom.us/. The status of the servers is displayed. make sure that all the servers are operational. 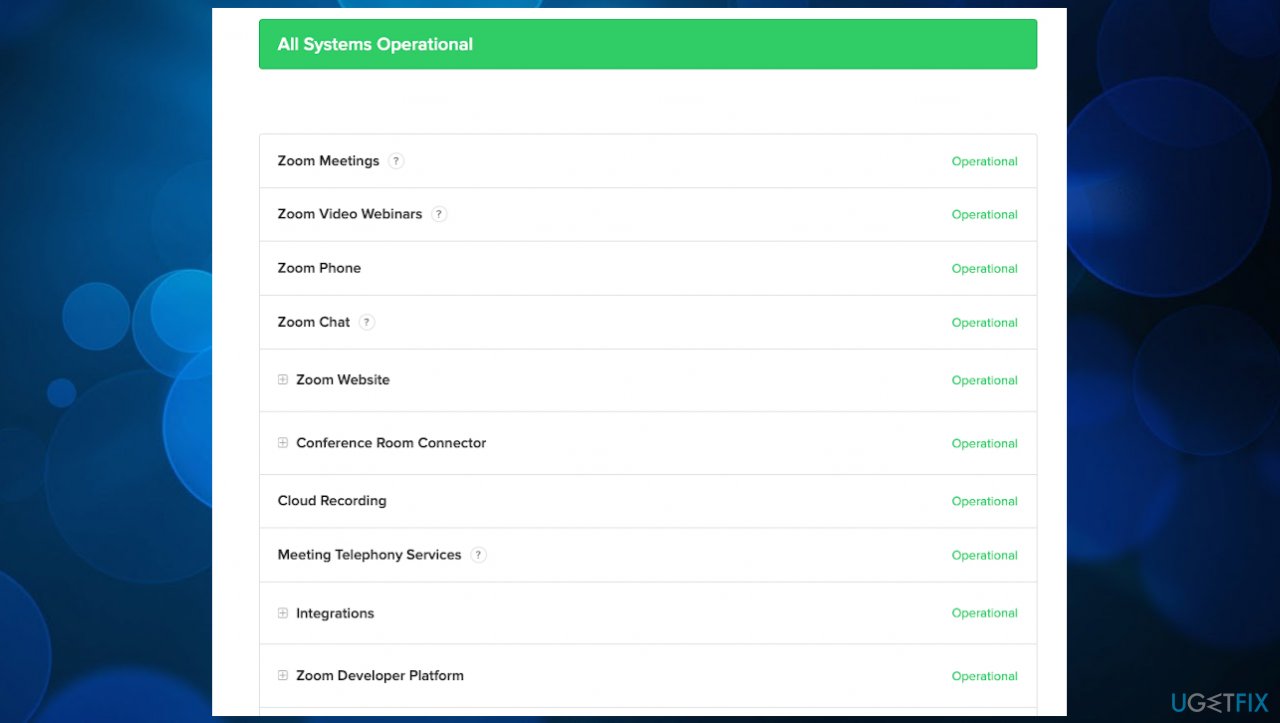
3. Reset your Network Adapter settings
- Press the Windows + R keys on your keyboard to open the Run utility.
- Type in cmd without the quotation marks and press the Enter key on your keyboard.
- Paste in the following command and press the Enter key to execute it:
ipconfig /flushdns - After the first command finishes running, paste in the next one, executing it with Enter once again:
netsh winsock reset - Close the Command Prompt and restart your device.
- Try connecting to your Zoom meeting after the reboot.
4. Change to a different DNS server
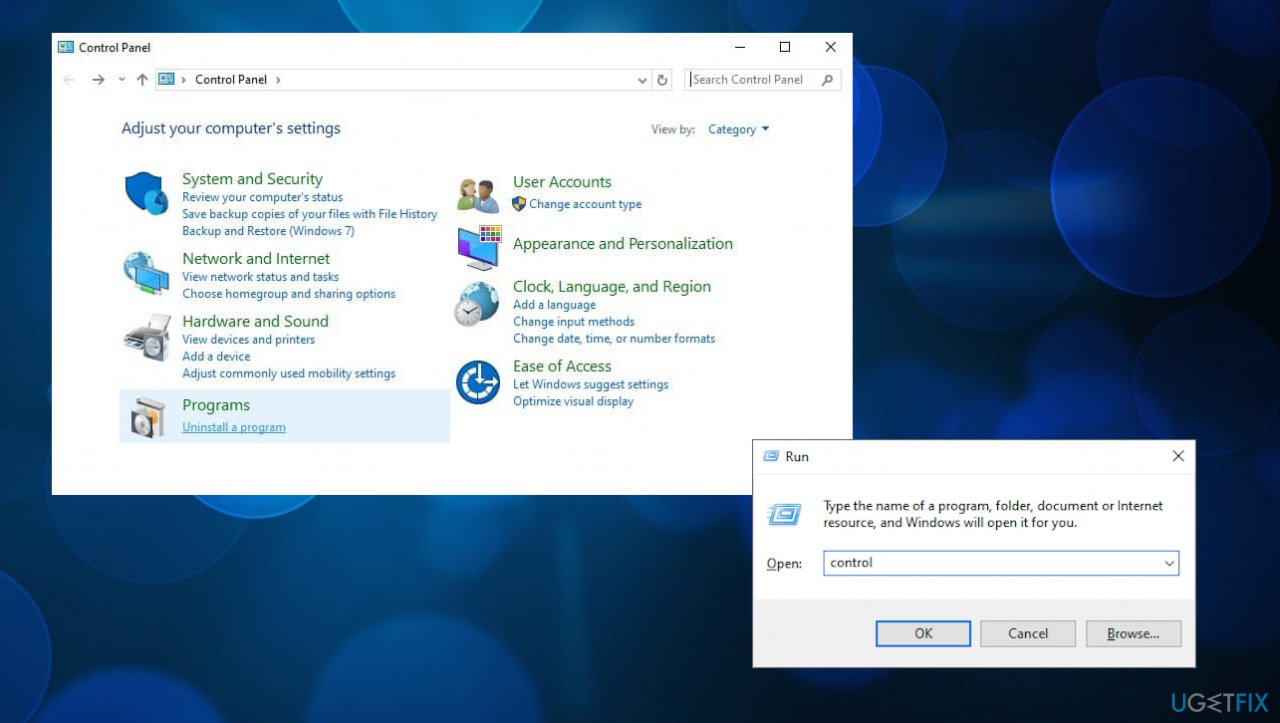
- Press the Windows + R keys on your keyboard.
- Type in control and press the Enter key on your keyboard.

- Click on Network and Internet.
- Choose Network and Sharing Center.
- From the menu on the left side, click on the Change adapter settings link.
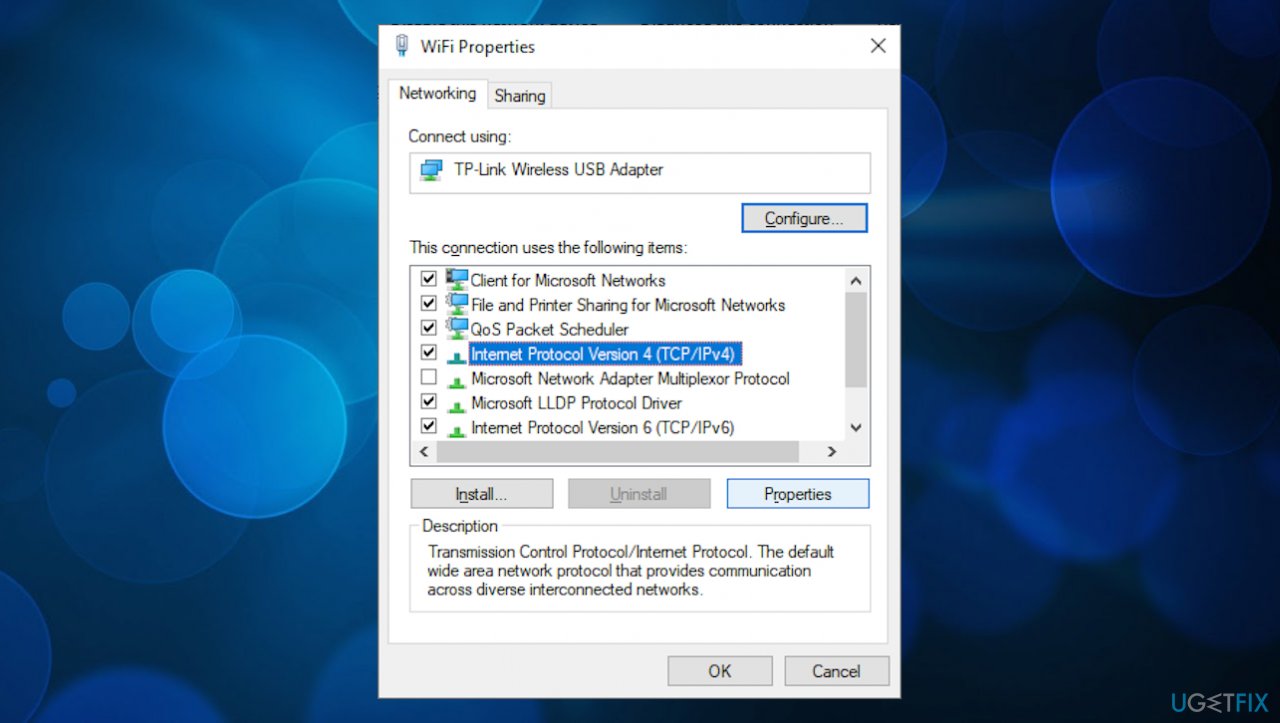
- Right-click on the connection you’re currently using and select Properties.

- Scroll down and click on Internet protocol version 4 (TCP/IPv4).
- Click on the Properties button.
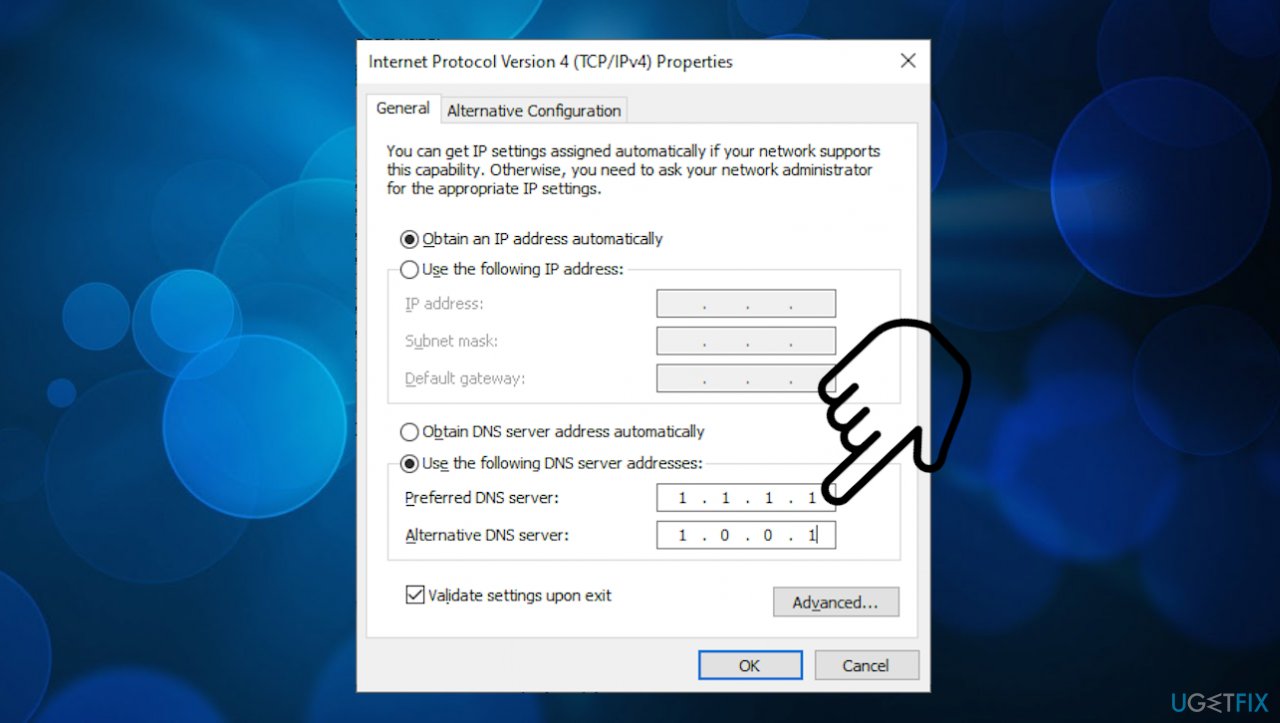
- Select Use the following DNS Server addresses.

- Type 1.1.1.1 into the first row, then 1.0.0.1 into the second row.
- Click OK to apply your changes.
- Try using Zoom and see if the error is resolved.
5. Check firewall settings
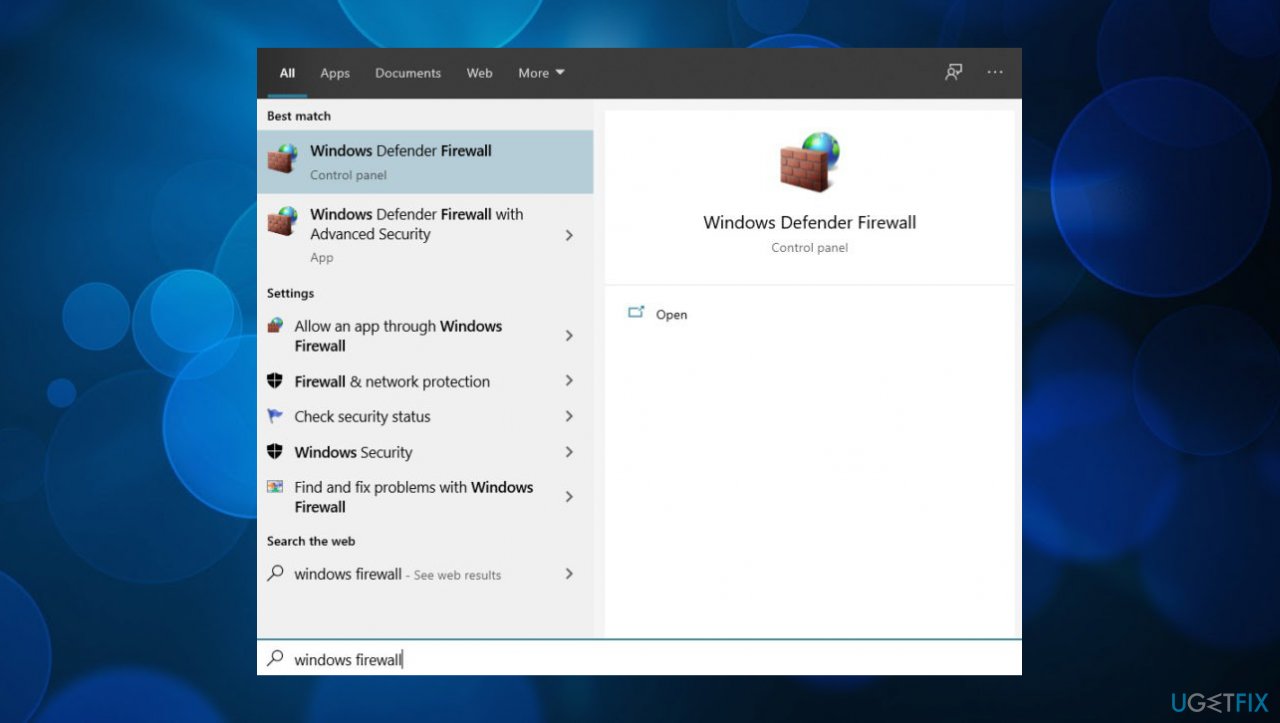
- Click on the Windows icon and search for the Windows Security or Windows Defender Firewall.

- Find Firewall & network protection.
- Select Allow an app through the firewall from the options.
- Select Change settings and find the Zoom Video Conference app from the list.
- Tick the checkbox next to Public and Private, and then press OK to confirm.
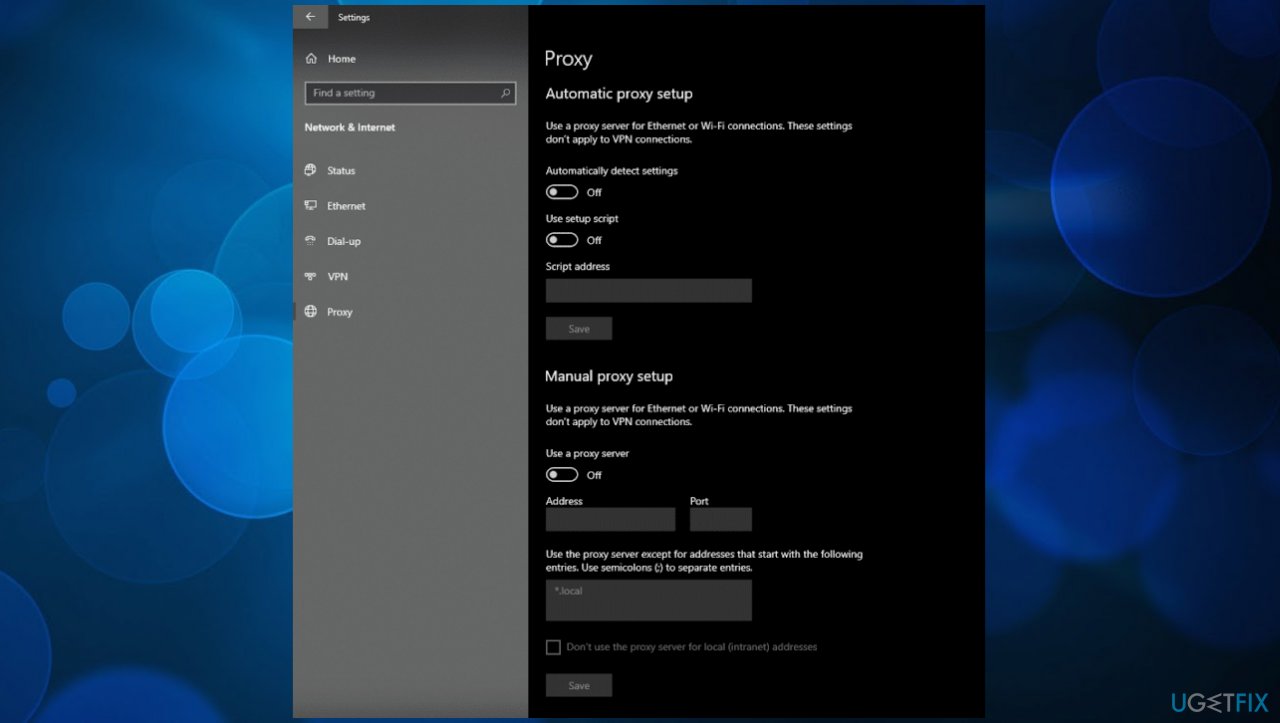
6. Disable Proxy servers
- On your computer, press on the Windows key + I to open Windows Settings.
- After that, click on Network & Internet.
- Inside the Network Settings, click on Proxy from the side menu.

- Lastly, make sure that Use a Proxy Server is turned off.
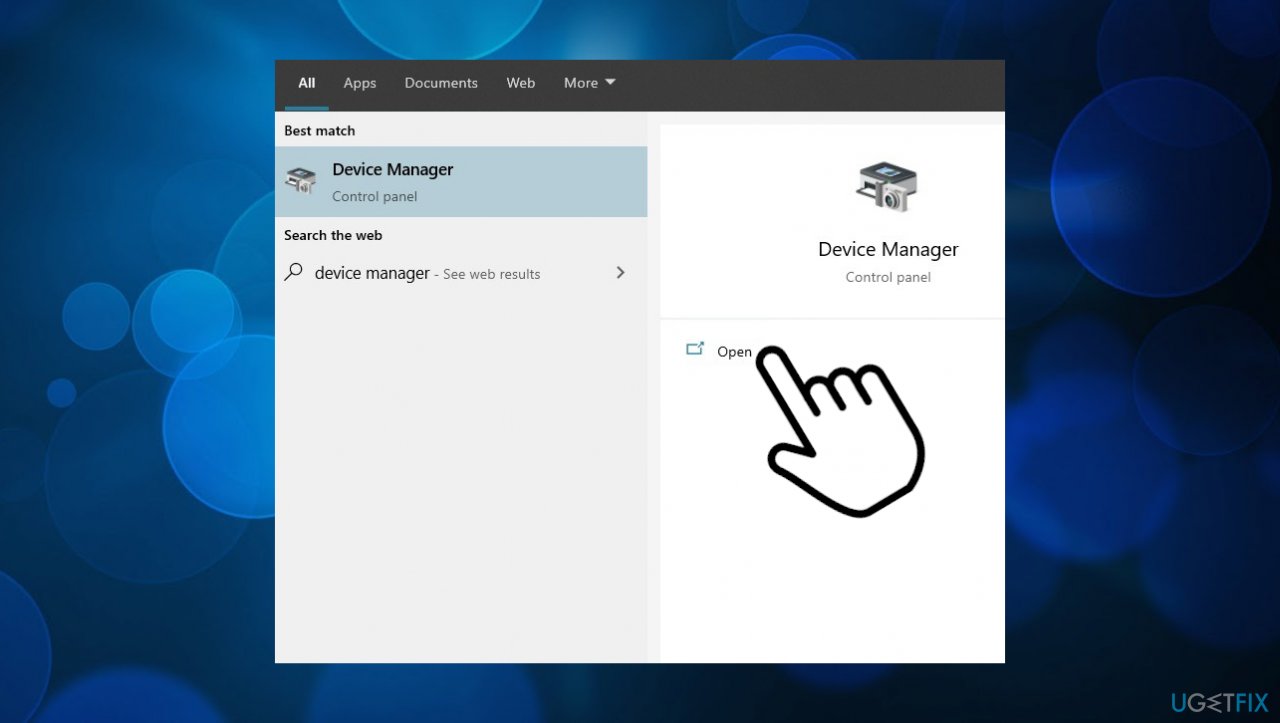
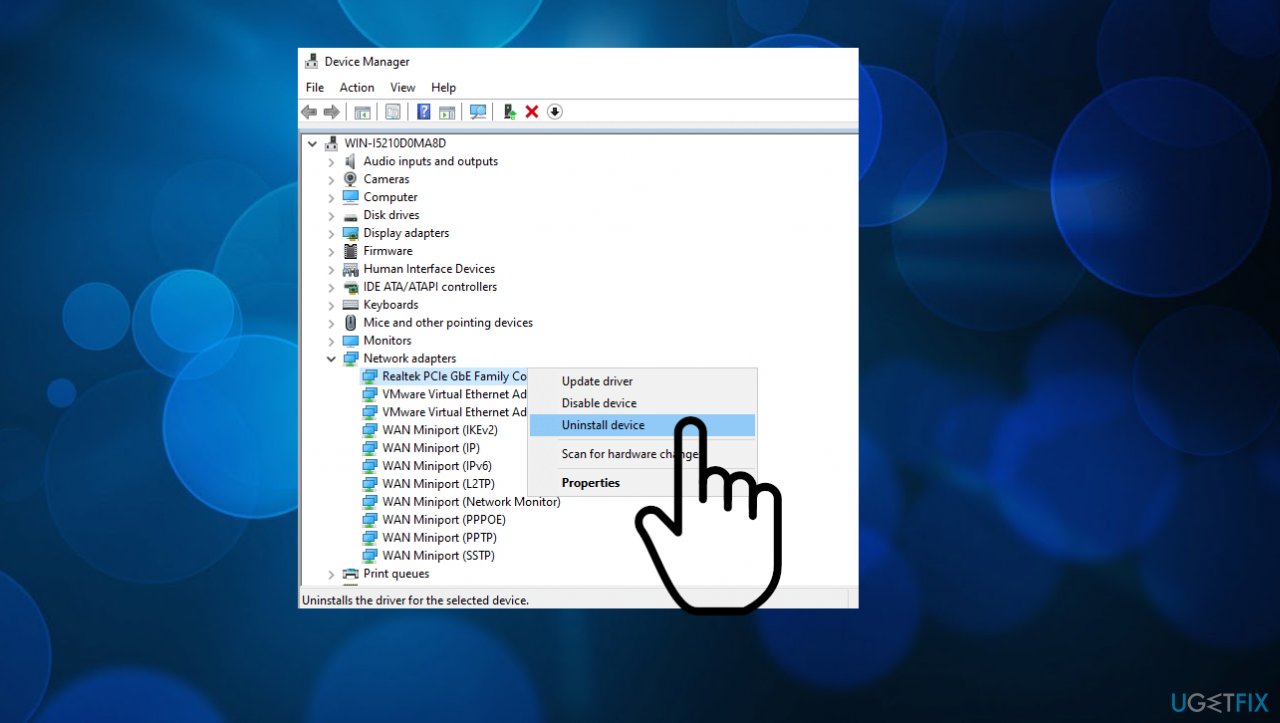
7. Reinstall Network drivers
- On your computer, press on the Windows key + S and search for Device Manager.

- Next, click on Open.
- Inside the Device Manager, click on Network Adapters to expand it.

- Right-click on your current network adapter and select Uninstall Device.
- Follow the on-screen prompts to proceed.
- Restart and try to use Zoom again.
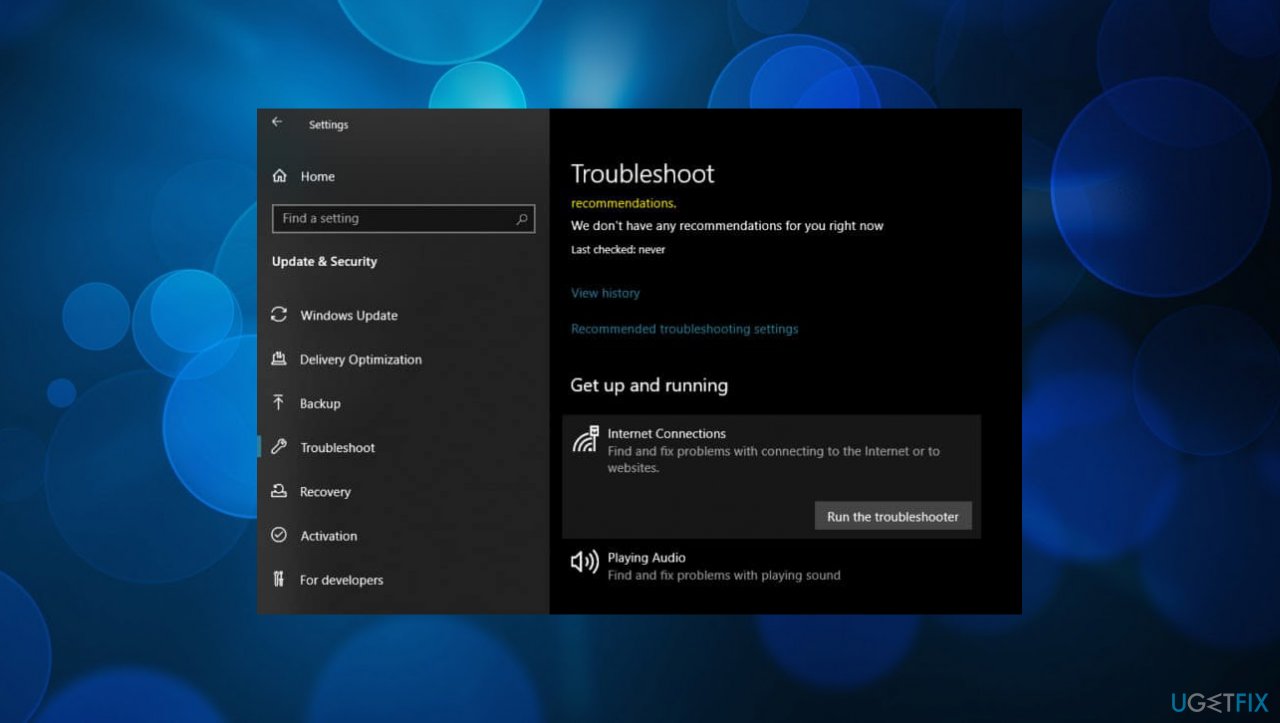
8. Run the Troubleshooter
- On your keyboard, press on the Windows key + I to open Windows Settings.
- Inside Windows Settings, click on Update & Security.
- After that, click on Troubleshoot.

- Next, click on Internet Connections.
- Lastly, click on Run the Troubleshooter.
- Follow the on-screen prompts to guide you on how to use the tool.
- If the troubleshooter suggested a possible solution to your network problem, simply click the Apply this Fix button to make the changes on your system.
- Once done, check if the error occurs again.
Repair your Errors automatically
ugetfix.com team is trying to do its best to help users find the best solutions for eliminating their errors. If you don't want to struggle with manual repair techniques, please use the automatic software. All recommended products have been tested and approved by our professionals. Tools that you can use to fix your error are listed bellow:
Protect your online privacy with a VPN client
A VPN is crucial when it comes to user privacy. Online trackers such as cookies can not only be used by social media platforms and other websites but also your Internet Service Provider and the government. Even if you apply the most secure settings via your web browser, you can still be tracked via apps that are connected to the internet. Besides, privacy-focused browsers like Tor is are not an optimal choice due to diminished connection speeds. The best solution for your ultimate privacy is Private Internet Access – be anonymous and secure online.
Data recovery tools can prevent permanent file loss
Data recovery software is one of the options that could help you recover your files. Once you delete a file, it does not vanish into thin air – it remains on your system as long as no new data is written on top of it. Data Recovery Pro is recovery software that searchers for working copies of deleted files within your hard drive. By using the tool, you can prevent loss of valuable documents, school work, personal pictures, and other crucial files.
- ^ Common error codes and messages. Zoom. Support Faq.
- ^ Malware. Wikipedia. The free encyclopedia.
- ^ Chris Hoffman. Windows 10’s New Update Is Deleting People’s Files Again. Howtogeek. Tech reviews, news and analysis.
